2018 Hyundai Sonata 87 mph
[x] Cancel search: 87 mphPage 40 of 522

2-23
Safety system of your vehicle
2
Seat Belt Warning Light
Seat belt warning light (for driver's seat)
The driver's seat belt warning light
and chime will come on according to
the following table when the ignition
switch is in the ON position.
*1: The Warning Pattern repeats 11 times with
an interval of 24 seconds. If the driver’s seat
belt is buckled, the light will stop within 6
seconds and chime will stop immediately.
*
2: The light will stop within 6 seconds and chime will stop immediately.
Damaged seat belts and seat
belt assemblies will not operate
properly. Always replace:
Frayed, contaminated, or dam-
aged webbing
Damaged hardware
The entire seat belt assembly
after it has been worn in an
accident, even if damage to
webbing or assembly is not
apparent
WARNING
OLMB033022
ConditionsWarning Pattern
Seat BeltVehicle
SpeedLight (Blink)Chime
Unbuckled6 seconds
Buckled6 secondsNone
Buckled →
Unbuckled
Below 3 mph (5 km/h)6 secondsNone
3 mph~6 mph6 seconds
Above 6 mph (10 km/h)6 sec. ON / 24 sec. OFF (11 times)
Unbuckled
Above 6 mph(10 km/h)
↓
Below 3 mph
(5 km/h)6 seconds *1
↓
Stop *
2
Page 41 of 522

2-24
Safety system of your vehicle
Seat belt warning light(for front passenger's seat)
The front passenger's seat belt
warning light will activate to the fol-
lowing table when the ignition switch
is in "ON" position.*1: The seat belt warning light will go off if the
vehicle speed decreases below 3 mph (5
km/h). If the vehicle speed increases above
3 mph (5 km/h), the warning light will blink
again.
Seat Belt Restraint System
Seat Belt-Driver’s 3-point sys-tem with emergency lockingretractor
To fasten your seat belt:
Pull the seat belt out of the retractor
and insert the metal tab (1) into the
buckle (2). There will be an audible
"click" when the tab locks into the
buckle.
The seat belt automatically adjusts to
the proper length after the lap belt por-
tion is adjusted manually so that it fits
snugly around your hips. If you lean
forward in a slow, easy motion, the belt
will extend and move with you.
ConditionsWarning
Pattern
Seat BeltVehicleSpeedLight-Blink
Unbuckled6 seconds
UnbuckledAbove 6mph (10 km/h)Continuously
Buckled6 seconds
Buckled →
Unbuckled
Above 6mph (10 km/h)Continuously *1
Below 6mph(10 km/h)None
OLMB033087
OLF037029
Page 102 of 522
3-17
Convenient features of your vehicle
3
Auto Door Lock/Unlock Features
Impact sensing door unlocksystem
All doors will be automatically
unlocked when an impact causes the
air bags to deploy.
Speed sensing door lock system
All doors will be automatically locked
when vehicle speed exceeds 9 mph
(15 km/h).
All of the doors will be automatically
unlocked after the engine is turned off.
Shift lever auto door lock
All doors will be automatically locked
when shifting the shift lever out of P
(Park) with the engine running.
You can activate or deactivate the
Auto Door Lock/Unlock features from
the User Settings Mode on the LCD
display.
For more information, refer to the
"LCD Display" section in this
chapter.
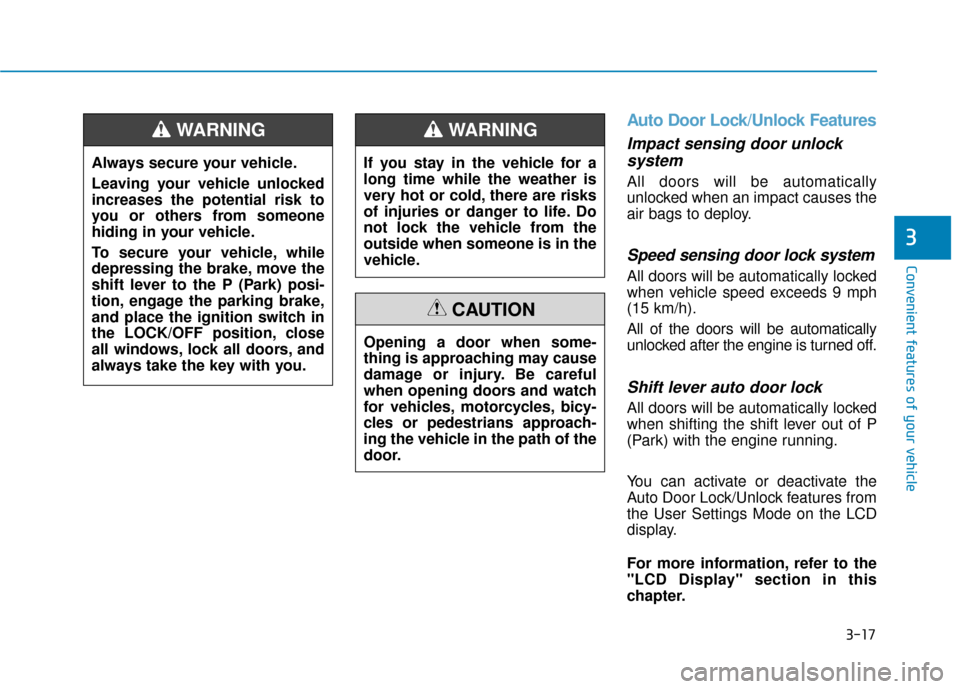
Always secure your vehicle.
Leaving your vehicle unlocked
increases the potential risk to
you or others from someone
hiding in your vehicle.
To secure your vehicle, while
depressing the brake, move the
shift lever to the P (Park) posi-
tion, engage the parking brake,
and place the ignition switch in
the LOCK/OFF position, close
all windows, lock all doors, and
always take the key with you.
WARNING
If you stay in the vehicle for a
long time while the weather is
very hot or cold, there are risks
of injuries or danger to life. Do
not lock the vehicle from the
outside when someone is in the
vehicle.
WARNING
Opening a door when some-
thing is approaching may cause
damage or injury. Be careful
when opening doors and watch
for vehicles, motorcycles, bicy-
cles or pedestrians approach-
ing the vehicle in the path of the
door.
CAUTION
Page 114 of 522
3-29
Convenient features of your vehicle
3
To adjust the Zone setting:
1. Determine the desired ZoneNumber based upon your current
location on the Zone Map.
2. Press and hold the button for 6 seconds, the current Zone
Number will appear on the display.
3. Pressing and holding the button again will cause the numbers to
increment (Note: they will repeat
…13, 14, 15, 1, 2, …). Releasing
the button when the desired Zone
Number appears on the display
will set the new Zone.
4. Within about 5 seconds the com- pass will start displaying a com-
pass heading again.
There are some conditions that can
cause changes to the vehicle mag-
nets, such as installing a ski rack or
a CB antenna. Body repair work on
the vehicle can also cause changes
to the vehicle’s magnetic field. In
these situations, the compass will
need to be re-calibrated to quickly
correct these changes. If you need to recalibrate the com-
pass:
1. Press and hold the button for
more than 9 seconds. When the
compass memory is cleared a "C"
will appear in the display.
2. Drive the vehicle in 2 complete cir- cles at less than 5 mph (8 km/h).Integrated HomeLink®Wireless
Control System
The HomeLink®Wireless Control
System can replace up to three
hand-held radio-frequency (RF)
transmitters with a single built-in
device. This innovative feature will
learn the radio frequency codes of
most current transmitters to operate
devices such as gate operators,
garage door openers, entry door
locks, security systems, even home
lighting. Both standard and rolling
code-equipped transmitters can be
programmed by following the out-
lined procedures.
Additional HomeLink
®information
can be found at: www.homelink.com
or by calling 1-800-355-3515.
Retain the original transmitter of the
RF device you are programming for
use in other vehicles as well as for
future HomeLink
®programming. It is
also suggested that upon the sale of
the vehicle, the programmed
HomeLink
®buttons be erased for
security purposes.
Page 121 of 522
3-36
Convenient features of your vehicle
To adjust the Zone setting:
1. Determine the desired Zone Number based upon your current
location on the Zone Map.
2. Press and hold the button for more than 3 but less than 6 sec-
onds, the current Zone Number
will appear on the display.
3. Pressing and holding the button again will cause the numbers to
increment (Note: they will repeat
…13, 14, 15, 1, 2, …). Releasing
the button when the desired Zone
Number appears on the display
will set the new Zone.
4. Within about 5 seconds the com- pass will start displaying a com-
pass heading again.
There are some conditions that can
cause changes to the vehicle mag-
nets, such as installing a ski rack or
a CB antenna. Body repair work on
the vehicle can also cause changes
to the vehicle’s magnetic field. In
these situations, the compass will
need to be re-calibrated to quickly
correct these changes. If you need to recalibrate the com-
pass:
1. Press and hold the button for
more than 6 seconds. When the
compass memory is cleared a "C"
will appear in the display.
2. Drive the vehicle in 2 complete cir- cles at less than 5 mph (8 km/h).
Integrated HomeLink®Wireless
Control System
The HomeLink®Wireless Control
System can replace up to three hand-
held radio-frequency (RF) transmit-
ters with a single built-in device. This
innovative feature will learn the radio
frequency codes of most current
transmitters to operate devices such
as gate operators, garage door open-
ers, entry door locks, security sys-
tems, even home lighting. Both stan-
dard and rolling code-equipped trans-
mitters can be programmed by fol-
lowing the outlined procedures.
Additional HomeLink
®information
can be found at: www.homelink.com
or by calling 1-800-355-3515.
Retain the original transmitter of the
RF device you are programming for
use in other vehicles as well as for
future HomeLink
®programming. It is
also suggested that upon the sale of
the vehicle, the programmed
HomeLink
®buttons be erased for
security purposes.
Page 151 of 522
3-66
Convenient features of your vehicle
LCD Display Control
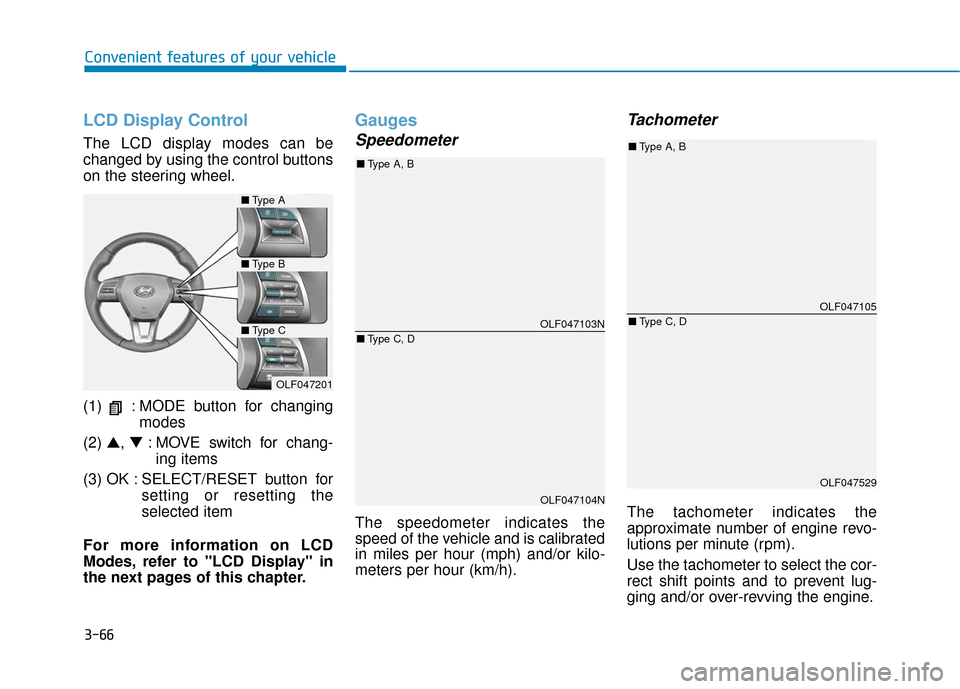
The LCD display modes can be
changed by using the control buttons
on the steering wheel.
(1) : MODE button for changingmodes
(2) ▲, ▼: MOVE switch for chang-
ing items
(3) OK : SELECT/RESET button for setting or resetting the
selected item
For more information on LCD
Modes, refer to "LCD Display" in
the next pages of this chapter.
Gauges
Speedometer
The speedometer indicates the
speed of the vehicle and is calibrated
in miles per hour (mph) and/or kilo-
meters per hour (km/h).
Tachometer
The tachometer indicates the
approximate number of engine revo-
lutions per minute (rpm).
Use the tachometer to select the cor-
rect shift points and to prevent lug-
ging and/or over-revving the engine.
OLF047201
■ Type A
■Type B
■Type COLF047103N
OLF047104N
■Type A, B
■ Type C, D
OLF047105
OLF047529
■Type A, B
■ Type C, D
Page 161 of 522

3-76
SCC Response (Smart CruiseControl)
- Slow/Normal/Fast To adjust the sensitivity of the
Smart Cruise Control system.
For more information, refer to the
"Smart Cruise Control" in chapter
5.
AEB (Auton. Emergency Braking)
To activate or deactivate the
Autonomous Emergency Braking
(AEB).
For more information, refer to
"Autonomous Emergency Braking
(AEB)" in chapter 5.
FCW (Fwd. Collision Warning)
- Late/Normal/Early To adjust the initial warning alert
time for Autonomous Emergency
Braking system.
For more information, refer to
"Autonomous Emergency Braking
(AEB)" in chapter 5. BSD Sound (Blind Spot Detection)
To activate or deactivate the Blind
Spot Detection sound.
For more information, refer to
"Blind Spot Detection" in chapter
5.
RCTA (Rear Cross Traffic Alert)
To activate or deactivate the Rear
Cross Traffic Alert system.
For more information, refer to
"Blind Spot Detection" in chapter
5.
2. Door
Automatic Lock
- Disable: The auto door lock opera-
tion will be canceled.
- Enable on Speed: All doors will be automatically locked when the
vehicle speed exceeds 15 km/h
(9.3 mph).
- Enable on Shift: All doors will be automatically locked if the auto-
matic transmission shift lever is
shifted from the P (Park) position to
the R (Reverse), N (Neutral), or D
(Drive) position.
Convenient features of your vehicle
Page 172 of 522
3-87
Convenient features of your vehicle
Automatic reset
To automatically reset the average
fuel economy after refueling, select
the "Auto Reset" mode in User
Settings menu on the LCD display.
- After Ignition: The average fueleconomy will reset automatically
whenever it has passed 4 hours
after turning OFF the engine.
- After Refueling: The average fuel economy will reset automatically
when driving speed exceeds 0.6
MPH, after adding 1.6 gallons (6
liters) of fuel or more.
Information
The average fuel economy may be
inaccurate, when the vehicle drives
shorter than 0.19 miles (300 meters)
after turning ON the Engine Start/
Stop button.
Instant Fuel Economy (3)
This mode displays the instant fueleconomy during the last few sec-
onds when the vehicle speed is
more than 6.2 MPH (10 km/h).
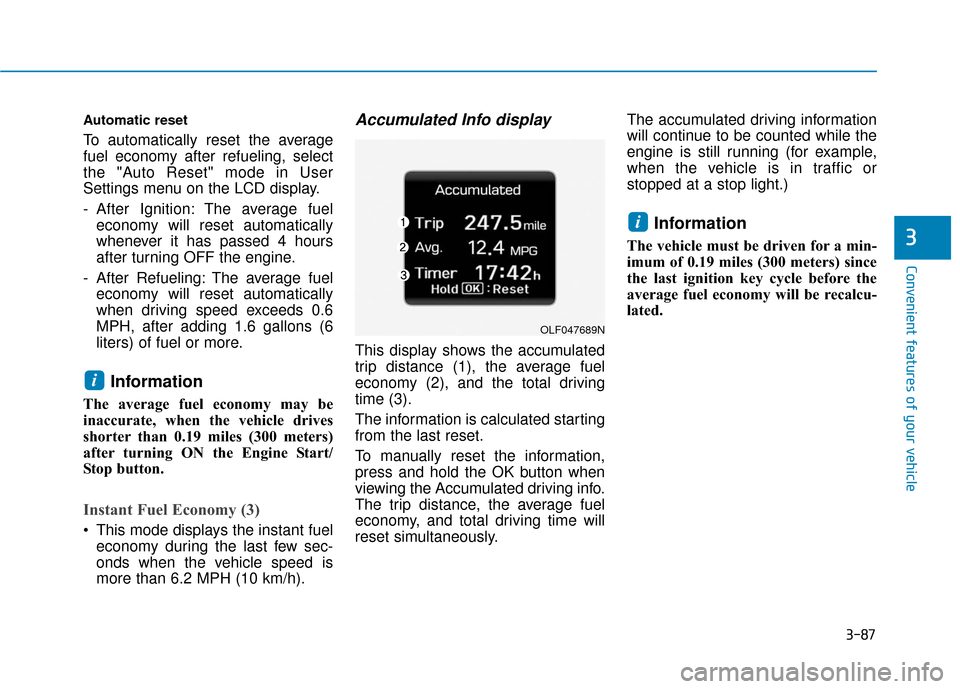
Accumulated Info display
This display shows the accumulated
trip distance (1), the average fuel
economy (2), and the total driving
time (3).
The information is calculated starting
from the last reset.
To manually reset the information,
press and hold the OK button when
viewing the Accumulated driving info.
The trip distance, the average fuel
economy, and total driving time will
reset simultaneously. The accumulated driving information
will continue to be counted while the
engine is still running (for example,
when the vehicle is in traffic or
stopped at a stop light.)
Information
The vehicle must be driven for a min-
imum of 0.19 miles (300 meters) since
the last ignition key cycle before the
average fuel economy will be recalcu-
lated.
i
i
3
OLF047689N