Page 147 of 570
Features of your vehicle
44
4
Opening the hood
1. Pull the release lever to unlatch
the hood. The hood should pop
open slightly. 2. Go to the front of the vehicle, raise
the hood slightly, pull the second-
ary latch (1) inside of the hood up
and lift the hood (2).
3. Raise the hood. It will raise com- pletely by itself after it has been
raised about halfway.
HOOD
WARNING
Open the hood after turning off
the engine on a flat surface,
shifting the shift lever to the P
(Park) position, and setting the
parking brake.
ODM042023
ONC046082
WARNING
When you check the engine
compartment, please make sure
your head is not injured by the
hood safety hook which is
located inside of the hood.
ODMNMC2034
Page 148 of 570
445
Features of your vehicle
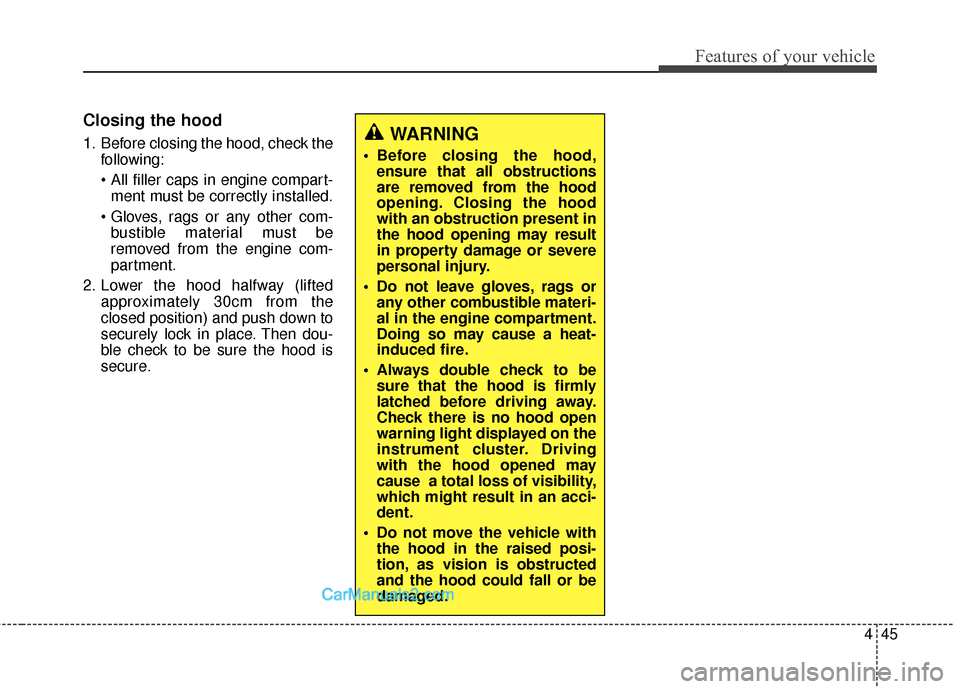
Closing the hood
1. Before closing the hood, check thefollowing:
ment must be correctly installed.
bustible material must be
removed from the engine com-
partment.
2. Lower the hood halfway (lifted approximately 30cm from the
closed position) and push down to
securely lock in place. Then dou-
ble check to be sure the hood is
secure.WARNING
Before closing the hood,ensure that all obstructions
are removed from the hood
opening. Closing the hood
with an obstruction present in
the hood opening may result
in property damage or severe
personal injury.
Do not leave gloves, rags or any other combustible materi-
al in the engine compartment.
Doing so may cause a heat-
induced fire.
Always double check to be sure that the hood is firmly
latched before driving away.
Check there is no hood open
warning light displayed on the
instrument cluster. Driving
with the hood opened may
cause a total loss of visibility,
which might result in an acci-
dent.
Do not move the vehicle with the hood in the raised posi-
tion, as vision is obstructed
and the hood could fall or be
damaged.
Page 149 of 570
Features of your vehicle
46
4
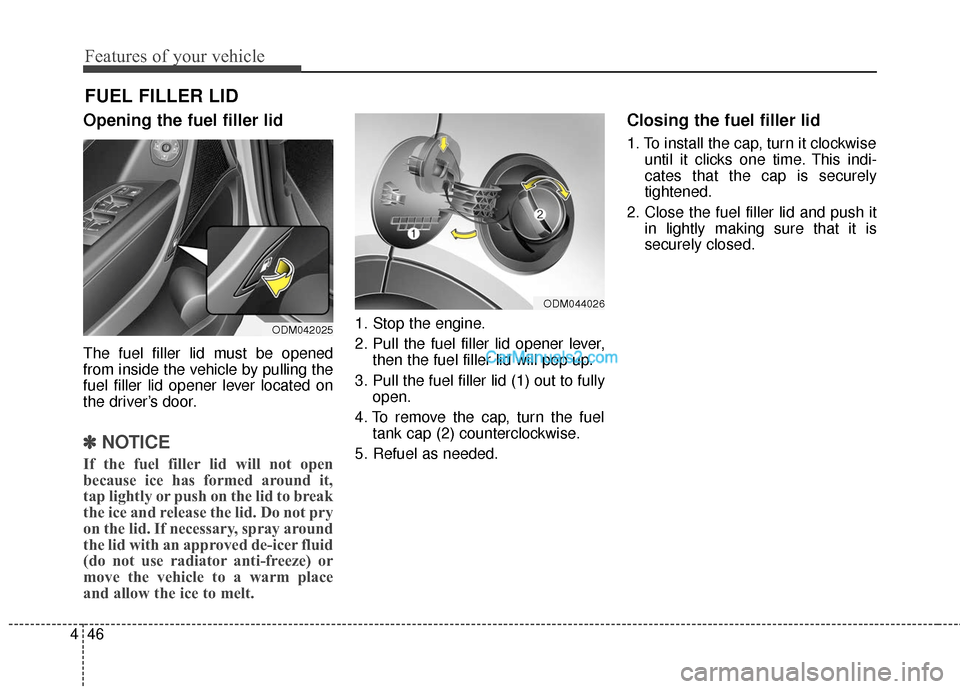
Opening the fuel filler lid
The fuel filler lid must be opened
from inside the vehicle by pulling the
fuel filler lid opener lever located on
the driver’s door.
✽ ✽
NOTICE
If the fuel filler lid will not open
because ice has formed around it,
tap lightly or push on the lid to break
the ice and release the lid. Do not pry
on the lid. If necessary, spray around
the lid with an approved de-icer fluid
(do not use radiator anti-freeze) or
move the vehicle to a warm place
and allow the ice to melt.
1. Stop the engine.
2. Pull the fuel filler lid opener lever,
then the fuel filler lid will pop up.
3. Pull the fuel filler lid (1) out to fully open.
4. To remove the cap, turn the fuel tank cap (2) counterclockwise.
5. Refuel as needed.
Closing the fuel filler lid
1. To install the cap, turn it clockwise until it clicks one time. This indi-
cates that the cap is securely
tightened.
2. Close the fuel filler lid and push it in lightly making sure that it is
securely closed.
FUEL FILLER LID
ODM042025
ODM044026
Page 151 of 570
Features of your vehicle
48
4
(Continued)
When refueling, always shut
the engine off. Sparks pro-
duced by electrical compo-
nents related to the engine
can ignite fuel vapors causing
a fire. Once refueling is com-
plete, check to make sure the
filler cap and filler door are
securely closed, before start-
ing the engine.
DO NOT use matches or a lighter and DO NOT SMOKE or
leave a lit cigarette in your
vehicle while at a gas station
especially during refueling.
Automotive fuel is highly
flammable and can, when
ignited, result in fire.
If a fire breaks out during refu- eling, leave the vicinity of the
vehicle, and immediately con-
tact the manager of the gas
station and then contact the
local fire department or 911.
Follow any safety instructions
they provide.(Continued)
When using an approvedportable fuel container, be sure
to place the container on the
ground prior to refueling. Static
electricity discharge from the
container can ignite fuel vapors
causing a fire. Once refueling
has begun, contact with the
vehicle should be maintained
until the filling is complete.
Use only approved portable
plastic fuel containers designed
to carry and store gasoline.
Do not use cellular phones while refueling. Electric cur-
rent and/or electronic interfer-
ence from cellular phones can
potentially ignite fuel vapors
causing a fire.
(Continued)CAUTION
Make sure to refuel your vehi-cle according to the "Fuelrequirements" suggested insection 1.
If the fuel filler cap requires replacement, use only a gen-uine HYUNDAI cap or theequivalent specified for yourvehicle. An incorrect fuel fillercap can result in a seriousmalfunction of the fuel systemor emission control system.
Do not spill fuel on the exterior surfaces of the vehicle. Anytype of fuel spilled on paintedsurfaces may damage the paint.
After refueling, make sure the fuel cap is installed securelyto prevent fuel spillage in theevent of an accident.
Page 154 of 570
451
Features of your vehicle
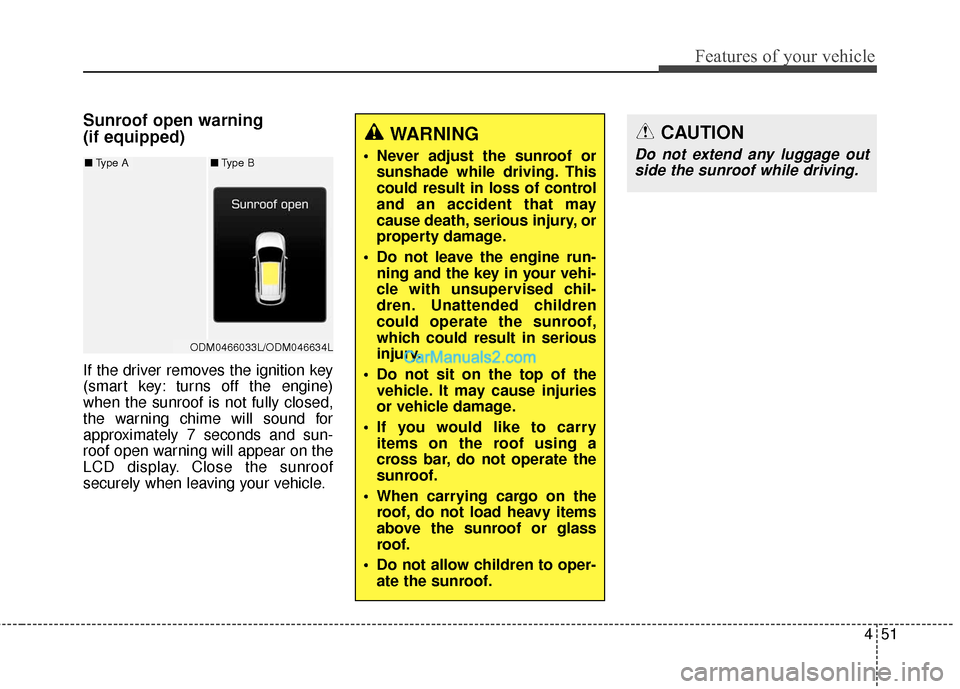
Sunroof open warning
(if equipped)
If the driver removes the ignition key
(smart key: turns off the engine)
when the sunroof is not fully closed,
the warning chime will sound for
approximately 7 seconds and sun-
roof open warning will appear on the
LCD display. Close the sunroof
securely when leaving your vehicle.
WARNING
Never adjust the sunroof orsunshade while driving. This
could result in loss of control
and an accident that may
cause death, serious injury, or
property damage.
Do not leave the engine run- ning and the key in your vehi-
cle with unsupervised chil-
dren. Unattended children
could operate the sunroof,
which could result in serious
injury.
Do not sit on the top of the vehicle. It may cause injuries
or vehicle damage.
If you would like to carry items on the roof using a
cross bar, do not operate the
sunroof.
When carrying cargo on the roof, do not load heavy items
above the sunroof or glass
roof.
Do not allow children to oper- ate the sunroof.
CAUTION
Do not extend any luggage outside the sunroof while driving.
ODM0466033L/ODM046634L
■ Type A■Type B
Page 159 of 570

Features of your vehicle
56
4
Electric power steering (EPS)
The power steering uses a motor to
assist you in steering the vehicle. If
the engine is off or if the power steer-
ing system becomes inoperative, the
vehicle may still be steered, but it will
require increased steering effort.
The motor driven power steering is
controlled by a power steering con-
trol unit which senses the steering
wheel torque and vehicle speed to
command the motor.
The steering becomes heavier as
the vehicle’s speed increases and
becomes lighter as the vehicle’s
speed decreases for optimum steer-
ing control.
Should you notice any change in the
effort required to steer during normal
vehicle operation, have the power
steering checked by an authorized
HYUNDAI dealer.
✽ ✽
NOTICE
The following symptoms may occur
during normal vehicle operation:
• The EPS warning light does not
illuminate.
• The steering gets heavy immedi- ately after turning the ignition
switch on. This happens as the sys-
tem performs the EPS system
diagnostics. When the diagnostics
is completed, the steering wheel
will return to its normal condition.
• A click noise may be heard from the EPS relay after the ignition
switch is turned to the ON or
LOCK (OFF) position.
• A motor noise may be heard when the vehicle is at a stop or at a low
driving speed.
• If the Electric Power Steering System does not operate normally,
the warning light will illuminate on
the instrument cluster. The steer-
ing wheel may become difficult to
control or operate abnormally.
Take your vehicle to an authorized
HYUNDAI dealer and have the
vehicle checked as soon as possible. (Continued)
STEERING WHEEL
CAUTION
If the Electric Power Steering
System does not operate nor-mally, the warning light willilluminate on the instrumentcluster. The steering wheelmay become difficult to con-trol or operate abnormally.Take your vehicle to anauthorized HYUNDAI dealerand have the vehicle checkedas soon as possible.
When you operate the steer- ing wheel in low temperature,abnormal noise could occur. Iftemperature rises, the noisewill disappear. This is a normalcondition.
Page 161 of 570
Features of your vehicle
58
4
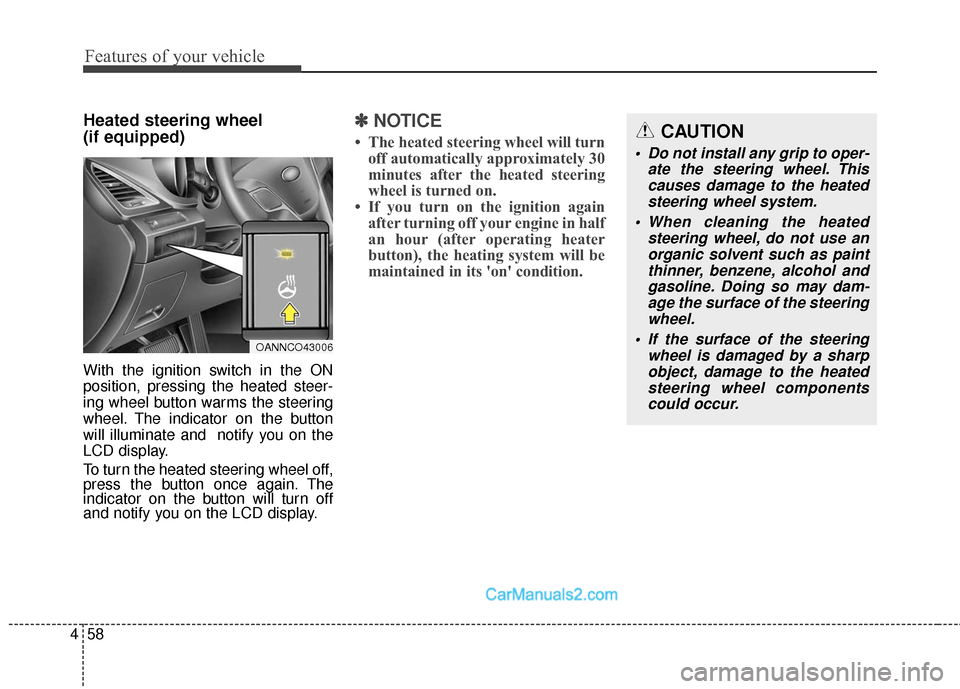
Heated steering wheel
(if equipped)
With the ignition switch in the ON
position, pressing the heated steer-
ing wheel button warms the steering
wheel. The indicator on the button
will illuminate and notify you on the
LCD display.
To turn the heated steering wheel off,
press the button once again. The
indicator on the button will turn off
and notify you on the LCD display.
✽ ✽
NOTICE
• The heated steering wheel will turn
off automatically approximately 30
minutes after the heated steering
wheel is turned on.
• If you turn on the ignition again after turning off your engine in half
an hour (after operating heater
button), the heating system will be
maintained in its 'on' condition.CAUTION
Do not install any grip to oper-
ate the steering wheel. Thiscauses damage to the heatedsteering wheel system.
When cleaning the heated steering wheel, do not use anorganic solvent such as paintthinner, benzene, alcohol andgasoline. Doing so may dam-age the surface of the steeringwheel.
If the surface of the steering wheel is damaged by a sharpobject, damage to the heatedsteering wheel componentscould occur.
OANNCO43006
Page 173 of 570
Features of your vehicle
70
4
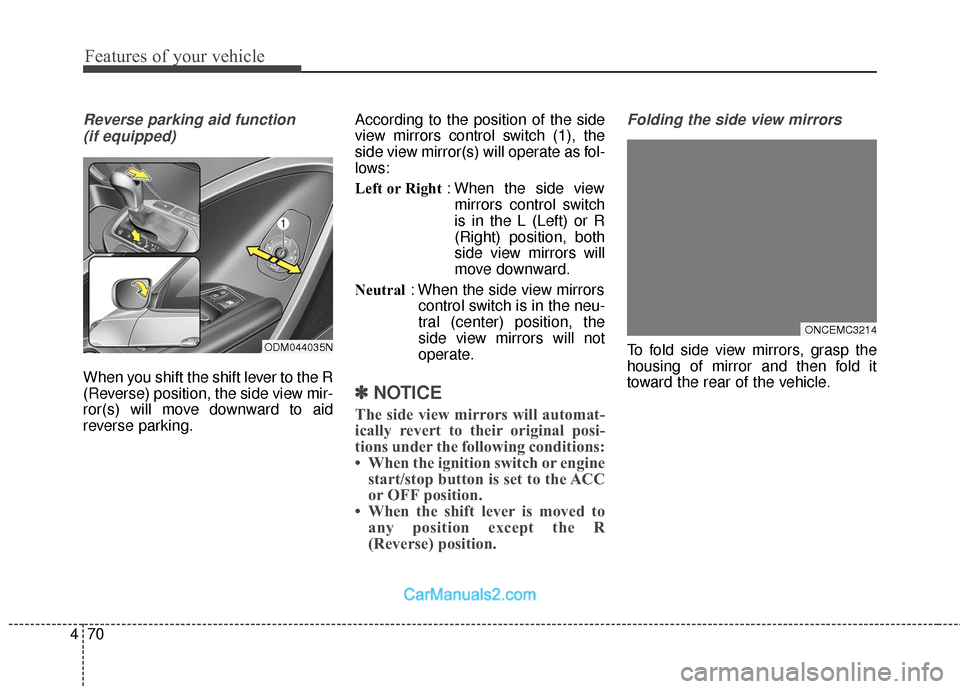
Reverse parking aid function
(if equipped)
When you shift the shift lever to the R
(Reverse) position, the side view mir-
ror(s) will move downward to aid
reverse parking. According to the position of the side
view mirrors control switch (1), the
side view mirror(s) will operate as fol-
lows:
Left or Right
: When the side view
mirrors control switch
is in the L (Left) or R
(Right) position, both
side view mirrors will
move downward.
Neutral : When the side view mirrors
control switch is in the neu-
tral (center) position, the
side view mirrors will not
operate.
✽ ✽ NOTICE
The side view mirrors will automat-
ically revert to their original posi-
tions under the following conditions:
• When the ignition switch or engine
start/stop button is set to the ACC
or OFF position.
• When the shift lever is moved to any position except the R
(Reverse) position.
Folding the side view mirrors
To fold side view mirrors, grasp the
housing of mirror and then fold it
toward the rear of the vehicle.
ONCEMC3214
ODM044035N