2018 Hyundai Santa Fe wheel
[x] Cancel search: wheelPage 402 of 570
Driving your vehicle
110
5
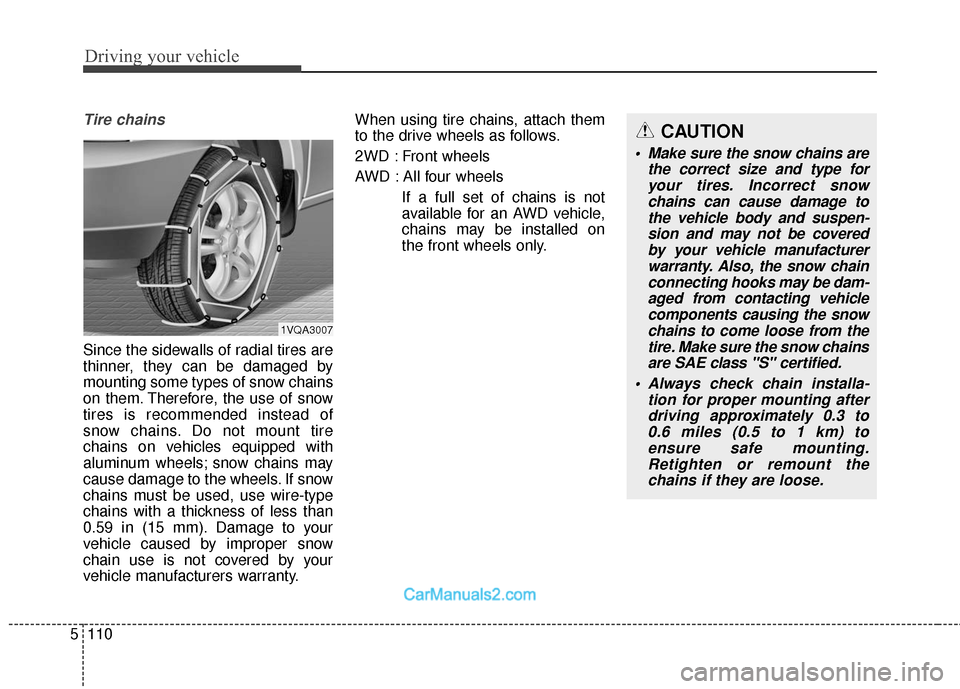
Tire chains
Since the sidewalls of radial tires are
thinner, they can be damaged by
mounting some types of snow chains
on them. Therefore, the use of snow
tires is recommended instead of
snow chains. Do not mount tire
chains on vehicles equipped with
aluminum wheels; snow chains may
cause damage to the wheels. If snow
chains must be used, use wire-type
chains with a thickness of less than
0.59 in (15 mm). Damage to your
vehicle caused by improper snow
chain use is not covered by your
vehicle manufacturers warranty. When using tire chains, attach them
to the drive wheels as follows.
2WD : Front wheels
AWD : All four wheels
If a full set of chains is not
available for an AWD vehicle,
chains may be installed on
the front wheels only.
CAUTION
Make sure the snow chains arethe correct size and type foryour tires. Incorrect snowchains can cause damage tothe vehicle body and suspen-sion and may not be coveredby your vehicle manufacturerwarranty. Also, the snow chainconnecting hooks may be dam-aged from contacting vehiclecomponents causing the snowchains to come loose from thetire. Make sure the snow chainsare SAE class "S" certified.
Always check chain installa- tion for proper mounting afterdriving approximately 0.3 to0.6 miles (0.5 to 1 km) toensure safe mounting.Retighten or remount thechains if they are loose.
1VQA3007
Page 403 of 570
5111
Driving your vehicle
Chain installation
When installing chains, follow the
manufacturer's instructions and
mount them as tightly as you can.
Drive slowly with chains installed. If
you hear the chains contacting the
body or chassis, stop and tighten
them. If they still make contact, slow
down until it stops. Remove the
chains as soon as you begin driving
on cleared roads.Use high quality ethylene gly-
col coolant
Your vehicle is delivered with high
quality ethylene glycol coolant in the
cooling system. It is the only type of
coolant that should be used because
it helps prevent corrosion in the cool-
ing system, lubricates the water
pump and prevents freezing. Be sure
to replace or replenish your coolant
in accordance with the maintenance
schedule in section 7. Before winter,
have your coolant tested to assure
that its freezing point is sufficient for
the temperatures anticipated during
the winter.
CAUTION
Chains that are the wrong sizeor improperly installed candamage your vehicle's brakelines, suspension, body andwheels.
Stop driving and retighten the chains any time you hear themhitting the vehicle.
WARNING- Tire chains
The use of chains may adversely affect vehicle han-
dling.
Do not exceed 20 mph (30 km/h) or the chain manufac-
turer's recommended speed
limit, whichever is lower.
Drive carefully and avoid bumps, holes, sharp turns, and
other road hazards, which may
cause the vehicle to bounce.
Avoid sharp turns or locked- wheel braking.
WARNING - Mounting
chains
When mounting snow chains,
park the vehicle on level ground
away from traffic. Turn on the
vehicle Hazard Warning flashers
and place a triangular emer-
gency warning device behind
the vehicle if available. Always
place the vehicle in P (Park),
apply the parking brake and
turn off the engine before
installing snow chains.
Page 405 of 570
5113
Driving your vehicle
Don't let your parking brake
freeze
Under some conditions your parking
brake can freeze in the engaged
position. This is most likely to happen
when there is an accumulation of
snow or ice around or near the rear
brakes or if the brakes are wet. If
there is a risk the parking brake may
freeze, apply it only temporarily while
you put the shift lever in P (automat-
ic transaxle) and block the rear
wheels so the vehicle cannot roll.
Then release the parking brake.
Don't let ice and snow accu-
mulate underneath
Under some conditions, snow and
ice can build up under the fenders
and interfere with the steering. When
driving in severe winter conditions
where this may happen, you should
periodically check underneath the
vehicle to be sure the movement of
the front wheels and the steering
components is not obstructed.
Carry emergency equipment
Depending on the severity of the
weather, you should carry appropri-
ate emergency equipment. Some of
the items you may want to carry
include tire chains, tow straps or
chains, flashlight, emergency flares,
sand, a shovel, jumper cables, a win-
dow scraper, gloves, ground cloth,
coveralls or a blanket, etc.
Don't place foreign objects or
materials in the engine com-
partment
Placement of foreign objects or
materials which prevent cooling of
the engine, in the engine compart-
ment, may cause a failure or com-
bustion. The manufacturer is not
responsible for the damage caused
by such placement.
Page 406 of 570
Driving your vehicle
114
5
TRAILER TOWING
If you are considering towing with
your vehicle, you should first check
with your state's Department of
Motor Vehicles to determine their
legal requirements.
Since laws vary the requirements for
towing trailers, cars, or other types of
vehicles or apparatus may differ. Ask
an authorized HYUNDAI dealer for
further details before towing.
Your vehicle can tow a trailer. To
identify what the vehicle trailering
capacity is for your vehicle, you
should read the information in
"Weight of the trailer" that appears
later in this section.Remember that trailering is different
than just driving your vehicle by itself.
Trailering means changes in han-
dling, durability, and fuel economy.
Successful, safe trailering requires
correct equipment, and it has to be
used properly.
This section contains many time-test-
ed, important trailering tips and safe-
ty rules. Many of these are important
for your safety and that of your pas-
sengers. Please read this section
carefully before you pull a trailer.
Load-pulling components such as
the engine, transaxle, wheel assem-
blies, and tires are forced to work
harder against the load of the added
weight. The engine is required to
operate at relatively higher speeds
and under greater loads. This addi-
tional burden generates extra heat.
The trailer also considerably adds
wind resistance, increasing the
pulling requirements.
WARNING - Towing a
trailer
If you don't use the correct
equipment and/or drive improp-
erly, you can lose control when
you pull a trailer. For example, if
the trailer is too heavy, the
brakes may not work well - or
even at all. You and your pas-
sengers could be seriously or
fatally injured. Pull a trailer only
if you have followed all the
steps in this section.
WARNING- Weight limits
Before towing, make sure the
total trailer weight, GCW (gross
combination weight), GVW
(gross vehicle weight), GAW
(gross axle weight) and trailer
tongue load are all within the
limits.
CAUTION
Pulling a trailer improperly can damage your vehicle and resultin costly repairs not covered byyour warranty. To pull a trailercorrectly, follow the advice inthis section.
Page 408 of 570
Driving your vehicle
116
5
Driving with a trailer
Towing a trailer requires a certain
amount of experience. Before setting
out for the open road, you must get to
know your trailer. Acquaint yourself
with the feel of handling and braking
with the added weight of the trailer.
And always keep in mind that the
vehicle you are driving is now a good
deal longer and not nearly so respon-
sive as your vehicle is by itself.
Before you start, check the trailer
hitch and platform, safety chains,
electrical connector(s), lights, tires
and mirror adjustment. If the trailer
has electric brakes, start your vehicle
and trailer moving and then apply the
trailer brake controller by hand to be
sure the brakes are working. This lets
you check your electrical connection
at the same time.
During your trip, check occasionally
to be sure that the load is secure,
and that the lights and any trailer
brakes are still working.
Following distance
Stay at least twice as far behind the
vehicle ahead as you would when
driving your vehicle without a trailer.
This can help you avoid situations
that require heavy braking and sud-
den turns.
Passing
You'll need more passing distance up
ahead when you're towing a trailer.
And, because of the increased vehi-
cle length, you'll need to go much far-
ther beyond the passed vehicle
before you can return to your lane.
Due to the added load to the engine
when going uphill the vehicle may
also take longer to pass than it would
on flat ground.
Backing up
Hold the bottom of the steering
wheel with one hand. Then, to move
the trailer to the left, just move your
hand to the left. To move the trailer to
the right, move your hand to the
right. Always back up slowly and, if
possible, have someone guide you.
Making turns
When you're turning with a trailer,
make wider turns than normal. Do
this so your trailer won't strike soft
shoulders, curbs, road signs, trees,
or other objects near the edge of the
road. Avoid jerky or sudden maneu-
vers. Signal well in advance before
turning or lane changes.
Page 410 of 570
Driving your vehicle
118
5
Parking on hills
Generally, if you have a trailer
attached to your vehicle, you should
not park your vehicle on a hill. People
can be seriously or fatally injured,
and both your vehicle and the trailer
can be damaged if they unexpected-
ly roll down hill. However, if you ever have to park your
trailer on a hill, here's how to do it:
1. Pull the vehicle into the parking
space. Turn the steering wheel in the
direction of the curb (right if headed
down hill, left if headed up hill).
2. If the vehicle has an automatic transaxle, place the car in P (Park).
3. Set the parking brake and shut off the vehicle.
4. Place chocks under the trailer wheels on the down hill side of the
wheels.
5. Start the vehicle, hold the brakes, shift to neutral, release the parking
brake and slowly release the
brakes until the trailer chocks
absorb the load.
6. Reapply the brakes, reapply the parking brake and shift the vehicle
to P (Park) for automatic transaxle.
7. Shut off the vehicle and release the vehicle brakes but leave the
parking brake set.
WARNING- Parking
on a hill
Parking your vehicle on a hill
with a trailer attached could
cause serious injury or death,
should the trailer break loose or
the brake stops working.
CAUTION
When towing a trailer on steep grades (in excess of 6%) payclose attention to the enginecoolant temperature gauge toensure the engine does notoverheat.
If the needle of the coolanttemperature gauge movesacross the dial towards "H"(HOT), pull over and stop assoon as it is safe to do so, andallow the engine to idle until itcools down. You may proceedonce the engine has cooledsufficiently.
Use caution when driving on an uphill grade to reduce thepossibility of engine andtransaxle overheating.
Page 430 of 570
What to do in an emergency
10
6
Tire pressure monitoring sys-
tem
Each tire, including the spare (if pro-
vided), should be checked monthly
when cold and inflated to the inflation
pressure recommended by the vehi-
cle manufacturer on the vehicle plac-
ard or tire inflation pressure label. (If
your vehicle has tires of a different
size than the size indicated on the
vehicle placard or tire inflation pres-
sure label, you should determine the
proper tire inflation pressure for
those tires.) As an added safety feature, your
vehicle has been equipped with a tire
pressure monitoring system (TPMS)
that illuminates a low tire pressure
telltale when one or more of your
tires is significantly under-inflated.
Accordingly, when the low tire pres-
sure telltale illuminates, you should
stop and check your tires as soon as
possible, and inflate them to the
proper pressure. Driving on a signifi-
cantly under-inflated tire causes the
tire to overheat and can lead to tire
failure. Under-inflation also reduces
fuel efficiency and tire tread life, and
may affect the vehicle’s handling and
stopping ability.
Please note that the TPMS is not a
substitute for proper tire mainte-
nance, and it is the driver’s responsi-
bility to maintain correct tire pres-
sure, even if under-inflation has not
reached the level to trigger illumina-
tion of the TPMS low tire pressure
telltale.Your vehicle has also been equipped
with a TPMS malfunction indicator to
indicate when the system is not
operating properly. The TPMS mal-
function indicator is combined with
the low tire pressure telltale. When
the system detects a malfunction,
the telltale will flash for approximate-
ly one minute and then remain con-
tinuously illuminated. This sequence
will continue upon subsequent vehi-
cle start-ups as long as the malfunc-
tion exists. When the malfunction
indicator is illuminated, the system
may not be able to detect or signal
low tire pressure as intended.
TPMS malfunctions may occur for a
variety of reasons, including the
installation of replacement or alter-
nate tires or wheels on the vehicle
that prevent the TPMS from function-
ing properly. Always check the TPMS
malfunction telltale after replacing
one or more tires or wheels on your
vehicle to ensure that the replace-
ment or alternate tires and wheels
allow the TPMS to continue to func-
tion properly.
WARNING
Over-inflation or under-inflation
can reduce tire life, adversely
affect vehicle handling, and
lead to sudden tire failure that
may cause loss of vehicle con-
trol resulting in an accident.
Page 431 of 570
611
What to do in an emergency
✽
✽NOTICE
If any of the below happens, have
the system checked by an authorized
HYUNDAI dealer.
1.The low tire pressure telltale/
TPMS malfunction indicator does
not illuminate for 3 seconds when
Engine Start/Stop button is turned
to the ON or engine is running.
2. The TPMS malfunction indicator remains illuminated after blinking
for approximately 1 minute.
3. The Low tire pressure position telltale remains illuminated.
Low tire pressure
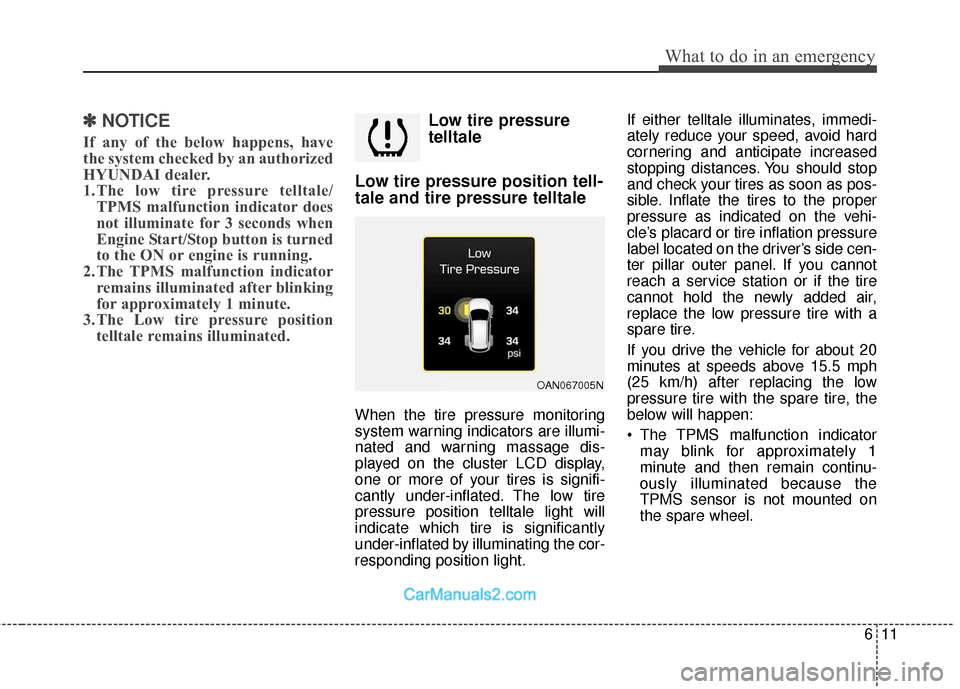
telltale
Low tire pressure position tell-
tale and tire pressure telltale
When the tire pressure monitoring
system warning indicators are illumi-
nated and warning massage dis-
played on the cluster LCD display,
one or more of your tires is signifi-
cantly under-inflated. The low tire
pressure position telltale light will
indicate which tire is significantly
under-inflated by illuminating the cor-
responding position light. If either telltale illuminates, immedi-
ately reduce your speed, avoid hard
cornering and anticipate increased
stopping distances. You should stop
and check your tires as soon as pos-
sible. Inflate the tires to the proper
pressure as indicated on the vehi-
cle’s placard or tire inflation pressure
label located on the driver’s side cen-
ter pillar outer panel. If you cannot
reach a service station or if the tire
cannot hold the newly added air,
replace the low pressure tire with a
spare tire.
If you drive the vehicle for about 20
minutes at speeds above 15.5 mph
(25 km/h) after replacing the low
pressure tire with the spare tire, the
below will happen:
The TPMS malfunction indicator
may blink for approximately 1
minute and then remain continu-
ously illuminated because the
TPMS sensor is not mounted on
the spare wheel.
OAN067005N