Page 445 of 497

7-38
Maintenance
Instrument panel fuse replace-
ment
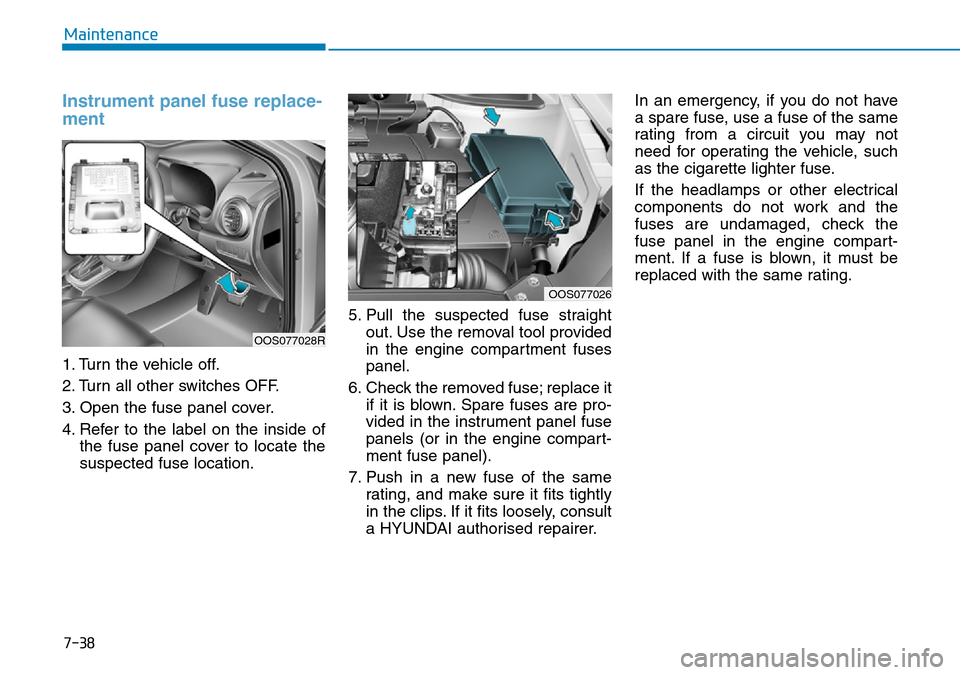
1. Turn the vehicle off.
2. Turn all other switches OFF.
3. Open the fuse panel cover.
4. Refer to the label on the inside ofthe fuse panel cover to locate the
suspected fuse location. 5. Pull the suspected fuse straight
out. Use the removal tool provided
in the engine compartment fuses
panel.
6. Check the removed fuse; replace it if it is blown. Spare fuses are pro-
vided in the instrument panel fuse
panels (or in the engine compart-
ment fuse panel).
7. Push in a new fuse of the same rating, and make sure it fits tightly
in the clips. If it fits loosely, consult
a HYUNDAI authorised repairer. In an emergency, if you do not have
a spare fuse, use a fuse of the same
rating from a circuit you may not
need for operating the vehicle, such
as the cigarette lighter fuse.
If the headlamps or other electrical
components do not work and the
fuses are undamaged, check the
fuse panel in the engine compart-
ment. If a fuse is blown, it must be
replaced with the same rating.
OOS077028R
OOS077026
Page 447 of 497

7-40
Maintenance
3. Remove the fuse panel cover by pressing the tab and pulling up.
4. Check the removed fuse; replace it if it is blown. To remove or insert
the fuse, use the fuse puller in the
engine compartment fuse panel.
5. Push in a new fuse of the same rating, and make sure it fits tightly
in the clips. If it fits loosely, consult
a HYUNDAI authorised repairer.
After checking the fuse panel in
the engine compartment, securely
install the fuse panel cover. You
may hear a clicking sound if the
cover is securely latched. If it is
not securely latched, electrical
failure may occur from water con-
tact.
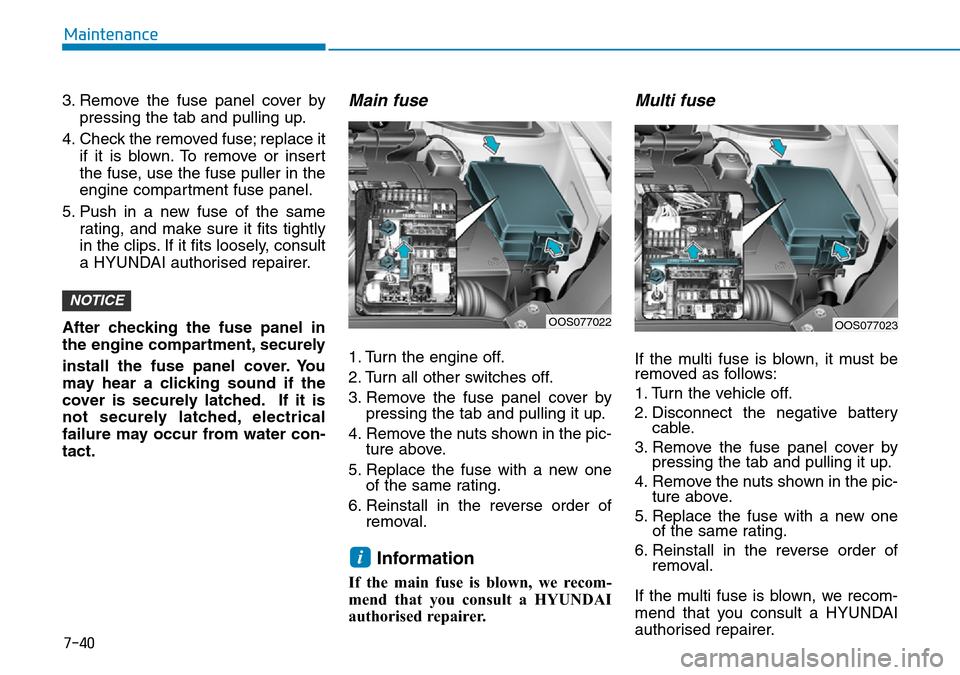
Main fuse
1. Turn the engine off.
2. Turn all other switches off.
3. Remove the fuse panel cover by pressing the tab and pulling it up.
4. Remove the nuts shown in the pic- ture above.
5. Replace the fuse with a new one of the same rating.
6. Reinstall in the reverse order of removal.
Information
If the main fuse is blown, we recom-
mend that you consult a HYUNDAI
authorised repairer.
Multi fuse
If the multi fuse is blown, it must be
removed as follows:
1. Turn the vehicle off.
2. Disconnect the negative batterycable.
3. Remove the fuse panel cover by pressing the tab and pulling it up.
4. Remove the nuts shown in the pic- ture above.
5. Replace the fuse with a new one of the same rating.
6. Reinstall in the reverse order of removal.
If the multi fuse is blown, we recom-
mend that you consult a HYUNDAI
authorised repairer.
i
NOTICE
OOS077022OOS077023
Page 457 of 497
7-50
Maintenance
Fuse NameSymbolFuse RatingCircuit Protected
SENSOR2S210APCB Block (A/CON Relay), E/R Junction Block (RLY.9), Purge Control Solenoid Valve,
RCV Control Solenoid Valve, Oil Control Valve #1~#2
ECU2E210AECM
ECU1E120AECM
INJECTORINJECTOR15A-
SENSOR1S115AOxygen Sensor (Up), Oxygen Sensor (Down)
IGN COILIGN COIL20AIgnition Coil #1~#4
ECU3E315AECM
A/CON10APCB Block (A/CON Relay)
ECU5E510AECM
SENSOR4S415AVacuum Pump
ABS3310AESC Control Module, Multipurpose Check Connector
TCM2T215ATCM, Transaxle Range Switch
Engine compartment fuse panel
■ Gamma 1.6 T-GDI
Page 460 of 497
7-53
7
Maintenance
Engine compartment fuse panel(Battery terminal cover)
Inside the fuse/relay box cover, you
can find the fuse/relay label describ-
ing fuse/relay names and ratings.
Information
Not all fuse panel descriptions in this
manual may be applicable to your
vehicle; the information is accurate at
the time of printing. When you inspect
the fuse panel in your vehicle, refer to
the fuse panel label.
i
OOS077035R
OPD076065
After checking the fuse panel in the engine compartment, securely
install the cover. If it is not securely latched, electrical failure may occur
from water contact.
NOTICE
Page 471 of 497
7-64
Maintenance
Side repeater lamp replace-
ment
If the light bulb does not operate, we
recommend that you have the vehicle
checked by a HYUNDAI authorised
repairer.
Rear combination lamp bulb
replacement(1) Stop/Tail lamp
(2) Tail lamp(Type A), Stop/Tail lamp (Type B)
(3) Turn signal lamp
(4) Rear fog lamp
(5) Backup lamp
Stop/Tail lamp
1. Turn off the engine.
2. Open the tailgate.
3. Loosen the lamp assembly retain- ing screws with a cross-tip screw-
driver.
OOS077039
OOS077066L
OOS077040
OOS077041
OOS077067L
■Type B (LED)
■Type A (Standard)
Page 484 of 497

7-77
7
Maintenance
Engine exhaust gas precautions (carbon monoxide)
• Carbon monoxide can be present
with other exhaust fumes. Therefore,
if you smell exhaust fumes of any
kind inside your vehicle, have it
inspected and repaired immediately.
If you ever suspect exhaust fumes
are coming into your vehicle, drive it
only with all the windows fully open.
Have your vehicle checked and
repaired immediately. • Do not operate the engine in con-
fined or closed areas (such as
garages) any more than what is
necessary to move the vehicle in or
out of the area.
• When the vehicle is stopped in an open area for more than a short
time with the engine running,
adjust the ventilation system (as
needed) to draw outside air into the
vehicle.
• Never sit in a parked or stopped vehicle for any extended time with
the engine running.
• When the engine stalls or fails to start, excessive attempts to restart
the engine may cause damage to
the emission control system.
Operating precautions for cat-alytic converters (if equipped)
Engine exhaust gases contain
carbon monoxide (CO). Though
colourless and odourless, it is
dangerous and could be lethal if
inhaled. Follow the instructions
following to avoid CO poisoning.
WARNING
•A hot exhaust system can
ignite flammable items under
your vehicle. Do not park, idle,
or drive the vehicle over or
near flammable objects, such
as dry grass, paper, leaves, etc.
•The exhaust system and cat-
alytic system are very hot
whilst the engine is running or
immediately after the engine
is turned off. Keep away from
the exhaust system and cat-
alytic converter as you may
get burned.
Also, do not remove the heat
sink around the exhaust sys-
tem, do not seal the bottom of
the vehicle and do not coat the
vehicle for corrosion control. It
may present a fire risk under
certain conditions.
WARNING
Page 493 of 497

8-8
Specifications & Consumer information
LubricantVolume Classification
Transfer case oil (4WD) 0.47~0.52
l
(0.41~0.46 lmp. qts.) HYPOID GEAR OIL API GL-5, SAE75W/90
(SHELL HD AXLE OIL 75W90 or equivalent)
Brake/clutch fluid 0.7 ~ 0.8 l
(0.6 ~ 0.7 lmp. qts.) FMVSS116 DOT-3 or DOT-4
Fuel 50
l(11 lmp. gal.)
Refer to “Fuel Requirements” in the Introduction chapter.
Recommended engine oil
Supplier Product
Shell Petrol EngineHELIX ULTRA AH-E 5W-30
HELIX ULTRA 5W-40
Always be sure to clean the area around any filler plug, drain plug, or dipstick before checking or draining
any lubricant. This is especially important in dusty or sandy areas and when the vehicle is used on unpaved
roads. Cleaning the plug and dipstick areas will prevent dirt and grit from entering the engine and other
mechanisms that could be damaged.
CAUTION
Recommended SAE viscosity number
Engine oil viscosity (thickness) has an effect on fuel economy and cold weather operating (engine start and engine
oil flowability). Lower viscosity engine oils can provide better fuel economy and cold weather performance, however,
higher viscosity engine oils are required for satisfactory lubrication in hot weather. Using oils of any viscosity other
than those recommended could result in engine damage.