Page 370 of 497

6-8
What to do in an emergency
If your temperature gauge indicates
overheating, you experience a loss
of power, or hear loud pinging or
knocking, the engine may be over-
heating. If this happens, you should:
1. Pull off the road and stop as soon as it is safe to do so.
2. Place the shift lever in P (Park, for dual clutch transmission vehicle)
or neutral (for manual transmis-
sion/dual clutch transmission vehi-
cle) and set the parking brake. If
the air conditioning is ON, turn it
OFF.
3. If engine coolant is running out under the vehicle or steam is com-
ing out from the bonnet, stop the
engine. Do not open the bonnet
until the coolant has stopped run-
ning or the steaming has stopped.
If there is no visible loss of engine
coolant and no steam, leave the
engine running and check to be
sure the engine cooling fan is
operating. If the fan is not running,
turn the engine off. 4. Check for coolant leaking from the
radiator, hoses or under the vehi-
cle. (If the air conditioning had been
in use, it is normal for cold water to
be draining from it when you stop.)
5. If engine coolant is leaking out, stop the engine immediately and we rec-
ommend that you call a HYUNDAI
authorised repairer for assistance.
IF THE ENGINE OVERHEATS
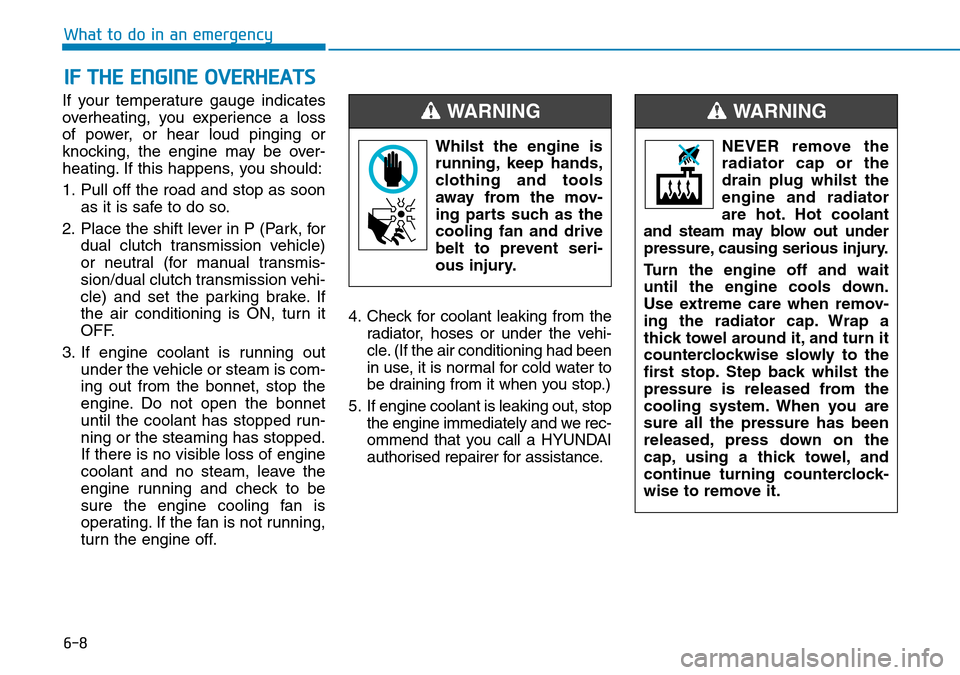
Whilst the engine isrunning, keep hands,
clothing and tools
away from the mov-
ing parts such as the
cooling fan and drive
belt to prevent seri-
ous injury.
WARNING
NEVER remove the
radiator cap or the
drain plug whilst the
engine and radiator
are hot. Hot coolant
and steam may blow out under
pressure, causing serious injury.
Turn the engine off and wait
until the engine cools down.
Use extreme care when remov-
ing the radiator cap. Wrap a
thick towel around it, and turn it
counterclockwise slowly to the
first stop. Step back whilst the
pressure is released from the
cooling system. When you are
sure all the pressure has been
released, press down on the
cap, using a thick towel, and
continue turning counterclock-
wise to remove it.
WARNING
Page 413 of 497

7-6
Maintenance
Whilst operating your vehicle:
• Note any changes in the sound ofthe exhaust or any smell of exhaust
fumes in the vehicle.
• Check for vibrations in the steering wheel. Notice if there is any
increased steering effort or loose-
ness in the steering wheel, or
change in its straight-ahead position.
• Notice if your vehicle constantly turns slightly or “pulls” to one side when
travelling on smooth, level road.
• When stopping, listen and check for unusual sounds, pulling to one side,
increased brake pedal travel or
“hard-to-push” brake pedal.
• If any slipping or changes in the operation of your transmission
occurs, check the transmission fluid
level.
• Check the dual clutch transmission P (Park) function.
• Check the parking brake.
• Check for fluid leaks under your vehicle (water dripping from the air
conditioning system during or after
use is normal).
At least monthly:
• Check coolant level in the enginecoolant reservoir.
• Check the operation of all exterior lights, including the stoplights, turn
signals and hazard warning flashers.
• Check the inflation pressures of all tyres including the spare for tyres
that are worn, show uneven wear,
or are damaged.
• Check for loose wheel lug nuts.
At least twice a year: (i.e., every Spring and Autumn)
• Check radiator, heater and air condi-
tioning hoses for leaks or damage.
• Check windscreen washer spray and wiper operation. Clean wiper
blades with a clean cloth damp-
ened with washer fluid.
• Check headlamp alignment.
• Check muffler, exhaust pipes, shields and clamps.
• Check the seat belts for wear and function.
At least once a year:
• Clean body and door drain holes.
• Lubricate door hinges and bonnethinges.
• Lubricate door and bonnet locks and latches.
• Lubricate door rubber weather strips.
• Check the air conditioning system.
• Inspect and lubricate dual clutch transmission linkage and controls.
• Clean the battery and terminals.
• Check the brake fluid level.
Page 428 of 497

7-21
7
Maintenance
WIPER BLADES
Blade inspection
Contamination of either the wind-
screen or the wiper blades with for-
eign matter can reduce the effective-
ness of the windscreen wipers.
Common sources of contamination
are insects, tree sap, and hot wax
treatments used by some commer-
cial car washes. If the blades are not
wiping properly, clean both the win-
dow and the blades with a good
cleaner or mild detergent, and rinse
thoroughly with clean water.
To prevent damage to the wiper
blades, arms or other compo-
nents, do not:
• Use petrol, kerosene, paint thin-ner, or other solvents on or near
them.
• Attempt to move the wipers manually.
• Use non-specified wiper blades.
Information
Commercial hot waxes applied by auto-
matic car washes have been known to
make the windscreen difficult to clean.
Information
Wiper blades are consumable item.
Normal wear of the wipers may not be
covered by your vehicle warranty.
Blade replacement
When the wipers no longer clean
adequately, the blades may be worn
or cracked, and require replacement.
To prevent damage to the wiper arms
or other components, do not attempt
to move the wipers manually.
The use of a non-specified wiper
blade could result in wiper mal-
function and failure.
• In order to prevent damage to the bonnet and the wiper arms,
the wiper arms should only be
lifted when in the top wiping
position.
• Always return the wiper arms to the windscreen before driving.
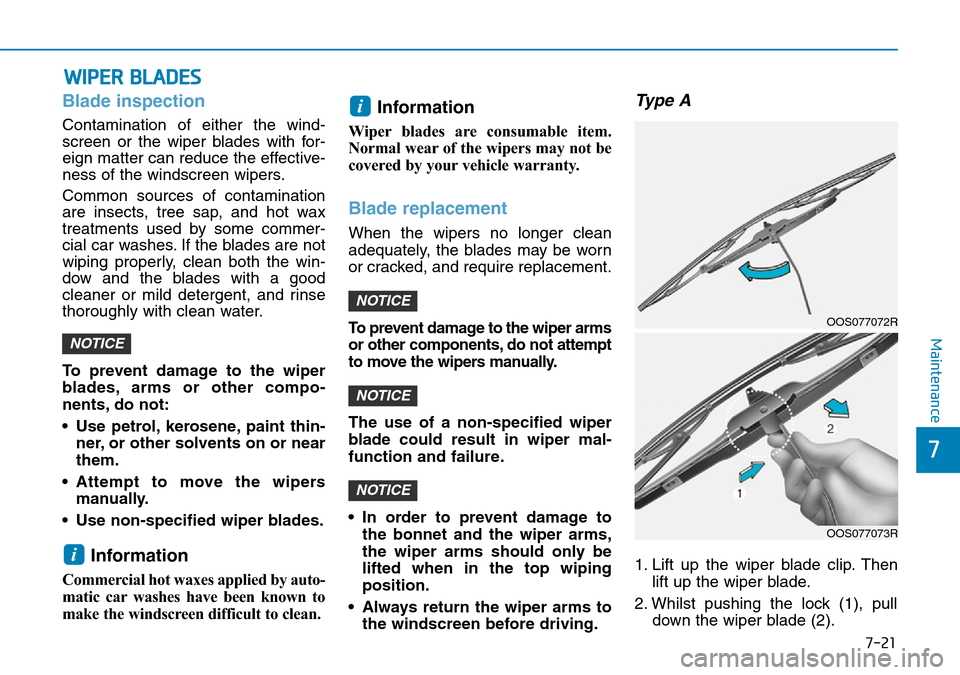
Type A
1. Lift up the wiper blade clip. Then lift up the wiper blade.
2. Whilst pushing the lock (1), pull down the wiper blade (2).
NOTICE
NOTICE
NOTICE
i
i
NOTICE
OOS077072R
OOS077073R
Page 463 of 497
![Hyundai Kona 2018 Owners Manual - RHD (UK, Australia) 7-56
Maintenance
[1] : High beam, [2] : Low beam
Headlamp and position lamp
1. Open the bonnet.
2. Disconnect the negative batterycable.
3. Remove the bulb cover by turning it counterclockwise.
4. Dis Hyundai Kona 2018 Owners Manual - RHD (UK, Australia) 7-56
Maintenance
[1] : High beam, [2] : Low beam
Headlamp and position lamp
1. Open the bonnet.
2. Disconnect the negative batterycable.
3. Remove the bulb cover by turning it counterclockwise.
4. Dis](/manual-img/35/16232/w960_16232-462.png)
7-56
Maintenance
[1] : High beam, [2] : Low beam
Headlamp and position lamp
1. Open the bonnet.
2. Disconnect the negative batterycable.
3. Remove the bulb cover by turning it counterclockwise.
4. Disconnect the bulb socket-con- nector. (for low beam and high
beam)
5. Remove the bulb from the head- lamp assembly.
6. Install a new bulb.
7. Connect the bulb socket-connec- tor. (for low beam and high beam)
8. Install the bulb cover by turning it clockwise.
Turn signal lamp
1. Open the bonnet.
2. Disconnect the negative batterycable.
3. Remove the socket (1) from the assembly by turning the socket
counterclockwise until the tabs on
the socket align with the slots on
the assembly.
4. Remove the bulb from the socket by pressing it in and rotating it
counterclockwise until the tabs on
the bulb align with the slots in the
socket. Pull the bulb out of the
socket. 5. Insert a new bulb by inserting it
into the socket and rotating it until
it locks into place.
6. Install the socket in the assembly by aligning the tabs on the socket
with the slots in the assembly.
7. Push the socket into the assembly and turn the socket clockwise.
Daytime running light
If the LED lamp does not operate, we
recommend you to have the vehicle
checked by a HYUNDAI authorised
repairer.OOS077038OOS077034
Page 465 of 497

7-58
Maintenance
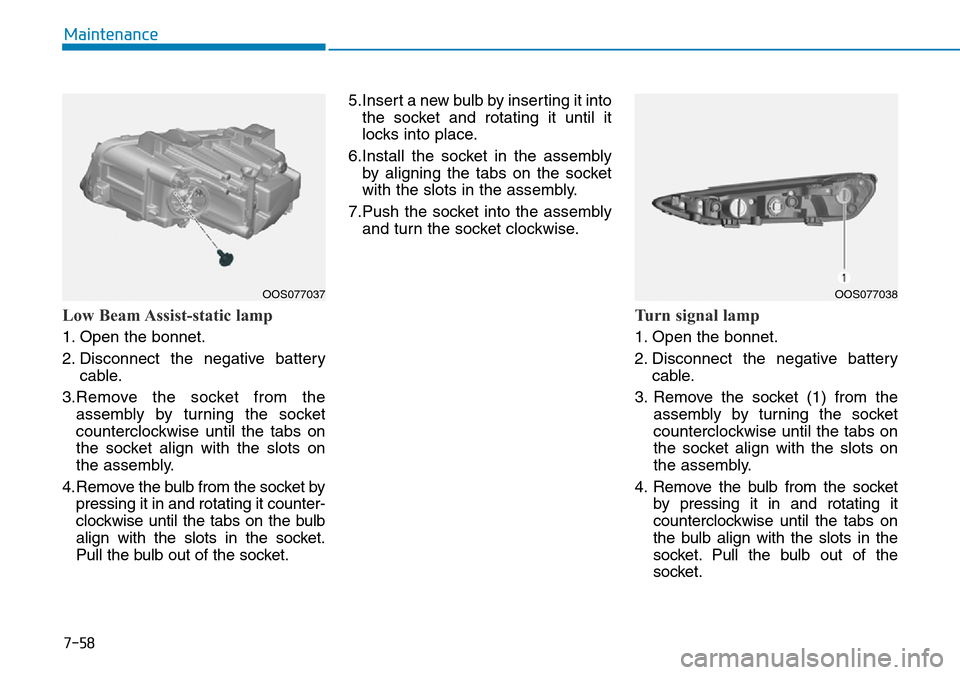
Low Beam Assist-static lamp
1. Open the bonnet.
2. Disconnect the negative batterycable.
3.Remove the socket from the assembly by turning the socket
counterclockwise until the tabs on
the socket align with the slots on
the assembly.
4.Remove the bulb from the socket by pressing it in and rotating it counter-
clockwise until the tabs on the bulb
align with the slots in the socket.
Pull the bulb out of the socket. 5.Insert a new bulb by inserting it into
the socket and rotating it until it
locks into place.
6.Install the socket in the assembly by aligning the tabs on the socket
with the slots in the assembly.
7.Push the socket into the assembly and turn the socket clockwise.
Turn signal lamp
1. Open the bonnet.
2. Disconnect the negative battery cable.
3. Remove the socket (1) from the assembly by turning the socket
counterclockwise until the tabs on
the socket align with the slots on
the assembly.
4. Remove the bulb from the socket by pressing it in and rotating it
counterclockwise until the tabs on
the bulb align with the slots in the
socket. Pull the bulb out of the
socket.
OOS077037 OOS077038
Page 497 of 497
8-12
Specifications & Consumer information
The refrigerant label provides infor-
mation such as refrigerant type and
amount.
The label is located on the underside
of the bonnet. The radio frequency components of
the vehicle comply with requirements
and other relevant provisions of
Directive 1995/5/EC.
Further information including the
manufacturer's declaration of con-
formity is available on HYUNDAI
web site as follows;
http://service.hyundai-motor.com
REFRIGERANT LABEL
(IF EQUIPPED)
OOS087008LCE0678
■
Example
DECLARATION OF
CONFORMITY (IF EQUIPPED)
Page:
< prev 1-8 9-16 17-24