Page 443 of 534
7-18
MaintenanceE
E XX PPLLAA NN AATTIIOO NN OO FF SS CC HH EEDD UU LLEE DD MM AAIINN TTEENN AANN CCEE IITT EEMM SS
Engine Oil and Filter
The engine oil and filter should be
changed at the intervals specified in
the maintenance schedule. If the car
is being driven in severe conditions,more frequent oil and filter changesare required.
Drive Belts
Inspect all drive belts for evidence of
cuts, cracks, excessive wear or oil
saturation and replace if necessary.
Drive belts should be checked peri-
odically for proper tension and
adjusted as necessary.
Fuel Filter
A clogged-up fuel filter may limit the
vehicle driving speed, damage theemission system, and cause the
hard starting. When a considerable
amount of foreign substances are
accumulated in the fuel tank, the fuelfilter should be replaced. Upon installing a new fuel filter, oper-
ate the engine for several minutes,
and check the connections for any
leakages. Fuel filters should be
installed by an authorized HYUNDAI
dealer.
Fuel Lines, Fuel Hoses and Connections
Check the fuel lines, fuel hoses and
connections for leakage and dam-
age. Have an authorized HYUNDAI
dealer replace any damaged or leak-
ing parts immediately.
Vapor Hose and Fuel Filler Cap
The vapor hose and fuel filler cap should be inspected at those inter-
vals specified in the maintenance
schedule. Make sure a new vaporhose or fuel filler cap is correctlyreplaced.
Vacuum Crankcase Ventilation Hoses (if equipped)
Inspect the surface of hoses for evi- dence of heat and/or mechanical
damage. Hard and brittle rubber,
cracking, tears, cuts, abrasions, and
excessive swelling indicate deterio-
ration. Particular attention should be
paid to examine those hose surfaces
nearest to high heat sources, such
as the exhaust manifold. Inspect the hose routing to assure that the hoses do not come in con-
tact with any heat source, sharp
edges or moving component whichmight cause heat damage or
mechanical wear.
Inspect all hose connections, such
as clamps and couplings, to make
sure they are secure, and that no
leaks are present. Hoses should be
replaced immediately if there is any
evidence of deterioration or damage.
Page 446 of 534
7-21
7
Maintenance
EENN GGIINN EE OO IILL
Checking the Engine Oil Level
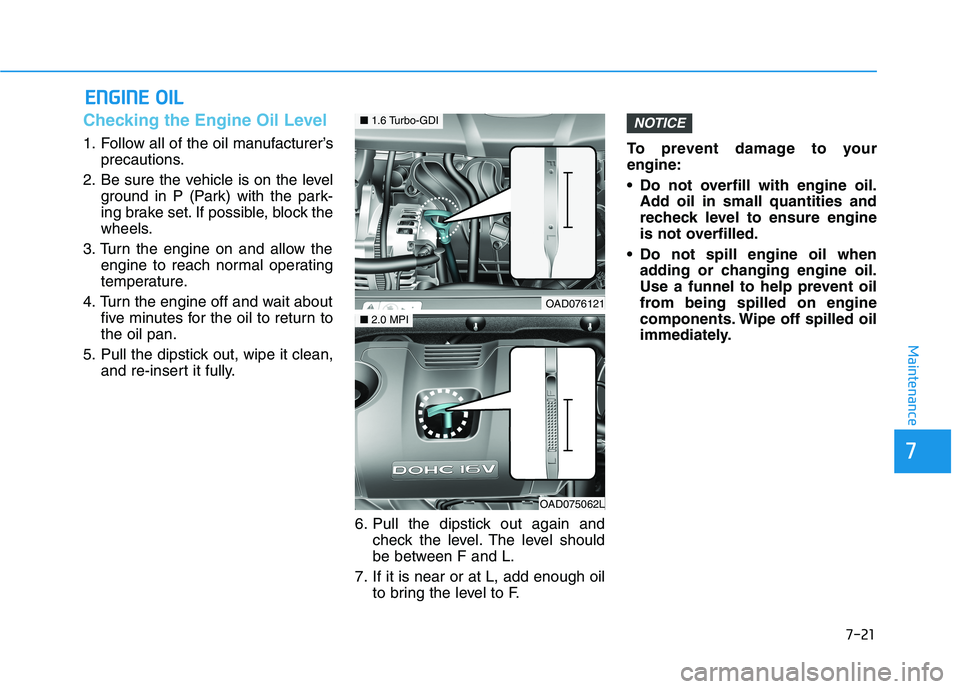
1. Follow all of the oil manufacturer’s
precautions.
2. Be sure the vehicle is on the level ground in P (Park) with the park-
ing brake set. If possible, block the
wheels.
3. Turn the engine on and allow the engine to reach normal operating
temperature.
4. Turn the engine off and wait about five minutes for the oil to return tothe oil pan.
5. Pull the dipstick out, wipe it clean, and re-insert it fully.
6. Pull the dipstick out again andcheck the level. The level should
be between F and L.
7. If it is near or at L, add enough oil to bring the level to F. To prevent damage to yourengine:
Do not overfill with engine oil.
Add oil in small quantities and
recheck level to ensure engine
is not overfilled.
Do not spill engine oil when adding or changing engine oil.
Use a funnel to help prevent oil
from being spilled on engine
components. Wipe off spilled oil
immediately.
NOTICE
OAD076121
■1.6 Turbo-GDI
OAD075062L
■2.0 MPI
Page 447 of 534
7-22
Maintenance
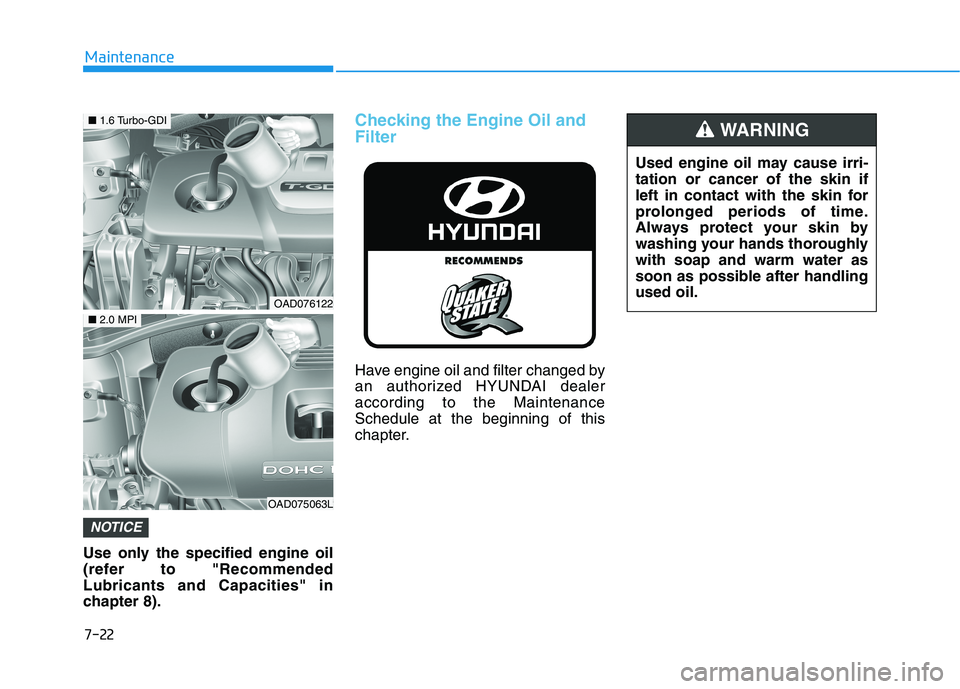
Use only the specified engine oil
(refer to "RecommendedLubricants and Capacities" in
chapter 8).
Checking the Engine Oil and Filter
Have engine oil and filter changed by
an authorized HYUNDAI dealeraccording to the MaintenanceSchedule at the beginning of this
chapter.
NOTICE
Used engine oil may cause irri- tation or cancer of the skin if
left in contact with the skin for
prolonged periods of time.
Always protect your skin by
washing your hands thoroughlywith soap and warm water as
soon as possible after handlingused oil.
WARNING
OAD076122
■1.6 Turbo-GDI
OAD075063L
■2.0 MPI
Page 452 of 534
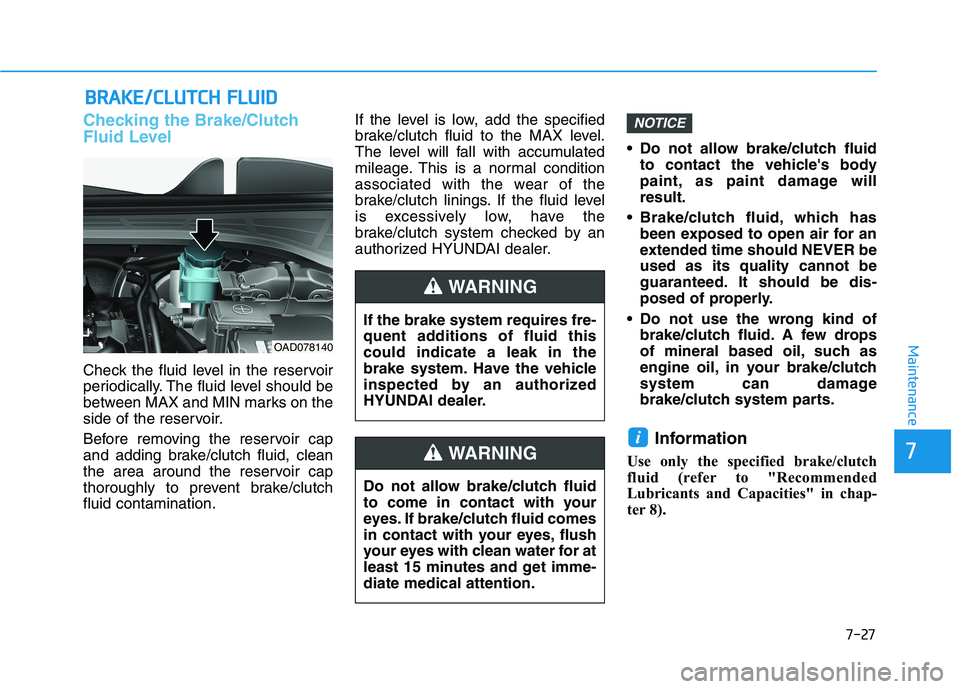
BBRRAA KKEE//CC LLUU TTCCHH FF LLUU IIDD
Checking the Brake/Clutch
Fluid Level
Check the fluid level in the reservoir
periodically. The fluid level should be
between MAX and MIN marks on the
side of the reservoir.
Before removing the reservoir cap
and adding brake/clutch fluid, clean
the area around the reservoir cap
thoroughly to prevent brake/clutchfluid contamination. If the level is low, add the specified
brake/clutch fluid to the MAX level.
The level will fall with accumulated
mileage. This is a normal condition
associated with the wear of the
brake/clutch linings. If the fluid level
is excessively low, have the
brake/clutch system checked by an
authorized HYUNDAI dealer.
Do not allow brake/clutch fluid
to contact the vehicle's body
paint, as paint damage willresult.
Brake/clutch fluid, which has been exposed to open air for an
extended time should NEVER beused as its quality cannot be
guaranteed. It should be dis-
posed of properly.
Do not use the wrong kind of brake/clutch fluid. A few drops
of mineral based oil, such as
engine oil, in your brake/clutch
system can damage
brake/clutch system parts.
Information
Use only the specified brake/clutch
fluid (refer to "Recommended
Lubricants and Capacities" in chap-
ter 8).
i
NOTICE
7-27
7
Maintenance
If the brake system requires fre-
quent additions of fluid thiscould indicate a leak in the
brake system. Have the vehicle
inspected by an authorized
HYUNDAI dealer.
WARNING
Do not allow brake/clutch fluid
to come in contact with your
eyes. If brake/clutch fluid comes
in contact with your eyes, flush
your eyes with clean water for at
least 15 minutes and get imme-diate medical attention.
WARNING
OAD078140
Page 479 of 534
7-54
Maintenance
Do not use a screwdriver or any
other metal object to remove
fuses because it may cause a
short circuit and damage the sys-tem.
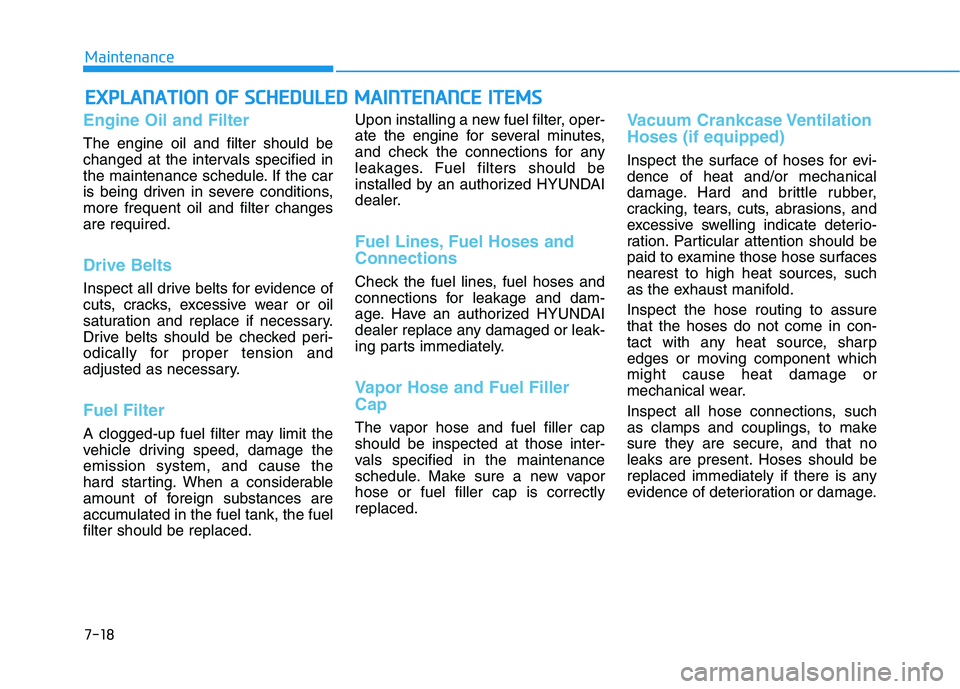
Instrument Panel Fuse Replacement
1. Turn the engine off.
2. Turn all other switches OFF.
3. Open the fuse panel cover.
4. Refer to the label on the inside ofthe fuse panel cover to locate the suspected fuse location.
NOTICE
OAD078021N
NEVER replace a fuse with any-
thing but another fuse of thesame rating.
A higher capacity fuse could
cause damage and possibly
cause a fire.
Do not install a wire or alu-
minum foil instead of the
proper fuse - even as a tem-
porary repair. It may cause
extensive wiring damage and
possibly a fire.
WARNING
Page 488 of 534
7-63
7
Maintenance
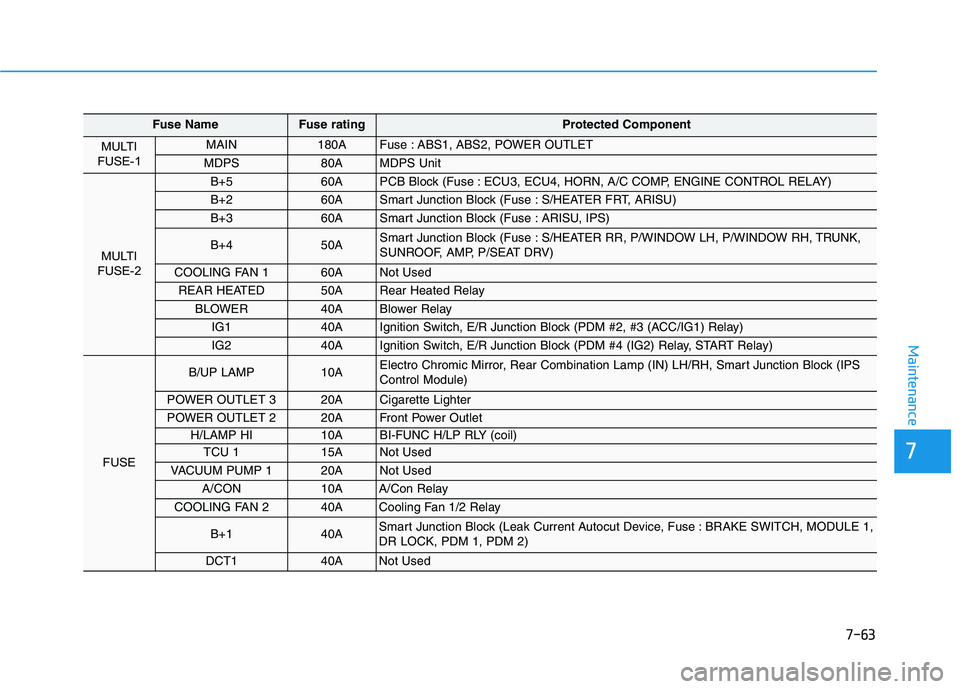
Fuse NameFuse rating Protected Component
MULTI
FUSE-1 MAIN 180A Fuse : ABS1, ABS2, POWER OUTLET
MDPS 80A MDPS Unit
MULTI
FUSE-2
B+5 60A PCB Block (Fuse : ECU3, ECU4, HORN, A/C COMP, ENGINE CONTROL RELAY)
B+2 60A Smart Junction Block (Fuse : S/HEATER FRT, ARISU)
B+3 60A Smart Junction Block (Fuse : ARISU, IPS)
B+4 50A Smart Junction Block (Fuse : S/HEATER RR, P/WINDOW LH, P/WINDOW RH, TRUNK,
SUNROOF, AMP, P/SEAT DRV)
COOLING FAN 1 60A Not Used
REAR HEATED 50A Rear Heated Relay
BLOWER 40A Blower Relay
IG1 40A Ignition Switch, E/R Junction Block (PDM #2, #3 (ACC/IG1) Relay)
IG2 40A Ignition Switch, E/R Junction Block (PDM #4 (IG2) Relay, START Relay)
FUSE
B/UP LAMP 10A Electro Chromic Mirror, Rear Combination Lamp (IN) LH/RH, Smart Junction Block (IPS Control Module)
POWER OUTLET 3 20A Cigarette Lighter
POWER OUTLET 2 20A Front Power Outlet
H/LAMP HI 10A BI-FUNC H/LP RLY (coil)
TCU 1 15A Not Used
VACUUM PUMP 1 20A Not Used
A/CON 10A A/Con Relay
COOLING FAN 2 40A Cooling Fan 1/2 Relay
B+1 40A Smart Junction Block (Leak Current Autocut Device, Fuse : BRAKE SWITCH, MODULE 1, DR LOCK, PDM 1, PDM 2)
DCT1 40A Not Used
Page 502 of 534
7-77
7
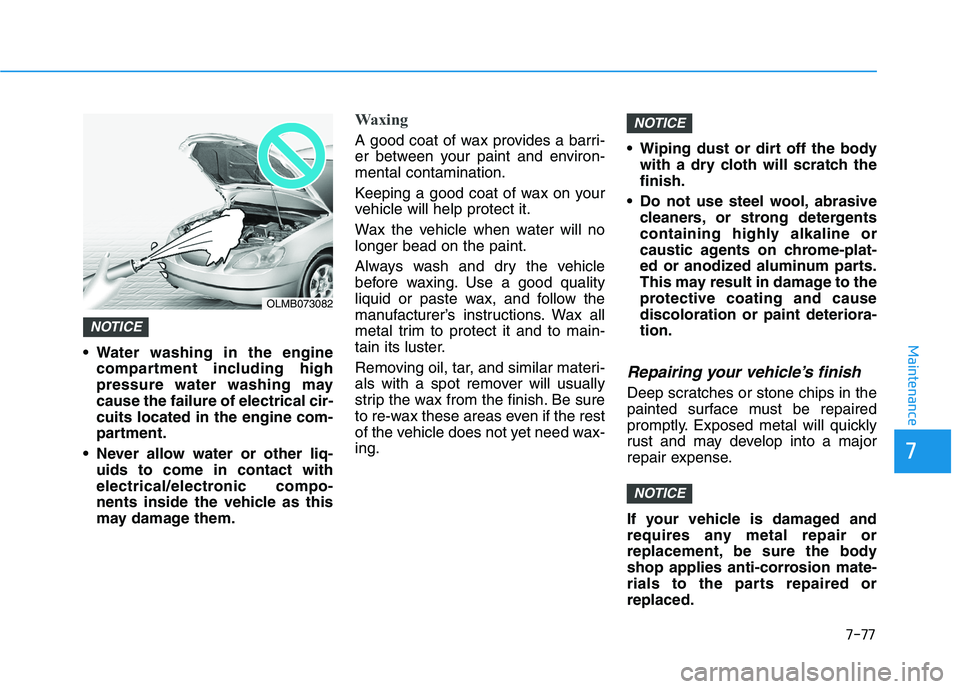
Maintenance Water washing in the enginecompartment including high
pressure water washing maycause the failure of electrical cir-cuits located in the engine com-
partment.
Never allow water or other liq- uids to come in contact with
electrical/electronic compo-
nents inside the vehicle as this
may damage them.
Waxing
A good coat of wax provides a barri-
er between your paint and environ-mental contamination.
Keeping a good coat of wax on your
vehicle will help protect it.
Wax the vehicle when water will no longer bead on the paint.
Always wash and dry the vehicle
before waxing. Use a good quality
liquid or paste wax, and follow the
manufacturer’s instructions. Wax all
metal trim to protect it and to main-
tain its luster.
Removing oil, tar, and similar materi-
als with a spot remover will usually
strip the wax from the finish. Be sure
to re-wax these areas even if the rest
of the vehicle does not yet need wax-ing. Wiping dust or dirt off the body
with a dry cloth will scratch thefinish.
Do not use steel wool, abrasive cleaners, or strong detergents
containing highly alkaline or
caustic agents on chrome-plat-
ed or anodized aluminum parts.
This may result in damage to the
protective coating and causediscoloration or paint deteriora-tion.
Repairing your vehicle’s finish
Deep scratches or stone chips in the
painted surface must be repaired
promptly. Exposed metal will quickly
rust and may develop into a major
repair expense.
If your vehicle is damaged and
requires any metal repair or
replacement, be sure the body
shop applies anti-corrosion mate-
rials to the parts repaired orreplaced.
NOTICE
NOTICE
NOTICE
OLMB073082
Page 519 of 534
8-7
88
Specifications
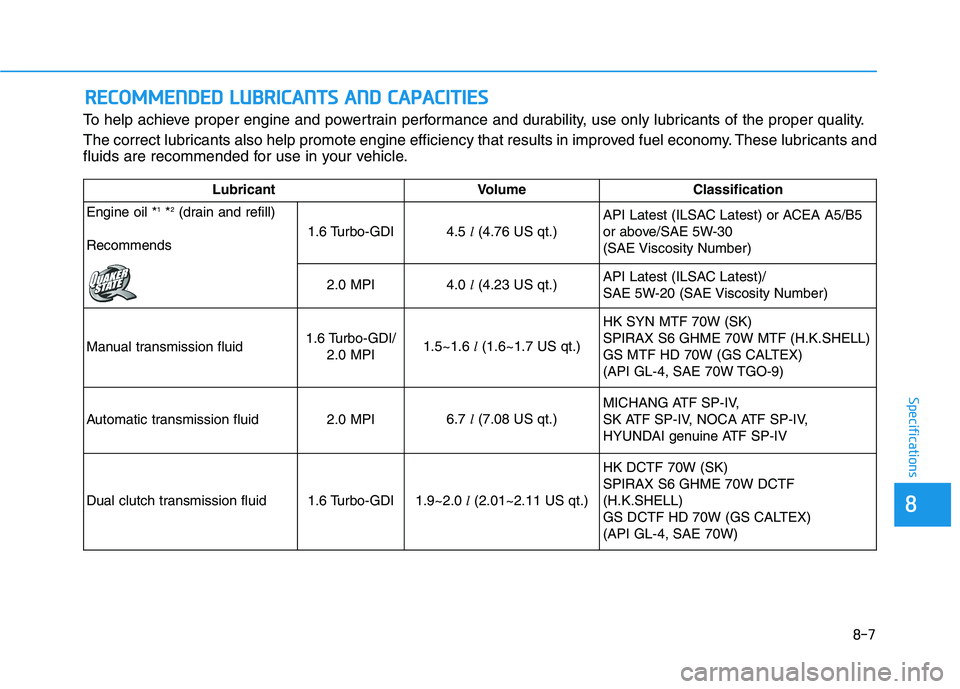
To help achieve proper engine and powertrain performance and durability, use only lubricants of the proper quality.
The correct lubricants also help promote engine efficiency that results in improved fuel economy. These lubricants and
fluids are recommended for use in your vehicle.
RREECCOO MM MMEENN DDEEDD LL UU BBRRIICC AA NN TTSS AA NN DD CC AA PPAA CCIITT IIEE SS
LubricantVolume Classification
Engine oil * 1
*2
(drain and refill)
Recommends
1.6 Turbo-GDI4.5 l(4.76 US qt.) API Latest (ILSAC Latest) or ACEA A5/B5
or above/SAE 5W-30
(SAE Viscosity Number)
2.0 MPI4.0
l(4.23 US qt.) API Latest (ILSAC Latest)/
SAE 5W-20 (SAE Viscosity Number)
Manual transmission fluid
1.6 Turbo-GDI/ 2.0 MPI1.5~1.6 l(1.6~1.7 US qt.) HK SYN MTF 70W (SK) SPIRAX S6 GHME 70W MTF (H.K.SHELL)
GS MTF HD 70W (GS CALTEX)
(API GL-4, SAE 70W TGO-9)
Automatic transmission fluid2.0 MPI6.7
l(7.08 US qt.)
MICHANG ATF SP-IV,
SK ATF SP-IV, NOCA ATF SP-IV,
HYUNDAI genuine ATF SP-IV
Dual clutch transmission fluid1.6 Turbo-GDI1.9~2.0 l(2.01~2.11 US qt.)
HK DCTF 70W (SK) SPIRAX S6 GHME 70W DCTF(H.K.SHELL)
GS DCTF HD 70W (GS CALTEX)(API GL-4, SAE 70W)