2018 HYUNDAI ELANTRA SPORT start stop button
[x] Cancel search: start stop buttonPage 16 of 534
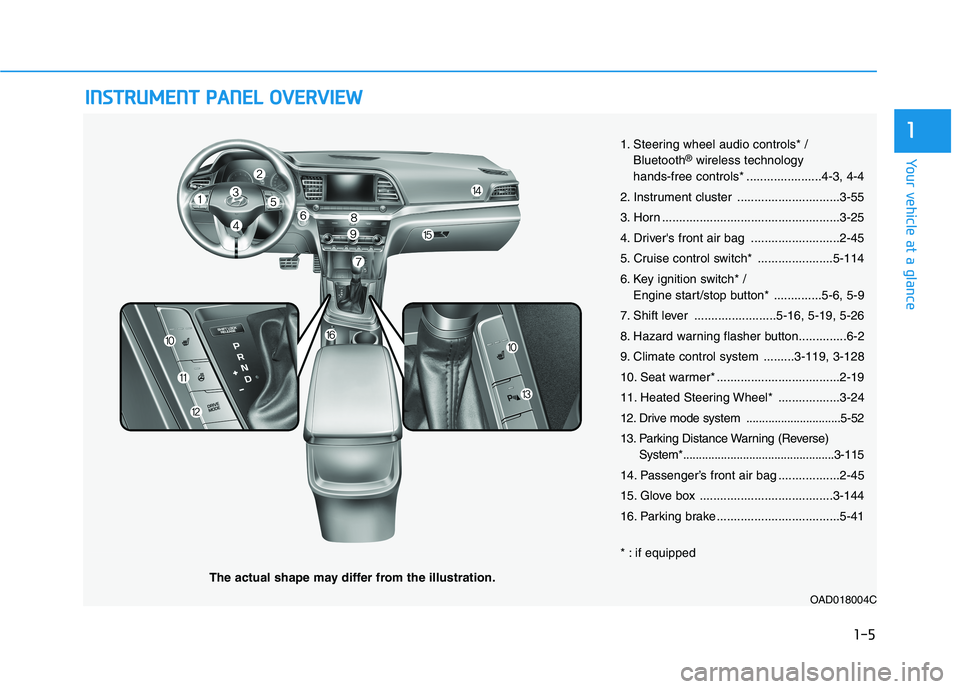
IINN SSTT RR UU MM EENN TT PP AA NN EELL OO VVEERR VV IIEE WW
The actual shape may differ from the illustration.
1-5
Your vehicle at a glance
11. Steering wheel audio controls* /Bluetooth ®
wireless technology
hands-free controls* ......................4-3, 4-4
2. Instrument cluster ..............................3-55
3. Horn ....................................................3-25
4. Driver's front air bag ..........................2-45
5. Cruise control switch* ......................5-114
6. Key ignition switch* / Engine start/stop button* ..............5-6, 5-9
7. Shift lever ........................5-16, 5-19, 5-26
8. Hazard warning flasher button..............6-2
9. Climate control system .........3-119, 3-128
10. Seat warmer* ....................................2-19
11. Heated Steering Wheel* ..................3-24
12. Drive mode system ..............................5-52
13. Parking Distance Warning (Reverse) System*................................................3-115
14. Passenger’s front air bag ..................2-45
15. Glove box .......................................3-144
16. Parking brake ....................................5-41
* : if equipped
OAD018004C
Page 84 of 534
2-66
Safety system of your vehicle
Additional Safety Precautions
Passengers should not move out
of or change seats while the vehi-
cle is moving.A passenger who is
not wearing a seat belt during a
crash or emergency stop can be
thrown against the inside of the vehi-
cle, against other occupants, or be
ejected from the vehicle.
Do not use any accessories on seat belts. Devices claiming to
improve occupant comfort or reposi-tion the seat belt can reduce the pro-
tection provided by the seat belt and
increase the chance of serious injury
in a crash
Do not modify the front seats.Modification of the front seats could
interfere with the operation of the
supplemental restraint system sens-
ing components or side air bags.
Do not place items under the front seats. Placing items under the front
seats could interfere with the opera-
tion of the supplemental restraintsystem sensing components and
wiring harnesses. Do not cause impact to the doors.Impact to the doors when the Engine
Start/Stop button is in the ON posi-
tion may cause the air bags to inflate. Modifications to accommodate disabilities.
If you require modification to your
vehicle to accommodate a disability,
contact the HYUNDAI Auto Canadaat 1-888-216-2626.
Adding equipment to or modify-
ing your air bag equipped vehicle
If you modify your vehicle by chang-
ing your vehicle's frame, bumper sys-tem, front end or side sheet metal or
ride height, this may affect the oper-
ation of your vehicle's air bag sys-tem.
If components of the air bag
system must be discarded, or
if the vehicle must be
scrapped, certain safety pre-
cautions must be observed.
Consult an authorized
HYUNDAI dealer for the nec-
essary information. Failure to
follow these precautionscould increase the risk of per-
sonal injury.
Page 92 of 534
3-7
Convenient features of your vehicle
3
Locking
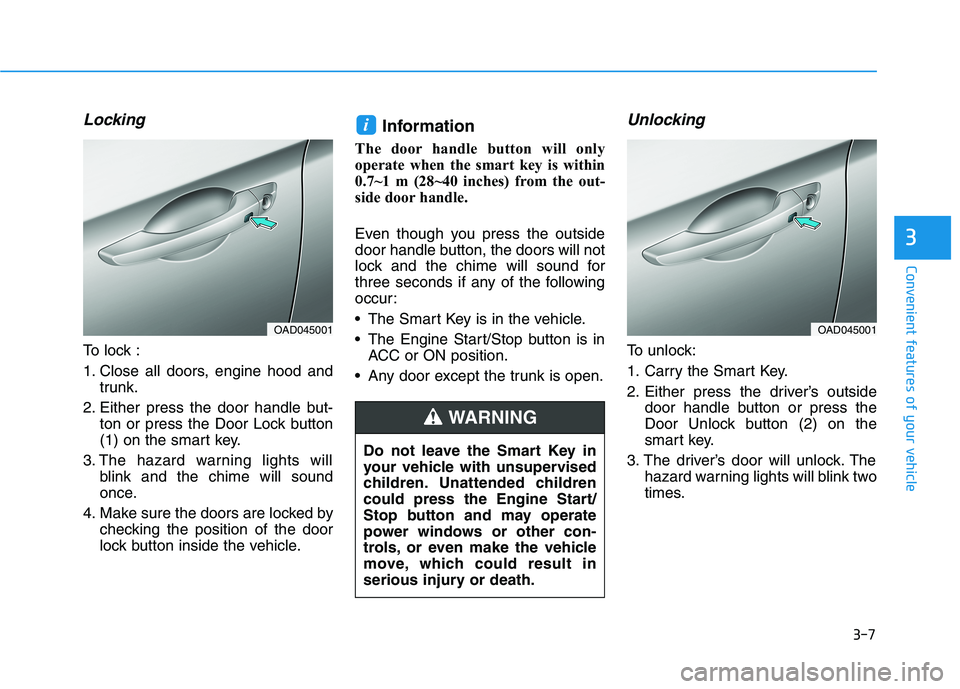
To lock :
1. Close all doors, engine hood andtrunk.
2. Either press the door handle but- ton or press the Door Lock button
(1) on the smart key.
3. The hazard warning lights will blink and the chime will sound
once.
4. Make sure the doors are locked by checking the position of the door
lock button inside the vehicle. Information
The door handle button will only
operate when the smart key is within
0.7~1 m (28~40 inches) from the out-
side door handle.
Even though you press the outside
door handle button, the doors will not
lock and the chime will sound for
three seconds if any of the following
occur:
The Smart Key is in the vehicle.
The Engine Start/Stop button is in ACC or ON position.
Any door except the trunk is open.
Unlocking
To unlock:
1. Carry the Smart Key.
2. Either press the driver’s outside door handle button or press the
Door Unlock button (2) on the
smart key.
3. The driver’s door will unlock. The hazard warning lights will blink two
times.
i
OAD045001
Do not leave the Smart Key in
your vehicle with unsupervised
children. Unattended children
could press the Engine Start/
Stop button and may operate
power windows or other con-
trols, or even make the vehicle
move, which could result in
serious injury or death.
WARNING
OAD045001
Page 94 of 534
3-9
Convenient features of your vehicle
3
Start-up
You can start the engine without
inserting the key.
For more details, refer to the
"Engine Start/Stop Button" sec-
tion in chapter 5.
To prevent damaging the smart
key:
Keep the smart key away fromany liquid or fire. Internal cir-
cuits may malfunction if the
inside of the remote key gets
damp (from liquids or moisture)
or if it is heated. This can
exclude the remote key from
warranty coverage.
Avoid dropping or throwing the smart key.
Protect the smart key from extreme temperatures.
Always have the smart key with you when leaving the vehicle. If
the smart key is left near the
vehicle, the vehicle battery may
be discharged.
Mechanical key
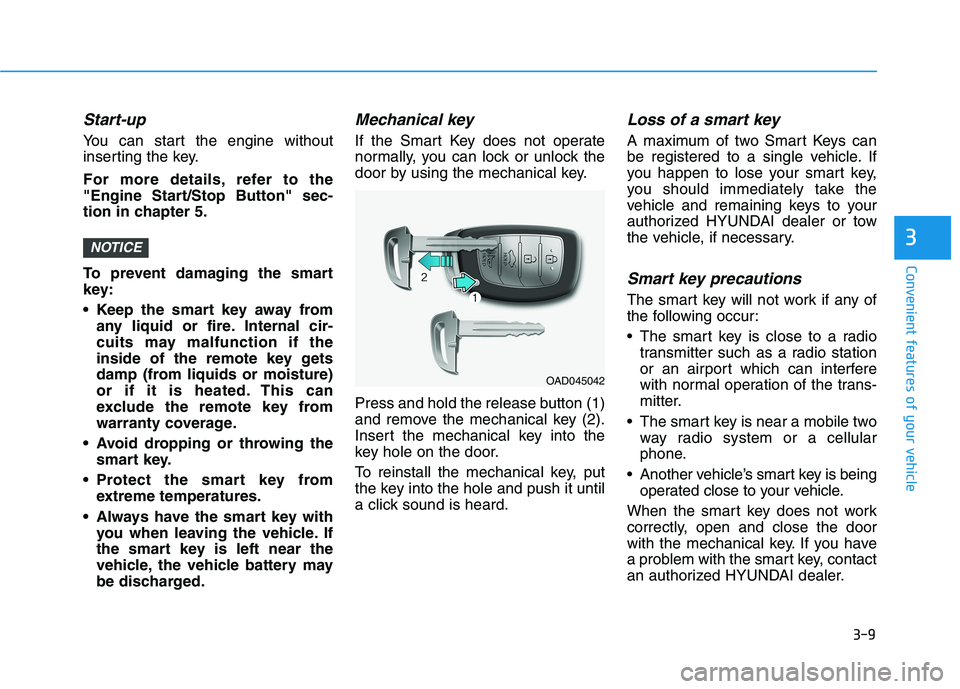
If the Smart Key does not operate
normally, you can lock or unlock the
door by using the mechanical key.
Press and hold the release button (1)
and remove the mechanical key (2).
Insert the mechanical key into the
key hole on the door.
To reinstall the mechanical key, put
the key into the hole and push it until
a click sound is heard.
Loss of a smart key
A maximum of two Smart Keys can
be registered to a single vehicle. If
you happen to lose your smart key,
you should immediately take the
vehicle and remaining keys to your
authorized HYUNDAI dealer or tow
the vehicle, if necessary.
Smart key precautions
The smart key will not work if any of
the following occur:
The smart key is close to a radiotransmitter such as a radio station
or an airport which can interfere
with normal operation of the trans-
mitter.
The smart key is near a mobile two way radio system or a cellular
phone.
Another vehicle’s smart key is being operated close to your vehicle.
When the smart key does not work
correctly, open and close the door
with the mechanical key. If you have
a problem with the smart key, contact
an authorized HYUNDAI dealer.
NOTICE
OAD045042
Page 107 of 534
3-22
Convenient features of your vehicle
While resetting the driver's seatmemory system
1. It starts with the notification sound.
2. The driver's seat and seatback is adjusted to the rearward position with the notification sound.
3. The driver's seat and seatback is re-adjusted to the default position
(central position) with the notifica-tion sound.
However, in the following cases, theresetting procedure and the notifica-
tion sound may stop.
- The memory button is pressed.
- The control switch is operated.
- The gear is shifted out of P (Park).
- The driving speed exceeds 3 km/h (2 mph).
- The driver's door is closed. Reattempt to do the resetting
procedure again, when the reset-
ting procedure incompletelystops or the notification sounddo not stop.
Make sure that there is no obsta- cle around the driver's seat in
advance of resetting the driver's
seat memory system.
Easy Access Function
When exiting the vehicle the driver’s
seat will move rearward when the
engine is turned off and the shift
lever in P (Park).
When entering the vehicle the dri-
ver’s seat will move forward when the
ignition switch is placed to the ACCposition.
You can activate or deactivate the Easy Access Function from the User
Settings Mode on the LCD display.
For more details, refer to the "LCD
Display" section in this chapter.
NOTICE
Page 144 of 534
3-59
Convenient features of your vehicle
3
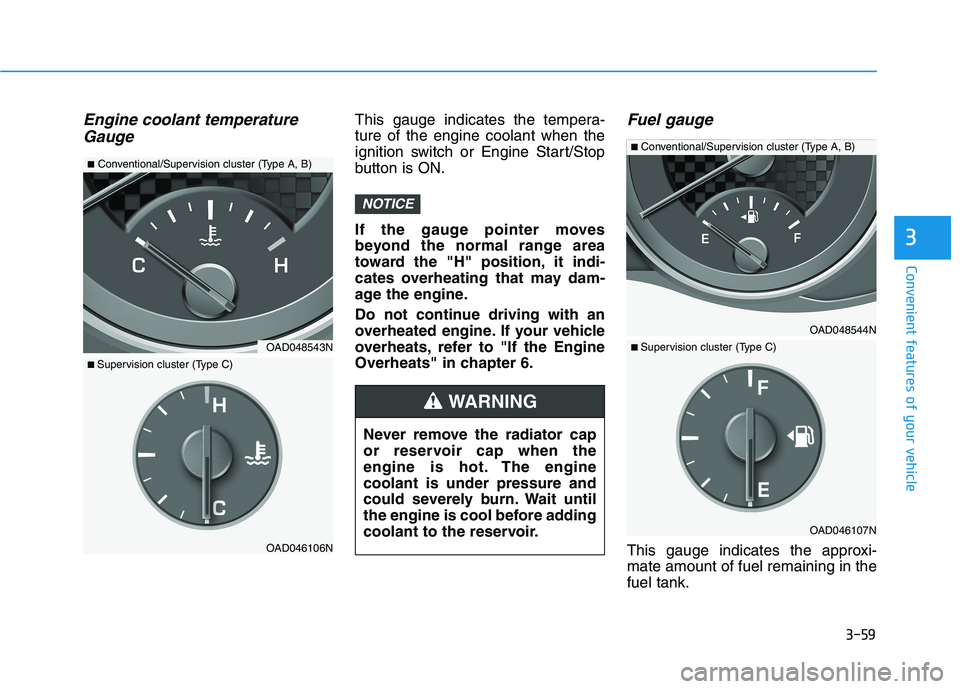
Engine coolant temperatureGaugeThis gauge indicates the tempera- ture of the engine coolant when the
ignition switch or Engine Start/Stop
button is ON.
If the gauge pointer moves
beyond the normal range area
toward the "H" position, it indi-
cates overheating that may dam-
age the engine.
Do not continue driving with an
overheated engine. If your vehicle
overheats, refer to "If the Engine
Overheats" in chapter 6.Fuel gauge
This gauge indicates the approxi-mate amount of fuel remaining in thefuel tank.
NOTICE
Never remove the radiator cap
or reservoir cap when the
engine is hot. The enginecoolant is under pressure and
could severely burn. Wait until
the engine is cool before adding
coolant to the reservoir.
WARNING
OAD048544N
■ Conventional/Supervision cluster (Type A, B)
OAD046107N
■ Supervision cluster (Type C)OAD048543N
■ Conventional/Supervision cluster (Type A, B)
OAD046106N
■ Supervision cluster (Type C)
Page 148 of 534
3-63
Convenient features of your vehicle
3
Automatic transmission anddual clutch transmission shift
indicator (if equipped)
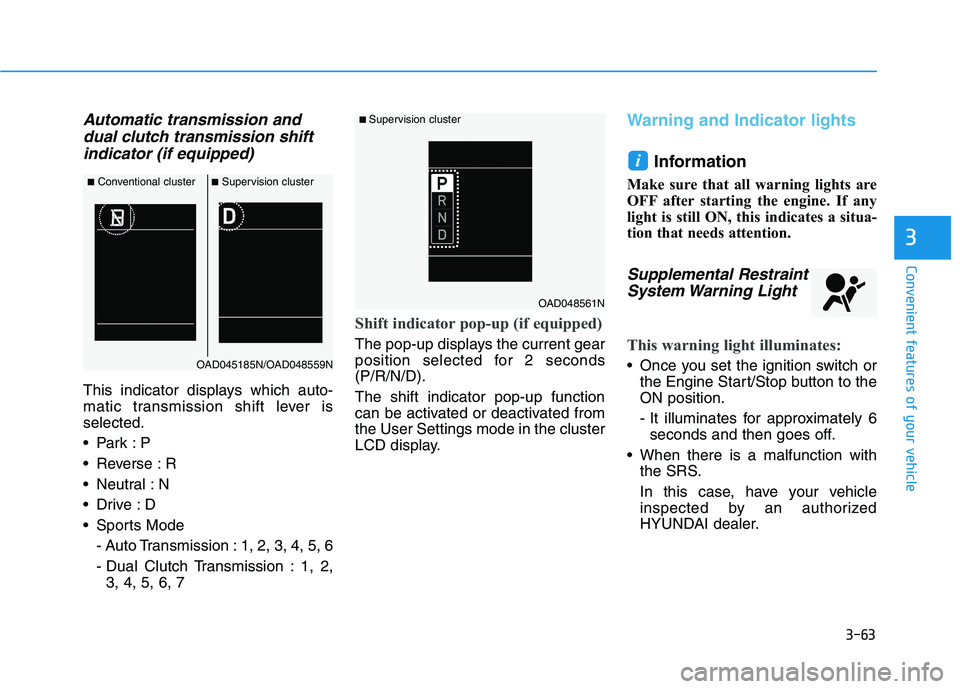
This indicator displays which auto-
matic transmission shift lever isselected.
Reverse : R
Neutral : N
Sports Mode
- Auto Transmission : 1, 2, 3, 4, 5, 6
- Dual Clutch Transmission : 1, 2,3, 4, 5, 6, 7
Shift indicator pop-up (if equipped)
The pop-up displays the current gear
position selected for 2 seconds(P/R/N/D). The shift indicator pop-up function
can be activated or deactivated fromthe User Settings mode in the cluster
LCD display.
Warning and Indicator lights
Information
Make sure that all warning lights are
OFF after starting the engine. If any
light is still ON, this indicates a situa-
tion that needs attention.
Supplemental Restraint System Warning Light
This warning light illuminates:
Once you set the ignition switch or the Engine Start/Stop button to the ON position.
- It illuminates for approximately 6seconds and then goes off.
When there is a malfunction with the SRS.
In this case, have your vehicle
inspected by an authorized
HYUNDAI dealer.
i
■Conventional cluster ■Supervision cluster
OAD045185N/OAD048559N
■ Supervision cluster
OAD048561N
Page 149 of 534
3-64
Convenient features of your vehicle
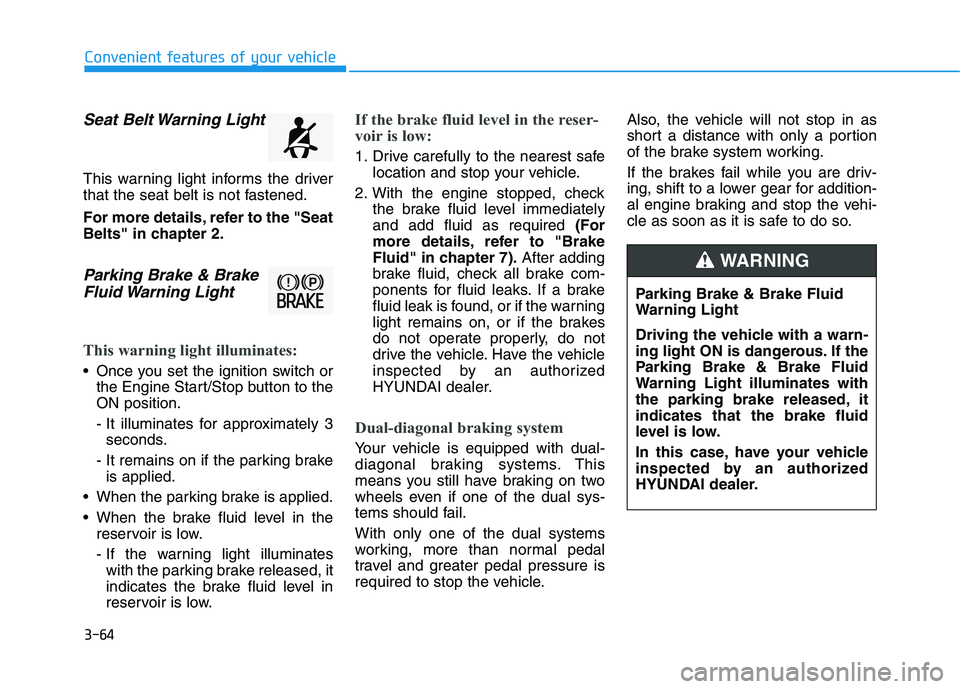
Seat Belt Warning Light
This warning light informs the driver
that the seat belt is not fastened.
For more details, refer to the "Seat
Belts" in chapter 2.
Parking Brake & BrakeFluid Warning Light
This warning light illuminates:
Once you set the ignition switch or the Engine Start/Stop button to the ON position.
- It illuminates for approximately 3seconds.
- It remains on if the parking brake is applied.
When the parking brake is applied.
When the brake fluid level in the reservoir is low.
- If the warning light illuminateswith the parking brake released, it
indicates the brake fluid level in
reservoir is low.
If the brake fluid level in the reser-
voir is low:
1. Drive carefully to the nearest safe location and stop your vehicle.
2. With the engine stopped, check the brake fluid level immediately and add fluid as required (For
more details, refer to "Brake
Fluid" in chapter 7). After adding
brake fluid, check all brake com-
ponents for fluid leaks. If a brake
fluid leak is found, or if the warning
light remains on, or if the brakes
do not operate properly, do not
drive the vehicle. Have the vehicle
inspected by an authorized
HYUNDAI dealer.
Dual-diagonal braking system
Your vehicle is equipped with dual-
diagonal braking systems. This
means you still have braking on two
wheels even if one of the dual sys-
tems should fail. With only one of the dual systems
working, more than normal pedal
travel and greater pedal pressure is
required to stop the vehicle. Also, the vehicle will not stop in as
short a distance with only a portion
of the brake system working.
If the brakes fail while you are driv-
ing, shift to a lower gear for addition-
al engine braking and stop the vehi-
cle as soon as it is safe to do so.
Parking Brake & Brake Fluid
Warning Light
Driving the vehicle with a warn-
ing light ON is dangerous. If the
Parking Brake & Brake Fluid
Warning Light illuminates with
the parking brake released, itindicates that the brake fluid
level is low.
In this case, have your vehicle
inspected by an authorized
HYUNDAI dealer.
WARNING