2018 Hyundai Elantra battery
[x] Cancel search: batteryPage 384 of 526

6-3
What to do in an emergency
If the Engine Doesn't Turn
Over or Turns Over Slowly
Be sure the shift lever is in N (Neutral)or P (Park). The engine starts only
when the shift lever is in N (Neutral) or
P (Park).
Check the battery connections to be sure they are clean and tight.
Turn on the interior light. If the light dims or goes out when you operate the
starter, the battery is drained.
Do not push or pull the vehicle to start it.
This could cause damage to your vehi-
cle. See instructions for "Jump Starting"
provided in this chapter.
If the Engine Turns Over
Normally but Doesn't Start
Check the fuel level and add fuel if nec-
essary.
If the engine still does not start, have
your vehicle checked by an authorized
HYUNDAI dealer. Jump starting can be dangerous if done
incorrectly. Follow the jump starting pro-
cedure in this section to avoid serious
injury or damage to your vehicle. If in
doubt about how to properly jump start
your vehicle, we strongly recommend
that you have a service technician or tow-
ing service do it for you.
I I
F
F
T
T H
H E
E
E
E N
N G
GI
IN
N E
E
W
W I
IL
L L
L
N
N O
O T
T
S
S T
T A
A R
RT
T
6
Push or pull starting the vehicle
may cause the catalytic converter
to overload which can lead to dam-
age to the emission control system.
CAUTION
J JU
U M
M P
P
S
S T
T A
A R
RT
TI
IN
N G
G
Page 385 of 526

6-4
What to do in an emergency
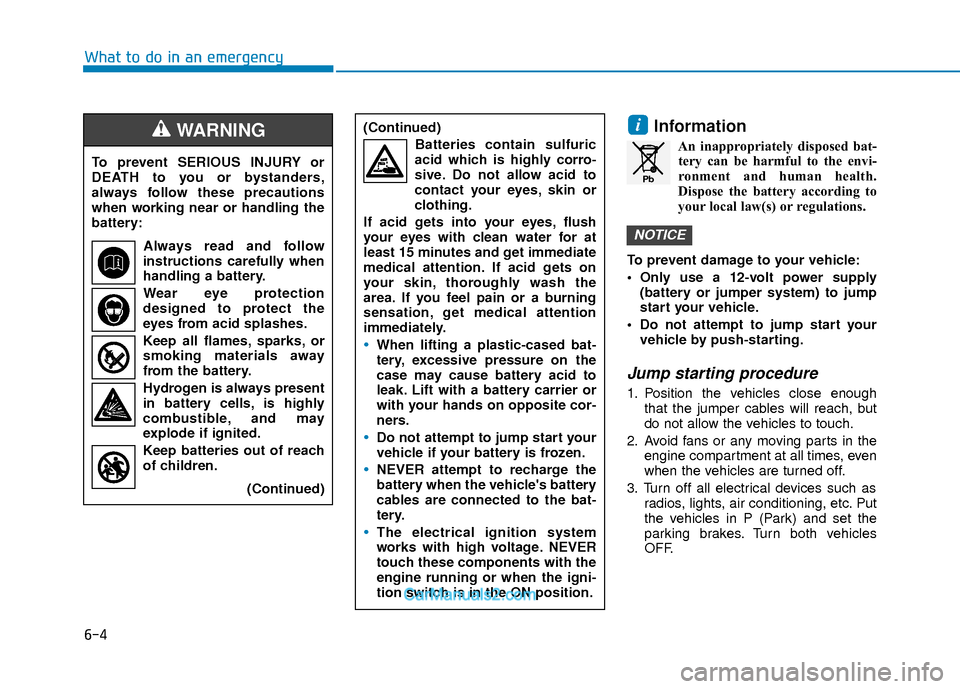
Information
An inappropriately disposed bat-tery can be harmful to the envi-
ronment and human health.
Dispose the battery according to
your local law(s) or regulations.
To prevent damage to your vehicle:
• Only use a 12-volt power supply (battery or jumper system) to jump
start your vehicle.
Do not attempt to jump start your vehicle by push-starting.
Jump starting procedure
1. Position the vehicles close enough that the jumper cables will reach, but
do not allow the vehicles to touch.
2. Avoid fans or any moving parts in the engine compartment at all times, even
when the vehicles are turned off.
3. Turn off all electrical devices such as radios, lights, air conditioning, etc. Put
the vehicles in P (Park) and set the
parking brakes. Turn both vehicles
OFF.
NOTICE
i
To prevent SERIOUS INJURY or
DEATH to you or bystanders,
always follow these precautions
when working near or handling the
battery:
Always read and follow
instructions carefully when
handling a battery.
Wear eye protection
designed to protect the
eyes from acid splashes.
Keep all flames, sparks, or
smoking materials away
from the battery.
Hydrogen is always present in battery cells, is highly
combustible, and may
explode if ignited.
Keep batteries out of reach
of children.
(Continued)
WARNING (Continued)Batteries contain sulfuric
acid which is highly corro-
sive. Do not allow acid to
contact your eyes, skin or
clothing.
If acid gets into your eyes, flush
your eyes with clean water for at
least 15 minutes and get immediate
medical attention. If acid gets on
your skin, thoroughly wash the
area. If you feel pain or a burning
sensation, get medical attention
immediately.
When lifting a plastic-cased bat-
tery, excessive pressure on the
case may cause battery acid to
leak. Lift with a battery carrier or
with your hands on opposite cor-
ners.
Do not attempt to jump start your
vehicle if your battery is frozen.
NEVER attempt to recharge the
battery when the vehicle's battery
cables are connected to the bat-
tery.
The electrical ignition system
works with high voltage. NEVER
touch these components with the
engine running or when the igni-
tion switch is in the ON position.
Pb
Page 386 of 526

6-5
What to do in an emergency
6
4. Connect the jumper cables in theexact sequence shown in the illustra-
tion. First connect one jumper cable to
the red, positive (+) jumper terminal of
your vehicle (1).
5. Connect the other end of the jumper cable to the red, positive (+) battery/
jumper terminal of the assisting vehi-
cle (2).
6. Connect the second jumper cable to the black, negative (-) battery/ chassis
ground of the assisting vehicle (3). 7. Connect the other end of the second
jumper cable to the black, negative (-)
chassis ground of your vehicle (4).
Do not allow the jumper cables to con-
tact anything except the correct bat-
tery or jumper terminals or the correct
ground. Do not lean over the battery
when making connections.
8. Start the engine of the assisting vehi- cle and let it run at approximately
2,000 rpm for a few minutes. Then
start your vehicle.
If your vehicle will not start after a few
attempts, it probably requires servicing.
In this event please seek qualified assis-
tance. If the cause of your battery dis-
charging is not apparent, have your vehi-
cle checked by an authorized HYUNDAI
dealer. Disconnect the jumper cables in the
exact reverse order you connected them:
1. Disconnect the jumper cable from the
black, negative (-) chassis ground of
your vehicle (4).
2. Disconnect the other end of the jumper cable from the black, negative
(-) battery/chassis ground of the
assisting vehicle (3).
3. Disconnect the second jumper cable from the red, positive (+) battery/
jumper terminal of the assisting vehi-
cle (2).
4. Disconnect the other end of the jumper cable from the red, positive (+)
jumper terminal of your vehicle (1).
1VQA4001
Page 402 of 526

6-21
What to do in an emergency
6
The Tire Mobility Kit is not designed
or intended as a permanent tire
repair method and is to be used for
one tire only.
This instruction shows you step by
step how to temporarily seal the
puncture simply and reliably.
Read the section "Notes on the safe
use of the Tire Mobility Kit".
Notes on the safe use of theTire Mobility Kit
Park your car at the side of the
road so that you can work with the
Tire Mobility Kit away from moving
traffic.
To be sure your vehicle will not move, even when you’re on fairly
level ground, always set your park-
ing brake.
Only use the Tire Mobility Kit for sealing/inflation passenger car
tires. Only punctured areas located
within the tread region of the tire
can be sealed using the tire mobil-
ity kit.
Do not use on motorcycles, bicy- cles or any other type of tires. When the tire and wheel are dam-
aged, do not use Tire Mobility Kit
for your safety.
Use of the Tire Mobility Kit may not be effective for tire damage larger
than approximately 0.24 inch (6
mm).
Please contact the nearest
HYUNDAI dealership if the tire
cannot be made roadworthy with
the Tire Mobility Kit.
Do not use the Tire Mobility Kit, if a flat tire or an under-inflated tire is
further severely damaged by being
continuously driven.
Do not remove any foreign objects such as nails or screws that have
penetrated the tire.
Provided the car is outdoors, leave the engine running. Otherwise
operating the compressor may
eventually drain the car battery.
Never leave the Tire Mobility Kit unattended while it is being used.
Do not leave the compressor run- ning for more than 10 minutes at a
time or it may overheat. Do not use the Tire Mobility Kit if
the ambient temperature is below
-22°F (-30°C).
sealant, wash the area thoroughly
with plenty of water. If the irritation
persists, seek medical attention.
sealant, flush your eyes for at least
15 minutes. If the irritation persists,
seek medical attention.
In case of swallowing the sealant, rinse the mouth and drink plenty of
water. However, never give any-
thing to an unconscious person
and seek medical attention imme-
diately.
Long time exposure to the sealant may cause damage to bodily tissue
such as kidney, etc.
Page 409 of 526

6-28
What to do in an emergency
The Tire Mobility Kit is not designed
or intended as a permanent tire
repair method and is to be used for
one tire only. This instruction shows
you step by step how to temporarily
seal the puncture simply and reliably.
Read the section "Notes on the safe
use of the Tire Mobility Kit".
Notes on the safe use of the
Tire Mobility Kit
Park your car at the side of the road so that you can work with the
Tire Mobility Kit away from moving
traffic.
To be sure your vehicle will not move, even when you're on fairly
level ground, always set your park-
ing brake.
Only use the Tire Mobility Kit for sealing/inflation passenger car tires.
Only punctured areas located with-
in the tread region of the tire can be
sealed using the tire mobility kit.
Do not use on motorcycles, bicy- cles or any other type of tires.
When the tire and wheel are dam- aged, do not use Tire Mobility Kit
for your safety.
Use of the Tire Mobility Kit may not be effective for tire damage larger
than approximately 6 mm (0.24 in).
If the tire cannot be made roadwor-
thy with the Tire Mobility Kit, we
recommend that you contact an
authorized HYUNDAI dealer.
Do not use the Tire Mobility Kit if a tire is severely damaged by driving run
flat or with insufficient air pressure. Do not remove any foreign objects
such as nails or screws that have
penetrated the tire.
Provided the car is outdoors, leave the engine running. Otherwise
operating the compressor may
eventually drain the car battery.
Never leave the Tire Mobility Kit unattended while it is being used.
Do not leave the compressor run- ning for more than 10 min. at a time
or it may overheat.
Do not use the Tire Mobility Kit if the ambient temperature is below
-30°C (-22°F).
In case of skin contact with the sealant, wash the area thoroughly
with plenty of water. If the irritation
persists, seek medical attention.
In case of eye contact with the sealant, flush your eyes for at least
15 minutes. If the irritation persists,
seek medical attention.
In case of swallowing the sealant, rinse the mouth and drink plenty of
water. However, never give anything
to an unconscious person and seek
medical attention immediately.
Long time exposure to the sealant may cause damage to bodily tissue
such as kidney, etc.
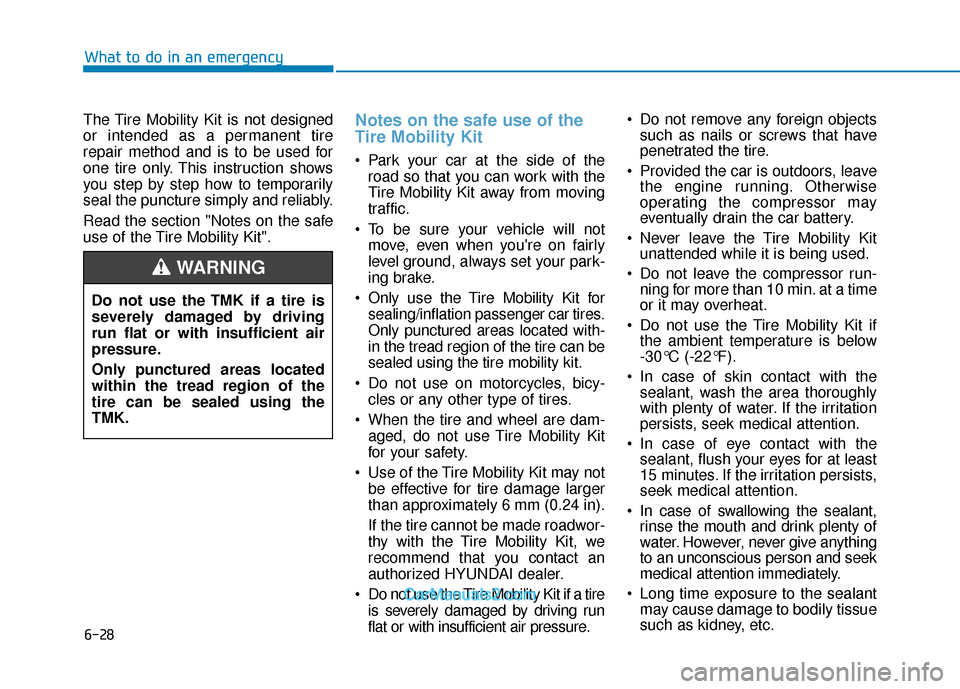
Do not use the TMK if a tire is
severely damaged by driving
run flat or with insufficient air
pressure.
Only punctured areas located
within the tread region of the
tire can be sealed using the
TMK.
WARNING
Page 419 of 526

7
Maintenance
7
Maintenance
Engine Compartment .............................................7-3
Maintenance Services ...........................................7-4
Owner's Responsibility .....................................................7-4
Owner Maintenance Precautions..................................7-4
Owner Maintenance ..............................................7-4
Owner Maintenance Schedule .......................................7-5
Scheduled Maintenance Services........................7-6
Normal Maintenance Schedule (Nu 2.0 MPI) .............7-7
Maintenance Under Severe Usage Conditions
(Nu 2.0 MPI)......................................................................7-\
10
Severe Driving Conditions .............................................7-11
Normal Maintenance Schedule (Gamma 1.6 T-GDI) ..7-12
Maintenance Under Severe Usage Conditions
(Gamma 1.6 T-GDI) .........................................................7-15
Severe Driving Conditions .............................................7-16
Explanation of Scheduled Maintenance Items.. 7-17
Engine Oil ..............................................................7-19
Checking the Engine Oil Level .....................................7-19
Checking the Engine Oil and Filter .............................7-20
Engine Coolant .....................................................7-21
Checking the Engine Coolant Level ............................7-21
Changing Engine Coolant ..............................................7-23
Brake/Clutch Fluid ...............................................7-23
Checking the Brake/Clutch Fluid Level .....................7-23
Washer Fluid .........................................................7-24
Checking the Washer Fluid Level................................7-24
Parking Brake .......................................................7-25
Checking the Parking Brake .........................................7-25
Air Cleaner ............................................................7-25
Filter Replacement ..........................................................7-25
Climate Control Air Filter ....................................7-26
Filter Inspection ...............................................................7-26
Wiper Blades.........................................................7-28
Blade Inspection ..............................................................7-28
Blade Replacement .........................................................7-28
Battery...................................................................7-30
For Best Battery Service ..............................................7-31
Battery Recharging ........................................................7-31
Reset Features.................................................................7-32
7
Page 421 of 526

7-3
7
Maintenance
E
EN
N G
GI
IN
N E
E
C
C O
O M
M P
PA
A R
RT
TM
M E
EN
N T
T
OAD076120/OAD075100L
■
■Nu 2.0 MPI
■
■Gamma 1.6 T-GDI
1. Engine oil filler cap
2. Engine oil dipstick
3. Brake fluid reservoir
4. Positive battery terminal
5. Negative battery terminal
6. Fuse box
7. Air cleaner
8. Engine coolant reservoir
9. Windshield washer fluid reservoir
The actual engine compartment in the
vehicle may differ from the illustration.
Page 422 of 526

7-4
Maintenance
M
MA
AI
IN
N T
TE
EN
N A
AN
N C
CE
E
S
S E
E R
R V
V I
IC
C E
E S
S
You should exercise the utmost care to
prevent damage to your vehicle and
injury to yourself whenever performing
any maintenance or inspection proce-
dures.
We recommend you have your vehicle
maintained and repaired by an author-
ized HYUNDAI dealer. An authorized
HYUNDAI dealer meets HYUNDAI’s high
service quality standards and receives
technical support from HYUNDAI in
order to provide you with a high level of
service satisfaction.
Owner's Responsibility
Maintenance service and record reten-
tion are the owner's responsibility.
You should retain documents that show
proper maintenance has been performed
on your vehicle in accordance with the
scheduled maintenance service charts
shown on the following pages. You need
this information to establish your compli-
ance with the servicing and maintenance
requirements of your vehicle warranties.
Detailed warranty information is provided
in your Owner's Handbook & Warranty
Information booklet.
Repairs and adjustments required as a
result of improper maintenance or a lack
of required maintenance are not covered.
Owner Maintenance
Precautions
Inadequate, incomplete or insufficient
servicing may result in operational prob-
lems with your vehicle that could lead to
vehicle damage, an accident, or person-
al injury. This chapter provides instruc-
tions only for the maintenance items that
are easy to perform. Several procedures
can be done only by an authorized
HYUNDAI dealer with special tools.
Your vehicle should not be modified in
any way. Such modifications may
adversely affect the performance, safety
or durability of your vehicle and may, in
addition, violate conditions of the limited
warranties covering the vehicle.
Certain modifications may also be in vio-
lation of regulations established by the
U.S. Department of Transportation and
other federal or state agencies.
Improper owner maintenance during
the warranty period may affect war-
ranty coverage. For details, read the
separate Owner's Handbook &
Warranty Information booklet provid-
ed with the vehicle. If you're unsure
about any service or maintenance
procedure, have it done by an author-
ized HYUNDAI dealer.
NOTICE
O O W
W N
NE
ER
R
M
M A
AI
IN
N T
TE
EN
N A
AN
N C
CE
E
Performing maintenance work on a
vehicle can be dangerous. If you
lack sufficient knowledge and
experience or the proper tools and
equipment to do the work, have it
done by an authorized HYUNDAI
dealer.
ALWAYS follow these precautions
for performing maintenance work:
•Park your vehicle on level
ground, move the shift lever into
the P (Park, for automatic trans-
mission vehicle) position or neu-
tral (for manual transmission
vehicle), apply the parking brake,
place the ignition switch in the
LOCK/OFF position.
Block the tires (front and back) to
prevent the vehicle from moving.
Remove loose clothing or jewelry
that can become entangled in
moving parts.
If you must run the engine during
maintenance, do so out doors or
in an area with plenty of ventila-
tion.
Keep flames, sparks, or smoking
materials away from the battery
and fuel-related parts.
WARNING