Page 612 of 763

610
uuBraking uCollision Mitigation Braking SystemTM (CMBSTM)*
Driving
The system has three alert stages for a possible collision. However, depending on circumstances, the CMBSTM may not go through all of
the stages before initiating the last stage.
■Collision Alert Stages
Distance between vehicles
CMBSTM
The sensors detect a vehicleAudible & Visual WARNINGSSteering WheelBraking
Stage oneThere is a risk of a
collision with the
vehicle ahead of you.
When in Long , visual and audible alerts
come on at a longer distance from a
vehicle ahead than in Normal setting,
and in Short, at a shorter distance than
in Normal .In case of an
oncoming vehicle
detected, rapid
vibration is
provided.
—
Stage
twoThe risk of a collision
has increased, time to
respond is reduced.
Visual and audible alerts.
—Lightly
applied
Stage three
The CMBSTM
determines that a
collision is
unavoidable.
—Forcefully applied
Your Vehicle Vehicle
Ahead
Normal
Short
Long
Your
Vehicle Vehicle
Ahead
Your
VehicleVehicle
Ahead
18 US ODYSSEY-31THR6010.book 610 ページ 2018年12月6日 木曜日 午後4時18分
Page 615 of 763
613
uuBraking uCollision Mitigation Braking SystemTM (CMBSTM)*
Continued
Driving
■Vehicle conditions
• Headlight lenses are dirty or the h eadlights are not properly adjusted.
• The outside of the windshield is blocked by dirt, mud, leaves, wet snow, etc.
• The inside of the windshield is fogged.
• An abnormal tire or wheel condition (wro ng sized, varied size or construction,
improperly inflated, co mpact spare tire, etc.).
• When tire chains are installed.
• The vehicle is tilted due to a heavy load or suspension modifications.
• The camera temperature gets too high.
• Driving with the parking brake applied.
• When the radar sensor in the front grille gets dirty.
18 US ODYSSEY-31THR6010.book 613 ページ 2018年12月6日 木曜日 午後4時18分
Page 619 of 763

617Continued
Driving
Parking Your Vehicle
When Stopped
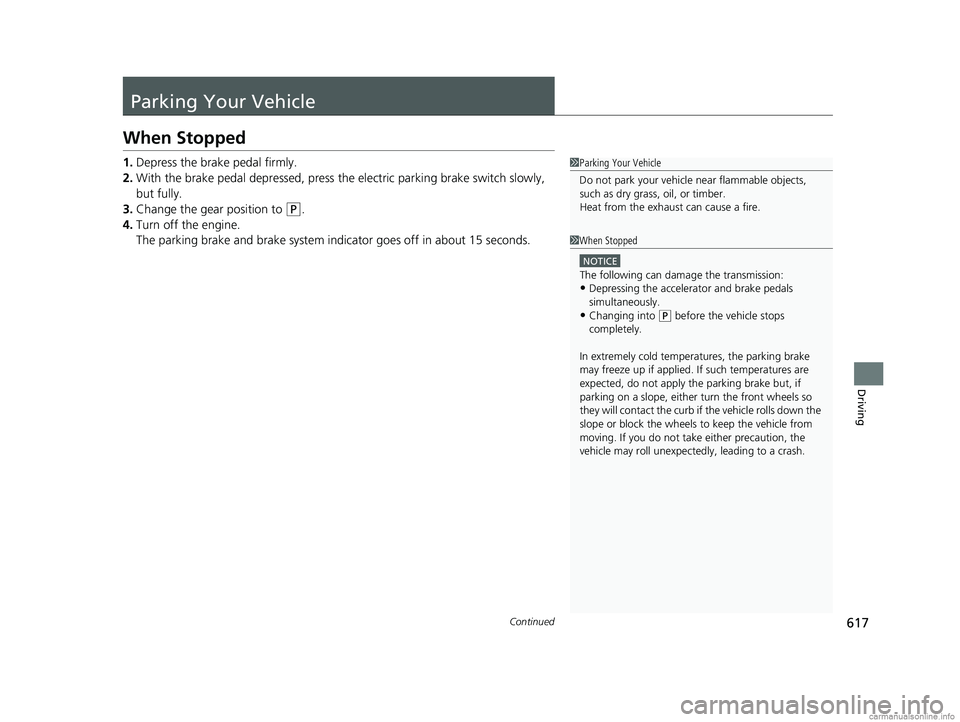
1.Depress the brake pedal firmly.
2. With the brake pedal depressed, press th e electric parking brake switch slowly,
but fully.
3. Change the gear position to
(P.
4. Turn off the engine.
The parking brake and brake system indi cator goes off in about 15 seconds.
1Parking Your Vehicle
Do not park your vehicle near flammable objects,
such as dry grass, oil, or timber.
Heat from the exhaust can cause a fire.
1 When Stopped
NOTICE
The following can dama ge the transmission:•Depressing the accelerator and brake pedals
simultaneously.
•Changing into ( P before the vehicle stops
completely.
In extremely cold temper atures, the parking brake
may freeze up if applied. If such temperatures are
expected, do not apply the parking brake but, if
parking on a slope, either turn the front wheels so
they will contact the curb if the vehicle rolls down the
slope or block the wheels to keep the vehicle from
moving. If you do not take either precaution, the
vehicle may roll unexpect edly, leading to a crash.
18 US ODYSSEY-31THR6010.book 617 ページ 2018年12月6日 木曜日 午後4時18分
Page 630 of 763

628
Driving
Multi-View Rear Camera
About Your Multi-View Rear Camera
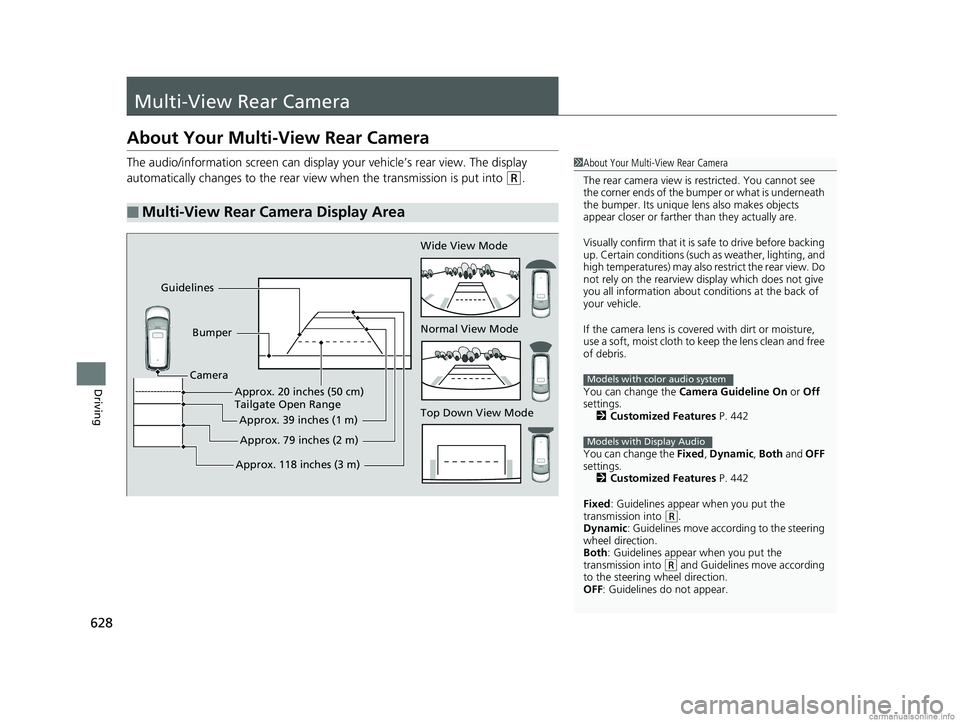
The audio/information screen can display your vehicle’s rear view. The display
automatically changes to the rear view when the transmission is put into
(R.
■Multi-View Rear Camera Display Area
1About Your Multi-View Rear Camera
The rear camera view is restricted. You cannot see
the corner ends of the bum per or what is underneath
the bumper. Its unique le ns also makes objects
appear closer or farther than they actually are.
Visually confirm that it is safe to drive before backing
up. Certain conditions (such as weather, lighting, and
high temperatures) may also re strict the rear view. Do
not rely on the rearview display which does not give
you all information about c onditions at the back of
your vehicle.
If the camera lens is cove red with dirt or moisture,
use a soft, moist cloth to keep the lens clean and free
of debris.
You can change the Camera Guideline On or Off
settings. 2 Customized Features P. 442
You can change the Fixed, Dynamic , Both and OFF
settings. 2 Customized Features P. 442
Fixed : Guidelines appear when you put the
transmission into
( R.
Dynamic : Guidelines move according to the steering
wheel direction.
Both : Guidelines appear when you put the
transmission into
( R and Guidelines move according
to the steering wheel direction.
OFF: Guidelines do not appear.
Models with color audio system
Models with Display Audio
Top Down View Mode Normal View Mode Wide View Mode
Guidelines
Bumper
Camera
Approx. 118 inches (3 m)Approx. 79 inches (2 m)
Approx. 39 inches (1 m)
Approx. 20 inches (50 cm)
Tailgate Open Range
18 US ODYSSEY-31THR6010.book 628 ページ 2018年12月6日 木曜日 午後4時18分
Page 637 of 763

635
Maintenance
This chapter discusses basic maintenance.
Before Performing MaintenanceInspection and Maintenance ............ 636
Safety When Performing Maintenance .... 637
Parts and Fluids Used in Maintenance Service ........................................... 638
Maintenance Minder
TM..................... 639
Maintenance Under the Hood
Maintenance Items Un der the Hood .... 645
Opening the Hood ........................... 646
Recommended Engine Oil ................ 648
Oil Check ......................................... 649
Adding Engine Oil ............................ 650
Changing the Engine Oil and Oil Filter ..... 651Engine Coolant ................................ 653
Transmission Fluid ............................ 655
Brake Fluid ....................................... 656
Refilling Window Washer Fluid......... 657
Replacing Light Bulbs ....................... 658
Checking and Maintaining Wiper Blades.... 669Checking and Maintaining Tires
Checking Tires ................................. 673
Tire and Loading Information Label ..... 674Tire Labeling .................................... 674DOT Tire Quality Grading (U.S. Vehicles) ...... 676Wear Indicators................................ 678 Tire Service Life ................................ 678
Tire and Wheel Replacement ........... 679
Tire Rotation .................................... 680
Winter Tires ..................................... 681
Battery ............................................... 682
Remote Transmitter Care ................. 684
Remote Control and Wireless Headphone Care
*........................... 685Climate Control System Maintenance.... 687Cleaning Interior Care .................................... 688
Exterior Care.................................... 691
Accessories and Modifications ........ 694
* Not available on all models
18 US ODYSSEY-31THR6010.book 635 ページ 2018年12月6日 木曜日 午後4時18分
Page 663 of 763

661
uuReplacing Light Bulbs uFog Light Bulbs*
Maintenance
Fog Light Bulbs*
When replacing, use the following bulbs.
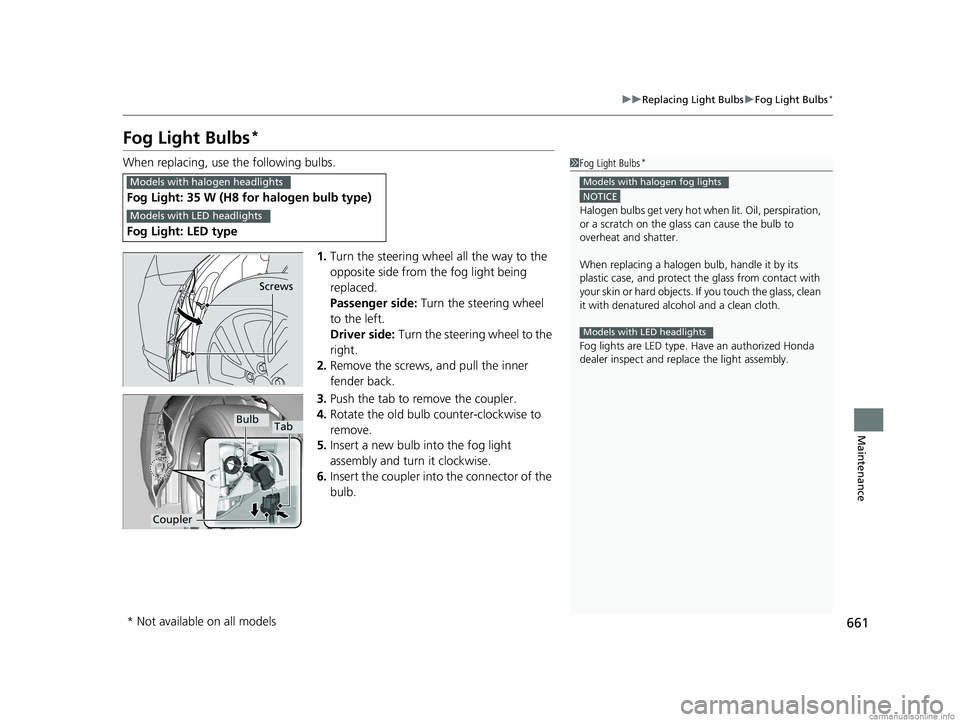
1.Turn the steering wheel all the way to the
opposite side from the fog light being
replaced.
Passenger side: Turn the steering wheel
to the left.
Driver side: Turn the steering wheel to the
right.
2. Remove the screws, and pull the inner
fender back.
3. Push the tab to remove the coupler.
4. Rotate the old bulb counter-clockwise to
remove.
5. Insert a new bulb into the fog light
assembly and turn it clockwise.
6. Insert the coupler into the connector of the
bulb.
Fog Light: 35 W (H8 for halogen bulb type)
Fog Light: LED type
1 Fog Light Bulbs*
NOTICE
Halogen bulbs get very hot wh en lit. Oil, perspiration,
or a scratch on the glass can cause the bulb to
overheat and shatter.
When replacing a halogen bulb, handle it by its
plastic case, and protect th e glass from contact with
your skin or hard objects. If you touch the glass, clean
it with denatured alc ohol and a clean cloth.
Fog lights are LED type. Ha ve an authorized Honda
dealer inspect and replace the light assembly.
Models with halogen fog lights
Models with LED headlights
Models with halogen headlights
Models with LED headlights
Screws
Bulb
Coupler
Tab
* Not available on all models
18 US ODYSSEY-31THR6010.book 661 ページ 2018年12月6日 木曜日 午後4時18分
Page 665 of 763
663
uuReplacing Light Bulbs uFront Turn Signal/Parking* Light Bulbs
Maintenance
Front Turn Signal/Parking* Light Bulbs
When replacing, use the following bulbs.
1.Turn the steering wheel all the way to the
opposite side from the light being replaced.
Passenger side: Turn the steering wheel
to the left.
Driver side: Turn the steering wheel to the
right.
2. Remove the screws, and pull the inner
fender back.
3. Rotate the socket counter-clockwise and
remove it.
4. Remove the old bulb and insert a new bulb.
Front Turn Signal/Parking* Light: 28/8 W (Amber)
Screws
Bulb
Socket
* Not available on all models
18 US ODYSSEY-31THR6010.book 663 ページ 2018年12月6日 木曜日 午後4時18分
Page 666 of 763

664
uuReplacing Light Bulbs uFront Side Marker Light Bulbs
Maintenance
Front Side Marker Light Bulbs
When replacing, use the following bulb.
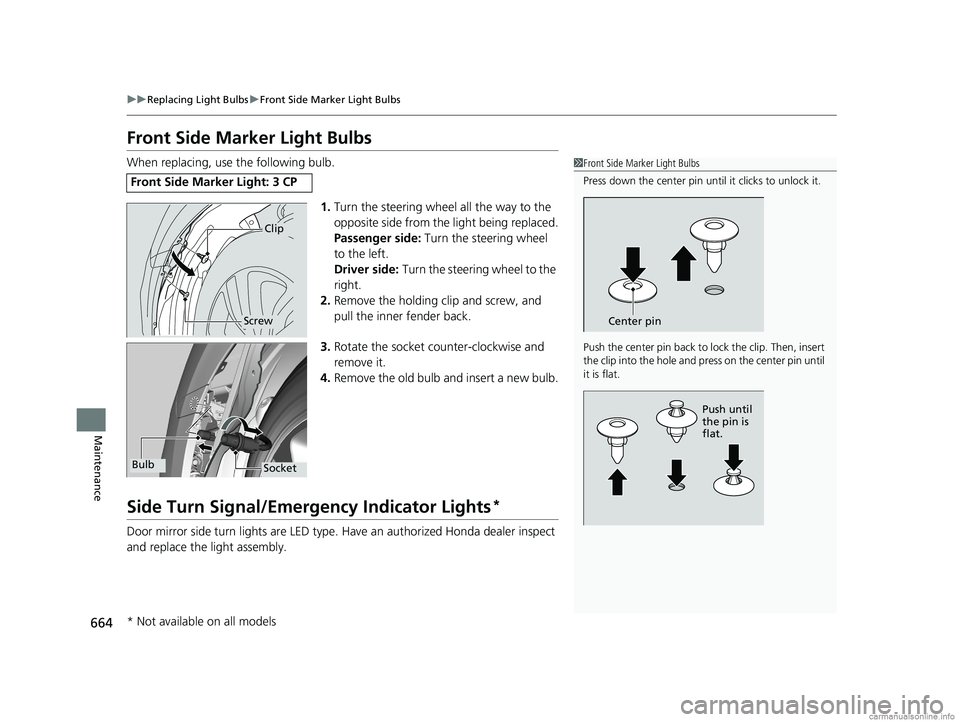
1.Turn the steering wheel all the way to the
opposite side from the light being replaced.
Passenger side: Turn the steering wheel
to the left.
Driver side: Turn the steering wheel to the
right.
2. Remove the holding clip and screw, and
pull the inner fender back.
3. Rotate the socket co unter-clockwise and
remove it.
4. Remove the old bulb and insert a new bulb.
Side Turn Signal/Emergency Indicator Lights*
Door mirror side turn lights are LED type. Have an authorized Honda dealer inspect
and replace the light assembly.
Front Side Marker Light: 3 CP
1 Front Side Marker Light Bulbs
Press down the center pin until it clicks to unlock it.
Push the center pin back to lock the clip. Then, insert
the clip into the hole and press on the center pin until
it is flat.
Center pin
Push until
the pin is
flat.
Clip
Screw
SocketBulb
* Not available on all models
18 US ODYSSEY-31THR6010.book 664 ページ 2018年12月6日 木曜日 午後4時18分