2018 HONDA CLARITY PLUG-IN check oil
[x] Cancel search: check oilPage 37 of 591

35
Quick Reference Guide
Maintenance (P 471)
Under the Hood (P 480)
● Check engine oil, coolants and windshield washer fluid. Add
when necessary.
● Check brake fluid.
● Check the 12-volt battery condition monthly.
aPull the hood release handle under the corner of the
dashboard.
bLocate the hood latch lever, push it to the side, and then
raise the hood. Once you have raised the hood slightly, you
can release the lever.
cWhen finished, close the hood and make sure it is firmly
locked in place.
Lights (P 494)
● Inspect all lights regularly.
Wiper Blades (P 496)
● Replace blades if they leave streaks
across the windshield.
Tires (P 499)
● Inspect tires and wheels regularly.
● Check tire pressures regularly.
● Install snow tires for winter driving.
18 CLARITY PHEV CSS-31TRW6000.book 35 ページ 2017年12月25日 月曜日 午後2時22分
Page 106 of 591

104
uuIndicators uDriver Information Interface Wa rning and Information Messages
Instrument Panel
MessageConditionExplanation
●Appears when there is a problem with the sensor on
the 12-volt battery.●Have your vehicle checked by an authorized Honda
Clarity Plug-In Hybrid dealer.
2 Checking the 12-Volt Battery P. 508
●Appears along with the battery charging system
indicator when the battery is not charging.●Turn off the climate control system and rear defogger to
reduce electricity consumption.
2If the 12-Volt Battery Charging System Indicator
Comes On P. 546
●Appears when the engine oil pressure is low.●Appears while driving - Immediately stop in a safe
place.
2If the Low Oil Pressure Warning Appears P. 545
●Appears when the engine coolant temperature gets
abnormally high.
2 Overheating P. 542
●Appears when the engine coolant temperature is
near its upper limit.●Drive slowly to prevent overheating.
●Appears if there is a pr oblem with the cooling
system.●Drive slowly to prevent overheating and have your
vehicle checked by an author ized Honda Clarity Plug-In
Hybrid dealer as soon as possible.
●Appears when the fuel fill cap is loose or is not
installed.
2 Tighten Fuel Cap Message P. 547
18 CLARITY PHEV CSS-31TRW6000.book 104 ページ 2017年12月25日 月曜日 午後2時22分
Page 456 of 591

454
Driving
Charging
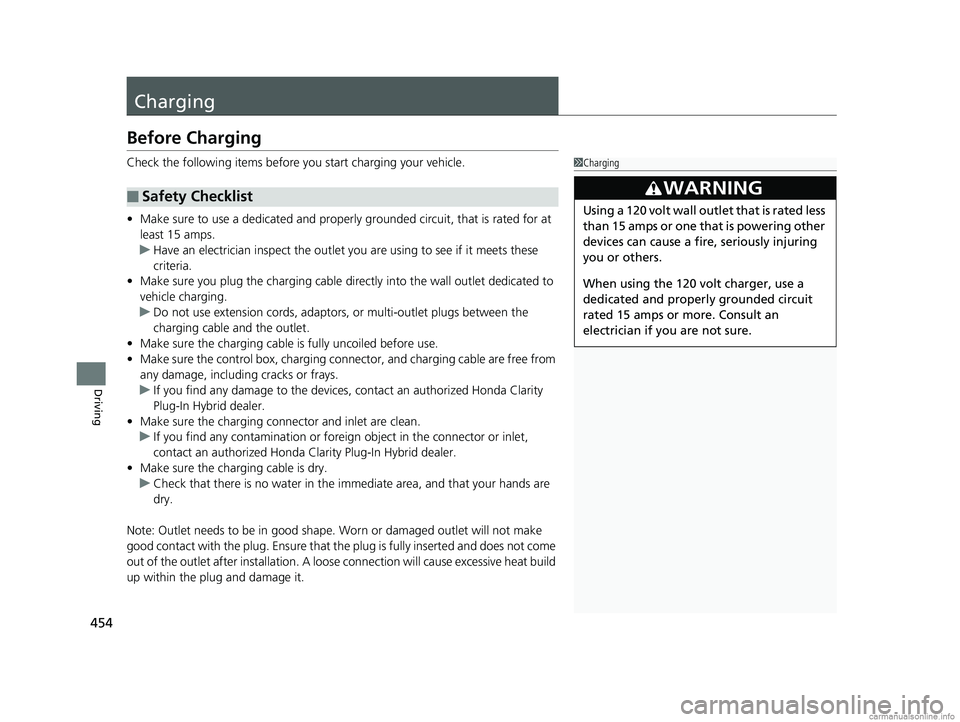
Before Charging
Check the following items before you start charging your vehicle.
•Make sure to use a dedicated and properly grounded circuit, that is rated for at
least 15 amps.
u Have an electrician inspect the outlet you are using to see if it meets these
criteria.
• Make sure you plug the charging cable dire ctly into the wall outlet dedicated to
vehicle charging.
u Do not use extension cords, adaptors , or multi-outlet plugs between the
charging cable and the outlet.
• Make sure the charging cable is fully uncoiled before use.
• Make sure the control box, charging connec tor, and charging cable are free from
any damage, including cracks or frays.
u If you find any damage to the devices, contact an authorized Honda Clarity
Plug-In Hybrid dealer.
• Make sure the charging connector and inlet are clean.
u If you find any contamination or fore ign object in the connector or inlet,
contact an authorized Honda Clarity Plug-In Hybrid dealer.
• Make sure the charging cable is dry.
u Check that there is no water in the i mmediate area, and that your hands are
dry.
Note: Outlet needs to be in good shape. Worn or damaged outlet will not make
good contact with the plug. Ensure that the plug is fully inserted and does not come
out of the outlet after installation. A loose connection will cause excessive heat build
up within the plug and damage it.
■Safety Checklist
1 Charging
3WARNING
Using a 120 volt wall outlet that is rated less
than 15 amps or one that is powering other
devices can cause a fire, seriously injuring
you or others.
When using the 120 volt charger, use a
dedicated and properly grounded circuit
rated 15 amps or more. Consult an
electrician if yo u are not sure.
18 CLARITY PHEV CSS-31TRW6000.book 454 ページ 2017年12月25日 月曜日 午後2時22分
Page 473 of 591

471
Maintenance
This chapter discusses basic maintenance.
Before Performing MaintenanceInspection and Maintenance ............ 472
Safety When Performing Maintenance...473Parts and Fluids Used in Maintenance Service ........................................... 474
Maintenance Minder
TM..................... 475
Maintenance Under the Hood Maintenance Items Under the Hood .. 480
Opening the Hood ........................... 481
Recommended Engine Oil ................ 482
Oil Check ......................................... 483
Adding Engine Oil ............................ 484
Changing the Engine Oil and Oil Filter ...485 Engine Coolant ................................ 488
Cooling System ................................ 490
Transmission Fluid ............................ 492
Brake Fluid ....................................... 492
Refilling Window Wa
sher Fluid......... 493
Replacing Light Bulbs ....................... 494Checking and Maintaining Wiper
Blades .......................................... 496
Checking and Maintaining Tires
Checking Tires ................................. 499
Tire and Loading Information Label .. 500
Tire Labeling .................................... 500
DOT Tire Quality Grading (U.S. Vehicles).. 502
Wear Indicators ............................... 504
Tire Service Life ................................ 504
Tire and Wheel Replacement ........... 505
Tire Rotation .................................... 506
Winter Tires ..................................... 507
12-Volt Battery ................................. 508
Remote Transmitter Care Replacing the Button Battery ........... 510
Climate Control System Maintenance.. 511CleaningInterior Care .................................... 513
Exterior Care.................................... 515
Accessories and Modifications ........ 519
18 CLARITY PHEV CSS-31TRW6000.book 471 ページ 2017年12月25日 月曜日 午後2時22分
Page 474 of 591

472
Maintenance
Before Performing Maintenance
Inspection and Maintenance
For your safety, perform all listed inspections and maintenance to keep your vehicle
in good condition. If you become aware of any abnormality (noise, smell, insufficient
brake fluid, oil residue on the ground, etc .), have your vehicle inspected by an
authorized Honda Clar ity Plug-In Hybrid dealer. (Note, however, that service at an
authorized Honda Clar ity Plug-In Hybrid dealer is not mandatory to keep your
warranties in effect.)
■Daily inspections
Perform inspections before long distance tri ps, when washing the vehicle, or when
refueling.
■Periodic inspections
• Check the brake fluid level monthly.
2 Brake Fluid P. 492
•Check the tire pressure monthly. Examin e the tread for wear and foreign objects.
2Checking and Maintaining Tires P. 499
•Check the operation of the exterior lights monthly.
2 Replacing Light Bulbs P. 494
•Check the condition of the wiper bl ades at least every six months.
2Checking and Maintaining Wiper Blades P. 496
■Types of Inspection and Maintenance
1Inspection and Maintenance
Maintenance, replacement, or repair of
emissions control devices and systems may be
done by any automotive repair establishment or
individuals using parts that are “certified” to
EPA standards.
According to state and fede ral regulations, failure to
perform maintenance on the maintenance main
items marked with # will not void your emissions
warranties. However, all ma intenance services should
be performed in accordan ce with the intervals
indicated by the driver information interface.
2 Maintenance Service Items P. 477
If you want to perform complex maintenance tasks
that require more skills a nd tools, you can purchase a
subscription to the Service Express website at
www.techinfo.honda.com .
2 Authorized Manuals P. 576
If you want to perform ma intenance yourself, make
sure that you have the necessary tools and skills first.
After performing ma intenance, update the records in
the separate maintenance booklet.
U.S. models
18 CLARITY PHEV CSS-31TRW6000.book 472 ページ 2017年12月25日 月曜日 午後2時22分
Page 479 of 591

477
uuMaintenance MinderTMuTo Use Maintenance MinderTM
Continued
Maintenance
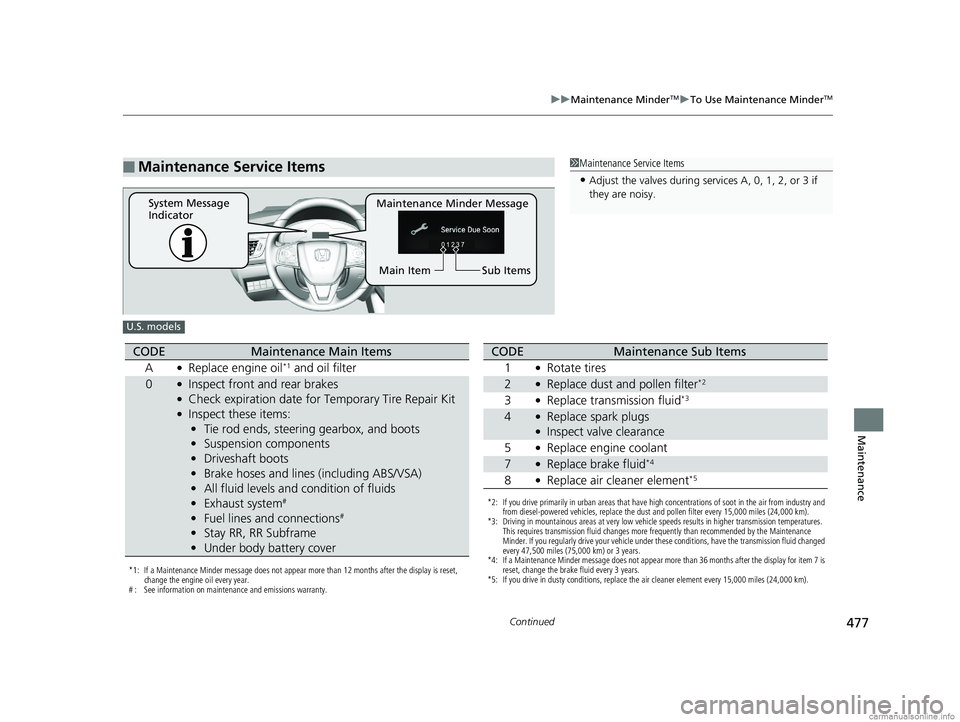
■Maintenance Service Items1Maintenance Service Items
•Adjust the valves during services A, 0, 1, 2, or 3 if
they are noisy.
Maintenance Minder Message
System Message
Indicator
Sub Items
Main Item
U.S. models
*1: If a Maintenance Minder message does not appear more than 12 months after the display is reset,
change the engine oil every year.
# : See information on maintenance and emissions warranty.
CODEMaintenance Main Items
A
●Replace engine oil*1 and oil filter
0●Inspect front and rear brakes●Check expiration date for Temporary Tire Repair Kit●Inspect these items: • Tie rod ends, steering gearbox, and boots
• Suspension components
• Driveshaft boots
• Brake hoses and lines (including ABS/VSA)
• All fluid levels and condition of fluids
• Exhaust system
#
•Fuel lines and connections#
•Stay RR, RR Subframe
• Under body battery cover
*2: If you drive primarily in urban areas that have high concentrations of soot in the air from industry and
from diesel-powered vehicles, replace the dust and pollen filter every 15,000 miles (24,000 km).
*3: Driving in mountainous areas at very low vehicle speeds results in higher transmission temperatures.
This requires transmission fluid changes more frequently than recommended by the Maintenance
Minder. If you regularly drive your vehicle under these conditions, have the transmission fluid changed
every 47,500 miles (75,000 km) or 3 years.
*4: If a Maintenance Minder message does not appear more than 36 months after the display for item 7 is reset, change the brake fluid every 3 years.
*5: If you drive in dusty conditions, replace the air cleaner element every 15,000 miles (24,000 km).
CODEMaintenance Sub Items
1
●Rotate tires
2●Replace dust and pollen filter*2
3●Replace transmission fluid*3
4●Replace spark plugs●Inspect valve clearance
5
●Replace engine coolant
7●Replace brake fluid*4
8●Replace air cleaner element*5
18 CLARITY PHEV CSS-31TRW6000.book 477 ページ 2017年12月25日 月曜日 午後2時22分
Page 480 of 591

478
uuMaintenance MinderTMuTo Use Maintenance MinderTM
Maintenance
1Maintenance Service Items
•Adjust the valves during services A, 9, 1, 2, or 3 if
they are noisy.
Canadian models
*1: If a Maintenance Minder message does not appear more than 12 months after the display is reset,
change the engine oil every year.
*2: If you drive primarily in urban areas that have high concentrations of soot in the air from industry and from diesel-powered vehicles, replace the dust and pollen filter every 24,000 km (15,000 miles).
*3: Driving in mountainous areas at very low vehicle speeds results in higher transmission temperatures.
This requires transmission fluid changes more frequently than recommended by the Maintenance
Minder. If you regularly drive your vehicle under these conditions, have the transmission fluid changed
every 75,000 km (47,500 miles) or 3 years.
*4: If a Maintenance Minder message does not appear more than 36 months after the display for item 7 is reset, change the brake fluid every 3 years.
*5: If you drive in dusty conditions, replace the air cleaner element every 24,000 km (15,000 miles).
# : See information on maintenance and emissions warranty.
CODEMaintenance Main Items
A
●Replace engine oil*1 and oil filter
CODEMaintenance Sub Items
1
●Rotate tires
2●Replace dust and pollen filter*2
3●Replace transmission fluid*3
4●Replace spark plugs●Inspect valve clearance
5
●Replace engine coolant
7●Replace brake fluid*4
8●Replace air cleaner element*5
9●Service front and rear brakes●Check expiration date for Temporary Tire Repair Kit●Inspect these items: • Tie rod ends, steering gearbox, and boots
• Suspension components
• Driveshaft boots
• Brake hoses and lines (including ABS/VSA)
• All fluid levels and condition of fluids
• Exhaust system
#
•Fuel lines and connections#
•Stay RR, RR Subframe
• Under body battery cover
18 CLARITY PHEV CSS-31TRW6000.book 478 ページ 2017年12月25日 月曜日 午後2時22分
Page 485 of 591

483
uuMaintenance Under the Hood uOil Check
Maintenance
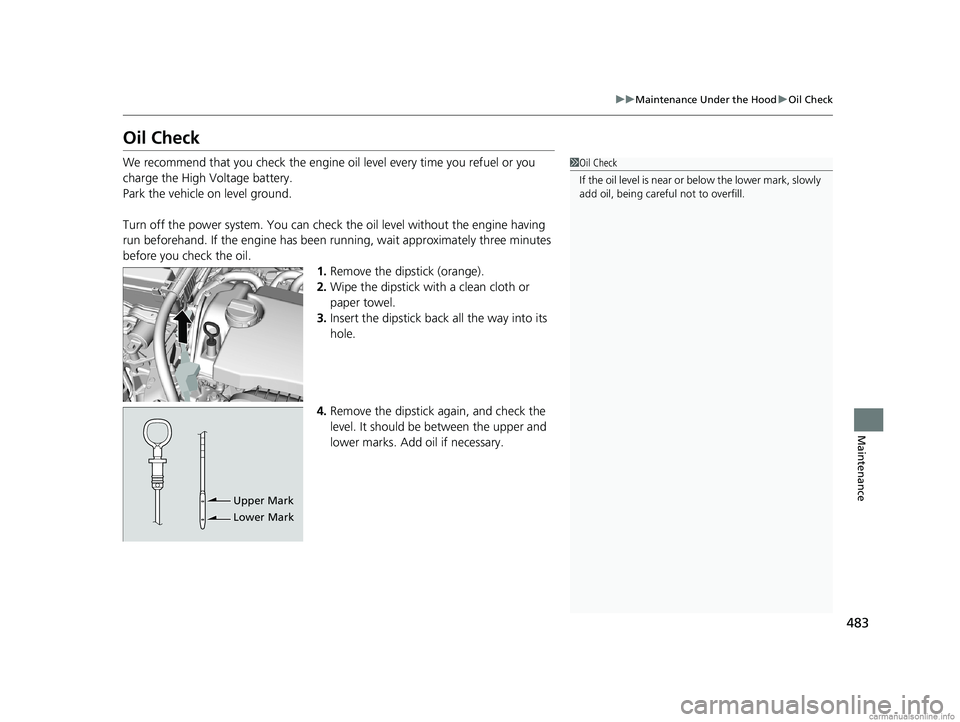
Oil Check
We recommend that you check the engine o il level every time you refuel or you
charge the High Voltage battery.
Park the vehicle on level ground.
Turn off the power system. You can check the oil level without the engine having
run beforehand. If the engine has been ru nning, wait approximately three minutes
before you check the oil. 1.Remove the dipstick (orange).
2. Wipe the dipstick with a clean cloth or
paper towel.
3. Insert the dipstick back all the way into its
hole.
4. Remove the dipstick again, and check the
level. It should be between the upper and
lower marks. Add oil if necessary.1Oil Check
If the oil level is near or below the lower mark, slowly
add oil, being carefu l not to overfill.
Upper Mark
Lower Mark
18 CLARITY PHEV CSS-31TRW6000.book 483 ページ 2017年12月25日 月曜日 午後2時22分