2018 HONDA CLARITY PLUG-IN Charge lid
[x] Cancel search: Charge lidPage 7 of 591
Contents
Child Safety P. 69Safety Labels P. 83
Opening and Closing the Trunk P. 150 Security System P. 153 Opening and Closing the Windows P. 156
Adjusting the Mirrors P. 173 Adjusting the Seats P. 175
Climate Control System P. 193
Audio Error Messages P. 284 General Information on the Audio System P. 288
Bluetooth ® HandsFreeLink ® P. 335
When Driving P. 376 Braking P. 431Parking Your Vehicle P. 447
Charging P. 454 Fuel Economy and CO
2 Emissions P. 469
Maintenance Under the Hood P. 480 Replacing Light Bulbs P. 494
Checking and Maintaining Tires P. 499 12-Volt Battery P. 508 Remote Transmitter Care P. 510
Accessories and Modifications P. 519
Power System Won’t Start P. 535 Jump Starting P. 539 Overheating P. 542
Fuses P. 553 Emergency Towing P. 561
When You Cannot Open the Charge Lid P. 563 When You Cannot Open the Trunk P. 564
Devices that Emit Radio Waves P. 569 Reporting Safety Defects P. 571
Authorized Manuals P. 576 Customer Service Information P. 577
Quick Reference GuideP. 6
Safe DrivingP. 41
Instrument PanelP. 85
ControlsP. 135
FeaturesP. 203
DrivingP. 369
MaintenanceP. 471
Handling the UnexpectedP. 521
InformationP. 565
IndexP. 579
18 CLARITY PHEV CSS-31TRW6000.book 7 ページ 2017年12月25日 月曜日 午後2時22分
Page 8 of 591
6
Quick Reference Guide
Quick Reference Guide
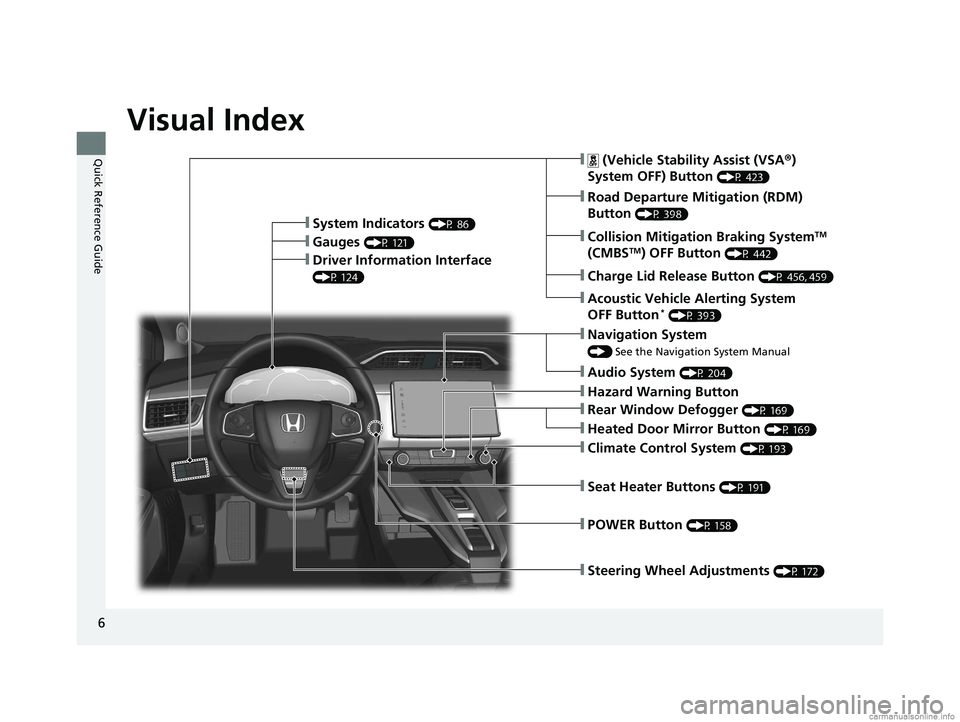
Visual Index
❙Steering Wheel Adjustments (P 172)
❙ (Vehicle Stability Assist (VSA®)
System OFF) Button
(P 423)
❙Road Departure Mitigation (RDM)
Button
(P 398)❙System Indicators (P 86)
❙Gauges (P 121)❙Collision Mitigation Braking SystemTM
(CMBSTM) OFF Button (P 442)❙Driver Information Interface
(P 124)
❙Navigation System
() See the Navigation System Manual
❙Audio System (P 204)
❙Hazard Warning Button
❙Climate Control System (P 193)
❙Rear Window Defogger (P 169)
❙POWER Button (P 158)
❙Seat Heater Buttons (P 191)
❙Heated Door Mirror Button (P 169)
❙Acoustic Vehicle Alerting System
OFF Button* (P 393)
❙Charge Lid Release Button (P 456, 459)
18 CLARITY PHEV CSS-31TRW6000.book 6 ページ 2017年12月25日 月曜日 午後2時22分
Page 110 of 591
108
uuIndicators uDriver Information Interface Wa rning and Information Messages
Instrument Panel
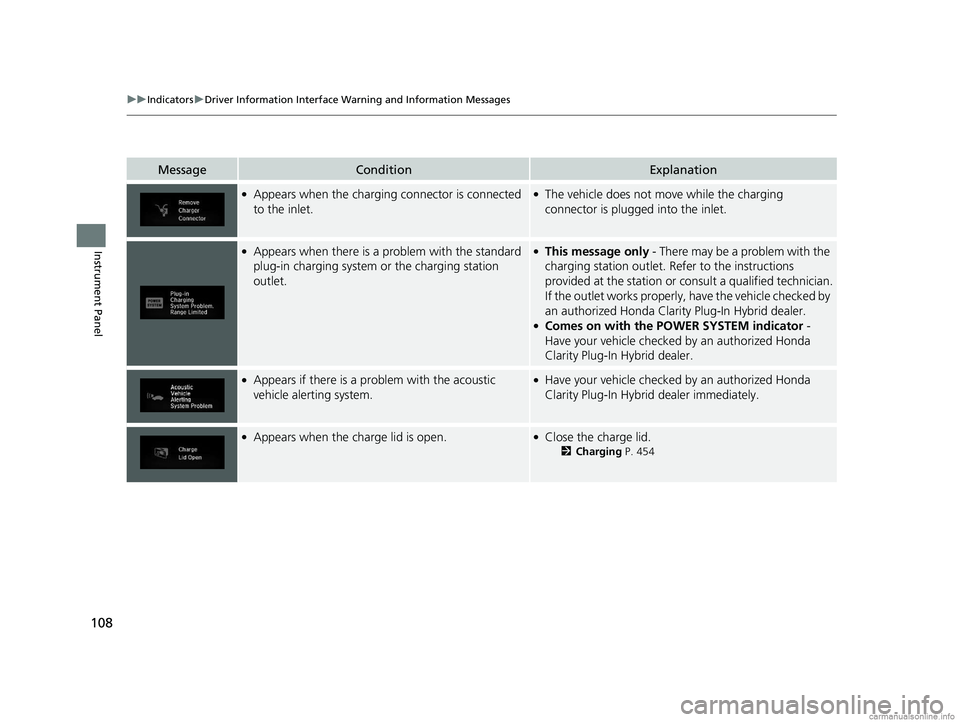
MessageConditionExplanation
●Appears when the charging connector is connected
to the inlet.●The vehicle does not move while the charging
connector is plugged into the inlet.
●Appears when there is a pr oblem with the standard
plug-in charging system or the charging station
outlet.●This message only - There may be a problem with the
charging station outlet. Refer to the instructions
provided at the station or consult a qualified technician.
If the outlet works properly, have the vehicle checked by
an authorized Honda Clarit y Plug-In Hybrid dealer.
●Comes on with the POWER SYSTEM indicator -
Have your vehicle checked by an authorized Honda
Clarity Plug-In Hybrid dealer.
●Appears if there is a pr oblem with the acoustic
vehicle alerting system.●Have your vehicle checked by an authorized Honda
Clarity Plug-In Hybrid dealer immediately.
●Appears when the charge lid is open.●Close the charge lid.
2 Charging P. 454
18 CLARITY PHEV CSS-31TRW6000.book 108 ページ 2017年12月25日 月曜日 午後2時22分
Page 139 of 591
137Continued
Controls
Locking and Unlocking the Doors
Key Types and Functions
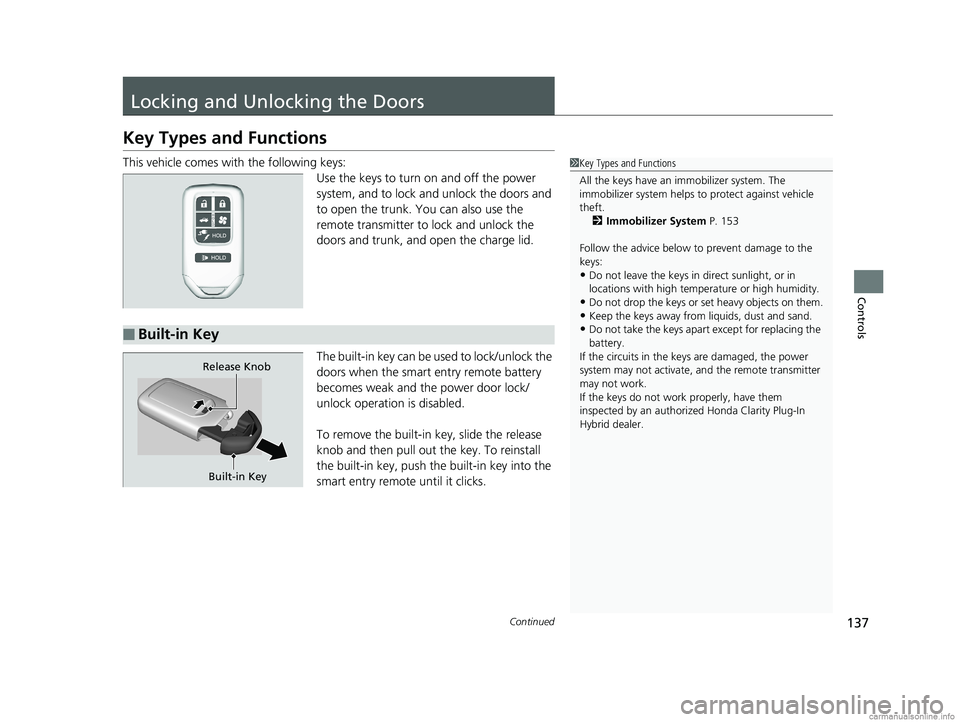
This vehicle comes with the following keys:
Use the keys to turn on and off the power
system, and to lock and unlock the doors and
to open the trunk. You can also use the
remote transmitter to lock and unlock the
doors and trunk, and open the charge lid.
The built-in key can be us ed to lock/unlock the
doors when the smart entry remote battery
becomes weak and the power door lock/
unlock operation is disabled.
To remove the built-in key, slide the release
knob and then pull out the key. To reinstall
the built-in key, push the built-in key into the
smart entry remote until it clicks.1 Key Types and Functions
All the keys have an immobilizer system. The
immobilizer system helps to protect against vehicle
theft. 2 Immobilizer System P. 153
Follow the advice below to prevent damage to the
keys:
•Do not leave the keys in direct sunlight, or in
locations with high temperature or high humidity.
•Do not drop the keys or set heavy objects on them.•Keep the keys away from liquids, dust and sand.
•Do not take the keys apart except for replacing the
battery.
If the circuits in the keys are damaged, the power
system may not activate, and the remote transmitter
may not work.
If the keys do not work properly, have them
inspected by an authorized Honda Clarity Plug-In
Hybrid dealer.■Built-in Key
Built-in Key
Release Knob
18 CLARITY PHEV CSS-31TRW6000.book 137 ページ 2017年12月25日 月曜日 午後2時22分
Page 458 of 591
uuCharging uCharge the High Voltage battery using a Level 1 or 2 charger
456
Driving
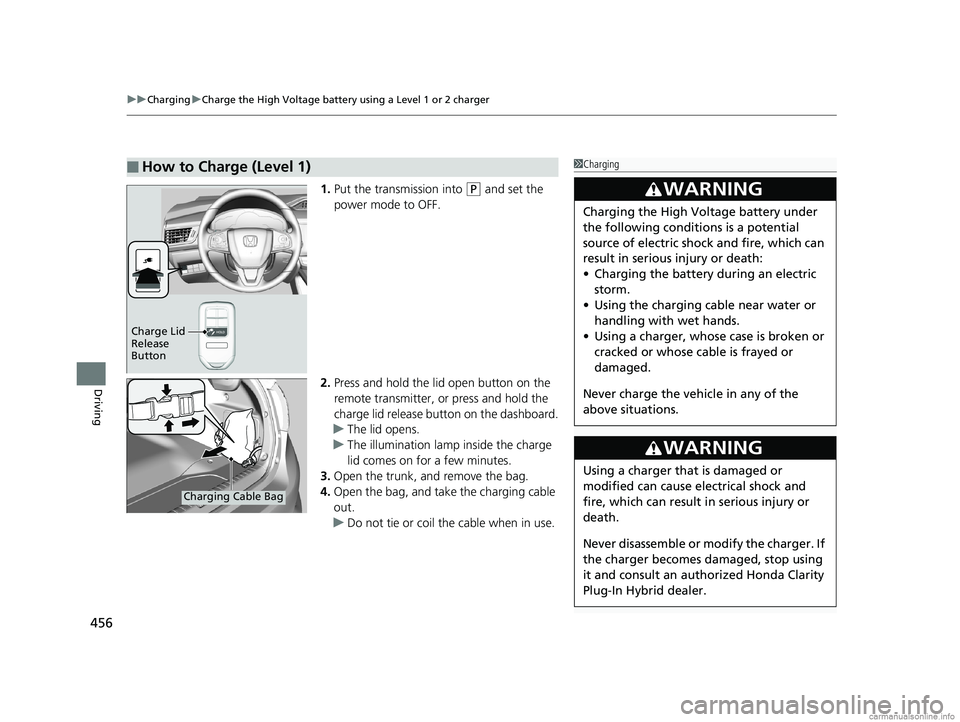
1. Put the transmission into (P and set the
power mode to OFF.
2. Press and hold the lid open button on the
remote transmitter, or press and hold the
charge lid release button on the dashboard.
u The lid opens.
u The illumination lamp inside the charge
lid comes on for a few minutes.
3. Open the trunk, and remove the bag.
4. Open the bag, and take the charging cable
out.
u Do not tie or coil the cable when in use.
■How to Charge (Level 1)1Charging
3WARNING
Charging the High Vo ltage battery under
the following conditions is a potential
source of electric shock and fire, which can
result in serious injury or death:
• Charging the battery during an electric
storm.
• Using the charging cable near water or
handling with wet hands.
• Using a charger, whose case is broken or
cracked or whose cable is frayed or
damaged.
Never charge the vehi cle in any of the
above situations.
3WARNING
Using a charger that is damaged or
modified can cause electrical shock and
fire, which can result in serious injury or
death.
Never disassemble or modify the charger. If
the charger becomes damaged, stop using
it and consult an authorized Honda Clarity
Plug-In Hybrid dealer.
Charge Lid
Release
Button
Charging Cable Bag
18 CLARITY PHEV CSS-31TRW6000.book 456 ページ 2017年12月25日 月曜日 午後2時22分
Page 459 of 591
Continued457
uuCharging uCharge the High Voltage battery using a Level 1 or 2 charger
Driving
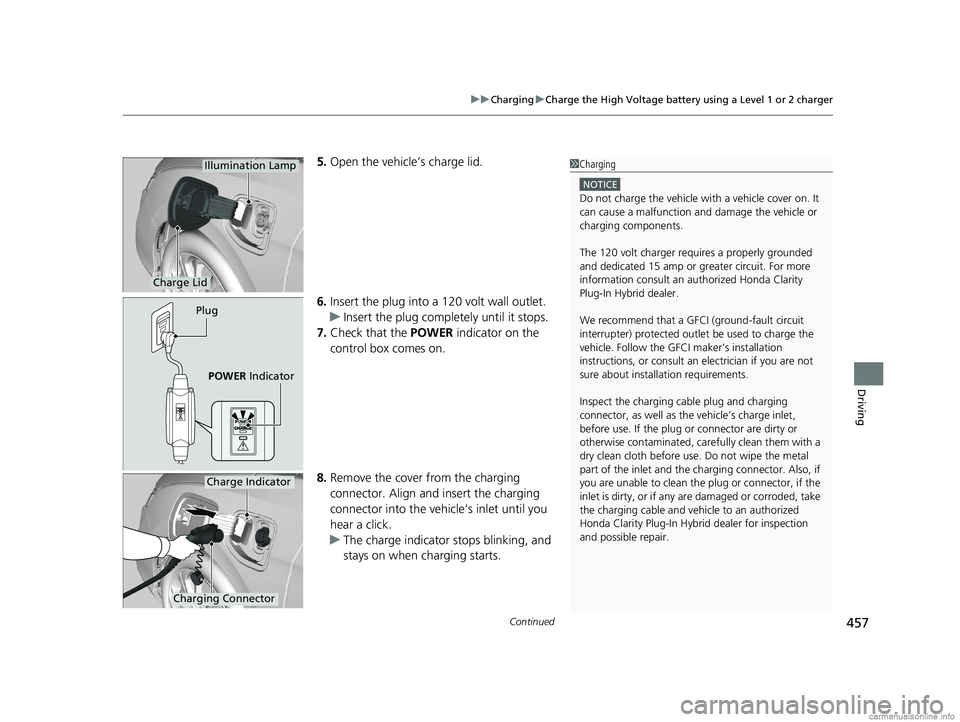
5. Open the vehicle’s charge lid.
6. Insert the plug into a 120 volt wall outlet.
u Insert the plug complete ly until it stops.
7. Check that the POWER indicator on the
control box comes on.
8. Remove the cover from the charging
connector. Align and insert the charging
connector into the vehicle’s inlet until you
hear a click.
u The charge indicator stops blinking, and
stays on when charging starts.
Charge Lid
Illumination Lamp
Plug
POWER Indicator
1Charging
NOTICE
Do not charge the vehicle wi th a vehicle cover on. It
can cause a malfunction and damage the vehicle or
charging components.
The 120 volt charger requires a properly grounded
and dedicated 15 amp or gr eater circuit. For more
information consult an au thorized Honda Clarity
Plug-In Hybrid dealer.
We recommend that a GFCI (ground-fault circuit
interrupter) protected outlet be used to charge the
vehicle. Follow the GF CI maker's installation
instructions, or consult an electrician if you are not
sure about installation requirements.
Inspect the charging cable plug and charging
connector, as well as the vehicle’s charge inlet,
before use. If the plug or connector are dirty or
otherwise contaminated, care fully clean them with a
dry clean cloth before use. Do not wipe the metal
part of the inlet and the ch arging connector. Also, if
you are unable to clean the plug or connector, if the
inlet is dirty, or if any ar e damaged or corroded, take
the charging cable and vehi cle to an authorized
Honda Clarity Plug-In Hybrid dealer for inspection
and possible repair.
Charging Connector
Charge Indicator
18 CLARITY PHEV CSS-31TRW6000.book 457 ページ 2017年12月25日 月曜日 午後2時22分
Page 461 of 591
Continued459
uuCharging uCharge the High Voltage battery using a Level 1 or 2 charger
Driving
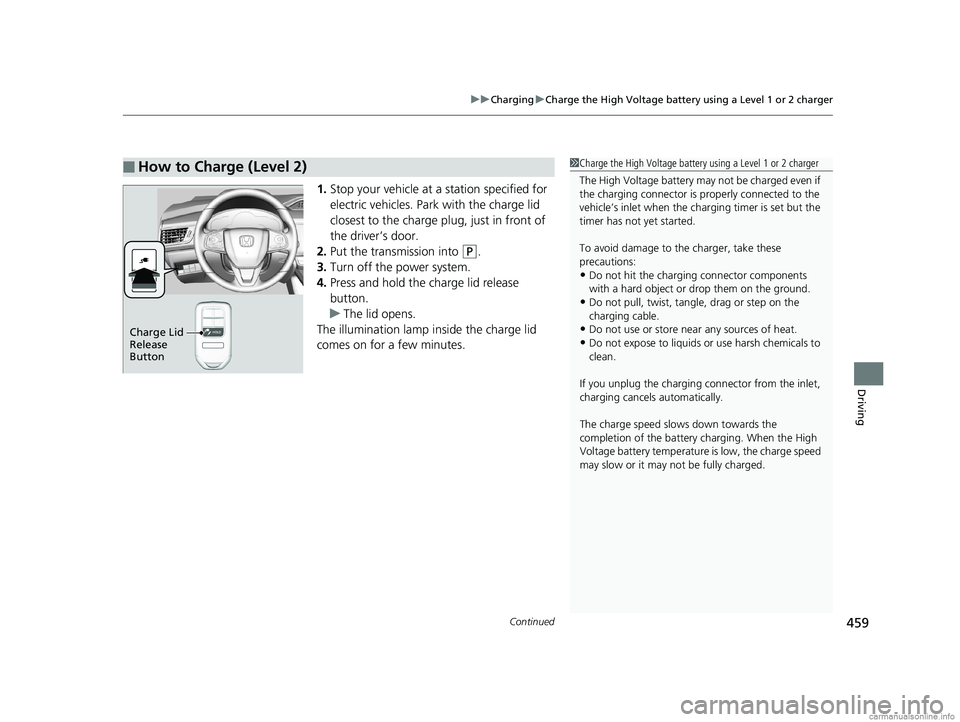
1. Stop your vehicle at a station specified for
electric vehicles. Park with the charge lid
closest to the charge plug, just in front of
the driver’s door.
2. Put the transmission into
(P.
3. Turn off the power system.
4. Press and hold the charge lid release
button.
u The lid opens.
The illumination lamp inside the charge lid
comes on for a few minutes.
■How to Charge (Level 2)1 Charge the High Voltage battery using a Level 1 or 2 charger
The High Voltage battery may not be charged even if
the charging connector is properly connected to the
vehicle’s inlet when the charging timer is set but the
timer has not yet started.
To avoid damage to th e charger, take these
precautions:
•Do not hit the charging connector components
with a hard object or drop them on the ground.
•Do not pull, twist, tangle, drag or step on the
charging cable.
•Do not use or store near any sources of heat.
•Do not expose to liquids or use harsh chemicals to
clean.
If you unplug the charging connector from the inlet,
charging cancels automatically.
The charge speed slows down towards the
completion of the battery charging. When the High
Voltage battery temperature is low, the charge speed
may slow or it may not be fully charged.Charge Lid
Release
Button
18 CLARITY PHEV CSS-31TRW6000.book 459 ページ 2017年12月25日 月曜日 午後2時22分
Page 462 of 591
uuCharging uCharge the High Voltage battery using a Level 1 or 2 charger
460
Driving
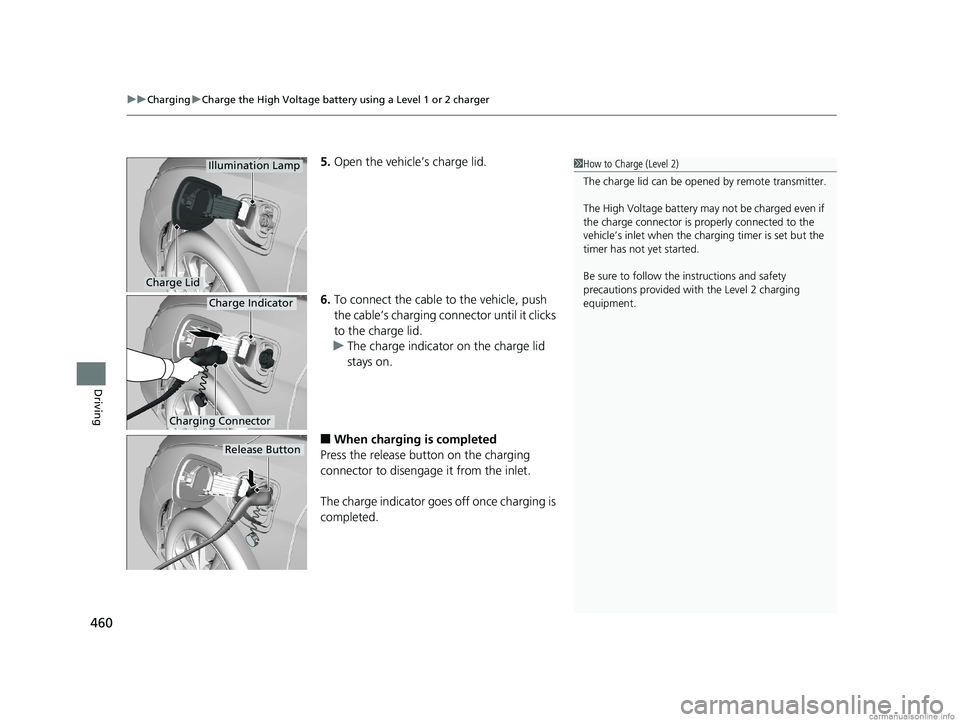
5. Open the vehicle’s charge lid.
6. To connect the cable to the vehicle, push
the cable’s charging connector until it clicks
to the charge lid.
u The charge indicator on the charge lid
stays on.
■When charging is completed
Press the release button on the charging
connector to disengage it from the inlet.
The charge indicator goes off once charging is
completed.
Charge Lid
Illumination Lamp1 How to Charge (Level 2)
The charge lid can be open ed by remote transmitter.
The High Voltage battery may not be charged even if
the charge connector is properly connected to the
vehicle’s inlet when the charging timer is set but the
timer has not yet started.
Be sure to follow the instructions and safety
precautions provided with the Level 2 charging
equipment.
Charging Connector
Charge Indicator
Release Button
18 CLARITY PHEV CSS-31TRW6000.book 460 ページ 2017年12月25日 月曜日 午後2時22分