2018 GENESIS G80 charging
[x] Cancel search: chargingPage 90 of 516

LCD display ...........................................................3-64
LCD Modes ........................................................................3-64
User Settings Mode ........................................................3-68
Warning Messages..........................................................3-75
Trip computer .......................................................3-87
Warning and indicator lights ..............................3-90
Warning lights ..................................................................3-90
Indicator Lights ................................................................3-98
Head Up Display (HUD).....................................3-103
Light .....................................................................3-106
Exterior lights ................................................................3-106
Smart High Beam ..........................................................3-108
Welcome system ...........................................................3-115
Interior lights..................................................................3-116
Wipers and washers ..........................................3-120
Windshield wipers .........................................................3-120
Windshield washers ......................................................3-122
Driver assist system ..........................................3-123
Rear view camera .........................................................3-123
Multi-View Camera System ........................................3-124
Parking Assist System .................................................3-125
Defroster .............................................................3-129
Rear window defroster ...............................................3-129
Automatic climate control system ...................3-131
Automatic heating and air conditioning ..................3-132
Manual heating and air conditioning .......................3-133
System operation ..........................................................3-141
Climate control air filter ..............................................3-143
Air conditioner refrigerant and compressor
lubricant ..........................................................................3-144
Air Conditioning refrigerant label .............................3-144
Windshield defrosting and defogging ............3-146
Auto defogging system ON/OFF...............................3-148
Climate control additional features.................3-149
Cluster ionizer ................................................................3-149
Smart ventilation ...........................................................3-149
Rear climate system ON/OFF ....................................3-150
CO2 control auto air conditioner ..............................3-150
Storage compartment ........................................3-151
Center console storage ...............................................3-151
Glove box ........................................................................3-152
Sunglass holder .............................................................3-152
Cellular Phone Holder ..................................................3-153
Wireless Cellular Phone Charging System..............3-153
3
Page 160 of 516

3-72
Convenient features of your vehicle
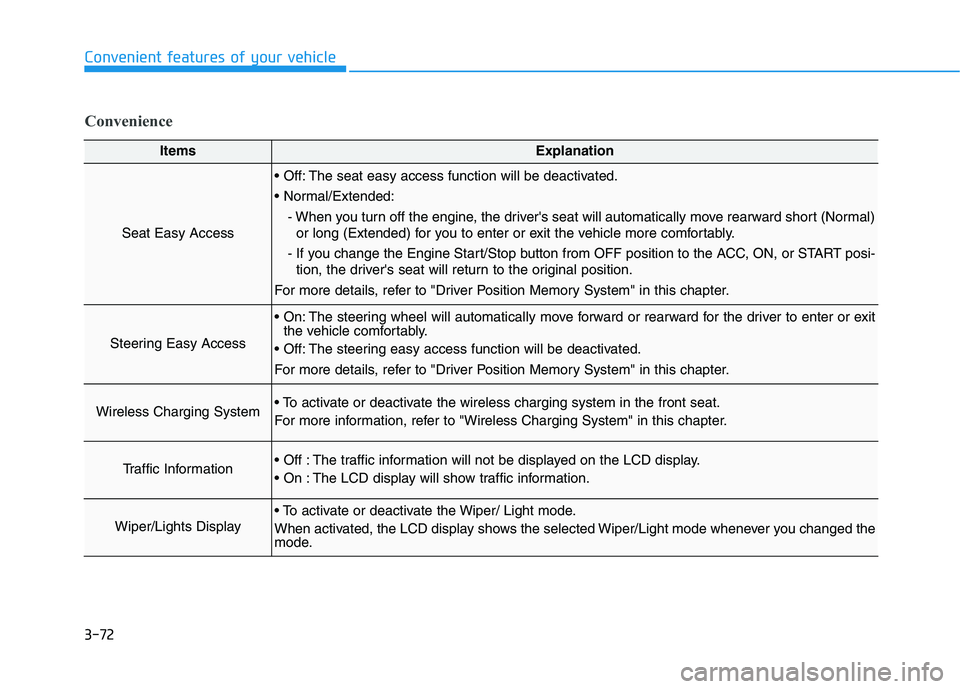
ItemsExplanation
Seat Easy Access
The seat easy access function will be deactivated.
- When you turn off the engine, the driver's seat will automatically move rearward short (Normal)
or long (Extended) for you to enter or exit the vehicle more comfortably.
- If you change the Engine Start/Stop button from OFF position to the ACC, ON, or START posi-
tion, the driver's seat will return to the original position.
For more details, refer to "Driver Position Memory System" in this chapter.
Steering Easy Access
The steering wheel will automatically move forward or rearward for the driver to enter or exit
the vehicle comfortably.
The steering easy access function will be deactivated.
For more details, refer to "Driver Position Memory System" in this chapter.
Wireless Charging System
For more information, refer to "Wireless Charging System" in this chapter.
Traffic Information The traffic information will not be displayed on the LCD display.
The LCD display will show traffic information.
Wiper/Lights Display
When activated, the LCD display shows the selected Wiper/Light mode whenever you changed the
mode.
Convenience
Page 182 of 516

3-94
Convenient features of your vehicle
Malfunction Indicator
Lamp (MIL)
This warning light illuminates:
Once you set the or Engine Start/
Stop button to the ON position.
- It remains on until the engine is
started.
When there is a malfunction with
the emission control system.
In this case, have your vehicle
inspected by an authorized retailer
of Genesis Branded products.
Charging System
Warning Light
If this warning light comes on while
the engine is running, the battery is
not being charged. Immediately turn
off all electrical accessories. Try not
to use electrically operated controls,
such as the power windows. Keep the
engine running; starting the engine
will quickly discharge the battery.
If there is a malfunction with either
the alternator or electrical charging
system:
1. Drive carefully to the nearest safe
location and stop your vehicle.
2. Turn the engine off and check the
alternator drive belt for looseness
or breakage.
If the belt is adjusted properly,
there may be a problem in the
electrical charging system.
In this case, have your vehicle
inspected by an authorized retailer
of Genesis Branded products.
Malfunction Indicator Lamp
(MIL)
Driving with the Malfunction
Indicator Lamp (MIL) on may
cause damage to the emission
control systems which could
affect drivability and/or fuel
economy.
CAUTION
Gasoline Engine
If the Malfunction Indicator
Lamp (MIL) illuminates, poten-
tial catalytic converter damage
is possible which could result in
loss of engine power.
In this case, have your vehicle
inspected by an authorized
retailer of Genesis Branded
products.
CAUTION
Page 206 of 516

3-118
Convenient features of your vehicle
Trunk room lamp (if equipped)
The trunk room lamp comes on
when the trunk is opened.
Door courtesy lamp
The door courtesy lamp comes ON
when the door is opened to assist
entering or exiting the vehicle. It also
serves as a warning to passing vehi-
cles that the vehicle door is open.
When the Engine Start/Stop button is
in the OFF or ACC position, the door
courtesy lamp turns off after 20 min-
utes.
Glove box lamp
The glove box lamp comes on when
the glove box is opened.
If the glove box is not closed, the
lamp will turn off after 20 minutes.
To prevent unnecessary charg-
ing system drain, close the
glove box securely after using
the glove box.
CAUTION
ODH043078ODH043077ODH043076
The trunk lamp comes on as
long as the trunk lid is open. To
prevent unnecessary charging
system drain, close the trunk lid
securely after using the trunk.
CAUTION
Page 241 of 516

3-153
Convenient features of your vehicle
3
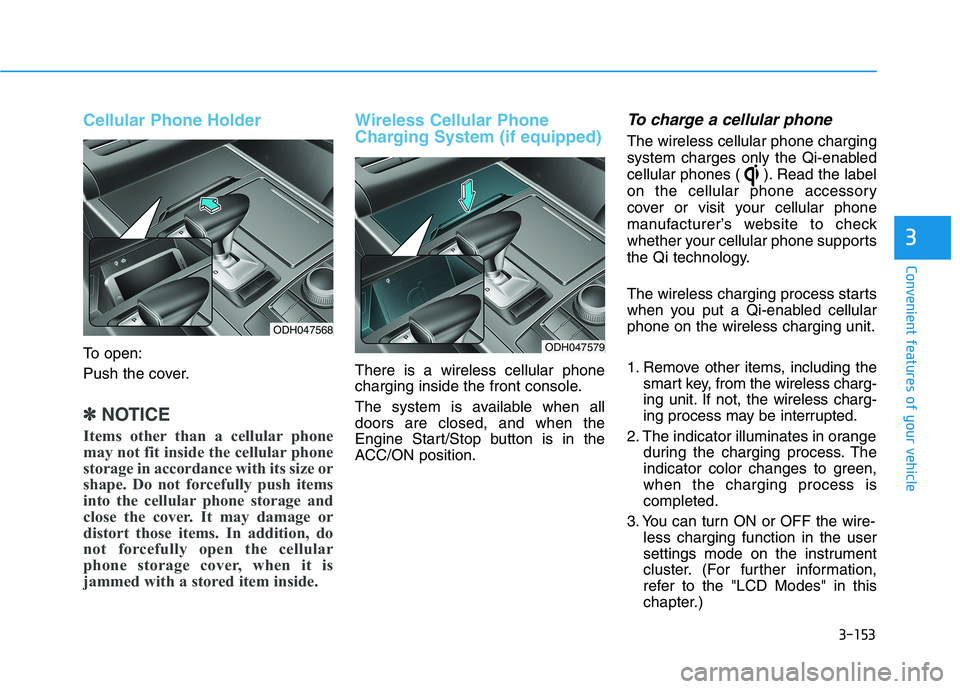
Cellular Phone Holder
To open:
Push the cover.
✽ ✽
NOTICE
Items other than a cellular phone
may not fit inside the cellular phone
storage in accordance with its size or
shape. Do not forcefully push items
into the cellular phone storage and
close the cover. It may damage or
distort those items. In addition, do
not forcefully open the cellular
phone storage cover, when it is
jammed with a stored item inside.
Wireless Cellular Phone
Charging System (if equipped)
There is a wireless cellular phone
charging inside the front console.
The system is available when all
doors are closed, and when the
Engine Start/Stop button is in the
ACC/ON position.
To charge a cellular phone
The wireless cellular phone charging
system charges only the Qi-enabled
cellular phones ( ). Read the label
on the cellular phone accessory
cover or visit your cellular phone
manufacturer’s website to check
whether your cellular phone supports
the Qi technology.
The wireless charging process starts
when you put a Qi-enabled cellular
phone on the wireless charging unit.
1. Remove other items, including the
smart key, from the wireless charg-
ing unit. If not, the wireless charg-
ing process may be interrupted.
2. The indicator illuminates in orange
during the charging process. The
indicator color changes to green,
when the charging process is
completed.
3. You can turn ON or OFF the wire-
less charging function in the user
settings mode on the instrument
cluster. (For further information,
refer to the "LCD Modes" in this
chapter.)
ODH047568
ODH047579
Page 242 of 516

3-154
Convenient features of your vehicle
Slightly change the cellular phone
position, when the cellular phone is
not being charged. Make sure that
the indicator illuminates in orange.
The indicator color may not change
to green in accordance with the cel-
lular phone type, even though the
charging process is completed. The
indicator blinks in orange for 10 sec-
onds when there is a malfunction
with the wireless charging system. In
this case, temporarily stop the charg-
ing process, and re-attempt to wire-
lessly charge your cellular phone
again.
The system warns you with a mes-
sage on the LCD display when you
do not take out the cellular phone
from the wireless charging unit with
the front door open and the Engine
Start/Stop button in the OFF posi-
tion.
✽ ✽
NOTICE
• The wireless cellular phone charg-
ing system may not support certain
cellular phones, which are not veri-
fied for the Qi specification ( ).
• Locate your cell phone well in the
middle of the wireless cellular
phone charging system. Even
when your cell phone locates
slightly to one side, the charging
speed may decrease.
• The wireless charging process may
temporarily stop, when a smart
key function operates (i.e. starting
the engine, opening the doors,
closing the doors).
• For certain cell phones, the indica-
tor color may not change to green,
even when the wireless charging
process is properly completed.
• The wireless charging process may
temporarily stop, when tempera-
ture abnormally increases inside
the wireless cellular phone charg-
ing system. The wireless charging
process restarts, when tempera-
ture falls to a proper level.
(Continued)(Continued)
• The wireless charging process may
temporarily stop when there is any
metallic item, such as a coin,
between the wireless cellular
phone charging system and a cel-
lular phone.
Page 262 of 516

5-7
Driving your vehicle
5
Engine Stop/Start button positions
Button Position Action Notice
OFF
To turn off the engine, press the Engine
Start/Stop button with shift lever in P (Park).
Also, the engine will turn off when the Engine
Start/Stop button is pressed with the shift
lever in D (Drive) or R (Reverse) because the
transmission automatically shifts to the P
(Park) position. But, when it is pressed in N
(Neutral), the Engine Start/Stop button will
go to the ACC position.
ACC
Press the Engine Start/Stop button when the
button is in the OFF position without depress-
ing the brake pedal.
Electrical accessories are usable.If you leave the Engine Start/Stop button in the
ACC position for more than one hour, the bat-
tery power will turn off automatically to help
prevent the battery from discharging.
Page 382 of 516

6-6
What to do in an emergency
7. Connect the jumper cables in the
exact sequence shown in the illus-
tration. First connect one jumper
cable to the red, positive (+)
jumper terminal of your vehicle (1).
8. Connect the other end of the
jumper cable to the red, positive
(+) battery/jumper terminal of the
assisting vehicle (2).
9. Connect the second jumper cable
to the black, negative (-) battery/
chassis ground of the assisting
vehicle (3).
10. Connect the other end of the sec-
ond jumper cable to the black,
negative (-) chassis ground of
your vehicle (4).
Do not allow the jumper cables to
contact anything except the cor-
rect battery or jumper terminals
or the correct ground. Do not lean
over the battery when making
connections.
11. Start the engine of the assisting
vehicle and let it run at approxi-
mately 2,000 rpm for a few min-
utes. Then start your vehicle.If your vehicle will not start after a
few attempts, it probably requires
servicing. In this event please seek
qualified assistance. If the cause of
your battery discharging is not
apparent, have your vehicle checked
by an authorized retailer of Genesis
Branded products.
Disconnect the jumper cables in the
exact reverse order you connected
them:
1. Disconnect the jumper cable from
the black, negative (-) chassis
ground of your vehicle (4).
2. Disconnect the other end of the
jumper cable from the black, neg-
ative (-) battery/chassis ground of
the assisting vehicle (3).
3. Disconnect the second jumper
cable from the red, positive (+)
battery/jumper terminal of the
assisting vehicle (2).
4. Disconnect the other end of the
jumper cable from the red, positive
(+) jumper terminal of your vehicle
(1).
Push-starting
Vehicles equipped with automatic
transmission cannot be push-start-
ed.
Follow the directions in this chapter
for jump-starting.