2018 FORD F-550 mirror
[x] Cancel search: mirrorPage 242 of 660

When shifting the transmission out of
reverse (R) and into any gear other than
park (P), the camera image remains in the
display until:
•
Your vehicle speed sufficiently
increases.
• You shift your vehicle into park (P).
• You apply the parking brake on vehicles
with a manual transmission.
360 DEGREE CAMERA (If Equipped) WARNINGS
The 360 degree camera system still
requires the driver to use it in
conjunction with looking out of the
windows, and checking the interior and
exterior mirrors for maximum coverage. Objects that are close to either
corner of the bumper or under the
bumper, might not be seen on the
screen due to the limited coverage of the
camera system. Use caution when turning camera
features on or off when the
transmission is not in park (P). Make
sure your vehicle is not moving. Note:
The 360 degree camera system turns
off when your vehicle is in motion at low
speed, except when in reverse (R).
The 360 degree camera system consists
of front, side and rear cameras. The
system:
• Allows you to see what is directly in
front or behind your vehicle.
• Provides cross traffic view in front and
behind your vehicle. •
Allows you to see a top-down view of
the area outside your vehicle, including
the blind spots.
• Provides visibility around your vehicle
to you in parking maneuvers such as:
•Centering in a parking space.
• Obstacles near vehicle.
• Parallel parking.
Camera Views The camera button is located on
the instrument panel. Pressing
the camera button activates the
system.
When in park (P), neutral (N) or drive (D),
only images from the front cameras are
displayed. Press the camera button to
display the front camera image on the
display screen.
When in reverse (R), only images from the
rear cameras are displayed. When you shift
into reverse (R), the rear view camera
image automatically shows on the display
screen.
Advanced Camera Views (If Equipped) Additional camera views may be
available for vehicles with
specific features. Press the small
camera icon shown on the top left corner
of the display screen to open the camera
view menu.
The following camera views can be
accessed in park (P), neutral (N) or drive
(D) when you press the camera button:
• Front 360 + Normal:
Contains the
normal front camera view next to a
360 degree camera view.
• Front Normal View:
Provides an
image of what is directly in front of your
vehicle.
239
Super Duty (TFE) Canada/United States of America, enUSA, Edition date: 201709, Second Printing Parking AidsE205884 E233726
Page 243 of 660

•
Front Split View: Provides an
extended view of what is in front of
your vehicle.
• Rear High View:
Provides an image
of your truck bed and can be used to
assist you when backing up to align and
hitch a fifth wheel or gooseneck trailer.
• Auxiliary View:
Provides a rear view
image from the back of your trailer
while reversing.
The following camera views can be
accessed when you shift into reverse (R):
• Rear 360 + Normal:
Contains the
normal rear camera view next to a 360
degree camera view. Press the zoom
(+) button to quickly access Rear
Normal View from this screen.
• Rear Normal View: Provides an image
of what is directly behind your vehicle.
• Rear Split View:
Provides an
extended view of what is behind your
vehicle.
• Rear High View:
Provides an image
of your truck bed and can be used to
assist you when backing up to align and
hitch a fifth wheel or gooseneck trailer.
• Auxiliary View:
Provides a rear view
image from the back of your trailer
while reversing.
• Trailer Reverse Guidance View:
Provides an image of the rear of your
vehicle using the side cameras, useful
when reversing with a trailer. Use the
arrows at the bottom of the screen to
adjust the side camera position. See
Trailer Reversing Aids
(page 274). Keep Out Zone
The Keep Out Zone is represented by the
yellow dotted lines running parallel to your
vehicle. It is designed to give you the
indication on the ground of the fully
extended outside mirror position.
Front Camera
WARNING
The front camera system still
requires the driver to use it in
conjunction with looking out of your
vehicle. 240
Super Duty (TFE) Canada/United States of America, enUSA, Edition date: 201709, Second Printing Parking AidsE184448 E184044
Page 244 of 660

The front video camera, located in the
grille, provides a video image of the area
in front of your vehicle. It adds assistance
to the driver while driving forward at low
speeds. To use the front video camera
system, place the transmission in any gear
except reverse (R). An image will display
once the camera enable button is pressed.
The area displayed on the screen may vary
according to your vehicle's orientation
and/or road condition.
Side Camera
The side view camera, located in the
outside mirror, provide a video image of
the area on the sides of your vehicle. It aids
you while parking your vehicle, or when
parking with a trailer attached.
Note:
Use caution when using the 360 view
while any of the doors are ajar. If a door is
ajar, the camera will be out of position and
the video image may be incorrect. Center High-Mount Stop Lamp
Camera (If Equipped) The center high-mount stop lamp camera
system is a variant of the rear view camera
that is mounted within the high-mount
stop lamp. It is designed to display the
contents of your truck bed or assist you
when backing up to align and hitch a fifth
wheel or gooseneck trailer. The center
high-mount stop lamp camera is not
meant as an alternative to the rear view
camera.
The center high-mount stop lamp camera
view contains a dynamic guideline to help
you locate the center of your vehicle. This
view can only be accessed while in reverse
(R).
241
Super Duty (TFE) Canada/United States of America, enUSA, Edition date: 201709, Second Printing Parking AidsE231401 E231402 E233763
Page 253 of 660

LANE KEEPING SYSTEM (If
Equipped) WARNING
The system is designed to aid the
driver. It is not intended to replace
your attention and judgment. You are
still responsible to drive with due care and
attention. Note:
The system works as long as the
camera can detect one lane marking at a
speed above
40 mph (64 km/h).
Note: The system may not function if the
camera is blocked or there is damage to the
windshield.
The Lane Keeping System automatically
detects and tracks the road lane markings
using a camera mounted behind the
interior review view mirror. The system
notifies you to stay in your lane when the
front camera detects an unintentional lane
change is likely to occur.
Switching the System On and Off
Note: The system on or off setting is stored
until it is manually changed, unless a MyKey
is detected. If the system detects a MyKey,
it defaults to on and the mode is set to alert.
Note: If a MyKey is detected, pressing the
button will not affect the on or off status of
the system. You can only change the mode
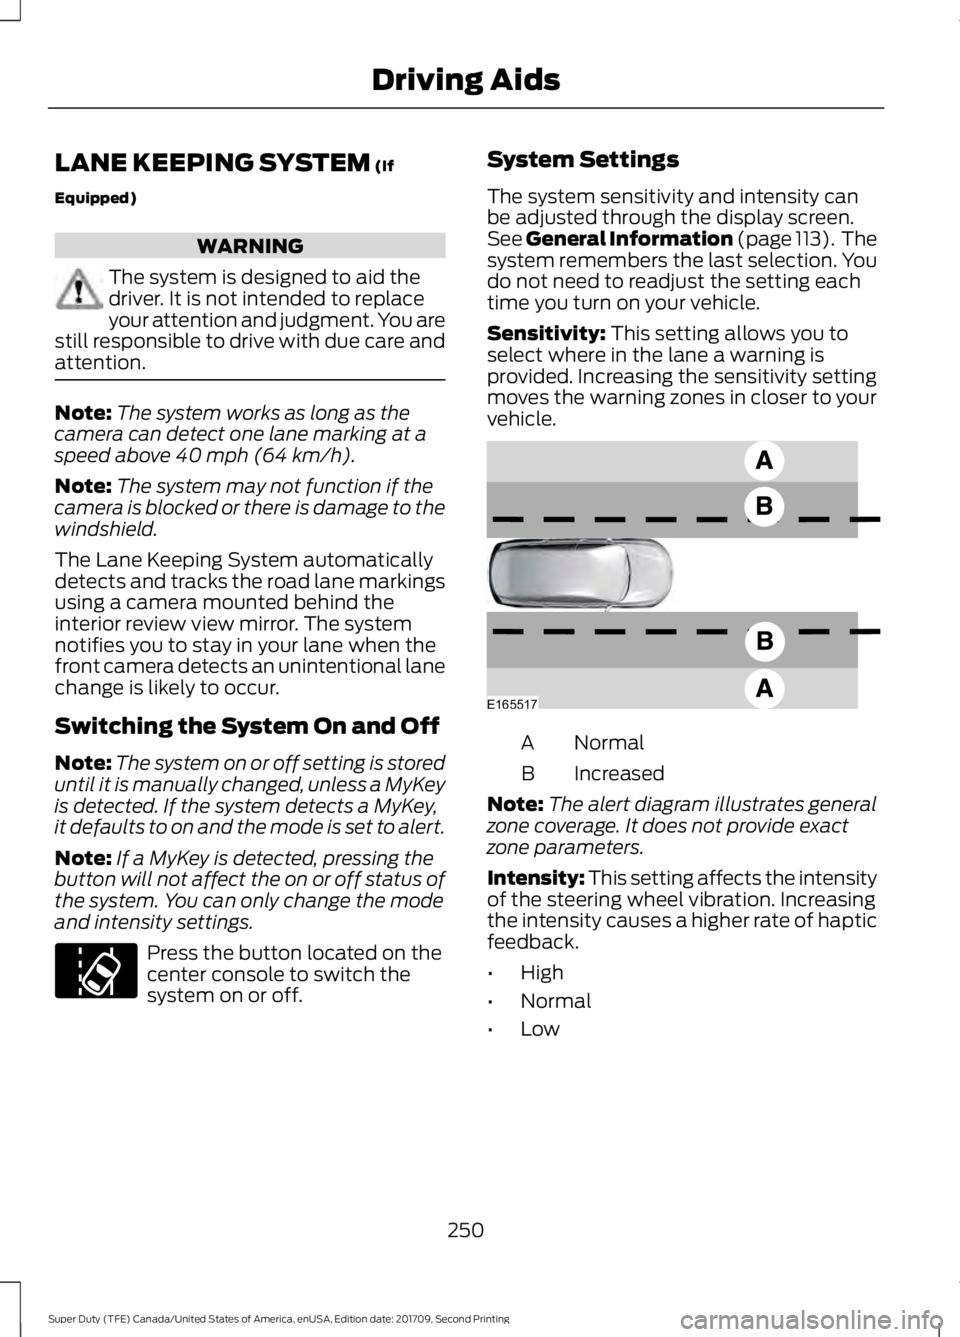
and intensity settings. Press the button located on the
center console to switch the
system on or off. System Settings
The system sensitivity and intensity can
be adjusted through the display screen.
See General Information (page 113). The
system remembers the last selection. You
do not need to readjust the setting each
time you turn on your vehicle.
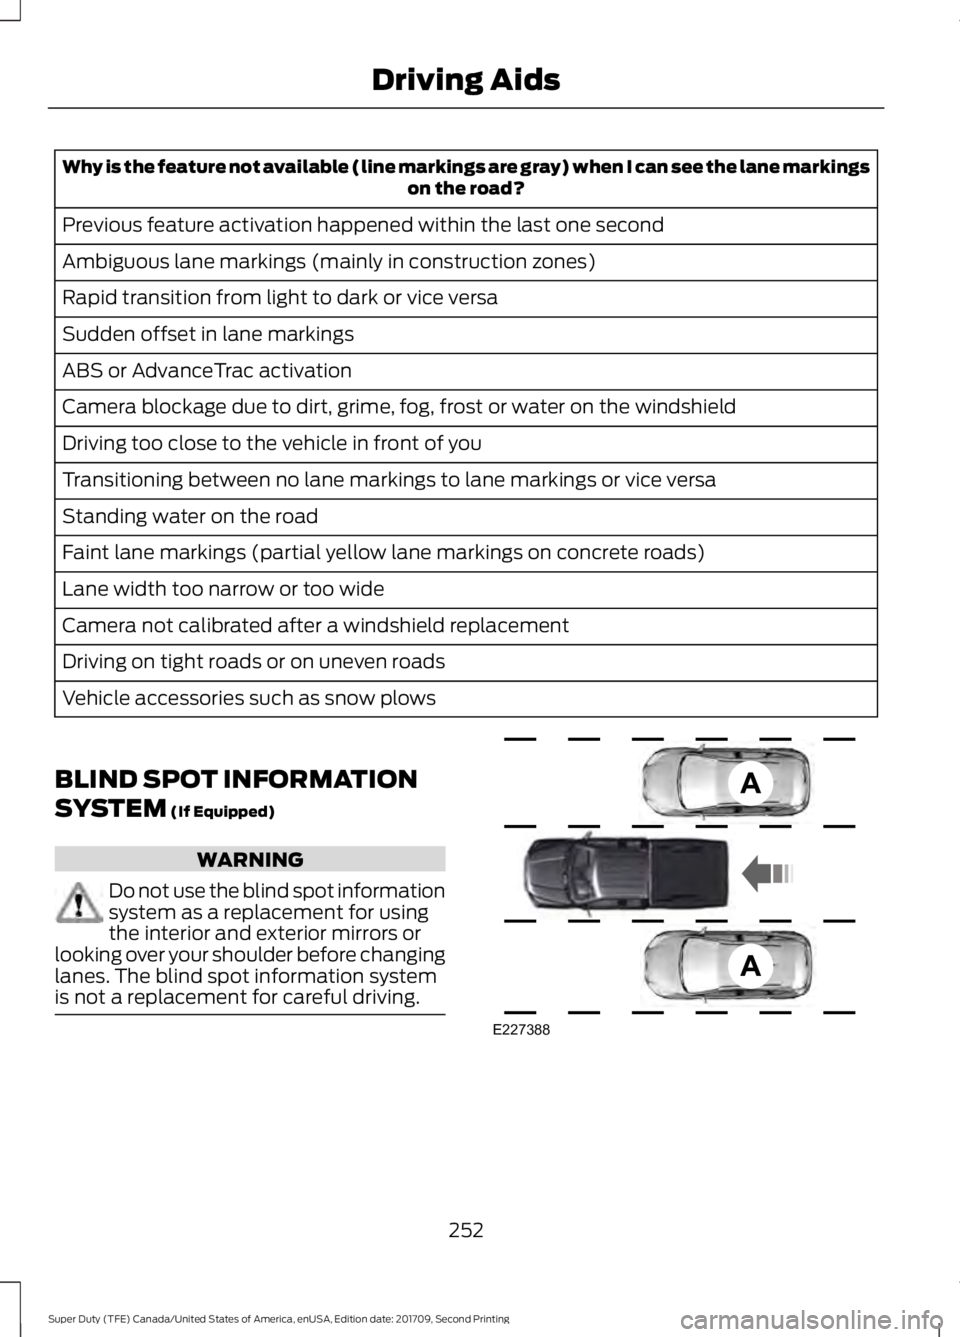
Sensitivity:
This setting allows you to
select where in the lane a warning is
provided. Increasing the sensitivity setting
moves the warning zones in closer to your
vehicle. Normal
A
Increased
B
Note: The alert diagram illustrates general
zone coverage. It does not provide exact
zone parameters.
Intensity: This setting affects the intensity
of the steering wheel vibration. Increasing
the intensity causes a higher rate of haptic
feedback.
• High
• Normal
• Low
250
Super Duty (TFE) Canada/United States of America, enUSA, Edition date: 201709, Second Printing Driving AidsE173233 E165517
Page 255 of 660

Why is the feature not available (line markings are gray) when I can see the lane markings
on the road?
Previous feature activation happened within the last one second
Ambiguous lane markings (mainly in construction zones)
Rapid transition from light to dark or vice versa
Sudden offset in lane markings
ABS or AdvanceTrac activation
Camera blockage due to dirt, grime, fog, frost or water on the windshield
Driving too close to the vehicle in front of you
Transitioning between no lane markings to lane markings or vice versa
Standing water on the road
Faint lane markings (partial yellow lane markings on concrete roads)
Lane width too narrow or too wide
Camera not calibrated after a windshield replacement
Driving on tight roads or on uneven roads
Vehicle accessories such as snow plows
BLIND SPOT INFORMATION
SYSTEM (If Equipped) WARNING
Do not use the blind spot information
system as a replacement for using
the interior and exterior mirrors or
looking over your shoulder before changing
lanes. The blind spot information system
is not a replacement for careful driving. 252
Super Duty (TFE) Canada/United States of America, enUSA, Edition date: 201709, Second Printing Driving AidsE227388
Page 256 of 660

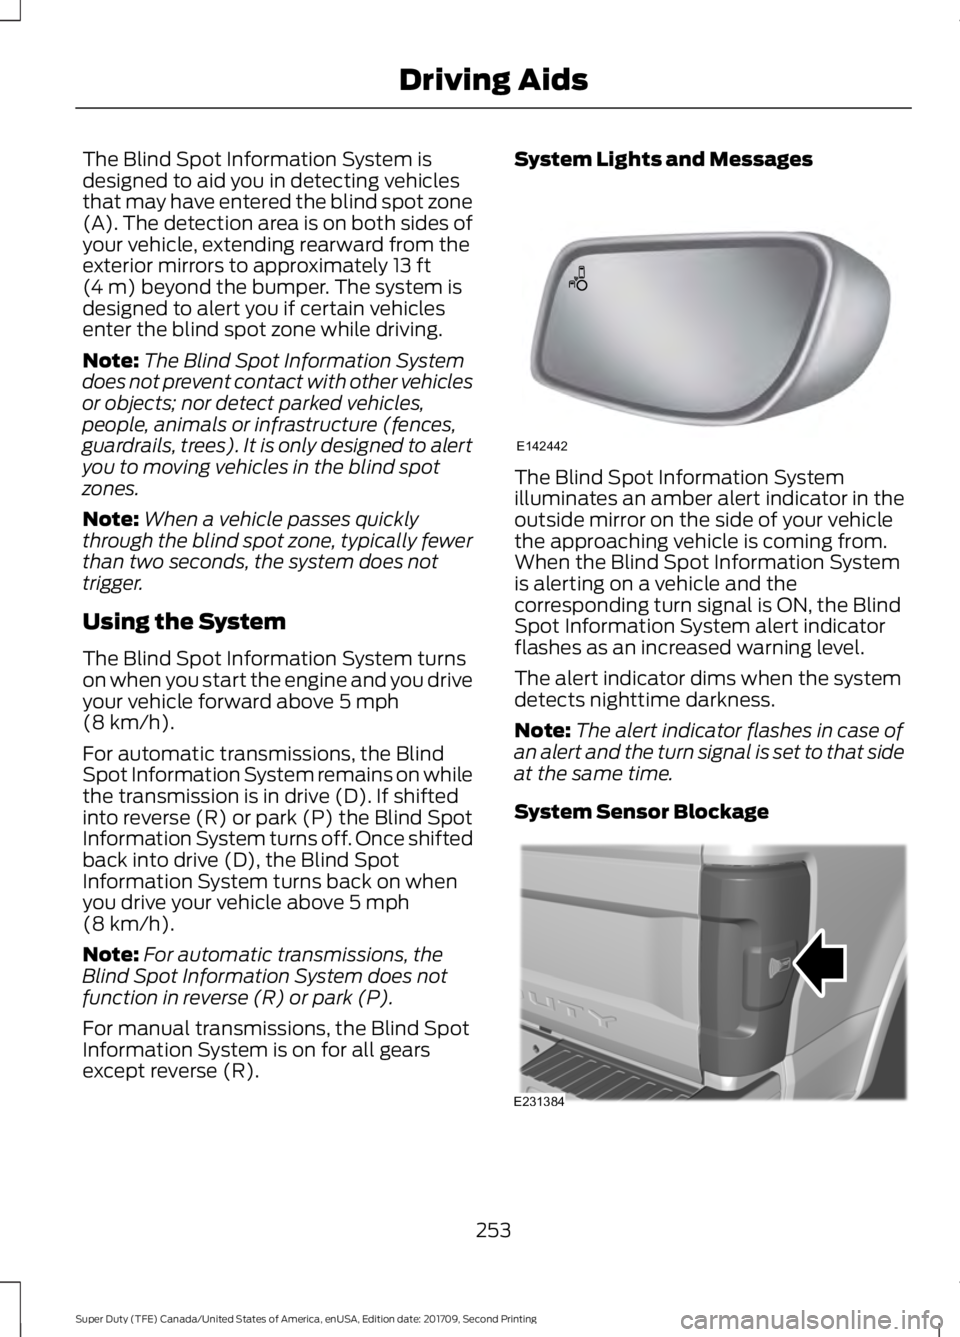
The Blind Spot Information System is
designed to aid you in detecting vehicles
that may have entered the blind spot zone
(A). The detection area is on both sides of
your vehicle, extending rearward from the
exterior mirrors to approximately 13 ft
(4 m) beyond the bumper. The system is
designed to alert you if certain vehicles
enter the blind spot zone while driving.
Note: The Blind Spot Information System
does not prevent contact with other vehicles
or objects; nor detect parked vehicles,
people, animals or infrastructure (fences,
guardrails, trees). It is only designed to alert
you to moving vehicles in the blind spot
zones.
Note: When a vehicle passes quickly
through the blind spot zone, typically fewer
than two seconds, the system does not
trigger.
Using the System
The Blind Spot Information System turns
on when you start the engine and you drive
your vehicle forward above
5 mph
(8 km/h).
For automatic transmissions, the Blind
Spot Information System remains on while
the transmission is in drive (D). If shifted
into reverse (R) or park (P) the Blind Spot
Information System turns off. Once shifted
back into drive (D), the Blind Spot
Information System turns back on when
you drive your vehicle above
5 mph
(8 km/h).
Note: For automatic transmissions, the
Blind Spot Information System does not
function in reverse (R) or park (P).
For manual transmissions, the Blind Spot
Information System is on for all gears
except reverse (R). System Lights and Messages
The Blind Spot Information System
illuminates an amber alert indicator in the
outside mirror on the side of your vehicle
the approaching vehicle is coming from.
When the Blind Spot Information System
is alerting on a vehicle and the
corresponding turn signal is ON, the Blind
Spot Information System alert indicator
flashes as an increased warning level.
The alert indicator dims when the system
detects nighttime darkness.
Note:
The alert indicator flashes in case of
an alert and the turn signal is set to that side
at the same time.
System Sensor Blockage 253
Super Duty (TFE) Canada/United States of America, enUSA, Edition date: 201709, Second Printing Driving AidsE142442 E231384
Page 257 of 660

The system uses radar sensors that are
located inside the tail lamp on each side
of your vehicle. Any dirt, mud and snow in
front of the sensors or driving in heavy rain
can cause system degradation. Also, other
types of obstructions in front of the sensor
can cause system degradation. This is
referred to as a
‘blocked ’ condition.
Note: Do not apply bumper stickers and/or
repair compound to these areas, this can
cause degraded system performance.
If the system detects a degraded
performance condition, a message warning
appears in the display screen. The alert
indicators remain ON and the system no
longer provides any warnings. You can
clear the warning but the alert indicators
remain illuminated.
A "blocked" condition can be cleared in
two ways:
• After the blockage in front of the
sensors is removed or the
rainfall/snowfall rate decreases or
stops, drive for a few minutes in traffic
to allow the sensors to detect passing
vehicles.
• By cycling the ignition from ON to OFF
and then back ON.
Note: If your vehicle has a tow bar with a
factory equipped trailer tow module and it
is towing a trailer, the sensors will
automatically turn the Blind Spot
Information System off. If your vehicle has
a tow bar but no factory equipped trailer
tow module, it is recommended to turn the
Blind Spot Information System off
manually. Operating the Blind Spot
Information System without the Blind Spot
Trailer Tow package and a trailer attached
will cause poor system performance. Blind Spot Information System
with Trailer Tow (If Equipped)
The Blind Spot Information System with
Trailer Tow is designed to aid you in
detecting vehicles that may have entered
the detection area zone (A). The detection
area is on both sides of your vehicle and
trailer, extending rearward from the
exterior mirrors to the end of your trailer.
When a trailer is attached and the
customer has set up a Blind Spot Trailer,
the Blind Spot Information System with
Trailer Tow becomes active when driving
forward above
6 mph (10 km/h). See
Trailer Reversing Aids (page 274).
The Blind Spot Information System with
Trailer Tow can be turned off in the
instrument cluster. If the Blind Spot
Information System is turned off, then the
Blind Spot Information System with Trailer
Tow automatically turns off.
254
Super Duty (TFE) Canada/United States of America, enUSA, Edition date: 201709, Second Printing Driving AidsE225007
Page 260 of 660

CROSS TRAFFIC ALERT (If
Equipped) WARNING
Do not use the cross traffic alert
system as a replacement for using
the interior and exterior mirrors or
looking over your shoulder before reversing
out of a parking space. The cross traffic
alert system is not a replacement for
careful driving. Note:
When a trailer is detected, Cross
Traffic Alert automatically turns off.
Cross Traffic Alert is designed to warn you
of vehicles approaching from the sides
when the transmission is in reverse (R). Using the System
Cross Traffic Alert turns on when you start
the engine and you shift into reverse (R).
Once shifted out of reverse (R), Cross
Traffic Alert turns off.
Cross Traffic Alert is designed to detect
vehicles that approach the rear of your
vehicle with a speed up to
37 mph
(60 km/h). Coverage decreases when the
sensors are partially, mostly or fully
obstructed. Reversing slowly helps
increase the coverage area and
effectiveness.
In this first example, the left sensor is only
partially obstructed; zone coverage to the
right is nearly maximized. Zone coverage also decreases when
parking at shallow angles. Here, the left
sensor is mostly obstructed; zone coverage
on that side is severely limited.
257
Super Duty (TFE) Canada/United States of America, enUSA, Edition date: 201709, Second Printing Driving AidsE142440