2018 FORD F-450 fuel pump
[x] Cancel search: fuel pumpPage 193 of 660

Do not use:
•
Diesel fuel.
• Fuels containing kerosene or paraffin.
• Fuel containing more than 15% ethanol
or E85 fuel.
• Fuels containing methanol.
• Fuels containing metallic-based
additives, including manganese-based
compounds.
• Fuels containing the octane booster
additive, methylcyclopentadienyl
manganese tricarbonyl (MMT).
• Leaded fuel, using leaded fuel is
prohibited by law.
The use of fuels with metallic compounds
such as methylcyclopentadienyl
manganese tricarbonyl (commonly known
as MMT), which is a manganese-based
fuel additive, will impair engine
performance and affect the emission
control system.
We recommend Top Tier detergent
gasolines to help minimize engine deposits
and maintain optimal vehicle and engine
performance. For additional information,
refer to www.toptiergas.com.
RUNNING OUT OF FUEL
Avoid running out of fuel because this
situation may have an adverse effect on
engine components.
If you have run out of fuel: •
You may need to cycle the ignition from
off to on several times after refueling
to allow the fuel system to pump the
fuel from the tank to the engine. On
restarting, cranking time will take a few
seconds longer than normal. With
keyless ignition, just start the engine.
Crank time will be longer than usual.
• Normally, adding 1 gal (4 L) of fuel is
enough to restart the engine. If the
vehicle is out of fuel and on a steep
grade, more than
1 gal (4 L) may be
required.
REFUELING - GASOLINE WARNINGS
Fuel vapor burns violently and a fuel
fire can cause severe injuries.
Read and follow all the instructions
on the pump island.
Turn off your engine when you are
refueling.
Do not smoke if you are near fuel or
refueling your vehicle.
Keep sparks, flames and smoking
materials away from fuel.
Stay outside your vehicle and do not
leave the fuel pump unattended
when refueling your vehicle. This is
against the law in some places. Keep children away from the fuel
pump; never let children pump fuel.
Do not use personal electronic
devices while refueling.
Wait at least 10 seconds before
removing the fuel pump nozzle to
allow any residual fuel to drain into
the fuel tank.
190
Super Duty (TFE) Canada/United States of America, enUSA, Edition date: 201709, Second Printing Fuel and Refueling
Page 194 of 660

WARNINGS
Stop refueling after the fuel pump
nozzle automatically shuts off for the
second time. Failure to follow this
will fill the expansion space in the fuel tank
and could lead to fuel overflowing. Do not remove the fuel pump nozzle
from its fully inserted position when
refueling.
Use the following guidelines to avoid
electrostatic charge build-up when filling
an ungrounded fuel container:
•
Place approved fuel container on the
ground.
• Do not fill a fuel container while it is in
the vehicle (including the cargo area).
• Keep the fuel pump nozzle in contact
with the fuel container while filling.
• Do not use a device that would hold
the fuel pump handle in the fill position.
Fuel Filler Cap WARNINGS
The fuel system may be under
pressure. If you hear a hissing sound
near the fuel filler door, do not refuel
until the sound stops. Otherwise, fuel may
spray out, which could cause serious
personal injury. If you do not use the proper fuel filler
cap, excessive pressure or vacuum
in the fuel tank may damage the fuel
system or cause the fuel cap to disengage
in a collision, which may result in possible
personal injury. Note:
If you must replace the fuel filler cap,
replace it with a fuel filler cap that is
designed for your vehicle. The customer
warranty may be void for any damage to the
fuel tank or fuel system if the correct
genuine Ford, Motorcraft or other certified
fuel filler cap is not used. Your fuel tank filler cap has an indexed
design with a 1/4th turn on and off feature.
When fueling your vehicle:
1. Put your vehicle in park (P).
2. Switch the engine off.
3. Carefully turn the filler cap
counterclockwise until it spins off.
4. Pull to remove the cap from the fuel filler pipe.
5. To install the cap, align the tabs on the
cap with the notches on the filler pipe.
6. Turn the filler cap clockwise 1/4 of a turn clockwise until it clicks at least
once.
If the Check Fuel Cap light or a Check Fuel
Cap message appears in the instrument
cluster and stays on after you start the
engine, you may not have installed the fuel
filler properly.
If the fuel cap light remains on, at the next
opportunity, safely pull off of the road,
remove the fuel filler cap, align the cap
properly and reinstall it. The check fuel cap
light or Check fuel cap message may not
reset immediately. It may take several
driving cycles for the indicators to turn off.
A driving cycle consists of an engine
start-up (after four or more hours with the
engine off) followed by normal city and
highway driving.
REFUELING - DIESEL WARNINGS
Read and follow all the instructions
on the pump island.
Stay outside your vehicle and do not
leave the fuel pump unattended
when refueling your vehicle.
Keep children away from the fuel
pump. Never let children pump fuel.
191
Super Duty (TFE) Canada/United States of America, enUSA, Edition date: 201709, Second Printing Fuel and Refueling
Page 195 of 660

WARNINGS
Wait at least 10 seconds before
removing the fuel pump nozzle to
allow any residual fuel to drain into
the fuel tank. Do not remove the fuel pump nozzle
from its fully inserted position when
refueling.
When refueling always shut the
engine off and never allow sparks or
open flames near the fuel tank filler
valve. Never smoke or use a cell phone
while refueling. Fuel vapor is extremely
hazardous under certain conditions. Avoid
inhaling excess fumes. Stop refueling after the fuel pump
nozzle automatically shuts off for the
second time. Failure to follow this
will fill the expansion space in the fuel tank
and could lead to fuel overflowing. The fuel system may be under
pressure. If the fuel filler cap is
venting vapor or if you hear a hissing
sound, wait until it stops before completely
removing the fuel filler cap. Otherwise, fuel
may spray out and injure you or others. If you do not use the proper fuel filler
cap, excessive pressure or vacuum
in the fuel tank may damage the fuel
system or cause the fuel cap to disengage
in a collision, which may result in possible
personal injury. Note:
If you must replace the fuel filler cap,
replace it with a fuel filler cap designed for
your vehicle. The vehicle Warranty may be
void for any damage to the fuel tank or fuel
system if the correct genuine Ford or
Motorcraft® fuel filler cap is not used. Fueling Tips
If air is allowed to enter the fuel system the
engine automatically purges any trapped
air. To purge the air sooner: prior to engine
start, prime the system by turning the key
to on for 30 seconds then to off. Repeat
this several times. The engine may run
rough and produce white smoke while air
is in the system. This is normal.
Use only clean, approved containers that
will prevent the entry of dirt or water
whenever you store diesel fuel.
Diesel fuel must not be stored in a
galvanized container. The fuel will dissolve
the zinc in the galvanized container. The
zinc will then remain in the fuel. If you run
the contaminated fuel through the engine,
the zinc will deposit in the fuel injectors
causing expensive-to-repair damage.
Diesel fuel dispensing nozzle fill rate
Your vehicle has a fuel fill pipe that is able
to accept fuel up to 20 gal (76 L) per
minute from an 1.2 in (30 mm)
fuel-dispensing nozzle. Pumping fuel at
greater flow rates may result in premature
nozzle shut-off or spit back.
Truck stops have pumps and nozzles
designed for larger, heavy-duty trucks.
When refueling at truck stops: if the nozzle
shuts off repeatedly when refueling, wait
5– 10 seconds; then use a slower rate of
flow, do not depress the nozzle trigger as
far.
Refueling
When fueling your vehicle do the following:
1. Fully open the fuel tank filler door until
it engages and remove the fuel tank
filler cap. The fuel tank filler cap has
an indexed design with a 1/4 turn
on/off feature. Carefully turn the filler
cap counterclockwise until it spins off.
192
Super Duty (TFE) Canada/United States of America, enUSA, Edition date: 201709, Second Printing Fuel and Refueling
Page 196 of 660

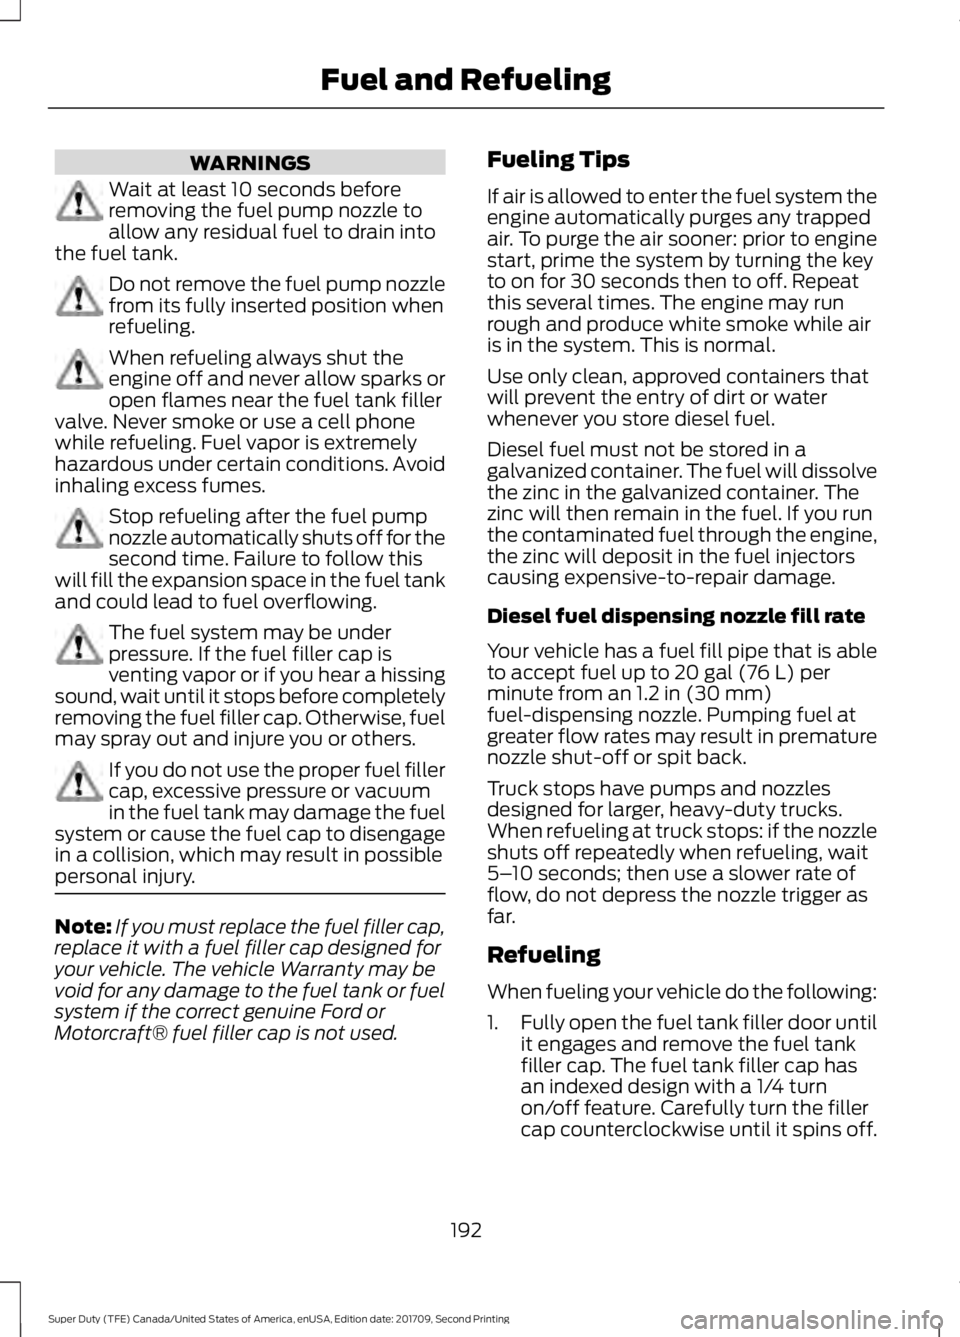
2. Insert the fuel pump nozzle up to the
first notch on the nozzle A. Keep it
resting on the cover of the fuel tank
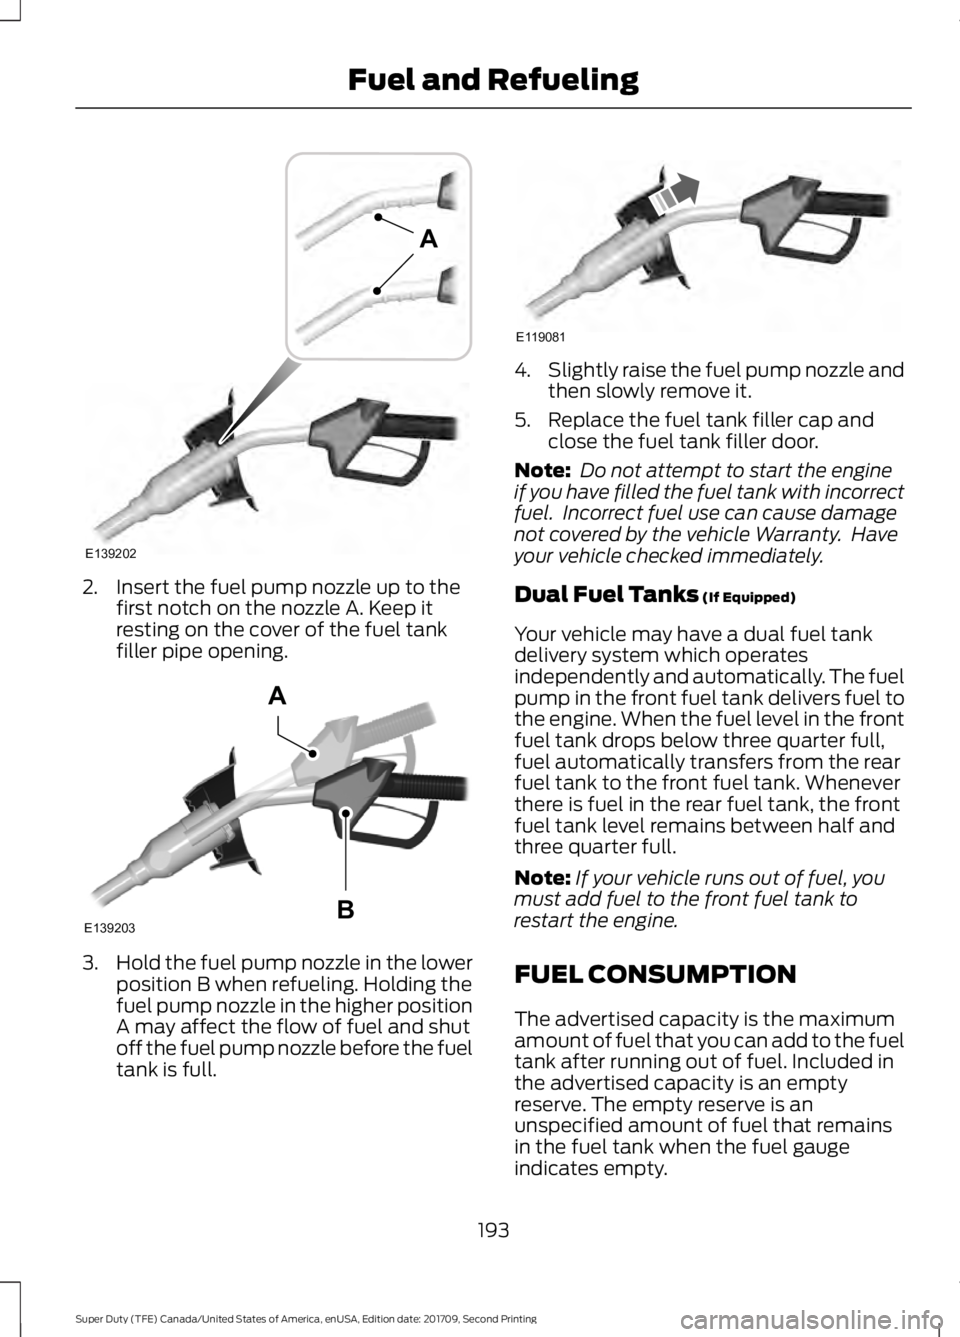
filler pipe opening. 3.
Hold the fuel pump nozzle in the lower
position B when refueling. Holding the
fuel pump nozzle in the higher position
A may affect the flow of fuel and shut
off the fuel pump nozzle before the fuel
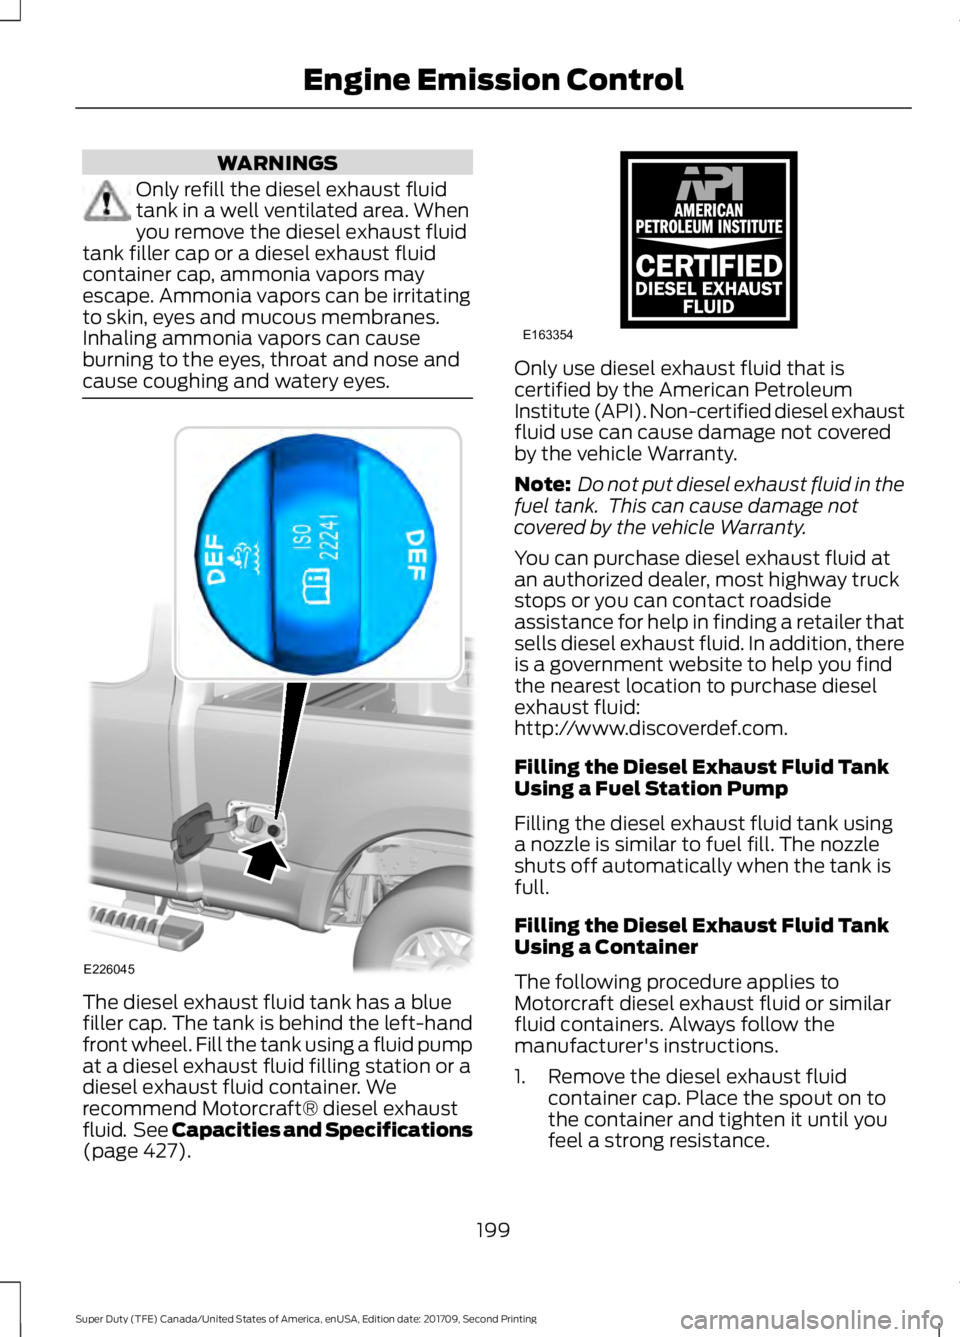
tank is full. 4.
Slightly raise the fuel pump nozzle and
then slowly remove it.
5. Replace the fuel tank filler cap and close the fuel tank filler door.
Note: Do not attempt to start the engine
if you have filled the fuel tank with incorrect
fuel. Incorrect fuel use can cause damage
not covered by the vehicle Warranty. Have
your vehicle checked immediately.
Dual Fuel Tanks (If Equipped)
Your vehicle may have a dual fuel tank
delivery system which operates
independently and automatically. The fuel
pump in the front fuel tank delivers fuel to
the engine. When the fuel level in the front
fuel tank drops below three quarter full,
fuel automatically transfers from the rear
fuel tank to the front fuel tank. Whenever
there is fuel in the rear fuel tank, the front
fuel tank level remains between half and
three quarter full.
Note: If your vehicle runs out of fuel, you
must add fuel to the front fuel tank to
restart the engine.
FUEL CONSUMPTION
The advertised capacity is the maximum
amount of fuel that you can add to the fuel
tank after running out of fuel. Included in
the advertised capacity is an empty
reserve. The empty reserve is an
unspecified amount of fuel that remains
in the fuel tank when the fuel gauge
indicates empty.
193
Super Duty (TFE) Canada/United States of America, enUSA, Edition date: 201709, Second Printing Fuel and RefuelingE139202
A E139203
A
B E119081
Page 202 of 660

WARNINGS
Only refill the diesel exhaust fluid
tank in a well ventilated area. When
you remove the diesel exhaust fluid
tank filler cap or a diesel exhaust fluid
container cap, ammonia vapors may
escape. Ammonia vapors can be irritating
to skin, eyes and mucous membranes.
Inhaling ammonia vapors can cause
burning to the eyes, throat and nose and
cause coughing and watery eyes. The diesel exhaust fluid tank has a blue
filler cap. The tank is behind the left-hand
front wheel. Fill the tank using a fluid pump
at a diesel exhaust fluid filling station or a
diesel exhaust fluid container. We
recommend Motorcraft® diesel exhaust
fluid. See Capacities and Specifications
(page 427). Only use diesel exhaust fluid that is
certified by the American Petroleum
Institute (API). Non-certified diesel exhaust
fluid use can cause damage not covered
by the vehicle Warranty.
Note:
Do not put diesel exhaust fluid in the
fuel tank. This can cause damage not
covered by the vehicle Warranty.
You can purchase diesel exhaust fluid at
an authorized dealer, most highway truck
stops or you can contact roadside
assistance for help in finding a retailer that
sells diesel exhaust fluid. In addition, there
is a government website to help you find
the nearest location to purchase diesel
exhaust fluid:
http://www.discoverdef.com.
Filling the Diesel Exhaust Fluid Tank
Using a Fuel Station Pump
Filling the diesel exhaust fluid tank using
a nozzle is similar to fuel fill. The nozzle
shuts off automatically when the tank is
full.
Filling the Diesel Exhaust Fluid Tank
Using a Container
The following procedure applies to
Motorcraft diesel exhaust fluid or similar
fluid containers. Always follow the
manufacturer's instructions.
1. Remove the diesel exhaust fluid container cap. Place the spout on to
the container and tighten it until you
feel a strong resistance.
199
Super Duty (TFE) Canada/United States of America, enUSA, Edition date: 201709, Second Printing Engine Emission ControlE226045 E163354)E163354
Page 307 of 660

Vehicles Sold in Canada: Getting
Roadside Assistance
To fully assist you should you have a
vehicle concern, Ford Motor Company of
Canada, Limited offers a complimentary
roadside assistance program. This
program is eligible within Canada or the
continental United States.
Canadian customers who require roadside
assistance, call 1-800-665-2006.
Vehicles Sold in Canada: Using
Roadside Assistance
Complete the roadside assistance
identification card and place it in your
wallet for quick reference.
In Canada, this card is found in the
Warranty Guide in the glove compartment
of your vehicle.
Vehicles Sold in Canada: Roadside
Assistance Program Coverage
The service is available 24 hours a day,
seven days a week.
Canadian roadside coverage and benefits
may differ from the U.S. coverage.
If you require more information, please
refer to the coverage section of your
warranty guide, call us in Canada at
1-800-665-2006, or visit our website at
www.ford.ca.
HAZARD FLASHERS
Note:
The hazard flashers operate when
the ignition is in any position, or if the key is
not in the ignition. If used when the vehicle
is not running, the battery loses charge. As
a result, there may be insufficient power to
restart your vehicle. The flasher control is on the
instrument panel. Use your
hazard flashers when your
vehicle is creating a safety hazard for other
motorists.
• Press the flasher control and all front
and rear direction indicators flash.
• Press the button again to switch them
off.
FUEL SHUTOFF WARNING
If your vehicle has been involved in a
crash, have the fuel system checked.
Failure to follow this instruction
could result in fire, personal injury or death. Note:
When you try to restart your vehicle
after a fuel shutoff, the vehicle makes sure
that various systems are safe to restart.
Once the vehicle determines the systems
are safe, then the vehicle allows you to
restart.
Note: In the event that your vehicle does
not restart after your third attempt, contact
a qualified technician.
The fuel pump shutoff stops the flow of
fuel to the engine in the event of a
moderate to severe crash. Not every
impact causes a shutoff.
Should your vehicle shut off after a crash,
you may restart your vehicle.
If your vehicle has a key system:
1. Switch off the ignition.
2. Switch to start position.
3. Switch off the ignition.
4. Switch on the ignition to re-enable the
fuel pump.
5. If the vehicle does not start, repeat steps 1 through 4.
304
Super Duty (TFE) Canada/United States of America, enUSA, Edition date: 201709, Second Printing Roadside Emergencies
Page 323 of 660

Protected Components
Fuse Rating
Fuse or Relay
Number
Horn relay.
—
39
Supplemental air heater bank #2 relay.
—
40
Glow plugs.
25A 2
41
Trailer tow lighting module (if equipped).
40A 2
42
Front blower motor.
40A 2
43
Voltage quality.
50A 3
44
Body control module power.
Active front steering.
60A 3
45
Supplemental air heater bank #2.
50A 3
46
Cooling fan.
50A 3
47
Supplemental air heater bank #3.
Body control module run power 1 bus.
50A 3
48
Inverter.
60A 3
49
Body control module run power 2 bus.
50A 3
50
Body control module B+ feed.
60A 3
51
Anti-lock brake system pump.
60A 3
52
Supplemental air heater bank #1.
50A 3
53
Trailer brake control module.
30A 3
54
Climate controlled seat module.
30A 3
55
Auxiliary lighting module.
40A 3
56
Power running boards.
30A 2
57
Compressed natural gas fuel control
module relay.
30A 2
58
320
Super Duty (TFE) Canada/United States of America, enUSA, Edition date: 201709, Second Printing Fuses
Page 324 of 660

Protected Components
Fuse Rating
Fuse or Relay
Number
Anti-lock brake system valve.
30A 2
59
Not used.
—
60
Driver power seat.
30A 2
61
Auxiliary power point #1 (instrument
panel).
20A 2
62
Starter motor.
30A 2
63
Auxiliary power point #2.
20A 2
64
Trailer tow lighting module (if equipped).
30A 2
65
Auxiliary power point #3 (center console).
20A 2
66
Passenger power seat.
30A 2
67
Auxiliary power point #4 (USB charger, rear
center console).
20A 2
68
4x4 module.
25A 2
69
Auxiliary power point #5 (rear center
console).
20A 2
70
Not used.
—
71
Trailer tow left hand/right hand stop/turn
(if equipped, not present with trailer brake
controller).
30A
2
72
Not used.
—
73
Not used.
—
74
Fuel pump.
30A 2
75
Not used.
—
76
Wiper motor.
30A 2
77
Not used.
—
78
321
Super Duty (TFE) Canada/United States of America, enUSA, Edition date: 201709, Second Printing Fuses