Page 377 of 571

When driving with the full-size dissimilar
spare wheel and tire assembly, do not:
•
Exceed 70 mph (113 km/h).
• Use more than one dissimilar spare
wheel and tire assembly at a time.
• Use snow chains on the end of the
vehicle with the dissimilar spare wheel
and tire assembly.
When driving with the full-size dissimilar
spare wheel and tire assembly, it is
recommended that you do not:
• Exceed
50 mph (80 km/h) in 4WD.
• Engage 4WD unless the vehicle is
stationary.
• Use 4WD on dry pavement.
The usage of a full-size dissimilar spare
wheel and tire assembly can lead to
impairment of the following:
• Handling, stability and braking
performance.
• Comfort and noise. •
Ground clearance and parking at curbs.
• Winter weather driving capability.
• Wet weather driving capability.
• Four-wheel driving capability.
When driving with the full-size dissimilar
spare wheel and tire assembly additional
caution should be given to:
• Towing a trailer.
• Driving vehicles equipped with a
camper body.
• Driving vehicles with a load on the
cargo rack.
Drive cautiously when using a full-size
dissimilar spare wheel and tire assembly
and seek service as soon as possible.
Location of the Spare Tire and
Tools
The spare tire is located under the vehicle,
just forward of the rear bumper. The jack,
swivel wrench and lug wrench are in the
following locations: Location
Item
Under the vehicle, just forward of the rearbumper
Spare tire
Under the access panel located in the floorcompartment behind the rear seat
Jack and tool kit bag
Tire Change Procedure WARNING:
Only use replacement
tires and wheels that are the same size,
load index, speed rating and type (such
as P-metric versus LT-metric or
all-season versus all-terrain) as those
originally provided by Ford. The
recommended tire and wheel size may
be found on either the Safety
Compliance Certification Label (affixed to either the door hinge pillar, door-latch
post, or the door edge that meets the
door-latch post, next to the driver's
seating position), or the Tire Label which
is located on the B-Pillar or edge of the
driver's door. If this information is not
found on these labels, then you should
contact your authorized dealer as soon
374
Expedition (TB8) Canada/United States of America, enUSA, Edition date: 201708, Third-Printing- Wheels and Tires
Page 379 of 571

2. Remove the wing nut by turning it
counterclockwise.
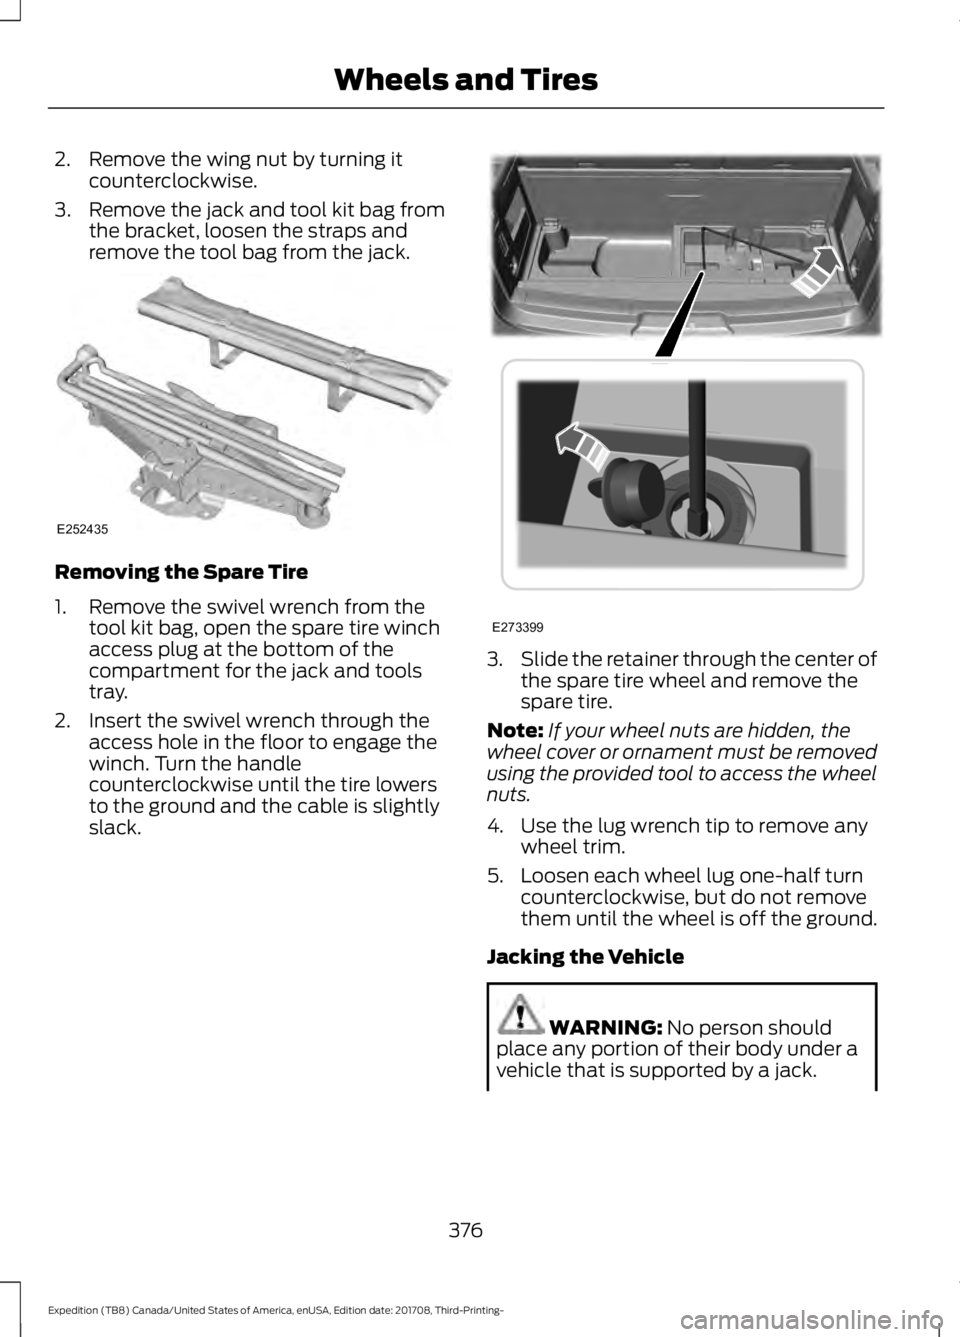
3. Remove the jack and tool kit bag from the bracket, loosen the straps and
remove the tool bag from the jack. Removing the Spare Tire
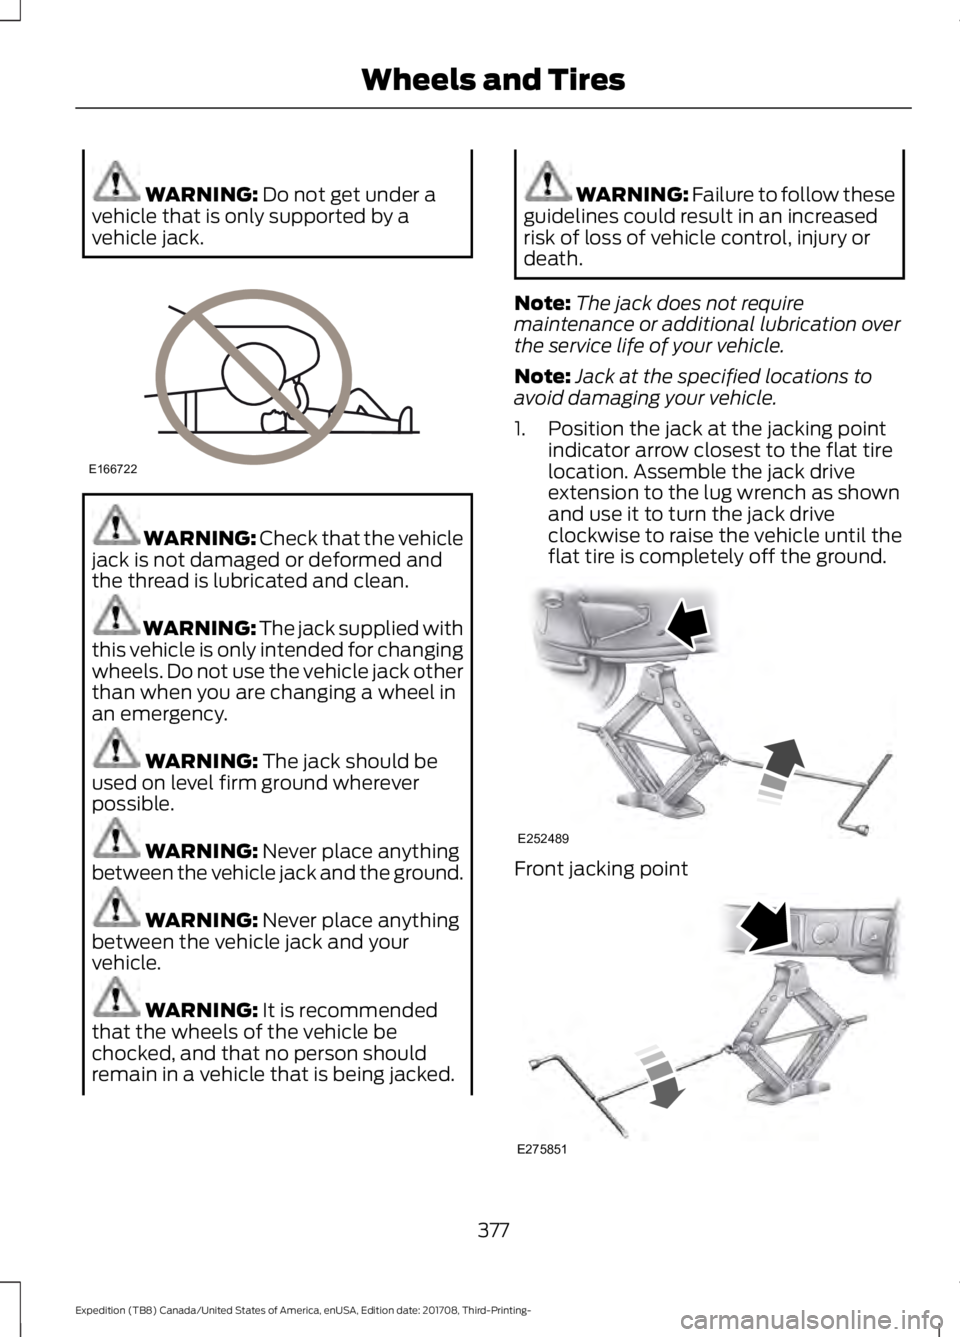
1. Remove the swivel wrench from the
tool kit bag, open the spare tire winch
access plug at the bottom of the
compartment for the jack and tools
tray.
2. Insert the swivel wrench through the access hole in the floor to engage the
winch. Turn the handle
counterclockwise until the tire lowers
to the ground and the cable is slightly
slack. 3.
Slide the retainer through the center of
the spare tire wheel and remove the
spare tire.
Note: If your wheel nuts are hidden, the
wheel cover or ornament must be removed
using the provided tool to access the wheel
nuts.
4. Use the lug wrench tip to remove any wheel trim.
5. Loosen each wheel lug one-half turn counterclockwise, but do not remove
them until the wheel is off the ground.
Jacking the Vehicle WARNING: No person should
place any portion of their body under a
vehicle that is supported by a jack.
376
Expedition (TB8) Canada/United States of America, enUSA, Edition date: 201708, Third-Printing- Wheels and TiresE252435 E273399
Page 380 of 571

WARNING: Do not get under a
vehicle that is only supported by a
vehicle jack. WARNING:
Check that the vehicle
jack is not damaged or deformed and
the thread is lubricated and clean. WARNING: The jack supplied with
this vehicle is only intended for changing
wheels. Do not use the vehicle jack other
than when you are changing a wheel in
an emergency. WARNING:
The jack should be
used on level firm ground wherever
possible. WARNING:
Never place anything
between the vehicle jack and the ground. WARNING:
Never place anything
between the vehicle jack and your
vehicle. WARNING:
It is recommended
that the wheels of the vehicle be
chocked, and that no person should
remain in a vehicle that is being jacked. WARNING:
Failure to follow these
guidelines could result in an increased
risk of loss of vehicle control, injury or
death.
Note: The jack does not require
maintenance or additional lubrication over
the service life of your vehicle.
Note: Jack at the specified locations to
avoid damaging your vehicle.
1. Position the jack at the jacking point indicator arrow closest to the flat tire
location. Assemble the jack drive
extension to the lug wrench as shown
and use it to turn the jack drive
clockwise to raise the vehicle until the
flat tire is completely off the ground. Front jacking point
377
Expedition (TB8) Canada/United States of America, enUSA, Edition date: 201708, Third-Printing- Wheels and TiresE166722 E252489 E275851
Page 381 of 571

Rear jacking point
1. Remove the lug nuts with the lug
wrench. Replace the flat tire with the
spare tire, making sure the valve stem
is facing outward.
2. Reinstall the lug nuts until the wheel is
snug against the hub. Do not fully
tighten the lug nuts until the wheel has
been lowered.
3. Completely lower the vehicle by turning
the jack drive counterclockwise.
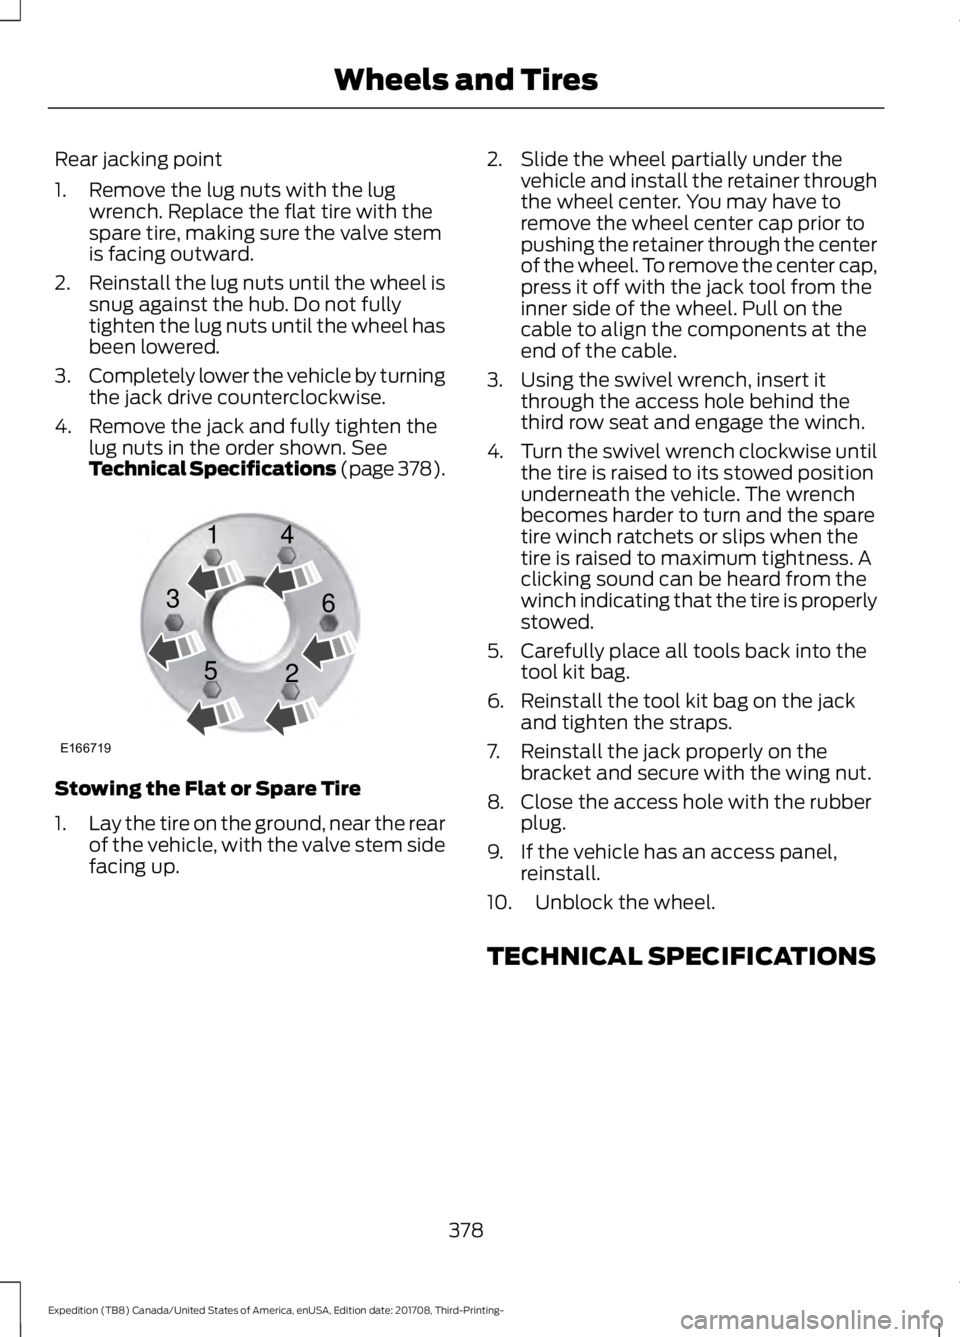
4. Remove the jack and fully tighten the lug nuts in the order shown. See
Technical Specifications (page 378). Stowing the Flat or Spare Tire
1.
Lay the tire on the ground, near the rear
of the vehicle, with the valve stem side
facing up. 2. Slide the wheel partially under the
vehicle and install the retainer through
the wheel center. You may have to
remove the wheel center cap prior to
pushing the retainer through the center
of the wheel. To remove the center cap,
press it off with the jack tool from the
inner side of the wheel. Pull on the
cable to align the components at the
end of the cable.
3. Using the swivel wrench, insert it through the access hole behind the
third row seat and engage the winch.
4. Turn the swivel wrench clockwise until
the tire is raised to its stowed position
underneath the vehicle. The wrench
becomes harder to turn and the spare
tire winch ratchets or slips when the
tire is raised to maximum tightness. A
clicking sound can be heard from the
winch indicating that the tire is properly
stowed.
5. Carefully place all tools back into the tool kit bag.
6. Reinstall the tool kit bag on the jack and tighten the straps.
7. Reinstall the jack properly on the bracket and secure with the wing nut.
8. Close the access hole with the rubber plug.
9. If the vehicle has an access panel, reinstall.
10. Unblock the wheel.
TECHNICAL SPECIFICATIONS
378
Expedition (TB8) Canada/United States of America, enUSA, Edition date: 201708, Third-Printing- Wheels and TiresE166719
1
3
5 4
6
2