2018 FORD EXPEDITION tow bar
[x] Cancel search: tow barPage 287 of 571
sticker is placed correctly based on
steps 3 and the measurements were
made correctly according to Step 4.
The troubleshooting guide for trailer
measurements can also be reviewed
for help in making measurements.
• To change sticker location or change
trailer measurements, go into the
Towing menu, select trailer options,
select change trailer setting and then
select the change sticker option.
• If the sticker location needs to be
changed, the previous sticker must be
removed and a new sticker needs to
be placed on the trailer. ONLY ONE
STICKER SHOULD BE PLACED ON
THE TRAILER FOR PROPER
SYSTEM FUNCTION.
• Disregard the prompt to remove this
sticker and continue to the next step if
you only plan to update the
measurements for the current sticker
location.
System consistently shows Stop now take
control of steering warning:
• The system displays this warning when
it can no longer steer the vehicle and
you must take over steering. There are
four reasons why this warning displays
and additional information regarding
the reason for the warning is available
on the center display.
• The steering wheel is touched while
the system is controlling it. Avoid
touching the wheel during system
operation.
• The maximum speed for feature
operation is exceeded. System
performance is optimized at slower
speeds. Backup slowly. •
The sticker was lost by the camera
system. Once your vehicle is stopped
additional warnings indicate the sticker
was lost. Refer to sticker lost trouble
shooting tips.
• An internal condition for system
operation was not met which requires
your vehicle return to manual control
of the steering.
Note: The system is designed to be used
with the same trailer connection every time
the trailer is chosen from the selection
menu. Using a different drawbar or a
different pin hole (on drawbars with more
than one) when connecting the drawbar to
your vehicle affects the trailer
measurements. Take the measurements
again and update if required.
TRAILER SWAY CONTROL WARNING: Turning off trailer sway
control increases the risk of loss of
vehicle control, serious injury or death.
Ford does not recommend disabling this
feature except in situations where speed
reduction may be detrimental (such as
hill climbing), the driver has significant
trailer towing experience, and can control
trailer sway and maintain safe operation.
Note: This feature does not prevent trailer
sway, but reduces it once it begins.
Note: This feature cannot stop all trailers
from swaying.
Note: In some cases, if vehicle speed is too
high, the system may activate multiple
times, gradually reducing vehicle speed.
284
Expedition (TB8) Canada/United States of America, enUSA, Edition date: 201708, Third-Printing- Towing
Page 288 of 571
This feature applies your vehicle brakes at
individual wheels and, if necessary, reduces
engine power. If the trailer begins to sway,
the stability control light flashes and the
message TRAILER SWAY REDUCE
SPEED appears in the information display.
The first thing to do is slow your vehicle
down, then pull safely to the side of the
road and check for proper tongue load and
trailer load distribution. See Towing (page
274
).
RECOMMENDED TOWING
WEIGHTS
Note: Do not exceed the trailer
weight for your vehicle
configuration listed in the chart
below.
Note: Make sure to take into
consideration trailer frontal area.
Do not exceed 36.5 feet² (3.39
meters²) if your vehicle is equipped
with the standard towing package,
or 60 feet² (5.57 meters²) if your
vehicle is equipped with the
optional heavy duty package.
Note: Exceeding this limitation
may significantly reduce the
performance of your towing
vehicle. Selecting a trailer with a
low aerodynamic drag and rounded
front design helps optimize
performance and fuel economy.
Note: For high altitude operation,
reduce the gross combined weight
by 2% per
1,000 ft (300 m)
starting at the 1,000 ft (300 m)
elevation point. Note:
Certain states require
electric trailer brakes for trailers
over a specified weight. Be sure to
check state regulations for this
specified weight. The maximum
trailer weights listed may be limited
to this specified weight, as the
vehicle ’s electrical system may not
include the wiring connector
needed to activate electric trailer
brakes.
Your vehicle may tow a trailer
provided the maximum trailer
weight is less than or equal to the
maximum trailer weight listed for
your vehicle configuration on the
following chart.
To calculate the maximum loaded
trailer weight for your vehicle:
1. Start with the gross combined weight rating for your vehicle
model and axle ratio. See the
following chart.
2. Subtract all of the following
that apply to your vehicle:
•Vehicle curb weight.
• Hitch hardware weight, such
as a draw bar, ball, locks or
weight distributing.
• Driver weight.
• Passenger weight.
• Payload, cargo and luggage
weight.
• Aftermarket equipment
weight.
3. This equals the maximum
loaded trailer weight for this
combination.
285
Expedition (TB8) Canada/United States of America, enUSA, Edition date: 201708, Third-Printing- Towing
Page 291 of 571
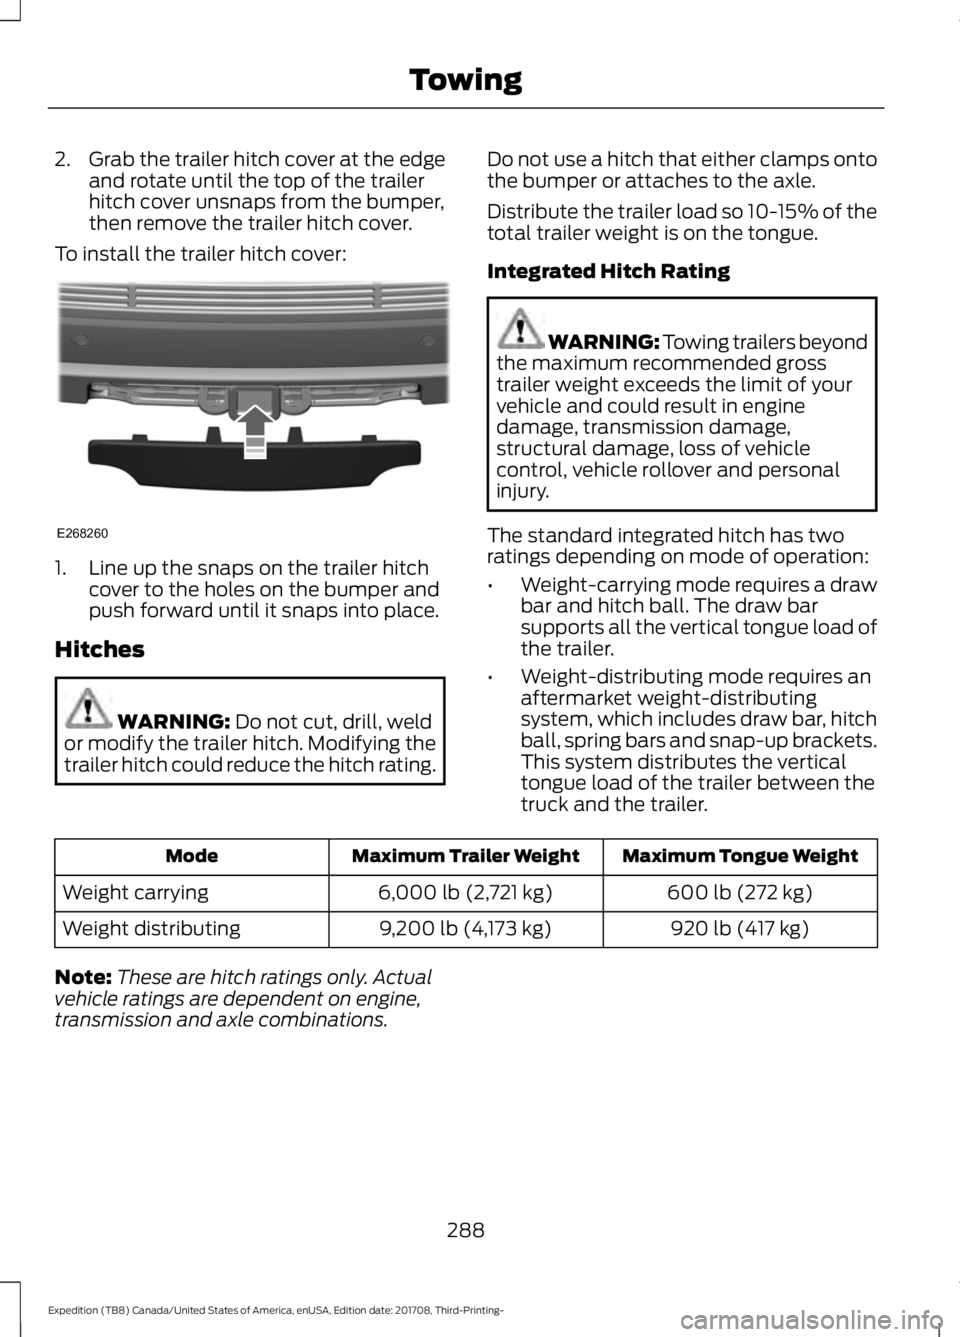
2.
Grab the trailer hitch cover at the edge
and rotate until the top of the trailer
hitch cover unsnaps from the bumper,
then remove the trailer hitch cover.
To install the trailer hitch cover: 1. Line up the snaps on the trailer hitch
cover to the holes on the bumper and
push forward until it snaps into place.
Hitches WARNING: Do not cut, drill, weld
or modify the trailer hitch. Modifying the
trailer hitch could reduce the hitch rating. Do not use a hitch that either clamps onto
the bumper or attaches to the axle.
Distribute the trailer load so 10-15% of the
total trailer weight is on the tongue.
Integrated Hitch Rating WARNING:
Towing trailers beyond
the maximum recommended gross
trailer weight exceeds the limit of your
vehicle and could result in engine
damage, transmission damage,
structural damage, loss of vehicle
control, vehicle rollover and personal
injury.
The standard integrated hitch has two
ratings depending on mode of operation:
• Weight-carrying mode requires a draw
bar and hitch ball. The draw bar
supports all the vertical tongue load of
the trailer.
• Weight-distributing mode requires an
aftermarket weight-distributing
system, which includes draw bar, hitch
ball, spring bars and snap-up brackets.
This system distributes the vertical
tongue load of the trailer between the
truck and the trailer. Maximum Tongue Weight
Maximum Trailer Weight
Mode
600 lb (272 kg)
6,000 lb (2,721 kg)
Weight carrying
920 lb (417 kg)
9,200 lb (4,173 kg)
Weight distributing
Note: These are hitch ratings only. Actual
vehicle ratings are dependent on engine,
transmission and axle combinations.
288
Expedition (TB8) Canada/United States of America, enUSA, Edition date: 201708, Third-Printing- TowingE268260
Page 292 of 571
Weight-distributing Hitch
WARNING: Do not adjust the
spring bars so that your vehicle's rear
bumper is higher than before attaching
the trailer. Doing so will defeat the
function of the weight-distributing hitch,
which may cause unpredictable
handling, and could result in serious
personal injury.
When hooking-up a trailer using a
weight-distributing hitch, always use the
following procedure:
1. Park the loaded vehicle, without the trailer, on a level surface.
2. Measure the height to the top of your vehicle's front wheel opening on the
fender. This is H1.
3. Attach the loaded trailer to your vehicle
without the weight-distributing bars
connected.
4. Measure the height to the top of your vehicle's front wheel opening on the
fender a second time. This is H2.
5. Install and adjust the tension in the weight-distributing bars so that the
height of your vehicle's front wheel
opening on the fender is approximately
half the way down from H2, toward H1.
6. Check that the trailer is level or slightly
nose down toward your vehicle. If not,
adjust the ball height accordingly and
repeat steps 2-6.
When the trailer is level or slightly nose
down toward the vehicle:
• Lock the bar tension adjuster in place.
• Check that the trailer tongue securely
attaches and locks onto the hitch.
• Install safety chains, lighting, and trailer
brake controls as required by law or the
trailer manufacturer. Safety Chains
Note:
Do not attach safety chains to the
bumper. Always connect the safety chains
to the frame or hook retainers of your trailer
hitch.
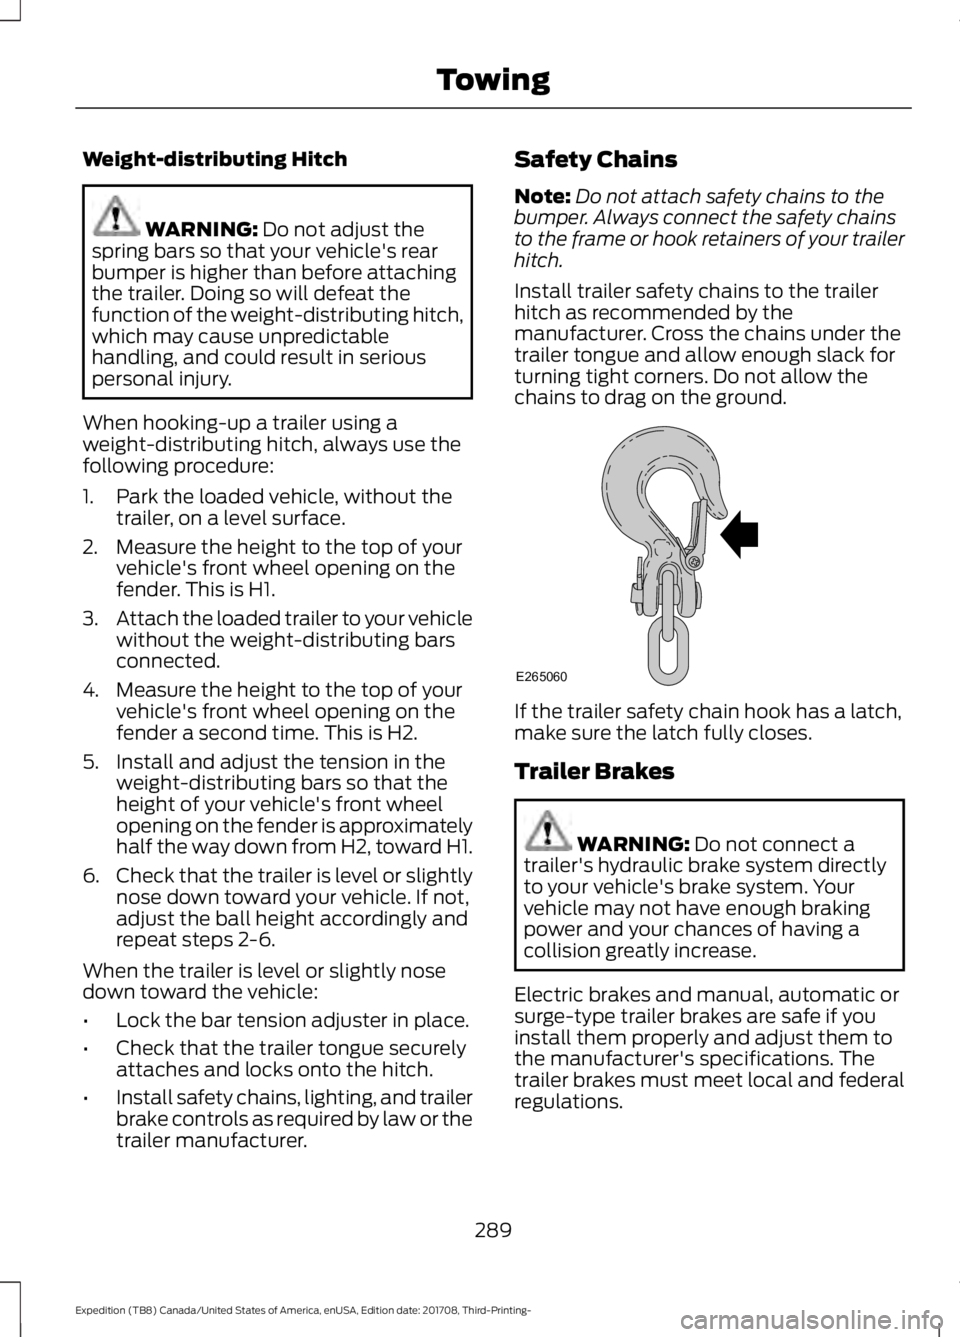
Install trailer safety chains to the trailer
hitch as recommended by the
manufacturer. Cross the chains under the
trailer tongue and allow enough slack for
turning tight corners. Do not allow the
chains to drag on the ground. If the trailer safety chain hook has a latch,
make sure the latch fully closes.
Trailer Brakes
WARNING:
Do not connect a
trailer's hydraulic brake system directly
to your vehicle's brake system. Your
vehicle may not have enough braking
power and your chances of having a
collision greatly increase.
Electric brakes and manual, automatic or
surge-type trailer brakes are safe if you
install them properly and adjust them to
the manufacturer's specifications. The
trailer brakes must meet local and federal
regulations.
289
Expedition (TB8) Canada/United States of America, enUSA, Edition date: 201708, Third-Printing- TowingE265060
Page 293 of 571
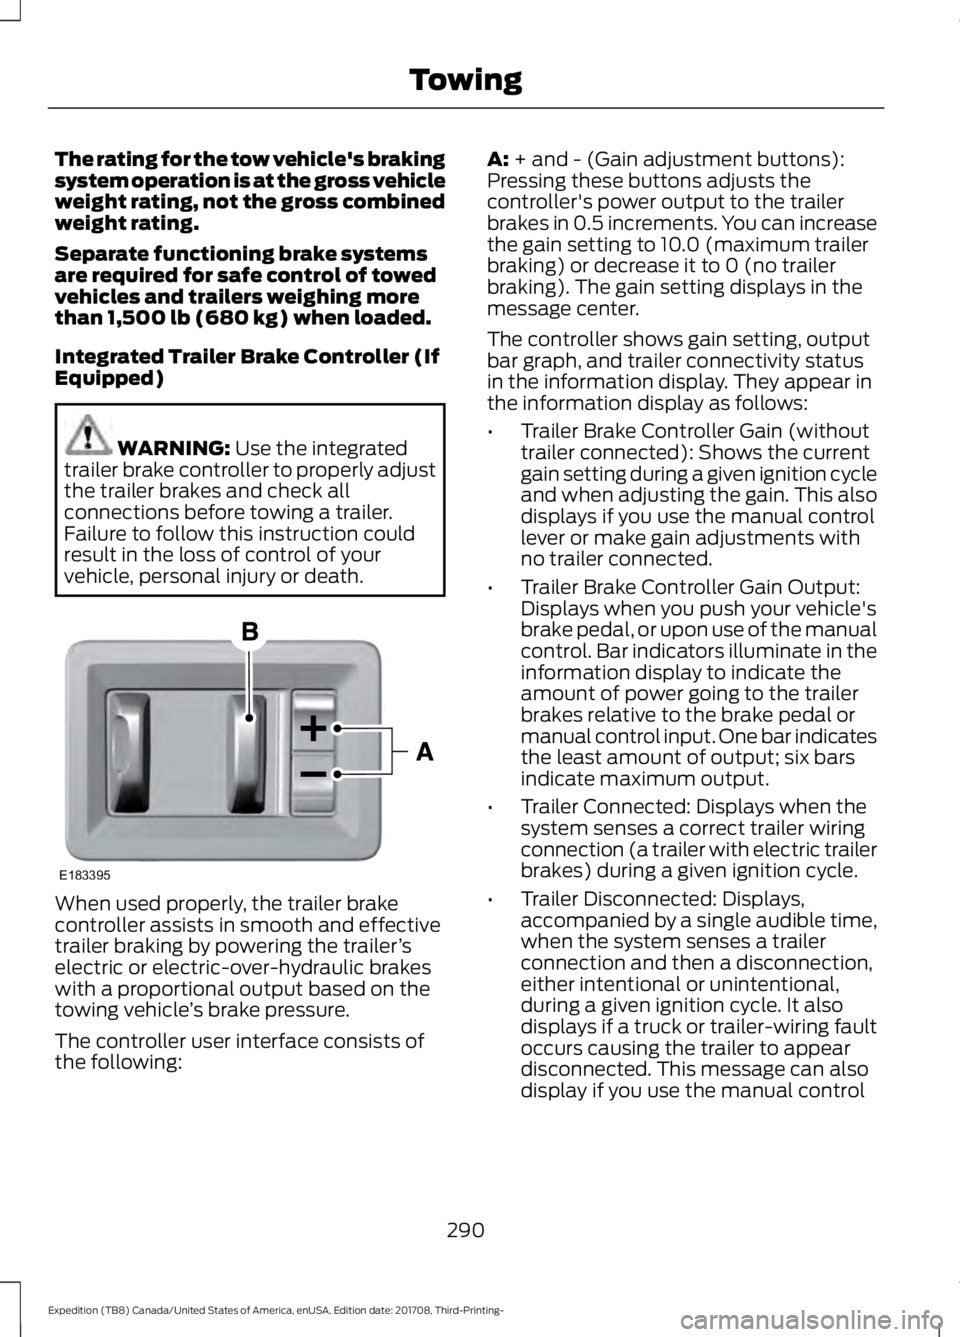
The rating for the tow vehicle's braking
system operation is at the gross vehicle
weight rating, not the gross combined
weight rating.
Separate functioning brake systems
are required for safe control of towed
vehicles and trailers weighing more
than 1,500 lb (680 kg) when loaded.
Integrated Trailer Brake Controller (If
Equipped)
WARNING: Use the integrated
trailer brake controller to properly adjust
the trailer brakes and check all
connections before towing a trailer.
Failure to follow this instruction could
result in the loss of control of your
vehicle, personal injury or death. When used properly, the trailer brake
controller assists in smooth and effective
trailer braking by powering the trailer
’s
electric or electric-over-hydraulic brakes
with a proportional output based on the
towing vehicle ’s brake pressure.
The controller user interface consists of
the following: A:
+ and - (Gain adjustment buttons):
Pressing these buttons adjusts the
controller's power output to the trailer
brakes in 0.5 increments. You can increase
the gain setting to 10.0 (maximum trailer
braking) or decrease it to 0 (no trailer
braking). The gain setting displays in the
message center.
The controller shows gain setting, output
bar graph, and trailer connectivity status
in the information display. They appear in
the information display as follows:
• Trailer Brake Controller Gain (without
trailer connected): Shows the current
gain setting during a given ignition cycle
and when adjusting the gain. This also
displays if you use the manual control
lever or make gain adjustments with
no trailer connected.
• Trailer Brake Controller Gain Output:
Displays when you push your vehicle's
brake pedal, or upon use of the manual
control. Bar indicators illuminate in the
information display to indicate the
amount of power going to the trailer
brakes relative to the brake pedal or
manual control input. One bar indicates
the least amount of output; six bars
indicate maximum output.
• Trailer Connected: Displays when the
system senses a correct trailer wiring
connection (a trailer with electric trailer
brakes) during a given ignition cycle.
• Trailer Disconnected: Displays,
accompanied by a single audible time,
when the system senses a trailer
connection and then a disconnection,
either intentional or unintentional,
during a given ignition cycle. It also
displays if a truck or trailer-wiring fault
occurs causing the trailer to appear
disconnected. This message can also
display if you use the manual control
290
Expedition (TB8) Canada/United States of America, enUSA, Edition date: 201708, Third-Printing- TowingE183395
Page 567 of 571

Opening and Closing the Liftgate...................
74
Opening the Liftgate Window......................... 75
Setting the Liftgate Open Height................... 75
Stopping the Liftgate Movement................... 75
Using the Hands-Free Liftgate........................ 76
Power Running Boards................................80
Power Seats....................................................153 Adjusting the Lumbar Support...................... 154
Adjusting the Multi-Contour Front Seats With Active Motion ...................................... 154
Power Windows.............................................96
Accessory Delay................................................... 96
Bounce-Back......................................................... 96
One-Touch Down................................................ 96
One-Touch Up...................................................... 96
Window Lock......................................................... 96
Pre-Collision Assist
.....................................257
Adjusting the Pre-Collision Assist
Settings............................................................ 259
Blocked Sensors................................................ 260
Distance Indication and Alert....................... 258
Using the Pre-Collision Assist System.............................................................. 258
Protecting the Environment........................14
Puncture See: Changing a Road Wheel........................ 373
R
Rear Axle
..........................................................210
Rear Parking Aid...........................................222 Obstacle Distance Indicator.......................... 222
Rear Passenger Climate Controls..........145 Automatic Climate Control............................. 147
Manual Climate Control.................................. 146
Rear Seats
........................................................157
Adjusting the Second-Row Center 20%
Seat...................................................................... 161
Adjusting the Second Row Outermost 40% Seat for Easy Entry........................................ 158
Folding the Second Row 40% Seat ...........157
Folding the Second Row Center 20% Seat ........................................................................\
...... 160
Power Easy Entry................................................ 159
Power Folding Rear Seats................................ 161
Reclining the Second Row Outermost 40% Seat Backrest................................................. 160Rear Under Floor Storage.........................264
Advanced System: Forward Divider, Cargo
Shelf and Rear Barrier (Bulkhead
Position)........................................................... 265
Cargo Management System......................... 264
Rear View Camera........................................231 Camera Guidelines............................................ 233
Manual Zoom...................................................... 234
Obstacle Distance Indicator.......................... 233
Rear Camera Delay........................................... 234
Using the Rear View Camera System........232
Rear View Camera See: Rear View Camera.................................... 231
Rear Window Wiper and Washers..........88 Rear Window Washer........................................ 88
Rear Window Wiper Blade............................... 88
Recommended Towing Weights
...........285
Reduced Engine Performance................297
Refueling..........................................................187 Refueling System Overview............................ 187
Refueling System Warning............................. 189
Refueling Your Vehicle...................................... 187
Remote Control..............................................53 Car Finder................................................................ 58
Integrated Keyhead Transmitter.....................53
Intelligent Access Key......................................... 54
Remote Start......................................................... 58
Replacing the Battery......................................... 55
Sounding the Panic Alarm................................ 58
Using the Key Blade............................................ 55
Remote Start.................................................148 Automatic Settings............................................ 148
Removing a Headlamp..............................339
Repairing Minor Paint Damage..............349
Replacement Parts Recommendation........................................12
Collision Repairs.................................................... 12
Scheduled Maintenance and Mechanical Repairs.................................................................. 12
Warranty on Replacement Parts..................... 12
Replacing a Lost Key or Remote Control
............................................................60
Reporting Safety Defects (Canada Only)...............................................................312
Reporting Safety Defects (U.S. Only)...............................................................312
564
Expedition (TB8) Canada/United States of America, enUSA, Edition date: 201708, Third-Printing- Index