2018 FORD EXPEDITION instrument panel
[x] Cancel search: instrument panelPage 92 of 571

GENERAL INFORMATION
Condensation in the Exterior Front
Lamps and Rear Lamps
Exterior front lamps and rear lamps have
vents to accommodate normal changes
in air pressure.
Condensation can be a natural by-product
of this design. When moist air enters the
lamp assembly through the vents, there is
a possibility that condensation can occur
when the temperature is cold. When
normal condensation occurs, a fine mist
can form on the interior of the lens. The
fine mist eventually clears and exits
through the vents during normal operation.
Clearing time may take as long as 48 hours
under dry weather conditions.
Examples of acceptable condensation are:
•
The presence of a fine mist (no streaks,
drip marks or large droplets).
• A fine mist covers less than 50% of the
lens.
Examples of unacceptable condensation
are:
• A water puddle inside the lamp.
• Streaks, drip marks or large droplets
present on the interior of the lens.
If you see any unacceptable condensation,
have your vehicle checked by an authorized
dealer. LIGHTING CONTROL Lamps off.
A
Parking lamps, instrument panel
lamps, license plate lamps and
rear lamps.
B
Headlamps.
C
Headlamp High Beam Push the lever away from you to
switch the high beam on.
Push the lever forward again or pull the
lever toward you to switch the high beams
off.
89
Expedition (TB8) Canada/United States of America, enUSA, Edition date: 201708, Third-Printing- LightingE142449 E167827
Page 142 of 571
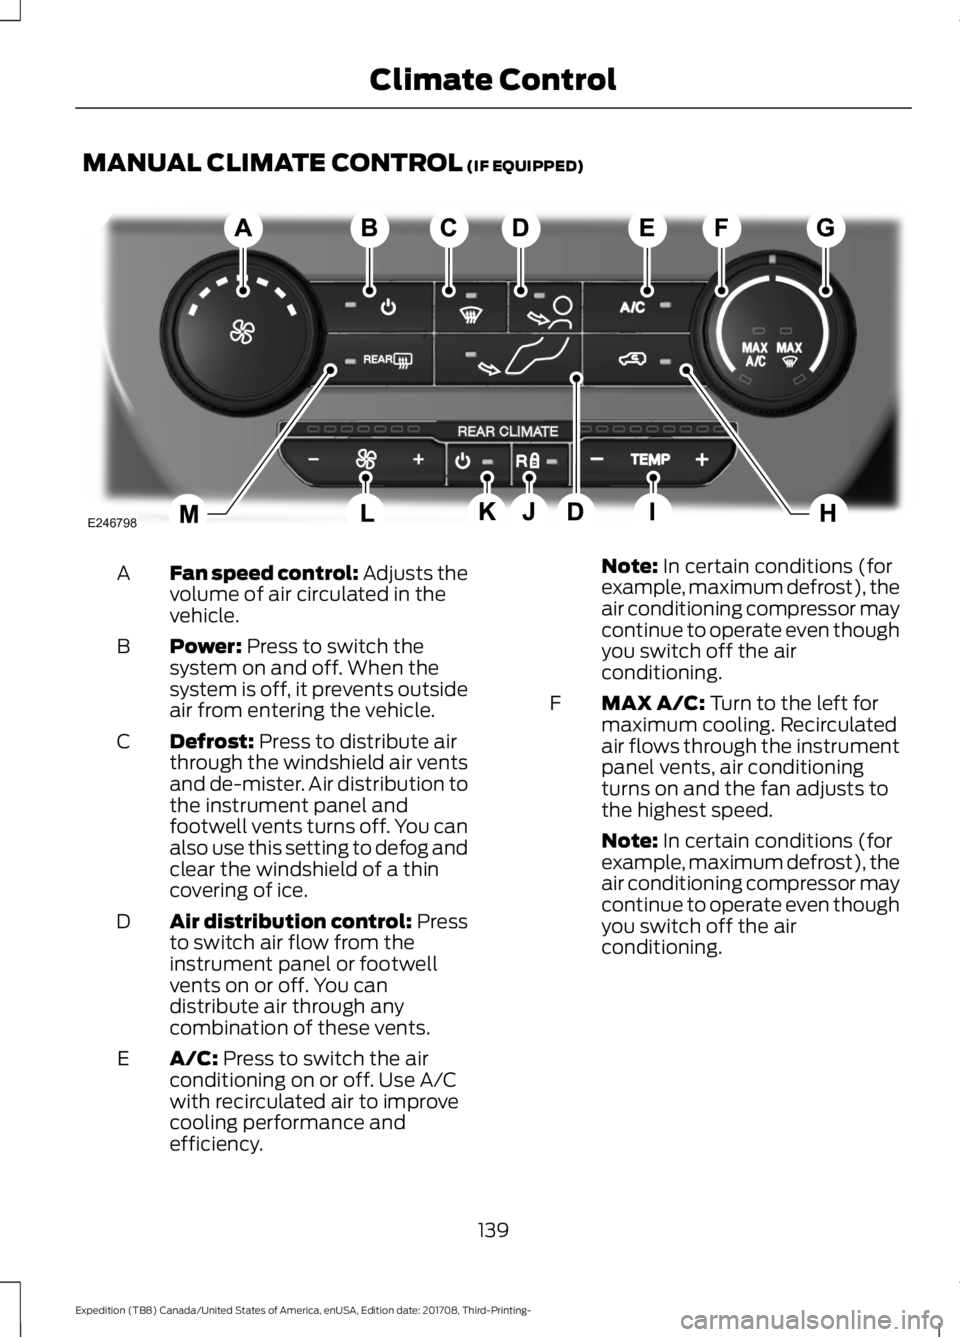
MANUAL CLIMATE CONTROL (IF EQUIPPED)
Fan speed control: Adjusts the
volume of air circulated in the
vehicle.
A
Power:
Press to switch the
system on and off. When the
system is off, it prevents outside
air from entering the vehicle.
B
Defrost:
Press to distribute air
through the windshield air vents
and de-mister. Air distribution to
the instrument panel and
footwell vents turns off. You can
also use this setting to defog and
clear the windshield of a thin
covering of ice.
C
Air distribution control: Press
to switch air flow from the
instrument panel or footwell
vents on or off. You can
distribute air through any
combination of these vents.
D
A/C:
Press to switch the air
conditioning on or off. Use A/C
with recirculated air to improve
cooling performance and
efficiency.
E Note:
In certain conditions (for
example, maximum defrost), the
air conditioning compressor may
continue to operate even though
you switch off the air
conditioning.
MAX A/C:
Turn to the left for
maximum cooling. Recirculated
air flows through the instrument
panel vents, air conditioning
turns on and the fan adjusts to
the highest speed.
F
Note:
In certain conditions (for
example, maximum defrost), the
air conditioning compressor may
continue to operate even though
you switch off the air
conditioning.
139
Expedition (TB8) Canada/United States of America, enUSA, Edition date: 201708, Third-Printing- Climate ControlE246798
Page 144 of 571
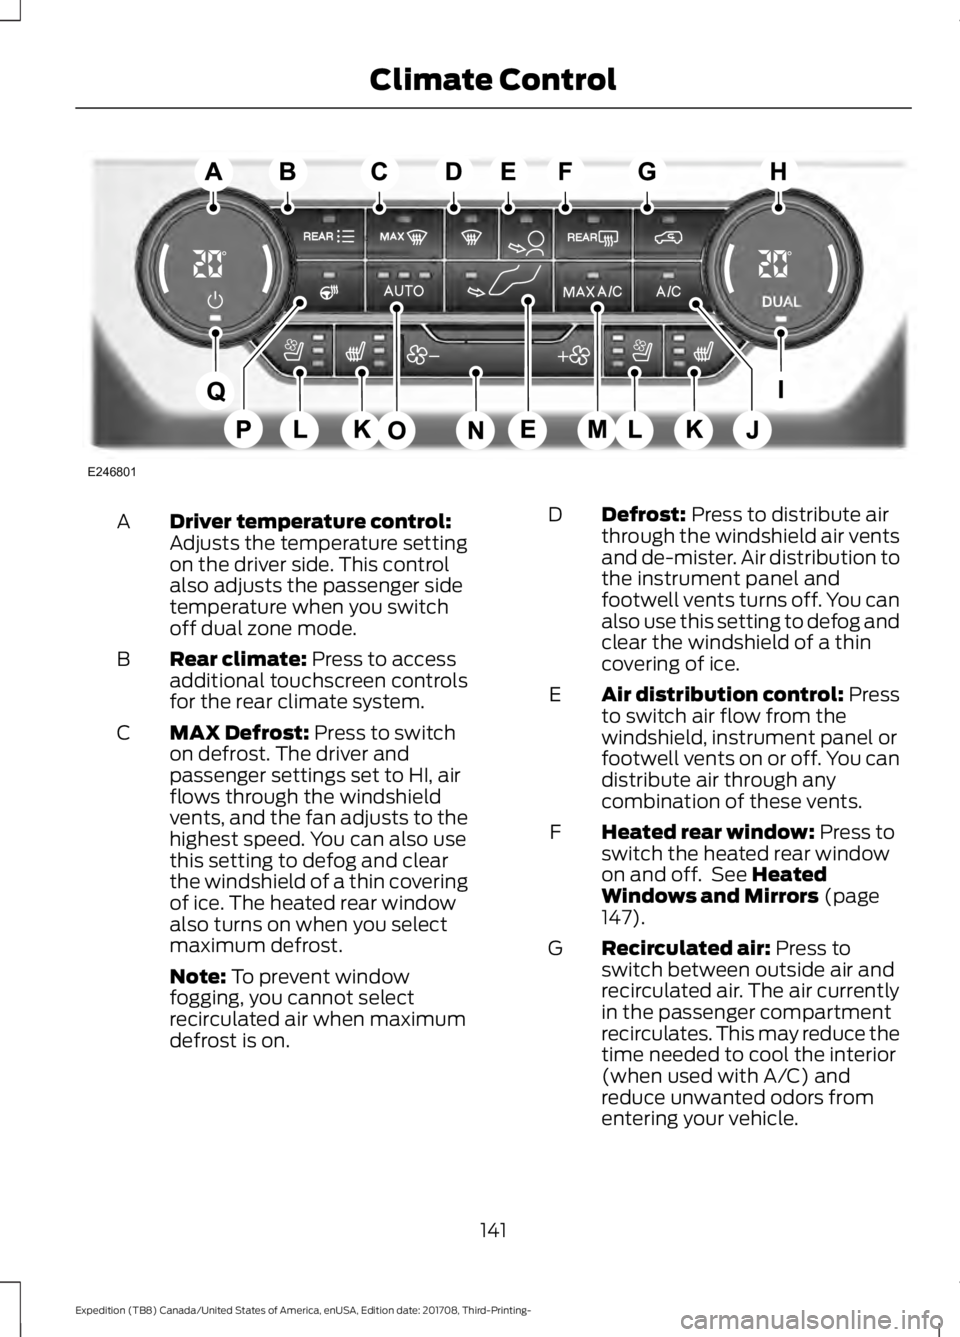
Driver temperature control:
Adjusts the temperature setting
on the driver side. This control
also adjusts the passenger side
temperature when you switch
off dual zone mode.
A
Rear climate: Press to access
additional touchscreen controls
for the rear climate system.
B
MAX Defrost:
Press to switch
on defrost. The driver and
passenger settings set to HI, air
flows through the windshield
vents, and the fan adjusts to the
highest speed. You can also use
this setting to defog and clear
the windshield of a thin covering
of ice. The heated rear window
also turns on when you select
maximum defrost.
C
Note:
To prevent window
fogging, you cannot select
recirculated air when maximum
defrost is on. Defrost:
Press to distribute air
through the windshield air vents
and de-mister. Air distribution to
the instrument panel and
footwell vents turns off. You can
also use this setting to defog and
clear the windshield of a thin
covering of ice.
D
Air distribution control: Press
to switch air flow from the
windshield, instrument panel or
footwell vents on or off. You can
distribute air through any
combination of these vents.
E
Heated rear window:
Press to
switch the heated rear window
on and off. See
Heated
Windows and Mirrors (page
147).
F
Recirculated air:
Press to
switch between outside air and
recirculated air. The air currently
in the passenger compartment
recirculates. This may reduce the
time needed to cool the interior
(when used with A/C) and
reduce unwanted odors from
entering your vehicle.
G
141
Expedition (TB8) Canada/United States of America, enUSA, Edition date: 201708, Third-Printing- Climate ControlE246801
Page 145 of 571
Note: Recirculated air may turn
off (or prevent you from
switching on) in all air flow
modes except MAX A/C to
reduce the risk of fogging.
Recirculation may also turn on
and off in various air distribution
control combinations during hot
weather in order to improve
cooling efficiency.
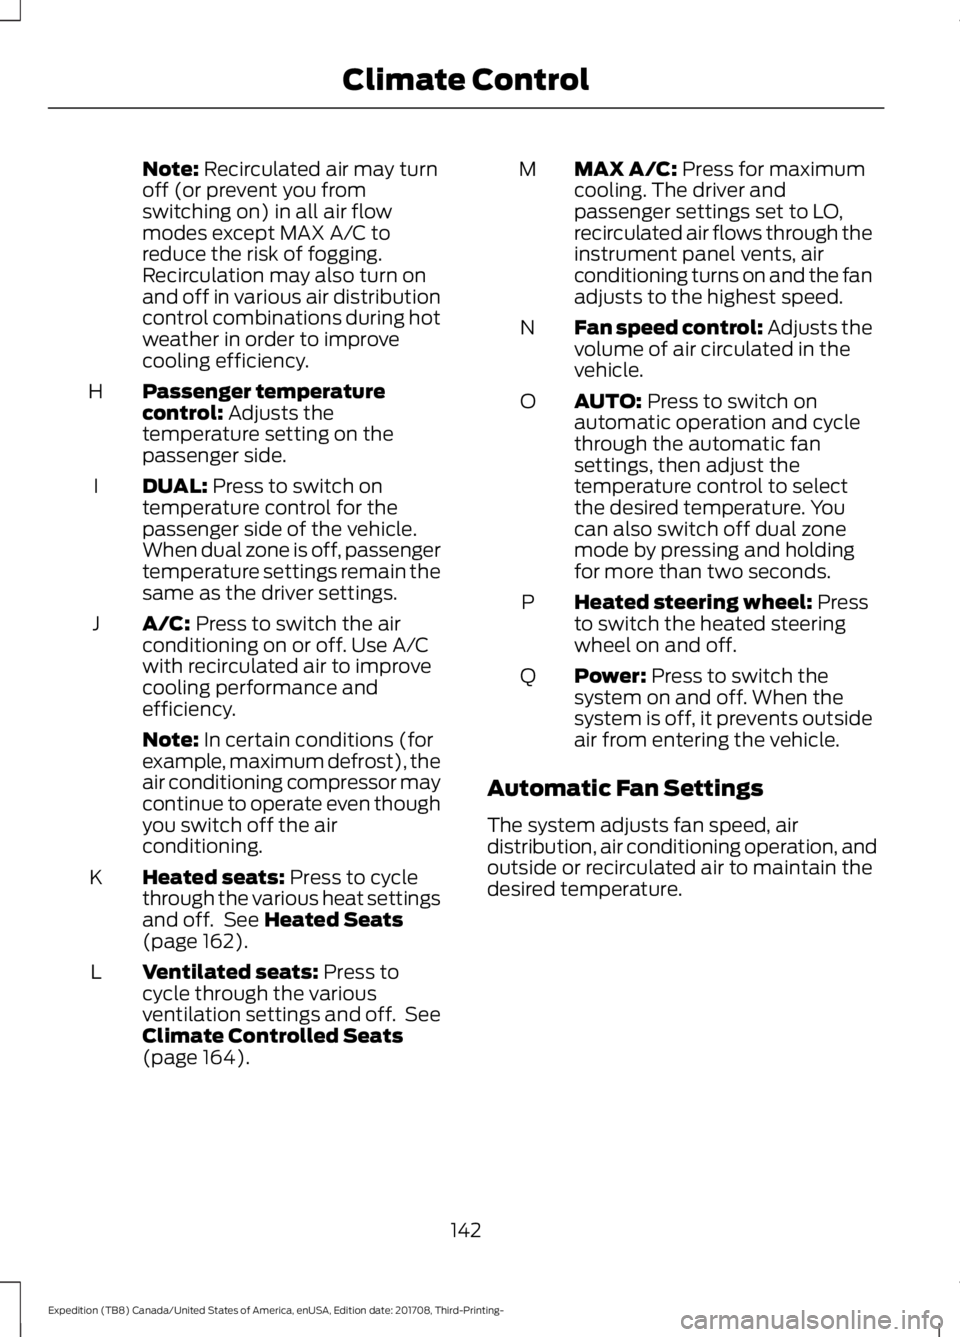
Passenger temperature
control:
Adjusts the
temperature setting on the
passenger side.
H
DUAL:
Press to switch on
temperature control for the
passenger side of the vehicle.
When dual zone is off, passenger
temperature settings remain the
same as the driver settings.
I
A/C:
Press to switch the air
conditioning on or off. Use A/C
with recirculated air to improve
cooling performance and
efficiency.
J
Note:
In certain conditions (for
example, maximum defrost), the
air conditioning compressor may
continue to operate even though
you switch off the air
conditioning.
Heated seats:
Press to cycle
through the various heat settings
and off. See
Heated Seats
(page 162).
K
Ventilated seats:
Press to
cycle through the various
ventilation settings and off. See
Climate Controlled Seats
(page
164).
L MAX A/C:
Press for maximum
cooling. The driver and
passenger settings set to LO,
recirculated air flows through the
instrument panel vents, air
conditioning turns on and the fan
adjusts to the highest speed.
M
Fan speed control: Adjusts the
volume of air circulated in the
vehicle.
N
AUTO:
Press to switch on
automatic operation and cycle
through the automatic fan
settings, then adjust the
temperature control to select
the desired temperature. You
can also switch off dual zone
mode by pressing and holding
for more than two seconds.
O
Heated steering wheel:
Press
to switch the heated steering
wheel on and off.
P
Power:
Press to switch the
system on and off. When the
system is off, it prevents outside
air from entering the vehicle.
Q
Automatic Fan Settings
The system adjusts fan speed, air
distribution, air conditioning operation, and
outside or recirculated air to maintain the
desired temperature.
142
Expedition (TB8) Canada/United States of America, enUSA, Edition date: 201708, Third-Printing- Climate Control
Page 146 of 571

The AUTO button illuminates for the
following settings:
•
When three indicators are on, there are
no limits on the fan speed so that you
reach the selected temperature as
quickly as possible with the highest
amount of cabin noise.
• When two indicators are on, there are
moderate limits on the fan speed so
that you reach the selected
temperature with a reduced amount
of cabin noise.
• When one indicator is on, there are
lower limits on the fan speed so that
you reach the selected temperature
with the least amount of cabin noise.
Note: The system starts at the previous fan
setting when you switch on AUTO.
HINTS ON CONTROLLING THE
INTERIOR CLIMATE
General Hints
Note: Prolonged use of recirculated air may
cause the windows to fog up.
Note: You may feel a small amount of air
from the footwell air vents regardless of the
air distribution setting.
Note: To reduce humidity build-up inside
your vehicle, do not drive with the system
switched off or with recirculated air always
switched on.
Note: Do not place objects under the front
seats as this may interfere with the airflow
to the rear seats. Note:
Remove any snow, ice or leaves from
the air intake area at the base of the
windshield.
Note: To improve the time to reach a
comfortable temperature in hot weather,
drive with the windows open until you feel
cold air through the air vents.
Manual Climate Control
Note: To reduce fogging of the windshield
during humid weather, adjust the air
distribution control to the windshield air
vents position.
Automatic Climate Control
Note: Adjusting the settings when your
vehicle interior is extremely hot or cold is
not necessary. The system automatically
adjusts to heat or cool the interior to your
selected temperature as quickly as possible.
For the system to function efficiently, the
instrument panel and side air vents should
be fully open.
Note: If you select
AUTO during cold
temperatures, the system directs airflow to
the windshield and side window vents. In
addition, the fan may run at a slower speed
until the engine warms up.
Note: If you select
AUTO during hot
temperatures and the inside of the vehicle
is hot, the system automatically uses
recirculated air to maximize interior cooling.
Fan speed may also reduce until the air
cools.
143
Expedition (TB8) Canada/United States of America, enUSA, Edition date: 201708, Third-Printing- Climate Control
Page 148 of 571
Recommended Settings for Cooling
Automatic climate control
Manual climate control
Press AUTO.
Adjust the fan speed to the center
setting.
1
Adjust the temperature control to the
desired setting. Use
72°F (22°C) as a
starting point, then adjust the setting as
necessary.
Adjust the temperature control to the
midway point of the cold settings.
2
Direct air to the instrument panel using
the air distribution buttons.
3
Defogging the Side Windows in Cold Weather Automatic climate control
Manual climate control
Press the defrost button.
Direct air to the windshield using the air
distribution buttons.
1
Adjust the temperature control to the
desired setting. Use
72°F (22°C) as a
starting point, then adjust the setting as
necessary.
Press A/C.
2
Adjust the temperature control to the
desired setting.
3
Adjust the fan speed to the highest
setting.
4
REAR PASSENGER CLIMATE CONTROLS
(IF EQUIPPED)
145
Expedition (TB8) Canada/United States of America, enUSA, Edition date: 201708, Third-Printing- Climate Control
Page 173 of 571

12 Volt DC Power Point
WARNING: Do not plug optional
electrical accessories into the cigar
lighter socket. Incorrect use of the cigar
lighter can cause damage not covered
by the vehicle warranty, and can result
in fire or serious injury.
Note: When you switch the ignition on, you
can use the socket to power 12 volt
appliances with a maximum current rating
of 15 amps.
If the power supply does not work after you
switch the ignition off, switch the ignition
on.
Note: Do not hang any accessory from the
accessory plug.
Note: Do not use the power point over the
vehicle capacity of 12 volt DC 180 watts or
a fuse may blow.
Note: Always keep the power point caps
closed when not in use.
Do not insert objects other than an
accessory plug into the power point. This
damages the power point and may blow
the fuse.
Run the vehicle for full capacity use of the
power point.
To prevent the battery from running out of
charge:
• Do not use the power point longer than
necessary when the engine is not
running.
• Do not leave devices plugged in
overnight or when you park your vehicle
for extended periods. USB Port and Power Point
Locations
USB Ports and Power Points may be in the
following locations:
•
On the lower instrument panel.
• Inside the center console.
• On the front of the center console.
• On the rear of the center console.
• In the cargo area.
• On the passenger side floor panel.
• 3rd row on the quarter trim panels.
Note: Some of the USB ports may not have
data transfer capabilities.
110 Volt AC Power Point
(If Equipped) WARNING: Do not keep electrical
devices plugged in the power point
whenever the device is not in use. Do not
use any extension cord with the 110 volt
AC power point, since it will defeat the
safety protection design. Doing so may
cause the power point to overload due
to powering multiple devices that can
reach beyond the 150 watt load limit and
could result in fire or serious injury.
Note: The power point turns off when you
switch off the ignition, when the vehicle is
not in accessory mode or when the battery
voltage drops below 11 volts.
You can use the power point for electric
devices that require up to 150 watts. It is
on the rear of the center console.
170
Expedition (TB8) Canada/United States of America, enUSA, Edition date: 201708, Third-Printing- Auxiliary Power Points
Page 175 of 571
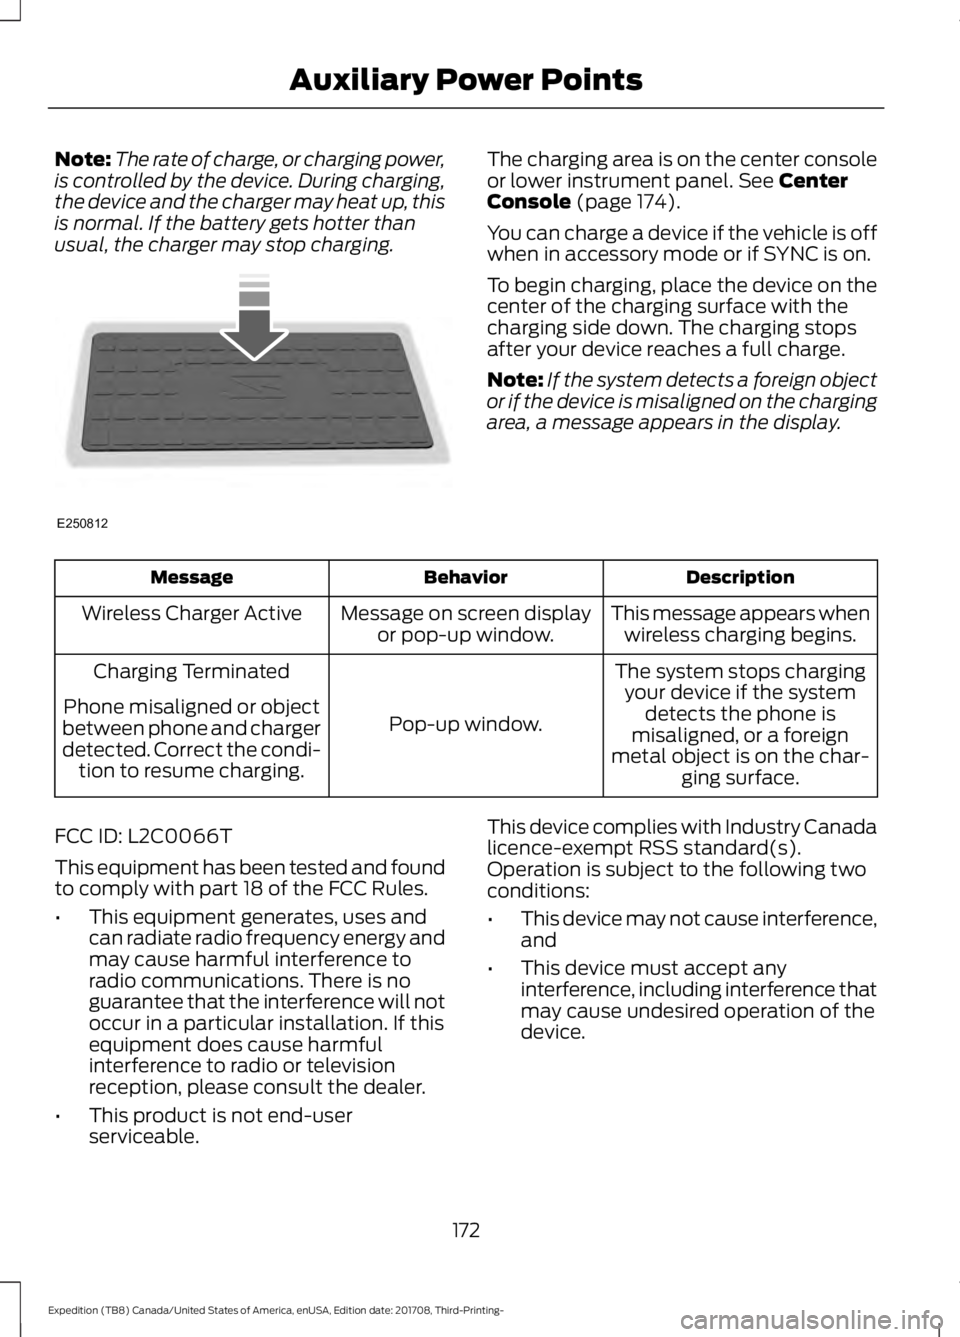
Note:
The rate of charge, or charging power,
is controlled by the device. During charging,
the device and the charger may heat up, this
is normal. If the battery gets hotter than
usual, the charger may stop charging. The charging area is on the center console
or lower instrument panel. See Center
Console (page 174).
You can charge a device if the vehicle is off
when in accessory mode or if SYNC is on.
To begin charging, place the device on the
center of the charging surface with the
charging side down. The charging stops
after your device reaches a full charge.
Note: If the system detects a foreign object
or if the device is misaligned on the charging
area, a message appears in the display. Description
Behavior
Message
This message appears whenwireless charging begins.
Message on screen display
or pop-up window.
Wireless Charger Active
The system stops chargingyour device if the system detects the phone is
misaligned, or a foreign
metal object is on the char- ging surface.
Pop-up window.
Charging Terminated
Phone misaligned or object
between phone and charger
detected. Correct the condi- tion to resume charging.
FCC ID: L2C0066T
This equipment has been tested and found
to comply with part 18 of the FCC Rules.
• This equipment generates, uses and
can radiate radio frequency energy and
may cause harmful interference to
radio communications. There is no
guarantee that the interference will not
occur in a particular installation. If this
equipment does cause harmful
interference to radio or television
reception, please consult the dealer.
• This product is not end-user
serviceable. This device complies with Industry Canada
licence-exempt RSS standard(s).
Operation is subject to the following two
conditions:
•
This device may not cause interference,
and
• This device must accept any
interference, including interference that
may cause undesired operation of the
device.
172
Expedition (TB8) Canada/United States of America, enUSA, Edition date: 201708, Third-Printing- Auxiliary Power PointsE250812