2018 FORD EXPEDITION lock
[x] Cancel search: lockPage 259 of 571

If the sensors are blocked, a message may
appear in the information display when
you shift into reverse (R). See
Information Messages (page 123).
System Limitations
The system may not correctly operate
when any of the following occur:
• The sensors are blocked.
• Adjacently parked vehicles or objects
are obstructing the sensors.
• Vehicles approach at speeds greater
than
37 mph (60 km/h).
• The vehicle speed is greater than 7 mph
(12 km/h)
.
• You reverse out of an angled parking
space.
System Errors
If the system detects a fault a message
displays. See General Information (page
111
).
Switching the System Off and On
You can temporarily switch the system off
using the information display. See
General
Information (page 111). When you switch
system off, a message displays. See
Information Messages (page 123).
Note: The system turns on each time you
switch the ignition on and you shift into
reverse (R). If you temporarily switch the
system off, it turns on the next time you
switch the ignition on.
Note: The system may not correctly operate
when towing a trailer. For vehicles with a
trailer tow module and tow bar approved
by us, the system turns off when you attach
a trailer. For vehicles with an aftermarket
trailer tow module or tow bar, we
recommend that you switch the system off
when you attach a trailer. To permanently switch the system off,
contact an authorized dealer.
STEERING
Electric Power Steering
WARNING:
The electric power
steering system has diagnostic checks
that continuously monitor the system. If
a fault is detected, a message displays
in the information display. Stop your
vehicle as soon as it is safe to do so.
Switch the ignition off. After at least 10
seconds, switch the ignition on and
watch the information display for a
steering system warning message. If a
steering system warning message
returns, have the system checked by an
authorized dealer. WARNING:
If the system detects
an error, you may not feel a difference in
the steering, however a serious condition
may exist. Obtain immediate service
from an authorized dealer, failure to do
so may result in loss of steering control.
Your vehicle has an electric power steering
system. There is no fluid reservoir. No
maintenance is required.
If your vehicle loses electrical power while
you are driving, electric power steering
assistance is lost. The steering system still
operates and you can steer your vehicle
manually. Manually steering your vehicle
requires more effort.
256
Expedition (TB8) Canada/United States of America, enUSA, Edition date: 201708, Third-Printing- Driving Aids
Page 262 of 571

If the time gap to a preceding vehicle is
small, a red visual indication appears.
Note:
Distance Indication and Alert
deactivates and the graphics do not display
when adaptive cruise control is active. Time Gap
Distance Gap
Graphics
Sensitivity
Speed
>0.9sec
>82 ft (25 m)
Grey
Normal
62 mph
(100 km/h)
0.6sec —0.9sec
56–82 ft
(17 –25 m)
Yellow
Normal
62 mph
(100 km/h)
<0.6sec
<
56 ft (17 m)
Red
Normal
62 mph
(100 km/h)
Adjusting the Pre-Collision Assist
Settings
You can adjust the following settings by
using the information display controls.
See
General Information (page 111).
• You can adjust the Alert and Distance
Alert sensitivity to one of three possible
settings.
• You can switch the Distance Indication
and Alert function on or off. •
If required, you can switch Active
Braking on or off.
• If required, you can switch the entire
Pre-Collision Assist feature on or off.
Note: Active braking automatically turns
on every time you switch the ignition on.
Note: We recommended that you switch
the system off if you install a snow plow or
similar object in such a way that it may
block the radar sensor. Your vehicle
remembers the setting across key cycles.
259
Expedition (TB8) Canada/United States of America, enUSA, Edition date: 201708, Third-Printing- Driving AidsE254791
Page 263 of 571

Blocked Sensors If a message regarding a blocked sensor
or camera appears in the information
display, the radar signals or camera images
are obstructed. The radar sensor is behind
a fascia cover near the driver side of the
lower grille. With an obstructed radar, the
Pre-Collision Assist system does not
function and cannot detect a vehicle
ahead. With the front camera obstructed,
the Pre-Collision Assist system does not
respond to pedestrians or stationary
vehicles and the system performance on
moving vehicles reduces. The following
table lists possible causes and actions for
when this message displays.
Action
Cause
Clean the grille surface in front of the radaror remove the object causing the obstruc- tion.
The surface of the radar in the grille is dirty
or obstructed in some way.
Wait a short time. It may take several
minutes for the radar to detect that there is no obstruction.
The surface of the radar in the grille is clean
but the message remains in the display.
The Pre-Collision Assist system is tempor-arily disabled. Pre-Collision Assist should
automatically reactivate a short time after the weather conditions improve.
Heavy rain, spray, snow, or fog is interfering
with the radar signals.
The Pre-Collision Assist system is tempor-arily disabled. Pre-Collision Assist should
automatically reactivate a short time after the weather conditions improve.
Swirling water, or snow or ice on the surface
of the road may interfere with the radar signals.
260
Expedition (TB8) Canada/United States of America, enUSA, Edition date: 201708, Third-Printing- Driving AidsE257553
Page 282 of 571
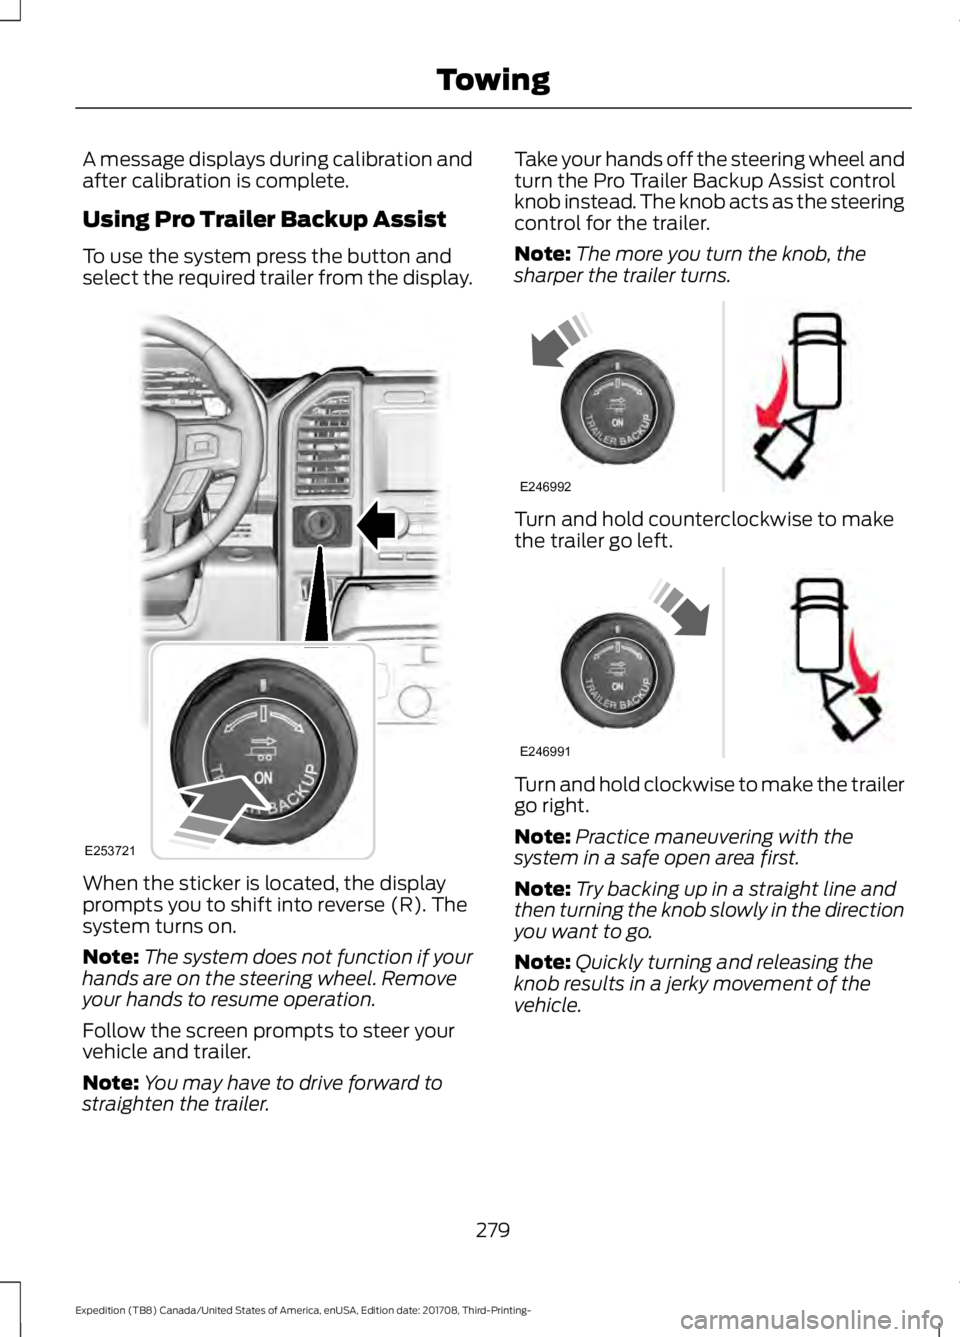
A message displays during calibration and
after calibration is complete.
Using Pro Trailer Backup Assist
To use the system press the button and
select the required trailer from the display.
When the sticker is located, the display
prompts you to shift into reverse (R). The
system turns on.
Note:
The system does not function if your
hands are on the steering wheel. Remove
your hands to resume operation.
Follow the screen prompts to steer your
vehicle and trailer.
Note: You may have to drive forward to
straighten the trailer. Take your hands off the steering wheel and
turn the Pro Trailer Backup Assist control
knob instead. The knob acts as the steering
control for the trailer.
Note:
The more you turn the knob, the
sharper the trailer turns. Turn and hold counterclockwise to make
the trailer go left.
Turn and hold clockwise to make the trailer
go right.
Note:
Practice maneuvering with the
system in a safe open area first.
Note: Try backing up in a straight line and
then turning the knob slowly in the direction
you want to go.
Note: Quickly turning and releasing the
knob results in a jerky movement of the
vehicle.
279
Expedition (TB8) Canada/United States of America, enUSA, Edition date: 201708, Third-Printing- TowingE253721 E246992 E246991
Page 285 of 571
For best results:
•
Use a long, straight, smooth and level
road when attempting to calibrate.
• Drive straight forward.
• Drive between 4 mph (6 km/h) and
24 mph (39 km/h).
System Operation
The following warnings or difficulties may
occur during feature operation. Tips to
resolve them are listed below.
The system is not available:
• The system relies on many
sub-systems in your vehicle to operate
correctly. If those sub-systems are not
operating correctly the system may not
be available.
• Low battery voltage is a condition
which prevents the system from
operating. Please make sure the
battery is correctly charged if the
system is not available.
• You may need to drive your vehicle
straight forward above
25 mph
(40 km/h) before the system is
available again.
• If the message still displays take your
vehicle to an authorized dealer for
service.
Sticker lost:
• If the system cannot initially find the
sticker, it may be necessary for you to
change the lighting conditions by
moving the vehicle and trailer or
waiting until conditions change.
• Check for the following if you receive
the lost sticker message while using
the system.
• Stop your vehicle as soon as the
message displays.
• Make sure the sticker is visible and the
pattern is discernable in the rear view
camera image. •
Clean the sticker and camera to make
sure they are unobstructed.
• Clean the lens with a soft, lint-free
cloth and water.
• Clean the sticker with isopropyl rubbing
alcohol sprayed directly onto the
sticker, and then wipe clean with a soft
cloth.
• Remove any items that may be
blocking the view of the sticker.
Depending on your trailer configuration
and any equipment mounted to your
trailer it is possible for the sticker to be
blocked from view of the camera as it
rotates on the hitch ball but not be
blocked during setup. Remove the
obstruction if possible. It is necessary
to remove the sticker from its current
location if the obstruction cannot be
cleared and place a new sticker that is
visible to the camera in all positions of
the trailer behind your vehicle.
• Placing the sticker on a surface angled
away from the vehicle reduces
performance. Use a drawbar that
positions the trailer level to the ground
when attached to vehicle. This typically
provides a level surface to mount the
sticker. Place the sticker on a bracket
or other object when no level surface
is available.
• Make sure the entire sticker is on a flat
surface that is completely visible to the
camera. Do not fold the sticker over an
edge on the trailer frame. This can
degrade performance.
• Shadows on the sticker may effect
tracking performance under some
lighting conditions. Moving the sticker
to another location within the allowed
placement area may improve
performance. Use the change sticker
option in your Towing menu if you
move the sticker.
282
Expedition (TB8) Canada/United States of America, enUSA, Edition date: 201708, Third-Printing- Towing
Page 288 of 571
This feature applies your vehicle brakes at
individual wheels and, if necessary, reduces
engine power. If the trailer begins to sway,
the stability control light flashes and the
message TRAILER SWAY REDUCE
SPEED appears in the information display.
The first thing to do is slow your vehicle
down, then pull safely to the side of the
road and check for proper tongue load and
trailer load distribution. See Towing (page
274
).
RECOMMENDED TOWING
WEIGHTS
Note: Do not exceed the trailer
weight for your vehicle
configuration listed in the chart
below.
Note: Make sure to take into
consideration trailer frontal area.
Do not exceed 36.5 feet² (3.39
meters²) if your vehicle is equipped
with the standard towing package,
or 60 feet² (5.57 meters²) if your
vehicle is equipped with the
optional heavy duty package.
Note: Exceeding this limitation
may significantly reduce the
performance of your towing
vehicle. Selecting a trailer with a
low aerodynamic drag and rounded
front design helps optimize
performance and fuel economy.
Note: For high altitude operation,
reduce the gross combined weight
by 2% per
1,000 ft (300 m)
starting at the 1,000 ft (300 m)
elevation point. Note:
Certain states require
electric trailer brakes for trailers
over a specified weight. Be sure to
check state regulations for this
specified weight. The maximum
trailer weights listed may be limited
to this specified weight, as the
vehicle ’s electrical system may not
include the wiring connector
needed to activate electric trailer
brakes.
Your vehicle may tow a trailer
provided the maximum trailer
weight is less than or equal to the
maximum trailer weight listed for
your vehicle configuration on the
following chart.
To calculate the maximum loaded
trailer weight for your vehicle:
1. Start with the gross combined weight rating for your vehicle
model and axle ratio. See the
following chart.
2. Subtract all of the following
that apply to your vehicle:
•Vehicle curb weight.
• Hitch hardware weight, such
as a draw bar, ball, locks or
weight distributing.
• Driver weight.
• Passenger weight.
• Payload, cargo and luggage
weight.
• Aftermarket equipment
weight.
3. This equals the maximum
loaded trailer weight for this
combination.
285
Expedition (TB8) Canada/United States of America, enUSA, Edition date: 201708, Third-Printing- Towing
Page 292 of 571
Weight-distributing Hitch
WARNING: Do not adjust the
spring bars so that your vehicle's rear
bumper is higher than before attaching
the trailer. Doing so will defeat the
function of the weight-distributing hitch,
which may cause unpredictable
handling, and could result in serious
personal injury.
When hooking-up a trailer using a
weight-distributing hitch, always use the
following procedure:
1. Park the loaded vehicle, without the trailer, on a level surface.
2. Measure the height to the top of your vehicle's front wheel opening on the
fender. This is H1.
3. Attach the loaded trailer to your vehicle
without the weight-distributing bars
connected.
4. Measure the height to the top of your vehicle's front wheel opening on the
fender a second time. This is H2.
5. Install and adjust the tension in the weight-distributing bars so that the
height of your vehicle's front wheel
opening on the fender is approximately
half the way down from H2, toward H1.
6. Check that the trailer is level or slightly
nose down toward your vehicle. If not,
adjust the ball height accordingly and
repeat steps 2-6.
When the trailer is level or slightly nose
down toward the vehicle:
• Lock the bar tension adjuster in place.
• Check that the trailer tongue securely
attaches and locks onto the hitch.
• Install safety chains, lighting, and trailer
brake controls as required by law or the
trailer manufacturer. Safety Chains
Note:
Do not attach safety chains to the
bumper. Always connect the safety chains
to the frame or hook retainers of your trailer
hitch.
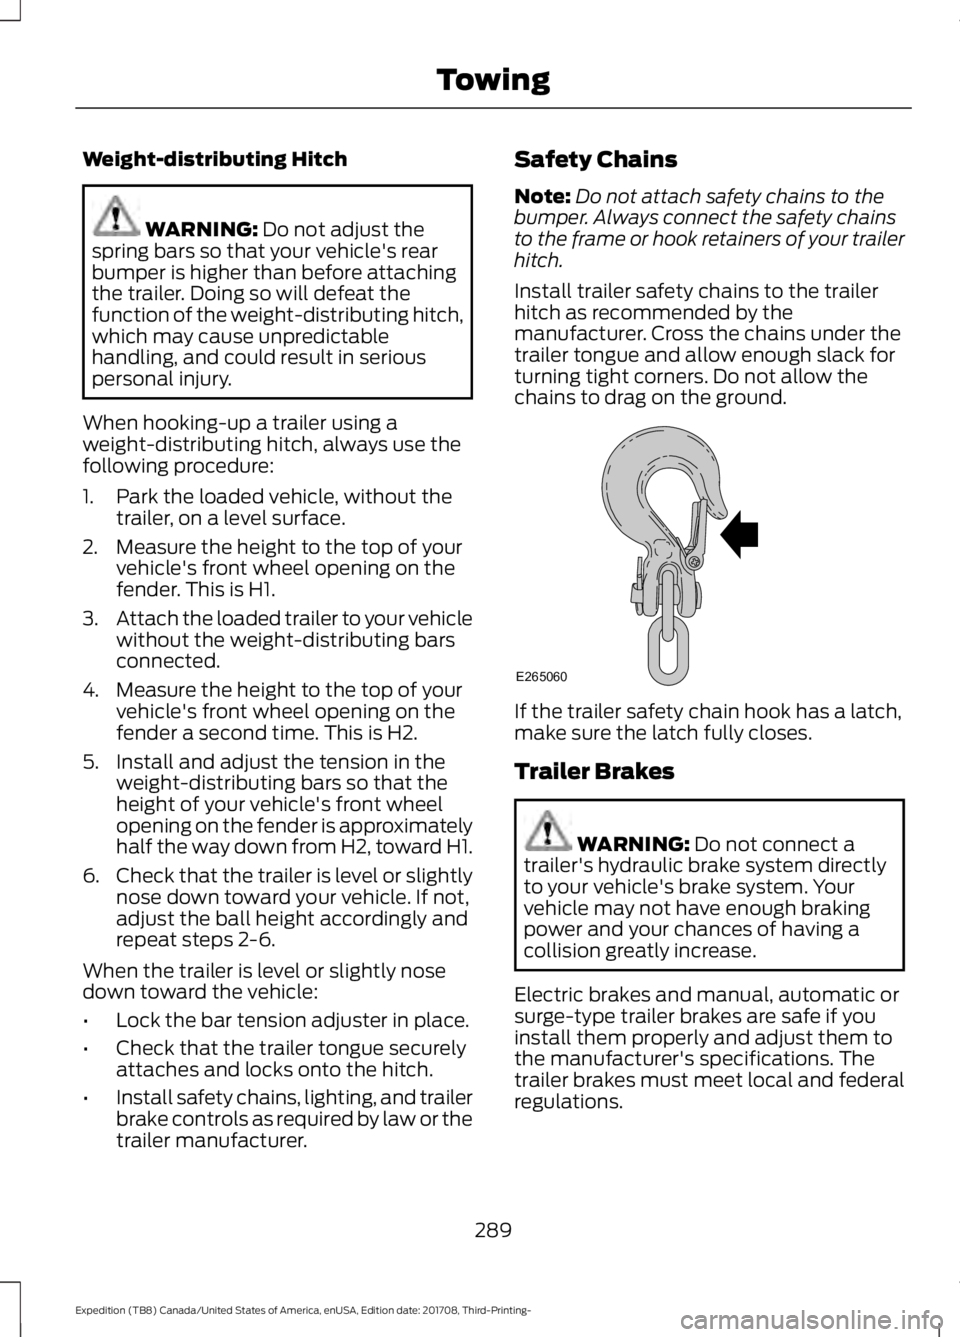
Install trailer safety chains to the trailer
hitch as recommended by the
manufacturer. Cross the chains under the
trailer tongue and allow enough slack for
turning tight corners. Do not allow the
chains to drag on the ground. If the trailer safety chain hook has a latch,
make sure the latch fully closes.
Trailer Brakes
WARNING:
Do not connect a
trailer's hydraulic brake system directly
to your vehicle's brake system. Your
vehicle may not have enough braking
power and your chances of having a
collision greatly increase.
Electric brakes and manual, automatic or
surge-type trailer brakes are safe if you
install them properly and adjust them to
the manufacturer's specifications. The
trailer brakes must meet local and federal
regulations.
289
Expedition (TB8) Canada/United States of America, enUSA, Edition date: 201708, Third-Printing- TowingE265060
Page 294 of 571
lever without a trailer connected. After
disconnecting the trailer connector,
press the brake pedal for
approximately five seconds to allow
the system to detect and update the
trailer status.
B: Manual control lever: Slide the control
lever to the left to turn on the trailer's
electric brakes independent of the tow
vehicle's. If you use the manual control
when the brake is also applied, the greater
of the two inputs determines the power
sent to the trailer brakes.
• Stop lamps: Using the manual control
lever illuminates both the trailer brake
lamps and your vehicle brake lamps
except the center high-mount stop
lamp, if you make the proper electrical
connection to the trailer. Pressing your
vehicle brake pedal also illuminates
both trailer and vehicle brake lamps.
Procedure for Adjusting Gain
Note: Only perform this procedure in a
traffic-free environment at speeds of
approximately
20– 25 mph (30–40 km/h).
The gain setting sets the trailer brake
controller for the specific towing condition.
You should change the setting as towing
conditions change. Changes to towing
conditions include trailer load, vehicle load,
road conditions and weather.
The gain should be set to provide the
maximum trailer braking assistance when
making sure the trailer wheels do not lock
when using the brakes. Locked trailer
wheels may lead to trailer instability.
1. Make sure the trailer brakes are in good
working condition, functioning normally
and properly adjusted. See your trailer
dealer if necessary.
2. Hook up the trailer and make the electrical connections according to the
trailer manufacturer's instructions. 3. When you plug in a trailer with electric
or electric-over-hydraulic brakes, a
message confirming connection
appears in the information display.
4. Use the gain adjustment (+ and -) buttons to increase or decrease the
gain setting to the desired starting
point. A gain setting of 6.0 is a good
starting point for heavier loads.
5. In a traffic-free environment, tow the trailer on a dry, level surface at a speed
of
20– 25 mph (30–40 km/h) and
squeeze the manual control lever
completely.
6. If the trailer wheels lock up, indicated by squealing tires, reduce the gain
setting. If the trailer wheels turn freely,
increase the gain setting. Repeat steps
5 and 6 until the gain setting is at a
point just below trailer wheel lock-up.
If towing a heavier trailer, trailer wheel
lock-up may not be attainable even
with the maximum gain setting of 10.
Explanation of Information Display
Warning Messages
Note: An authorized dealer can diagnose
the trailer brake controller to determine
exactly which trailer fault has occurred.
However, your Ford warranty does not cover
this diagnosis if the fault is with the trailer.
A message indicating a trailer brake
module fault may display in response to
faults sensed by the trailer brake controller,
accompanied by a single tone. If this
message appears, contact an authorized
dealer as soon as possible for diagnosis
and repair. The controller may still
function, but performance may be
degraded.
A message indicating a trailer wiring fault
may display when there is a short circuit
on the electric brake output wire. If this
message displays, accompanied by a
single tone, with no trailer connected, the
problem is with your vehicle wiring
291
Expedition (TB8) Canada/United States of America, enUSA, Edition date: 201708, Third-Printing- Towing