2018 FIAT 124 SPIDER instrument cluster
[x] Cancel search: instrument clusterPage 53 of 220

ODOMETER / TRIP METER
The display mode can be changed from
odometer to “Trip meter A” to “Trip
meter B” and then back to odometer by
pressing the selector 1 fig. 52 while one
of them is displayed. The selected
mode will be displayed.
When the ignition is switched to ACC or
OFF, the odometer or trip meters
cannot be displayed, however, pressing
the selector can inadvertently switch
the trip meters or reset them during an
approximate ten-minute period in the
following cases:
after the ignition is switched to off
from ON;
after the driver's door is opened.Trip meter
The trip meter can record the total
distance of two trips. One is recorded in
“Trip A”, and the other is recorded in
“Trip B”.
For instance, “Trip A” can record the
distance from the point of origin, and
“Trip B” can record the distance from
where the fuel tank is filled.
Use this meter to measure trip
distances and to compute fuel
consumption.
Versions with Radio 7”: if the fuel
economy data is reset using the fuel
economy monitor, or Trip A is reset
using the trip meter when the function
which synchronizes the fuel economy
monitor and the trip meter is on, the
fuel economy data and Trip A are reset
simultaneously.
NOTE Only the trip meters record
tenths of kilometers (miles).
Trip meter reset
The trip meter will be erased when the
power supply is interrupted (blown fuse
or the battery is disconnected) or when
the vehicle is driven over 9999.9 km
(mile).
INSTRUMENT PANEL
ILLUMINATION
Brightness adjustment
The brightness of the instrument cluster
and dashboard illuminations can be
adjusted by rotating the knob 1 fig. 53:
the brightness decreasesby
rotating the knob to the left. A beep
sound will be heard when the knob has
been rotated to the maximum dim
position;
the brightness increasesby
rotating the knob to the right.
Cancelling illumination dimmer
Rotate the knob to the right until a beep
sound is heard while the instrument
cluster is dimmed with the ignition
switched ON. If the instrument cluster's
visibility is reduced due to glare from
surrounding brightness, cancel the
illumination dimmer.
5205020102-121-001
5305020102-121-001
51
Page 54 of 220
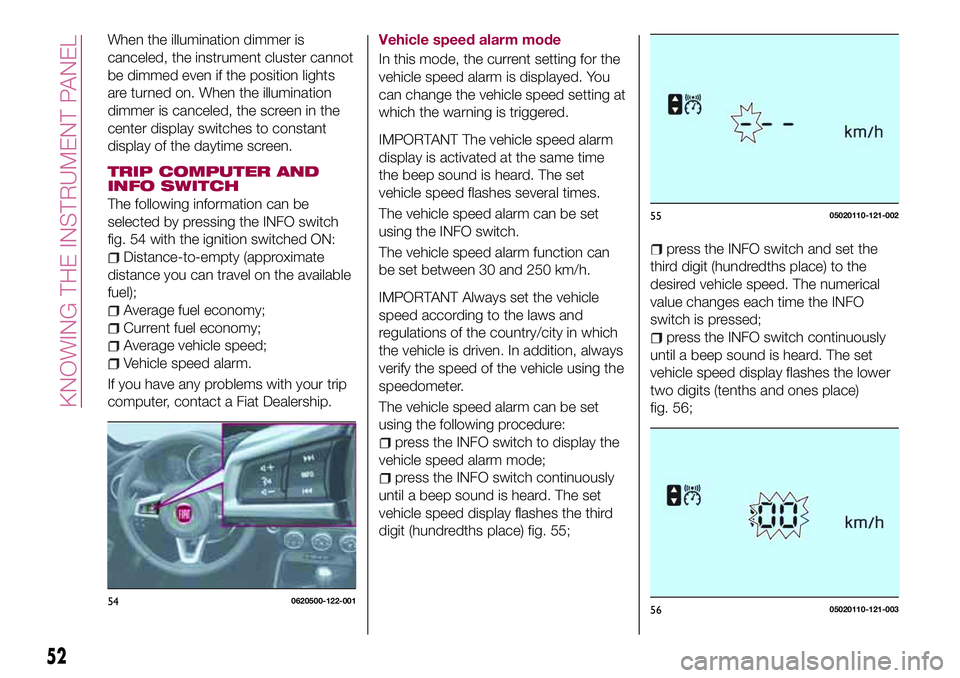
When the illumination dimmer is
canceled, the instrument cluster cannot
be dimmed even if the position lights
are turned on. When the illumination
dimmer is canceled, the screen in the
center display switches to constant
display of the daytime screen.
TRIP COMPUTER AND
INFO SWITCH
The following information can be
selected by pressing the INFO switch
fig. 54 with the ignition switched ON:
Distance-to-empty (approximate
distance you can travel on the available
fuel);
Average fuel economy;
Current fuel economy;
Average vehicle speed;
Vehicle speed alarm.
If you have any problems with your trip
computer, contact a Fiat Dealership.Vehicle speed alarm mode
In this mode, the current setting for the
vehicle speed alarm is displayed. You
can change the vehicle speed setting at
which the warning is triggered.
IMPORTANT The vehicle speed alarm
display is activated at the same time
the beep sound is heard. The set
vehicle speed flashes several times.
The vehicle speed alarm can be set
using the INFO switch.
The vehicle speed alarm function can
be set between 30 and 250 km/h.
IMPORTANT Always set the vehicle
speed according to the laws and
regulations of the country/city in which
the vehicle is driven. In addition, always
verify the speed of the vehicle using the
speedometer.
The vehicle speed alarm can be set
using the following procedure:
press the INFO switch to display the
vehicle speed alarm mode;
press the INFO switch continuously
until a beep sound is heard. The set
vehicle speed display flashes the third
digit (hundredths place) fig. 55;
press the INFO switch and set the
third digit (hundredths place) to the
desired vehicle speed. The numerical
value changes each time the INFO
switch is pressed;
press the INFO switch continuously
until a beep sound is heard. The set
vehicle speed display flashes the lower
two digits (tenths and ones place)
fig. 56;
540620500-122-001
5505020110-121-002
5605020110-121-003
52
KNOWING THE INSTRUMENT PANEL
Page 55 of 220

press the INFO switch and set the
two lower digits (tenths and ones place)
to the desired vehicle speed. The
numerical value changes each time the
INFO switch is pressed;
press the INFO switch continuously
until a beep sound is heard. The set
vehicle speed is displayed on the
vehicle speed alarm screen.
GEAR SHIFT INDICATOR
The gear shift indicator supports you to
obtain optimum fuel economy and
smooth driving.
It displays the selected gear position 1
fig. 57 in the instrument cluster as well
as notifies the driver to change to the
most suitable gear position
2 corresponding to the actual driving
condition.
Indication Condition
NumeralThe selected gear
position is displayed
and numeralShift up or down to
the indicated gear
position is
recommended
IMPORTANT Do not rely solely on the
shift-up/shift-down recommendations
by indications. The actual driving
situation might require shift operations
different from indication. To avoid the
risk of accidents, the road and traffic
conditions have to be judged correctly
by the driver before shifting.
Versions with manual transmission
The gear shift indicator turns off when
the following operations are performed:
the vehicle is stopped;
the vehicle is put in neutral;
the vehicle is driven in reverse;
the clutch is not fully engaged when
accelerating from a stop;
the clutch pedal remains depressed
for 2 seconds or longer while driving.Versions with automatic
transmission
The gear shift indicator turns off when
the following operations are performed:
the vehicle is stopped;
manual shift mode is cancelled.
Manually shifting up
(versions with automatic transmission)
Using selector lever: to shift up to a
higher gear, tap the selector lever back
+ once.
5705210102-12A-001
53
Page 73 of 220

DSC operation is possible at speeds
greater than 20 km/h.
The warning light turns on when the
system has a malfunction. Refer to
“Warning lights and messages”
paragraph in “Knowing the instrument
panel” chapter.
NOTE The DSC may not operate
correctly unless the following are
observed:
use tires of the correct size specified
for your vehicle on all four wheels;
use tires of the same manufacturer,
brand and tread pattern on all four
wheels;
do not mix worn tires.
IMPORTANT The DSC may not operate
correctly when tire chains are used or a
temporary spare tire is installed
because the tire diameter changes.
TCS / DSC indicator light
The
indicator light stays on for a few
seconds when the ignition is switched
ON. If the TCS or DSC is operating, the
indicator light flashes.
If the light stays on, the TCS, DSC or
the brake assist system may have a
malfunction and they may not operate
correctly. Take your vehicle to a Fiat
Dealership.DSC OFF indicator light
The
indicator light stays on for a few
seconds when the ignition is switched
ON. It also illuminates when the DSC
OFF switch is pressed and TCS/DSC is
switched off.
If the light remains illuminated and the
TCS/DSC is not switched off, contact a
Fiat Dealership. The DSC may have a
malfunction.
DSC OFF switch
Press the switch fig. 58 to turn off the
TCS/DSC. The
warning light in the
instrument cluster will illuminate.
Press the switch again to turn the TCS/
DSC back on. The DSC OFF indicator
light will turn off.
IMPORTANT When DSC is on and you
attempt to free the vehicle when it is
stuck, or drive it out of freshly fallen
snow, the TCS (part of the DSCsystem) will activate. Depressing the
accelerator will not increase engine
power and freeing the vehicle may be
difficult. When this happens, turn off the
TCS/DSC.
IMPORTANT If the TCS/DSC is off
when the engine is turned off, it
automatically activates when the
ignition is switched ON.
IMPORTANT Leaving the TCS/DSC on
will provide the best traction.
IMPORTANT If the switch is pressed
and held for 10 seconds or more, the
DSC OFF switch malfunction detection
function operates and the DSC system
activates automatically. The DSC OFF
indicator light turns off while the DSC
system is operative.
ACTIVE BONNET
PRECAUTIONS
75)
In the unlikely event that the vehicle
were to hit a pedestrian and a certain
amount of impact is applied to the front
of the vehicle, impact to the head of the
pedestrian if it were to hit the bonnet is
lessened by the rear area of the bonnet
raising instantly to maintain a wide
space between it and the parts in the
engine compartment.
If the sensor 1 fig. 59 installed to the
5805060301-12A-987
71
Page 76 of 220

74)The capability of the DSC system must
never be tested irresponsibly and
dangerously, in such a way as to
compromise personal safety and the safety
of others.
75)If the active bonnet has activated,
always contact a Fiat Dealership. If the
bonnet release handle is pulled after the
active bonnet has activated, the bonnet will
rise even further. If the vehicle is driven with
the bonnet raised it will obstruct visibility
and could result in an accident. In addition,
do not attempt to push the bonnet back
down. Otherwise, it could deform the
bonnet or cause injury because the
activated bonnet cannot be lowered
manually. Before driving the vehicle contact
a Fiat Dealership after the active bonnet
has activated, make sure that the raised
bonnet does not obstruct vision and drive
the vehicle at a low speed.AUXILIARY DRIVING
SYSTEMS
TPMS (Tire Pressure
Monitoring System)
76) 77) 78)
The Tire Pressure Monitoring System
(TPMS) monitors the air pressure of all
four tires. If the air pressure of one or
more tires is too low, the system warns
the driver by indicating the tire pressure
monitoring system warning light
in
the instrument cluster and operating a
beep sound. The system monitors the
tire pressures indirectly using the data
sent from the ABS wheel speed
sensors.
To allow the system to operate
correctly, the system needs to be
initialized with the specified tire pressure
(value on the tire pressure label). Refer
to “Tire Pressure Monitoring System
Initialization” in this paragraph.
The warning light flashes when the
system has a malfunction. Refer to
“Warning lights and messages”
paragraph in “Knowing the instrument
panel” chapter.
IMPORTANT Each tire, including the
spare (where provided), should be
checked monthly when cold and
inflated to the inflation pressure
recommended by the vehiclemanufacturer on the vehicle placard or
tire inflation pressure label (if your
vehicle has tires of a different size than
the size indicated on the vehicle placard
or tire inflation pressure label, you
should determine the proper tire
inflation pressure for those tires).
IMPORTANT As an added safety
feature, your vehicle has been equipped
with a TPMS system that illuminates a
low tire pressure telltale when one or
more of your tires is significantly
under-inflated. Accordingly, when the
low tire pressure telltale illuminates, you
should stop and check your tires as
soon as possible, and inflate them to
the proper pressure. Driving on a
significantly under-inflated tire causes
the tire to overheat and can lead to tire
failure. Under-inflation also reduces fuel
efficiency and tire tread life, and may
affect the vehicle's handling and
stopping ability.
IMPORTANT Please note that the
TPMS is not a substitute for proper tire
maintenance, and it is the driver's
responsibility to maintain correct tire
pressure, even if under-inflation has not
reached the level to trigger illumination
of the TPMS low tire pressure telltale.
Your vehicle has also been equipped
with a TPMS malfunction indicator to
74
SAFETY
Page 79 of 220

Tire Pressure Monitoring System
initialization
(versions with conventional tires)
In the following cases, system
initialization must be performed so that
the system operates normally:
a tire pressure is adjusted;
tire rotation is performed;
a tire or wheel is replaced;
the battery is replaced or completely
drained;
the tire pressure monitoring system
warning light is illuminated.
Initialization method
Proceed as follows:
park the car in a safe place and firmly
apply the parking brake;
let the tires cool, then adjust the tire
pressure of all four (4) tires to the
specified pressure indicated on the tire
pressure label located on the driver's
door frame (door open);
switch the ignition ON;
while the vehicle is parked, press and
hold the TPMS system set switch
fig. 60 and verify that the tire pressure
monitoring system warning light in the
instrument cluster flashes twice and a
beep sound is heard once.
IMPORTANT If the system initialization
is performed without adjusting the tire
pressure, the system cannot detect the
normal tire pressure and it may not
illuminate the tire pressure monitoring
system warning light even if a tire
pressure is low, or it may illuminate the
light even if the pressures are normal.
IMPORTANT Adjust the tire pressure on
all four tires and initialize the system
when the tire pressure monitoring
system warning light is turned on. If the
warning light turns on for a reason
other than a flat tire, the tire pressure of
all four tires may have decreased
naturally.
IMPORTANT The system initialization
will not be performed if the switch is
pressed while the vehicle is being
driven.HLA (Hill Launch Assist)
FUNCTION
Hill Launch Assist (HLA) is a function
which assists the driver in accelerating
from a stop while on a slope. When the
driver releases the brake pedal and
depresses the accelerator pedal while
on a slope, the function prevents the
vehicle from rolling. The braking force is
maintained automatically after the brake
pedal is released on a steep grade.
For vehicles with a manual
transmission, Hill Launch Assist
operates on a downward slope when
the shift lever is in the reverse (R)
position, and on an upward slope when
the shift lever is in a position other than
the reverse (R) position.
For vehicles with an automatic
transmission, Hill Launch Assist
operates on a downward slope when
the selector lever is in the reverse (R)
position, and on an upward slope when
the selector lever is in a forward gear.
IMPORTANT Hill Launch Assist does
not operate on a gentle slope. In
addition, the gradient of the slope on
which the system will operate changes
depending on the vehicle's load.
IMPORTANT Hill Launch Assist does
not operate if the parking brake is
6005120101-12A-321
77
Page 121 of 220

warning light (green) turns on.
The cruise control speed setting cannot
be performed under the following
conditions:
Automatic transmission: the
selector lever is in the P or N position;
Manual transmission: the shift
lever is in the neutral position;
The parking brake is applied;
Vehicles with Speed limiter: the
MODE switch for the adjustable speed
limiter is pressed.
Release the SET/- switch at the
desired speed, otherwise the speed will
continue decreasing while the SET/-
switch is pressed and held (except
when the accelerator pedal is
depressed);
On a steep grade, the vehicle may
momentarily slow down while
ascending, or speed up while
descending.
The cruise control will cancel if the
vehicle speed decreases below
21 km/h when climbing a steep grade.
The cruise control may cancel at
about 15 km/h below the preset speed
such as when climbing a long, steep
grade.
The vehicle speed preset using the
cruise control is displayed in the
instrument cluster.
INCREASING /
DECREASING SPEED
To increase speed
With cruise control switch: press the
RESUME/+ switch and hold it your
vehicle will accelerate. Release the
switch at the desired speed. Press the
RESUME/+ switch and release it
immediately to adjust the preset speed.
Multiple operations will increase the
preset speed according to the number
of times it is operated.
Using accelerator pedal: depress the
accelerator pedal to accelerate to the
desired speed. Press the SET/- switch
and release it immediately.
IMPORTANT Accelerate if you want to
speed up temporarily when the cruise
control is on. Greater speed will not
interfere with or change the set speed.
Take your foot off the accelerator to
return to the set speed.
RESUME SPEED
If some other method besides the
OFF/CANCEL switch was used to
cancel cruising speed (such as applying
the brake pedal) and the system is still
activated, the most recent set speed
will automatically resume when the
RESUME/+ switch is pressed.
If vehicle speed is below 25 km/h,
increase the vehicle speed up to25 km/h or more and press the
RESUME/+ switch.
TEMPORARILY
CANCELLING THE
SYSTEM
To temporarily cancel the system, use
one of these methods: slightly depress
the brake pedal/depress the clutch
pedal (versions with manual
transmission)/press the OFF/CANCEL
switch.
If the RESUME/+ switch is pressed
when the vehicle speed is 25 km/h or
higher, the system reverts to the
previously set speed.
Note
If any of the following conditions occur,
the cruise control system is temporarily
canceled:
the parking brake is applied;
Versions with Speed limiter: the
MODE switch for the adjustable speed
limiter is pressed;
Automatic transmission: the
selector lever is in the P or N position or
on versions withmanual
transmission: the shift lever is in the
neutral position;
Automatic transmission: the cruise
control cannot be cancelled while
driving in manual mode (selector lever
shifted from D to M position). Therefore,
engine braking will not be applied even
119
Page 123 of 220

SETTING A DESIRED
SPEED
Proceed as follows:
press the ON switch to turn the
system on;
press the SET/- to set the speed.
When the current vehicle speed is
30 km/h or more, the speed is set to
the current vehicle speed. When the
current vehicle speed is less than
30 km/h, the speed is set to 30 km/h;
to increase the set speed: press
the RES/+ switch continuously.To
decrease the set speed: press the
SET/- switch continuously.
NOTE When the vehicle set speed is
displayed in the instrument cluster,
press the RES/+ switch to set the
displayed vehicle speed.
NOTE The vehicle speed may exceed
the set speed on a down slope.
TEMPORARILY
CANCELLING THE
SYSTEM
The system is temporarily cancelled
(stand-by status) when any of the
following operations is done while the
speed limiter is displayed:
OFF/CAN switch is pressed;
accelerator pedal is strongly
depressed.
Press the RES/+ switch to resume the
operation at the previous set speed.The set speed can be set by pressing
the SET/- switch while the system is in
stand-by status.
WARNING
148)Always turn off the system when
changing drivers. If the driver is changed
and the new driver is unaware of the speed
limiter function, the vehicle may not
accelerate when the driver depresses the
accelerator pedal, leading to an accident.
149)Always verify the safety of the
surrounding area and keep a safer distance
between vehicles ahead and behind you
when setting the speed limiter. If the speed
is set lower than the current vehicle speed,
the vehicle speed is decreased to the set
speed.
PARKING SENSOR
SYSTEM
(where provided)
150) 151)
26) 27) 28)
The parking sensor system uses
4 ultrasonic sensors (2 rear sensors and
2 rear corner sensors) fig. 93 to detect
obstructions around the vehicle while
parking the vehicle in a garage or
during parallel parking when the shift
lever (manual transmission)/selector
lever (automatic transmission) is in
reverse (R).
9305200100-121-001
121