Page 368 of 568
Cavity Cartridge Fuse Micro FuseDescription
F56 –15 Amp Blue Additional Content (Diesel engine only)
F57 –20 Amp Yellow NOX Sensor
F58 –15 Amp Blue HID Headlamps LH — If Equipped
F59 –10 Amp Red Purging Pump (Diesel engine only)
F60 –15 Amp Blue Transmission Control Module
F61 –10 Amp Red Transmission Control Module/PM Sensor (Diesel en-
gine only)
F62 –10 Amp Red Air Conditioning Clutch
F63 –20 Amp Yellow Ignition Coils (Gas), Urea Heater (Diesel)
F64 –25 Amp Clear Fuel Injectors/Powertrain
F66 –10 Amp Red Sunroof/Passenger Window Switches/Rain Sensor
F67 –15 Amp Blue CD/DVD/Bluetooth Hands-free Module — If
Equipped
F68 –20 Amp Yellow Rear Wiper Motor
F69 –15 Amp Blue Spotlight Feed — If Equipped
F70 –20 Amp Yellow Fuel Pump Motor
F71 –30 Amp Green Audio Amplifier
F72 –10 Amp Red PCM — If Equipped
F73 –15 Amp Blue HID Headlamp RH — If Equipped
F75 –10 Amp Red Dual Batt Control — If Equipped
366 IN CASE OF EMERGENCY
Page 467 of 568

Customer Programmable Features — Uconnect
4C/4C NAV Settings
Press the “Apps” button, then press the “Settings”
button on the touchscreen to display the menu setting
screen. In this mode the Uconnect system allows you to
access programmable features that may be equipped
such as Display, Units, Voice, Clock, Safety & Driving
Assistance, Lights, Doors & Locks, Auto-On Comfort,
Engine Off Options, Audio, Phone/Bluetooth, SiriusXM
Setup, Restore Settings, Clear Personal Data, and Sys-
tem Information.
NOTE: Depending on the vehicles options, feature settings
may vary.
When making a selection, press the button on the touch-
screen to enter the desired mode. Once in the desired mode, press and release the preferred setting “option” until
a check-mark appears next to the setting, showing that
setting has been selected. Once the setting is complete,
either press the “Back” Arrow button on the touchscreen to
return to the previous menu, or press the “X” button on the
touchscreen to close out of the settings screen. Pressing the
“Up” or “Down” Arrow button on the right side of the
screen will allow you to toggle up or down through the
available settings.
Display
After pressing the “Display” button on the touchscreen, the
following settings will be available:
Setting Name
Selectable Options
Display Mode ManualAuto
Display Brightness With Headlights ON +-
NOTE:
To make changes to the �Display Brightness with Headlights ON� setting, the headlights must be on and the interior
dimmer switch must not be in the �party�or�parade� positions.
10
MULTIMEDIA 465
Page 482 of 568
Setting NameSelectable Options
AUX Volume Offset — If Equipped +-
NOTE:
This feature provides the ability to tune the audio level for portable devices connected through the AUX input. Auto Play On Off
Phone/Bluetooth Settings
After pressing the “Phone/Bluetooth Settings” button on
the touchscreen, the following settings will be available:
Setting Name Selectable Options
Do Not Disturb List of Settings
NOTE:
Press “Do Not Disturb” to access the available settings. The following settings are: Auto Reply (both, text, call), Auto
Reply Message (custom, default) and Custom Auto Reply Message (create message). Paired Phones and Audio Sources List Of Paired Phones and Audio Sources
NOTE:
The “Paired Phones and Audio Sources” feature shows which phones and audio sources are paired to the Phone and
Audio Sources Settings system. For further information, refer to the Uconnect Owner ’s Manual Supplement.
480 MULTIMEDIA
Page 485 of 568
Reset
After pressing the “Reset” button on the touchscreen, the
following settings will be available:
Setting NameSelectable Options
Reset App Drawer to De- fault Ok
Cancel
Restore Apps Ok Cancel
Restore Settings to Default OkCancel X
NOTE:
When this feature is selected, it will reset all of the radio features to their default settings. To restore the settings to
their default setting, press the “Restore Settings” button on the touchscreen. A pop-up will appear asking �Are you
sure you want to reset your settings to default?”
Clear Personal Data OKCancel X
NOTE:
When this feature is selected, it will remove all personal data including Bluetooth devices and presets. To remove per-
sonal information, press the “Clear Personal Data” button and a pop-up will appear asking �Are you sure you want
to clear all personal data?”
Modem Reset OK Cancel
10
MULTIMEDIA 483
Page 508 of 568

STEERING WHEEL AUDIO CONTROLS — IF
EQUIPPED
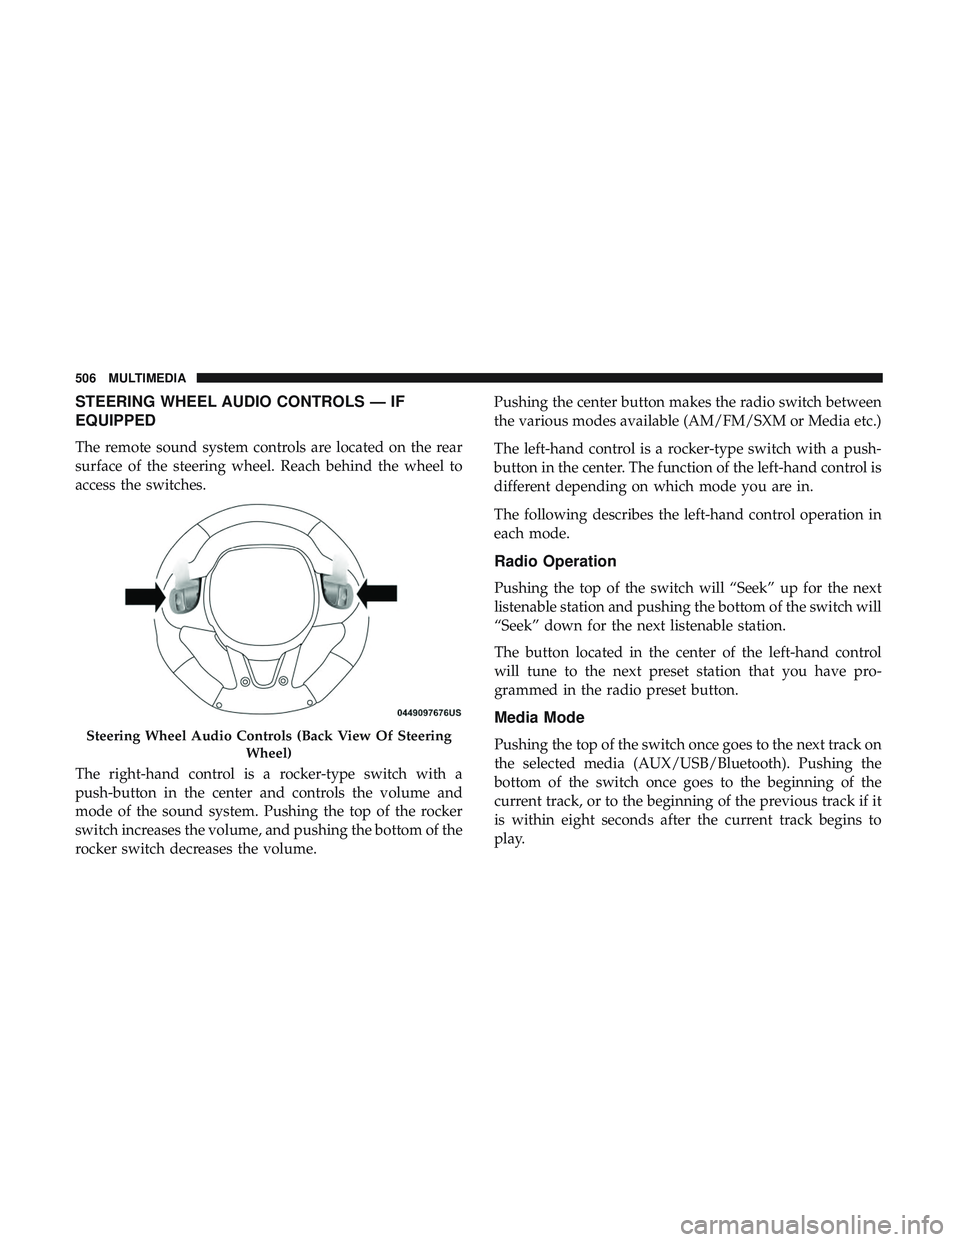
The remote sound system controls are located on the rear
surface of the steering wheel. Reach behind the wheel to
access the switches.
The right-hand control is a rocker-type switch with a
push-button in the center and controls the volume and
mode of the sound system. Pushing the top of the rocker
switch increases the volume, and pushing the bottom of the
rocker switch decreases the volume.Pushing the center button makes the radio switch between
the various modes available (AM/FM/SXM or Media etc.)
The left-hand control is a rocker-type switch with a push-
button in the center. The function of the left-hand control is
different depending on which mode you are in.
The following describes the left-hand control operation in
each mode.
Radio Operation
Pushing the top of the switch will “Seek” up for the next
listenable station and pushing the bottom of the switch will
“Seek” down for the next listenable station.
The button located in the center of the left-hand control
will tune to the next preset station that you have pro-
grammed in the radio preset button.
Media Mode
Pushing the top of the switch once goes to the next track on
the selected media (AUX/USB/Bluetooth). Pushing the
bottom of the switch once goes to the beginning of the
current track, or to the beginning of the previous track if it
is within eight seconds after the current track begins to
play.Steering Wheel Audio Controls (Back View Of Steering
Wheel)
506 MULTIMEDIA
Page 531 of 568
TIP:At any time, if you are not sure of what to say or want
to learn a Voice Command, push the VR button
and say
“ Help.” The system provides you with a list of com-
mands. MediaUconnect offers connections via USB, Bluetooth and auxil-
iary ports (If Equipped). Voice operation is only available
for connected USB and AUX devices.
Push the VR button
. After the beep, say one of the
following commands and follow the prompts to switch
your media source or choose an artist.
• “Change source to Bluetooth”
• “Change source to AUX”
• “Change source to USB”
• “Play artist Beethoven”; “ Play albumGreatest Hits”;
“ Play song Moonlight Sonata”; “ Play genreClassical”
Uconnect 4C/4C NAV Radio
10
MULTIMEDIA 529
Page 534 of 568
Apple iPhone iOS 6 or later supports readingincoming
text messages only. To enable this feature on your Apple
iPhone, follow these four simple steps:
TIP: Voice Text Reply is not compatible with iPhone, but if
your vehicle is equipped with Siri Eyes Free, you can use
your voice to send a text message.Climate
Too hot? Too cold? Adjust vehicle temperatures hands-free
and keep everyone comfortable while you keep moving
ahead. (If vehicle is equipped with climate control.)
Push the VR button
. After the beep, say one of the
following commands:
• “Set driver temperature to 70degrees”
• “Set passenger temperature to 70degrees”
TIP: Voice Command for Climate may only be used to
adjust the interior temperature of your vehicle. Voice
Command will not work to adjust the heated seats or
steering wheel if equipped.
iPhone Notification Settings
1 — Select “Settings”
2 — Select “Bluetooth”
3 — Select The (i) For The Paired Vehicle
4 — Turn On “Show Notifications” 532 MULTIMEDIA
Page 539 of 568

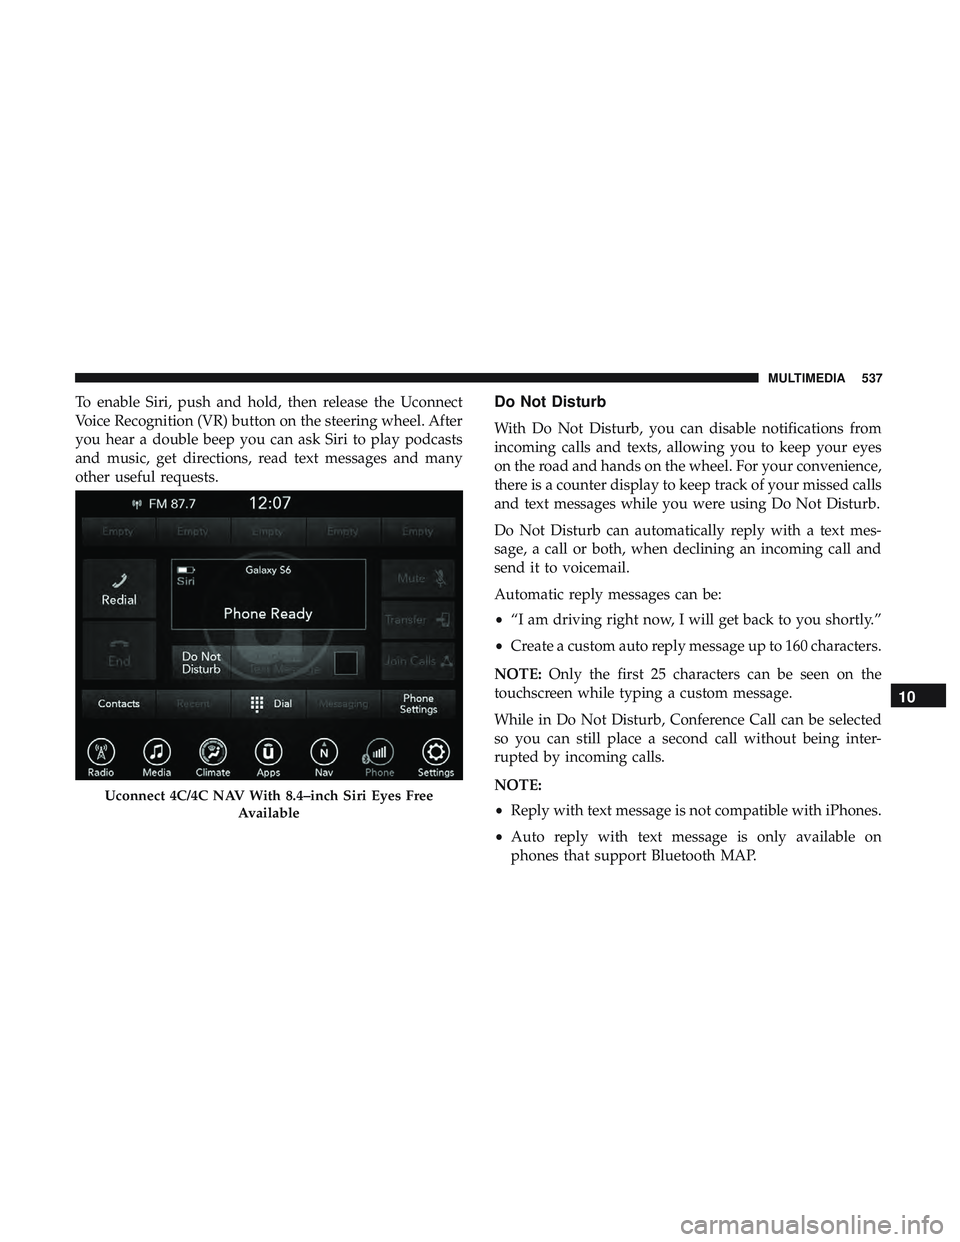
To enable Siri, push and hold, then release the Uconnect
Voice Recognition (VR) button on the steering wheel. After
you hear a double beep you can ask Siri to play podcasts
and music, get directions, read text messages and many
other useful requests.Do Not Disturb
With Do Not Disturb, you can disable notifications from
incoming calls and texts, allowing you to keep your eyes
on the road and hands on the wheel. For your convenience,
there is a counter display to keep track of your missed calls
and text messages while you were using Do Not Disturb.
Do Not Disturb can automatically reply with a text mes-
sage, a call or both, when declining an incoming call and
send it to voicemail.
Automatic reply messages can be:
•“I am driving right now, I will get back to you shortly.”
• Create a custom auto reply message up to 160 characters.
NOTE: Only the first 25 characters can be seen on the
touchscreen while typing a custom message.
While in Do Not Disturb, Conference Call can be selected
so you can still place a second call without being inter-
rupted by incoming calls.
NOTE:
• Reply with text message is not compatible with iPhones.
• Auto reply with text message is only available on
phones that support Bluetooth MAP.
Uconnect 4C/4C NAV With 8.4–inch Siri Eyes Free
Available
10
MULTIMEDIA 537