Page 467 of 568

Customer Programmable Features — Uconnect
4C/4C NAV Settings
Press the “Apps” button, then press the “Settings”
button on the touchscreen to display the menu setting
screen. In this mode the Uconnect system allows you to
access programmable features that may be equipped
such as Display, Units, Voice, Clock, Safety & Driving
Assistance, Lights, Doors & Locks, Auto-On Comfort,
Engine Off Options, Audio, Phone/Bluetooth, SiriusXM
Setup, Restore Settings, Clear Personal Data, and Sys-
tem Information.
NOTE: Depending on the vehicles options, feature settings
may vary.
When making a selection, press the button on the touch-
screen to enter the desired mode. Once in the desired mode, press and release the preferred setting “option” until
a check-mark appears next to the setting, showing that
setting has been selected. Once the setting is complete,
either press the “Back” Arrow button on the touchscreen to
return to the previous menu, or press the “X” button on the
touchscreen to close out of the settings screen. Pressing the
“Up” or “Down” Arrow button on the right side of the
screen will allow you to toggle up or down through the
available settings.
Display
After pressing the “Display” button on the touchscreen, the
following settings will be available:
Setting Name
Selectable Options
Display Mode ManualAuto
Display Brightness With Headlights ON +-
NOTE:
To make changes to the �Display Brightness with Headlights ON� setting, the headlights must be on and the interior
dimmer switch must not be in the �party�or�parade� positions.
10
MULTIMEDIA 465
Page 468 of 568
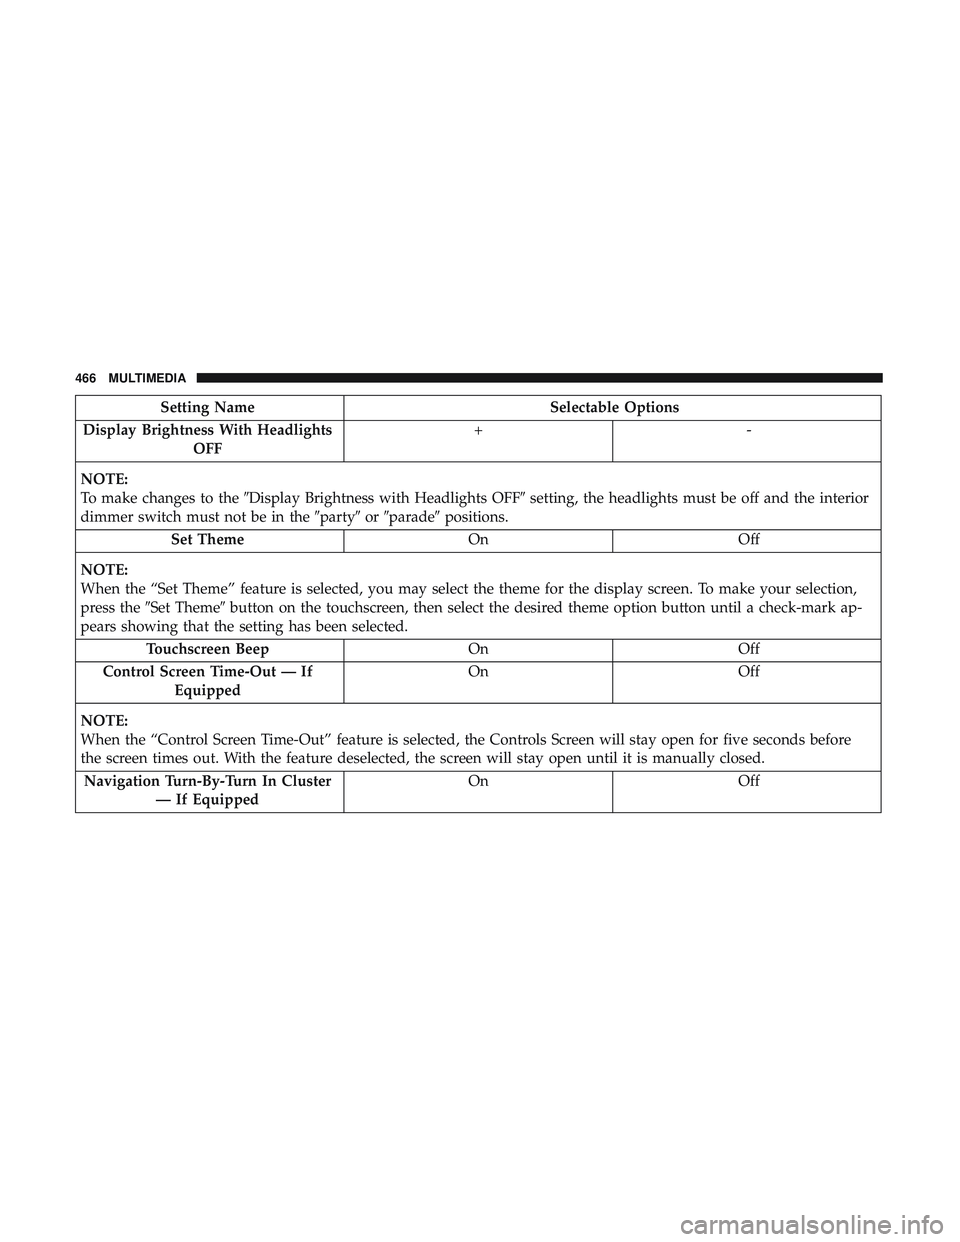
Setting NameSelectable Options
Display Brightness With Headlights OFF +-
NOTE:
To make changes to the �Display Brightness with Headlights OFF� setting, the headlights must be off and the interior
dimmer switch must not be in the �party�or�parade� positions.
Set Theme OnOff
NOTE:
When the “Set Theme” feature is selected, you may select the theme for the display screen. To make your selection,
press the �Set Theme� button on the touchscreen, then select the desired theme option button until a check-mark ap-
pears showing that the setting has been selected.
Touchscreen Beep OnOff
Control Screen Time-Out — If Equipped On
Off
NOTE:
When the “Control Screen Time-Out” feature is selected, the Controls Screen will stay open for five seconds before
the screen times out. With the feature deselected, the screen will stay open until it is manually closed. Navigation Turn-By-Turn In Cluster — If Equipped On
Off
466 MULTIMEDIA
Page 474 of 568

Setting NameSelectable Options
LaneSense Warning — If Equipped Early
Medium Late
NOTE:
The “LaneSense Warning” setting determines at what distance the LaneSense system warns you, through steering
wheel feedback, of a possible lane departure. LaneSense Strength — If Equipped Low
Medium High
Blind Spot Alert — If Equipped Off
LightsLights & Chime
NOTE:
When the “Blind Spot Alert” feature is selected, the Blind Spot Alert system is activated and shows a visual alert in
the outside mirrors, or it shows a visual alert in the outside mirrors as well as play an audible alert when the turn
signal is on. When “Off” is selected, the Blind Spot Alert system is deactivated.
If your vehicle has experienced any damage in the area where the sensor is located, even if the fascia is not damaged,
the sensor may have become misaligned. Take your vehicle to an authorized dealer to verify sensor alignment. A sen-
sor that is misaligned results in the Blind Spot Alert System not operating to specification. Electronic Power Steering Default — If Equipped Normal
SportComfort
NOTE:
When the “Electronic Power Steering Default” is selected, it allows you to change the default setting of your vehicle
to either normal, sport, or comfort.
472 MULTIMEDIA
Page 481 of 568
Audio
After pressing the “Audio” button on the touchscreen, the
following settings will be available:
Setting NameSelectable Options
Balance/Fade Speaker Icon
NOTE:
When in this display you may adjust the “Balance/Fade” of the audio by pressing and dragging the “Speaker Icon”
toward any location in the box. Equalizer BassMid Treble
NOTE:
When in this display you may adjust the “Bass”, “Mid” and “Treble” settings. Adjust the settings with the “+” and
“–” setting buttons on the touchscreen or by selecting any point on the scale between the “+” and “–” buttons on the
touchscreen. Bass/Mid/Treble also allow you to simply slide your finger up or down to change the setting as well as
press directly on the desired setting. Speed Adjusted Vol- ume Off
12 3
Surround Sound — If Equipped On
Off
10
MULTIMEDIA 479
Page 487 of 568
The Performance Pages include the following:
•Home
• Timers
• Gauges
• G-Force
• Engine
• Dyno The following describes each feature and its operation:
Home
When Home is selected, a series of widgets (gauges) can be
customized by the user. Follow these steps to change a widget:
1. Pressing any of the gauges allows you to switch the
display.
Performance Pages — Home
10
MULTIMEDIA 485
Page 496 of 568
The following options can be selected:
•Pressing the STOP button will freeze the graph. Selecting
Play will clear the graph and restart the process over.
• Press the “+” or “–” buttons to change the history of the
graph. The selectable options are 30, 60, 90, and 120
seconds. The graph will expand or constrict depending
on the setting selected.
• Select the “Gear” display (if equipped) to turn the graph
gear markers on and off.SRT DRIVE MODES
Your SRT vehicle is equipped with a Drive Modes feature
which allows for coordinating the operation of various vehicle
systems depending upon the type of driving behavior desired.
Drive Modes
494 MULTIMEDIA
Page 504 of 568

To adjust the Launch RPM, drag the slider bar or press the
arrows on the touchscreen to adjust the holding RPM. The
launch RPM limit will display in the head units tachometer
display.
Shift Light
Your vehicle is equipped with a shift light feature that
illuminates the back lighting of the tachometer (in red)
within the instrument cluster display. This feature is a
visual cue to manually up-shift using the paddle shifters.
To actuate the Shift Light feature, press the “Shift Light”
button on the touchscreen, then press the “Shift Light On”
button on the touchscreen. Activation is shown on the
instrument cluster display. Pressing the “Shift Light RPM
Set-Up” button on the touchscreen will take you to the
Shift Light RPM Set-Up screen.
NOTE:You must be in Paddle Shift Mode, or the
electronic-shifter must be in the M position, in order to
activate the shift light. Refer to “Automatic Transmission”
in “Starting And Operating” for further information. The Shift Light RPM Set-Up allows you to set the shift light
to illuminate for gears 1, 2, 3, 4, and 5-8. Pressing and
releasing the up/down arrow buttons above and below
each listed gear, the RPM values will change in increments
of 250 RPM. Pressing and holding the arrows will change
the RPM values in increments of 500 RPM, ranging from
6250 RPM. The Shift Light setup screen may only be
accessed if the feature is enabled, press the “Reset to
Shift Light RPM Set-Up
502 MULTIMEDIA
Page 505 of 568

Factory Default” button on the touchscreen to change back
to factory settings, or press the “Shift Light Off” button on
the touchscreen to turn the system off completely.
VALET MODE
To enter Valet Mode press the “Valet” button on the
touchscreen and a popup screen will ask you if you would
like to enter Valet Mode, after selecting “Yes” you will be
asked to enter a four digit PIN code. The PIN code is not
set, so you are free to select any four digit numeric
combination that will be easy to remember.
While in Valet Mode the following vehicle configurations
are set and locked to prevent unauthorized modification:
•All-Wheel Drive is set to 50/50.
• Transmission locks out access to first gear and up-shifts
earlier than normal.
• Steering wheel paddle shifters are disabled.
• The Drive Mode interface is not available. Pushing the
SRT button on the console will display the unlock
keypad.
• The ESC Off button is disabled.
• The Launch Control button is disabled.
• Engine power is reduced.
Valet Mode Activation
10
MULTIMEDIA 503