Page 382 of 592
CavityCartridge Fuse Micro Fuse Description
F50 –20 Amp Yellow Air Suspension Control Module/Slip Differ-
ential - If Equipped
F51 –15 Amp Blue Ignition Node Module/Keyless Ignition/
Steering Column Lock
F53 –20 Amp Yellow Trailer Tow – Left Turn/Stop Lights — If
Equipped
F56 –15 Amp Blue Additional Content (Diesel engine only)
F57 –20 Amp Yellow NOX Sensor
F58 –15 Amp Blue HID Headlamps LH — If Equipped
F59 –10 Amp Red Purging Pump (Diesel engine only)
F60 –15 Amp Blue Transmission Control Module
F61 –10 Amp Red Transmission Control Module/PM Sensor
(Diesel engine only)
F62 –10 Amp Red Air Conditioning Clutch
F63 –20 Amp Yellow Ignition Coils (Gas), Urea Heater (Diesel)
F64 –25 Amp Clear Fuel Injectors/Powertrain
F66 –10 Amp Red Sunroof/Passenger Window Switches/
Rain Sensor
F67 –15 Amp Blue CD/DVD/Bluetooth Hands-free Module —
If Equipped
F68 –20 Amp Yellow Rear Wiper Motor
380 IN CASE OF EMERGENCY
Page 490 of 592

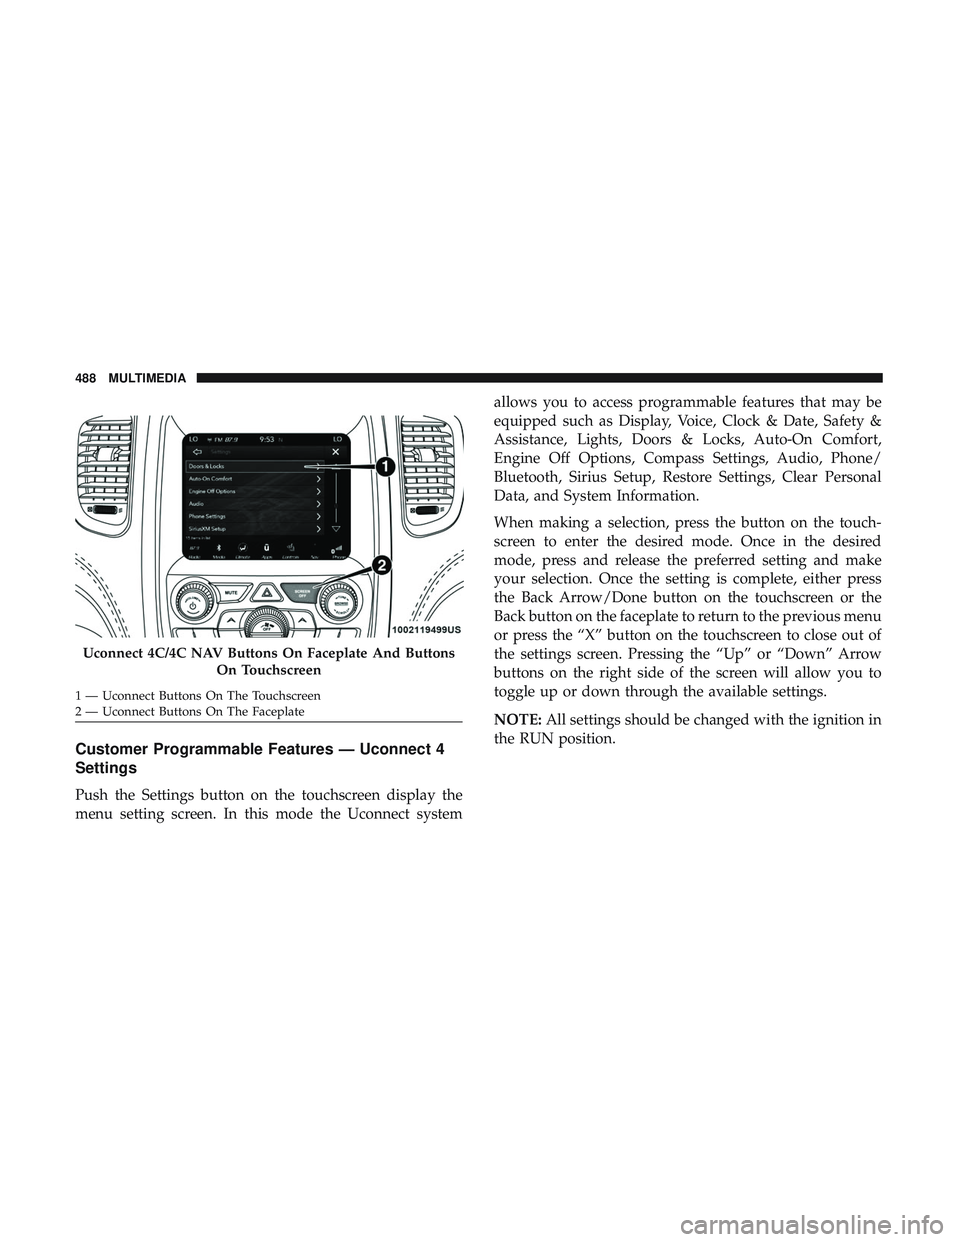
Customer Programmable Features — Uconnect 4
Settings
Push the Settings button on the touchscreen display the
menu setting screen. In this mode the Uconnect systemallows you to access programmable features that may be
equipped such as Display, Voice, Clock & Date, Safety &
Assistance, Lights, Doors & Locks, Auto-On Comfort,
Engine Off Options, Compass Settings, Audio, Phone/
Bluetooth, Sirius Setup, Restore Settings, Clear Personal
Data, and System Information.
When making a selection, press the button on the touch-
screen to enter the desired mode. Once in the desired
mode, press and release the preferred setting and make
your selection. Once the setting is complete, either press
the Back Arrow/Done button on the touchscreen or the
Back button on the faceplate to return to the previous menu
or press the “X” button on the touchscreen to close out of
the settings screen. Pressing the “Up” or “Down” Arrow
buttons on the right side of the screen will allow you to
toggle up or down through the available settings.
NOTE:
All settings should be changed with the ignition in
the RUN position.
Uconnect 4C/4C NAV Buttons On Faceplate And Buttons
On Touchscreen
1 — Uconnect Buttons On The Touchscreen
2 — Uconnect Buttons On The Faceplate 488 MULTIMEDIA
Page 505 of 592
Setting NameSelectable Options
Speed Adjusted Volume Off123
Surround Sound — If Equipped OnOff
Loudness — If Equipped Ye sN o
NOTE:
This feature improves sound quality at lower volumes when enabled. AUX Volume Offset — If Equipped OnOff
NOTE:
This feature provides the ability to tune the audio level for portable devices connected through the AUX input.
Phone/Bluetooth
After pressing the “Phone/Bluetooth” button on the touch-
screen, the following settings will be available:
Setting Name Selectable Options
Paired Phones List of Paired Phones
NOTE:
The “Paired Phones” feature shows which phones are paired to the Phone/Bluetooth system. For further information,
refer to the Uconnect Owner ’s Manual Supplement.10
MULTIMEDIA 503
Page 507 of 592
Reset
After pressing the “Reset” button on the touchscreen, the
following settings will be available:
Setting NameSelectable Options
Restore Settings OKCancel X
NOTE:
When this feature is selected, it will reset all settings to their default settings. To restore the settings to their default
setting, press the “Restore Settings” button on the touchscreen. A pop-up will appear asking �Are you sure you want
to reset your settings to default?”
Restore App Drawer OK Cancel
Clear Personal Data OKCancel X
NOTE:
When this feature is selected, it will remove all personal data including Bluetooth devices and presets. To remove per-
sonal information, press the “Clear Personal Data” button and a pop-up will appear asking �Are you sure you want
to clear all personal data?”
10
MULTIMEDIA 505
Page 508 of 592

System Information
After pressing the “System Information” button on the
touchscreen, the following settings will be available:
Setting NameSelectable Options
Software License System Software Information Screen
NOTE:
When the “System Information” feature is selected, a “System Software Information” screen will appear, displaying
the system software version.
Customer Programmable Features — Uconnect
4C/4C NAV Settings
Press the “Apps” button, then press the “Settings”
button on the touchscreen to display the menu setting
screen. In this mode the Uconnect system allows you to
access programmable features that may be equipped
such as Display, Units, Voice, Clock, Safety & Driving
Assistance, Lights, Doors & Locks, Auto-On Comfort,
Engine Off Options, Audio, Phone/Bluetooth, SiriusXM
Setup, Restore Settings, Clear Personal Data, and Sys-
tem Information.
NOTE: Depending on the vehicles options, feature settings
may vary. When making a selection, press the button on the touch-
screen to enter the desired mode. Once in the desired
mode, press and release the preferred setting “option” until
a check-mark appears next to the setting, showing that
setting has been selected. Once the setting is complete,
either press the “Back” Arrow button on the touchscreen to
return to the previous menu, or press the “X” button on the
touchscreen to close out of the settings screen. Pressing the
“Up” or “Down” Arrow button on the right side of the
screen will allow you to toggle up or down through the
available settings.
506 MULTIMEDIA
Page 525 of 592
Setting NameSelectable Options
NOTE:
This feature provides the ability to tune the audio level for portable devices connected through the AUX input. Auto Play On Off
Phone/Bluetooth Settings
After pressing the “Phone/Bluetooth Settings” button on
the touchscreen, the following settings will be available:
Setting Name Selectable Options
Do Not Disturb List of Settings
NOTE:
Press “Do Not Disturb” to access the available settings. The following settings are: Auto Reply (both, text, call), Auto
Reply Message (custom, default) and Custom Auto Reply Message (create message). Paired Phones and Audio Sources List Of Paired Phones and Audio Sources
NOTE:
The “Paired Phones and Audio Sources” feature shows which phones and audio sources are paired to the Phone and
Audio Sources Settings system. For further information, refer to the Uconnect Owner ’s Manual Supplement.
10
MULTIMEDIA 523
Page 528 of 592
Reset
After pressing the “Reset” button on the touchscreen, the
following settings will be available:
Setting NameSelectable Options
Reset App Drawer OK Cancel
Restore Personal Settings OkCancel X
NOTE:
When this feature is selected, it will reset all settings to their default settings. To restore the settings to their default
setting, press the “Restore Settings” button on the touchscreen. A pop-up will appear asking �Are you sure you want
to reset your settings to default?”
Clear Personal Data OKCancel X
NOTE:
When this feature is selected, it will remove all personal data including Bluetooth devices and presets. To remove per-
sonal information, press the “Clear Personal Data” button and a pop-up will appear asking �Are you sure you want
to clear all personal data?”
526 MULTIMEDIA
Page 530 of 592

The right-hand control is a rocker-type switch with a
push-button in the center and controls the volume and
mode of the sound system. Pushing the top of the rocker
switch increases the volume, and pushing the bottom of the
rocker switch decreases the volume.
Pushing the center button makes the radio switch between
the various modes available (AM/FM/SXM or Media etc.)
The left-hand control is a rocker-type switch with a push-
button in the center. The function of the left-hand control is
different depending on which mode you are in.
The following describes the left-hand control operation in
each mode.
Radio Operation
Pushing the top of the switch will “Seek” up for the next
listenable station and pushing the bottom of the switch will
“Seek” down for the next listenable station.
The button located in the center of the left-hand control
will tune to the next preset station that you have pro-
grammed in the radio preset button.
Media Mode
Pushing the top of the switch once goes to the next track on
the selected media (AUX/USB/Bluetooth). Pushing the
bottom of the switch once goes to the beginning of the
current track, or to the beginning of the previous track if it
is within eight seconds after the current track begins to
play.
IPOD/USB/MP3 CONTROL — IF EQUIPPED
This feature allows an iPod or external USB device to be
plugged into the USB port, located in the lower section of
the front integrated center stack, in front of the rotary
transmission gear selector.
iPod control supports Mini, 4G, Photo, Nano, 5G iPod and
iPhone devices. Some iPod software versions may not fully
support the iPod control features. Please visit Apple’s
website for software updates.
For further information, refer to the Uconnect Owner ’s
Manual Supplement.
528 MULTIMEDIA