Page 10 of 592
FRONT VIEW
Front View
1 — Doors4 — Wheels/Tires
2 — Exterior Mirrors 5 — Hood/Engine Compartment
3 — Windshield 6 — Headlights
8 GRAPHICAL TABLE OF CONTENTS
Page 11 of 592
REAR VIEW
Rear View
1 — Rear Lights
2 — Rear Windshield Wiper
3 — Liftgate Handle
2
GRAPHICAL TABLE OF CONTENTS 9
Page 17 of 592

▫Illuminated Vanity Mirrors ................71
� EXTERIOR LIGHTS .......................72
▫ Headlight Switch .......................72
▫ Daytime Running Lights — If Equipped .......73
▫ Multifunction Lever ......................73
▫ High/Low Beam Switch ...................74
▫ Automatic High Beam — If Equipped ........74
▫ Flash-To-Pass ..........................74
▫ Automatic Headlights ....................74
▫ Parking Lights And Panel Lights .............75
▫ Headlights On Automatically With Wipers .....75
▫ Headlight Delay ........................75
▫ Lights-On Reminder ......................75
▫ Fog Lights — If Equipped .................76
▫ Turn Signals ...........................76
▫ Lane Change Assist — If Equipped ..........76
▫ Battery Saver ...........................77 �
INTERIOR LIGHTS .......................77
▫ Courtesy Lights .........................77
� WINDSHIELD WIPERS AND WASHERS ........80
▫ Windshield Wiper Operation ................81
▫ Rain Sensing Wipers — If Equipped ..........83
▫ Rear Window Wiper/Washer ...............84
� CLIMATE CONTROLS .....................85
▫ Automatic Climate Control Overview .........86
▫ Climate Control Functions .................97
▫ Automatic Temperature Control (ATC) — If
Equipped .............................98
▫ Operating Tips ........................100
� WINDOWS ............................102
▫ Power Windows .......................102
▫ Wind Buffeting ........................105
� POWER SUNROOF — IF EQUIPPED .........105
▫ Opening Sunr
oof .......................106
3
GETTING TO KNOW YOUR VEHICLE 15
Page 70 of 592

MIRRORS
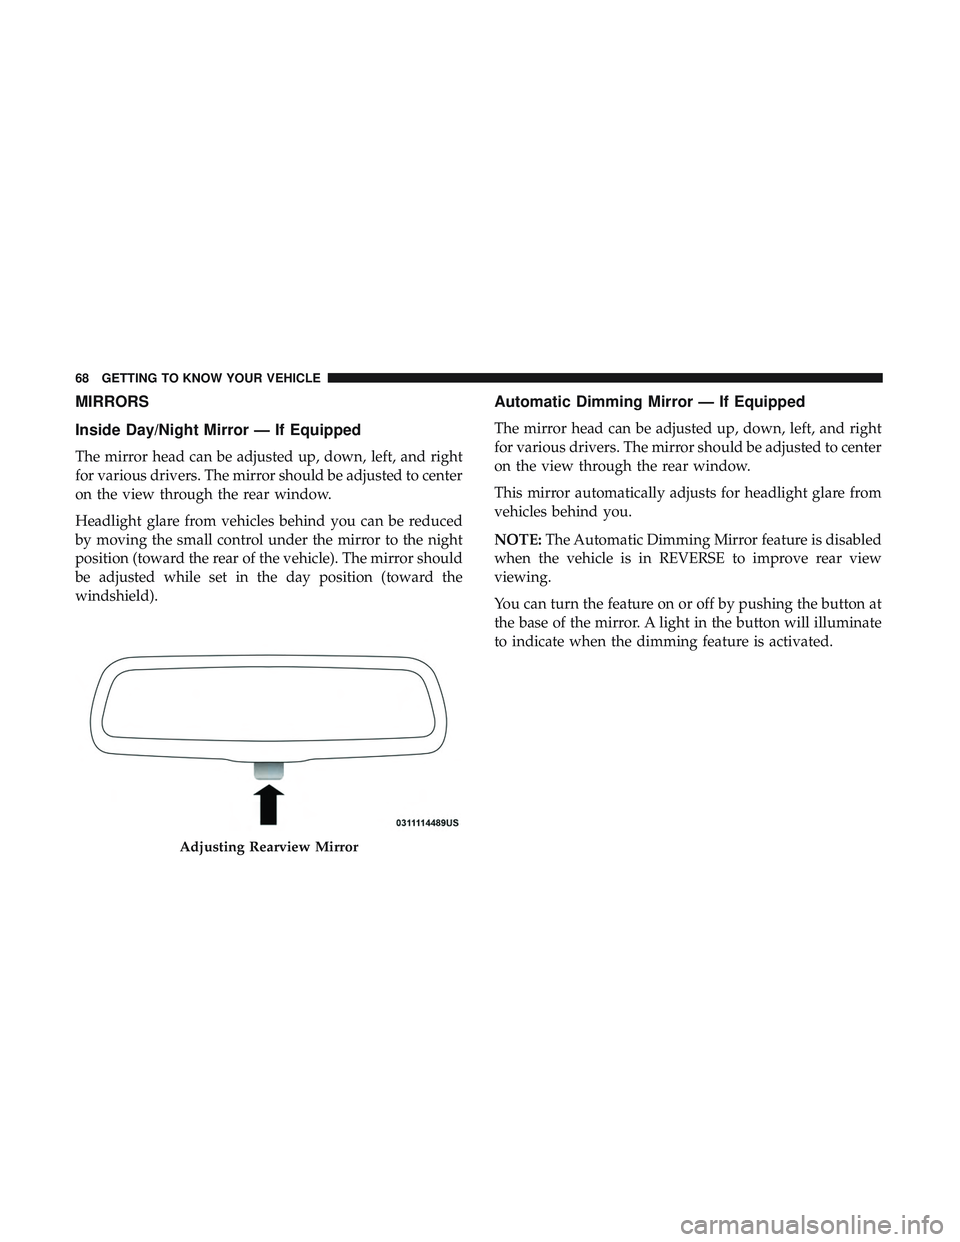
Inside Day/Night Mirror — If Equipped
The mirror head can be adjusted up, down, left, and right
for various drivers. The mirror should be adjusted to center
on the view through the rear window.
Headlight glare from vehicles behind you can be reduced
by moving the small control under the mirror to the night
position (toward the rear of the vehicle). The mirror should
be adjusted while set in the day position (toward the
windshield).
Automatic Dimming Mirror — If Equipped
The mirror head can be adjusted up, down, left, and right
for various drivers. The mirror should be adjusted to center
on the view through the rear window.
This mirror automatically adjusts for headlight glare from
vehicles behind you.
NOTE:The Automatic Dimming Mirror feature is disabled
when the vehicle is in REVERSE to improve rear view
viewing.
You can turn the feature on or off by pushing the button at
the base of the mirror. A light in the button will illuminate
to indicate when the dimming feature is activated.
Adjusting Rearview Mirror
68 GETTING TO KNOW YOUR VEHICLE
Page 74 of 592

Sun Visor “Slide-On-Rod” Feature — If Equipped
The sun visor “Slide-On-Rod” feature allows for additional
flexibility in positioning the sun visor to block out the sun.
1. Fold down the sun visor.
2. Unclip the visor from the center clip.
3. Pivot the sun visor toward the side window.
4. Extend the sun visor blade for additional sun blockage.
NOTE:The sun visor blade can also be extended while the
sun visor is against the windshield for additional sun
blockage through the front of the vehicle.
EXTERIOR LIGHTS
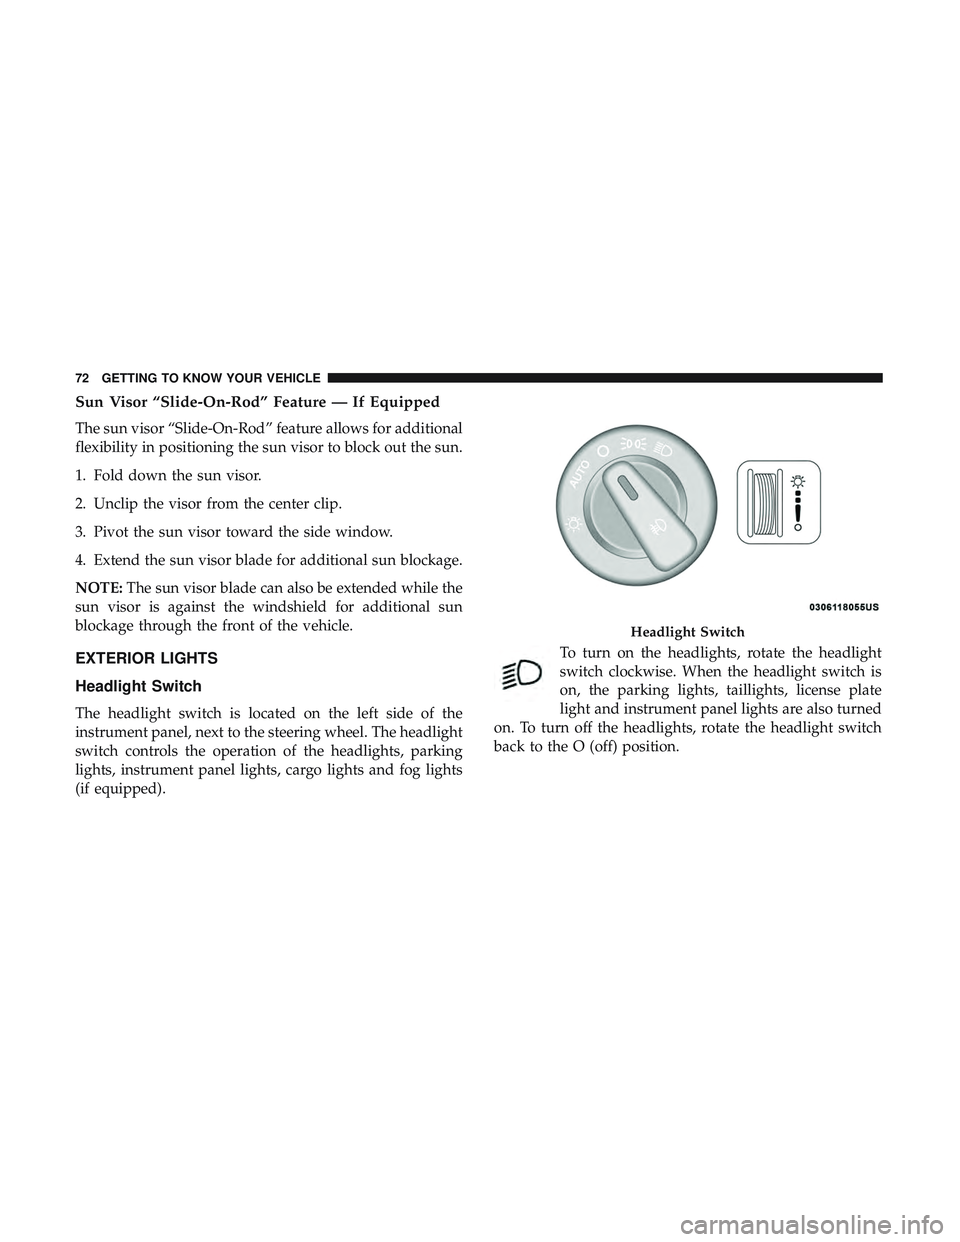
Headlight Switch
The headlight switch is located on the left side of the
instrument panel, next to the steering wheel. The headlight
switch controls the operation of the headlights, parking
lights, instrument panel lights, cargo lights and fog lights
(if equipped). To turn on the headlights, rotate the headlight
switch clockwise. When the headlight switch is
on, the parking lights, taillights, license plate
light and instrument panel lights are also turned
on. To turn off the headlights, rotate the headlight switch
back to the O (off) position.
Headlight Switch
72 GETTING TO KNOW YOUR VEHICLE
Page 76 of 592

High/Low Beam Switch
Push the multifunction lever toward the instrument panel
to switch the headlights to high beams. Pulling the multi-
function back toward the steering wheel will turn the low
beams back on, or shut the high beams off.
Automatic High Beam — If Equipped
The Automatic High Beam Headlamp Control system
provides increased forward lighting at night by automat-
ing high beam control through the use of a digital camera
mounted on the inside rearview mirror. This camera de-
tects vehicle specific light and automatically switches from
high beams to low beams until the approaching vehicle is
out of view.
NOTE:
•The Automatic High Beam Headlamp Control can be
turned on or off by selecting “ON” under “Auto High
Beam” within your Uconnect settings, as well as turning
the headlight switch to the AUTO position. Refer to
“Uconnect Settings” in “Multimedia” for further infor-
mation.
• Broken, muddy, or obstructed headlights and taillights
of vehicles in the field of view will cause headlights to
remain on longer (closer to the vehicle). Also, dirt, film, and other obstructions on the windshield or camera lens
will cause the system to function improperly.
If the windshield or Automatic High Beam Headlamp
Control mirror is replaced, the mirror must be re-aimed to
ensure proper performance. See your local authorized
dealer.Flash-To-Pass
You can signal another vehicle with your headlights by
lightly pulling the multifunction lever toward you. This
will cause the high beam headlights to turn on, and remain
on, until the lever is released.
Automatic Headlights
This system automatically turns the headlights on or off
according to ambient light levels. To turn the system on,
rotate the headlight switch counterclockwise to the AUTO
position. When the system is on, the headlight time delay
feature is also on. This means the headlights will stay on
for up to 90 seconds after you place the ignition into the
OFF position. The headlight time delay can be pro-
grammed 0/30/60/90 seconds.
Refer to “Uconnect Settings” in “Multimedia” for further
information.
74 GETTING TO KNOW YOUR VEHICLE
Page 82 of 592
The brightness of the instrument panel lighting can be
regulated by rotating the dimmer control up (brighter) or
down (dimmer). When the headlights are on you can
supplement the brightness of the odometer, trip odometer,
radio and overhead console by rotating the control to its
farthest position up until you hear a click. This feature is
termed the “Parade” mode and is useful when headlights
are required during the day.WINDSHIELD WIPERS AND WASHERS
The windshield wiper/washer controls are located on the
multifunction lever on the left side of the steering column.
The front wipers are operated by rotating a switch, located
on the end of the lever. For information on the rear
wiper/washer, refer to “Rear Window Wiper/Washer” in
this section.
Dimmer ControlMultifunction Lever
80 GETTING TO KNOW YOUR VEHICLE
Page 83 of 592
Windshield Wiper Operation
Rotate the end of the lever to one of the first four detent
positions for intermittent settings, the fifth detent for low
wiper operation and the sixth detent for high wiper
operation.
CAUTION!
Always remove any buildup of snow that prevents the
windshield wiper blades from returning to the “park”
position. If the windshield wiper switch is turned off,
and the blades cannot return to the “park” position,
damage to the wiper motor may occur.
Intermittent Wiper System
Use one of the four intermittent wiper settings when
weather conditions make a single wiping cycle, with a
variable delay between cycles, desirable. At driving speeds
above 10 mph (16 km/h), the delay can be regulated from
a maximum of approximately 18 seconds between cycles
(first detent), to a cycle every one second (fourth detent).
Windshield Wiper Operation
3
GETTING TO KNOW YOUR VEHICLE 81