2018 DODGE CHARGER window
[x] Cancel search: windowPage 94 of 553
NOTE:For vehicles equipped with the Uconnect system,
the power window switches will remain active for up to
ten minutes after the ignition is placed in the OFF position.
Opening either front door will cancel this feature. The time
is programmable. Refer to “Uconnect Settings” in “Multi-
media” for further information.
WARNING!
Never leave children unattended in a vehicle, and do
not let children play with power windows. Do not
leave the key fob in or near the vehicle, or in a location
accessible to children, and do not leave the ignition of
a vehicle equipped with Keyless Enter-N-Go in the
ACC or ON/RUN mode. Occupants, particularly unat-
tended children, can become entrapped by the win-
dows while operating the power window switches.
Such entrapment may result in serious injury or death.
Auto-Down Feature
The driver and, in some models, passenger power window
switches have an Auto-Down feature. Push the window
switch to the second detent, release, and the window will
go down automatically.
To open the window part way, push the window switch to
the first detent and release it when you want the window
to stop.
To stop the window from going all the way down during
the Auto-Down operation, pull up on the switch briefly.
Auto-Up Feature With Anti-Pinch Protection — If
Equipped
Pull window up switch to second detent for at least a half
of a second and the window will go up automatically.
To stop the window during an Auto-Up operation, push or
pull the window switch again.
To close the window part way, pull and hold the window
switch briefly and release it when you want the window to
stop.
92 GETTING TO KNOW YOUR VEHICLE
Page 95 of 553
NOTE:
•If the window runs into any obstacle during Auto-
Closure, it will reverse direction and then go back down.
Remove the obstacle and use the window switch again
to close the window.
• Any impact due to rough road conditions may trigger
the Auto-Reverse function unexpectedly during auto-
closure. If this happens, pull and hold the switch to close
the window manually.
WARNING!
There is no anti-pinch protection when the window is
almost closed. Be sure to clear all objects from the
window before closing.
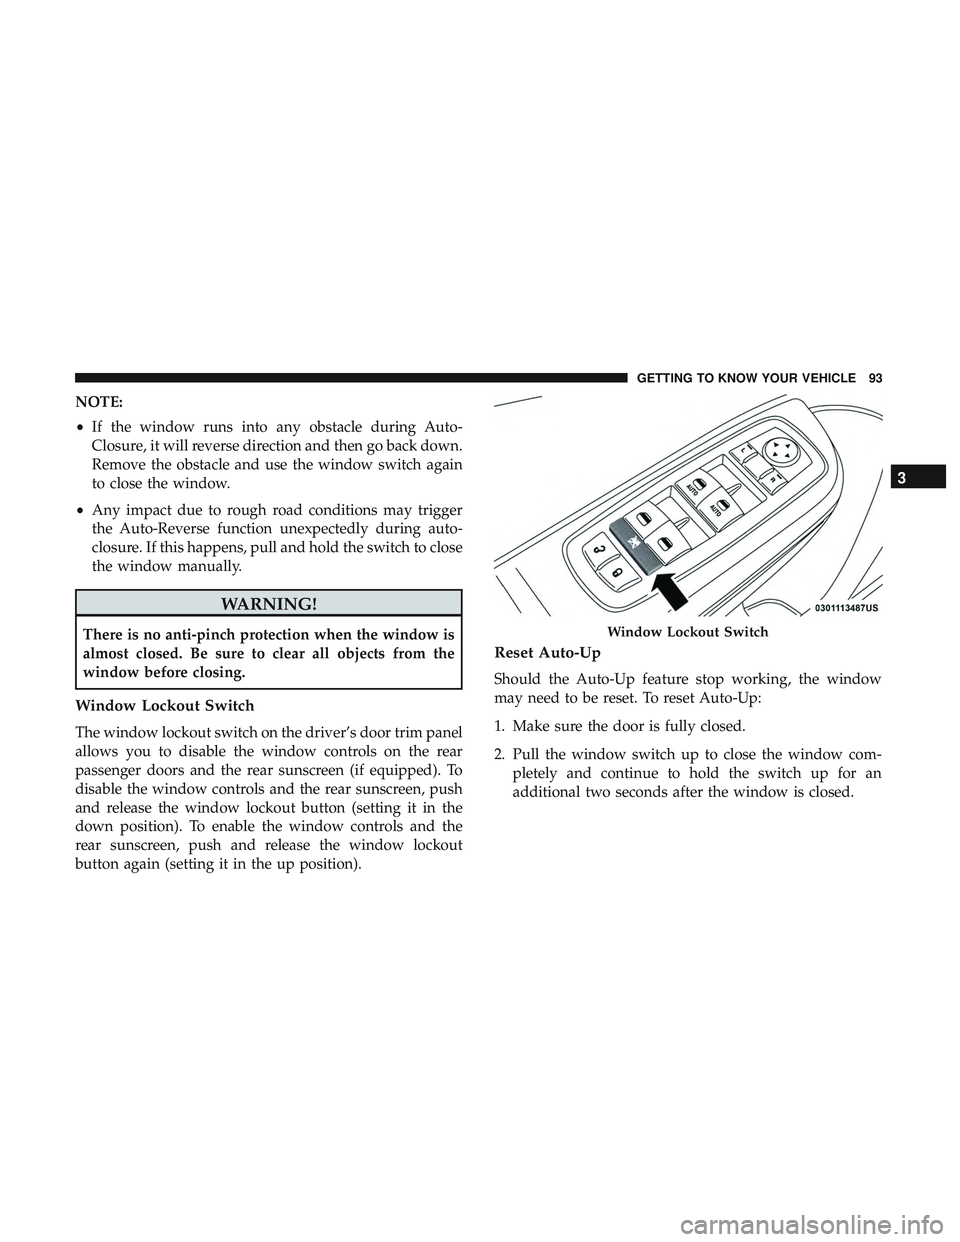
Window Lockout Switch
The window lockout switch on the driver’s door trim panel
allows you to disable the window controls on the rear
passenger doors and the rear sunscreen (if equipped). To
disable the window controls and the rear sunscreen, push
and release the window lockout button (setting it in the
down position). To enable the window controls and the
rear sunscreen, push and release the window lockout
button again (setting it in the up position).
Reset Auto-Up
Should the Auto-Up feature stop working, the window
may need to be reset. To reset Auto-Up:
1. Make sure the door is fully closed.
2. Pull the window switch up to close the window com-
pletely and continue to hold the switch up for an
additional two seconds after the window is closed.
Window Lockout Switch
3
GETTING TO KNOW YOUR VEHICLE 93
Page 96 of 553
3. Push the window switch down firmly to the seconddetent to open the window completely and continue to
hold the switch down for an additional two seconds
after the window is fully open.
Wind Buffeting
Wind buffeting can be described as the perception of
pressure on the ears or a helicopter-type sound in the ears.
Your vehicle may exhibit wind buffeting with the windows
down, or the sunroof (if equipped) in certain open or
partially open positions. This is a normal occurrence and
can be minimized. If the buffeting occurs with the rear
windows open, open the front and rear windows together
to minimize the buffeting. If the buffeting occurs with the
sunroof open, adjust the sunroof opening to minimize the
buffeting or open any window.
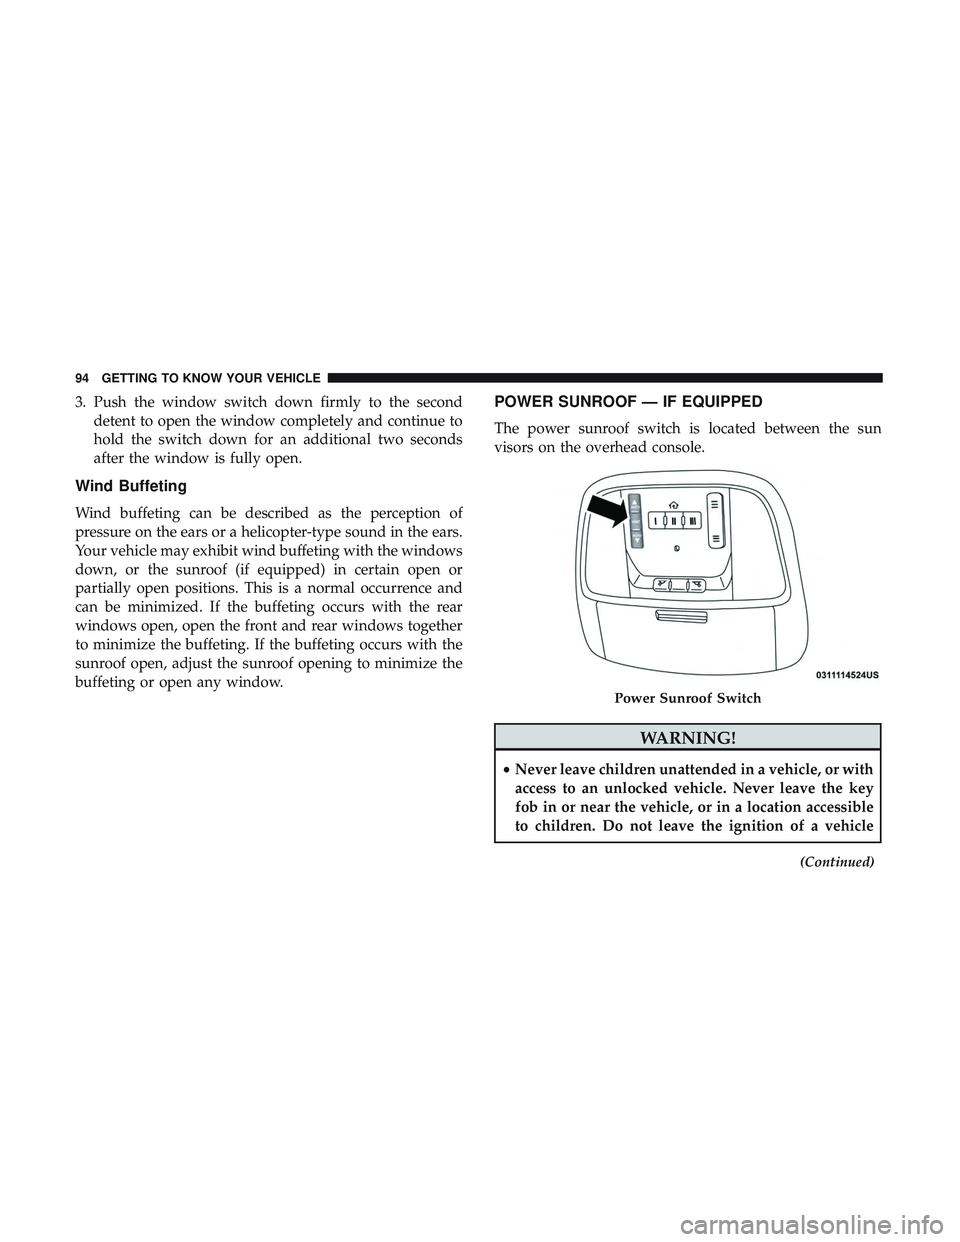
POWER SUNROOF — IF EQUIPPED
The power sunroof switch is located between the sun
visors on the overhead console.
WARNING!
•Never leave children unattended in a vehicle, or with
access to an unlocked vehicle. Never leave the key
fob in or near the vehicle, or in a location accessible
to children. Do not leave the ignition of a vehicle
(Continued)
Power Sunroof Switch
94 GETTING TO KNOW YOUR VEHICLE
Page 98 of 553
Wind Buffeting
Wind buffeting can be described as the perception of
pressure on the ears or a helicopter-type sound in the ears.
Your vehicle may exhibit wind buffeting with the windows
down, or the sunroof (if equipped) in certain open or
partially open positions. This is a normal occurrence and
can be minimized. If the buffeting occurs with the rear
windows open, then open the front and rear windows
together to minimize the buffeting. If the buffeting occurs
with the sunroof open, adjust the sunroof opening to
minimize the buffeting or open any window.
Venting Sunroof — Express
Push and release the Vent button within one half second
and the sunroof will open to the vent position. This is
called “Express Vent”, and it will occur regardless of
sunroof position. During Express Vent operation, any other
actuation of the switch will stop the sunroof.
Sunshade Operation
The sunshade can be opened manually. However, the
sunshade will open automatically as the sunroof opens.
NOTE:The sunshade cannot be closed if the sunroof is
open.
Pinch Protect Feature
This feature will detect an obstruction in the closing of the
sunroof during the Express Close operation. If an obstruc-
tion in the path of the sunroof is detected, the sunroof will
automatically retract. Remove the obstruction if this oc-
curs.
NOTE: If three consecutive sunroof close attempts result in
Pinch Protect reversals, Pinch Protect will disable and the
sunroof must be closed in Manual Mode.
Sunroof Maintenance
Use only a non-abrasive cleaner and a soft cloth to clean the
glass panel.
Ignition Off Operation
NOTE:
• The power sunroof switch can remain active in Acces-
sory Delay for up to approximately ten minutes after the
vehicle’s ignition is placed to the OFF position. Opening
either front door will cancel this feature.
• This feature is programmable using the Uconnect Sys-
tem. Refer to “Uconnect Settings” in “Multimedia” for
further information.
96 GETTING TO KNOW YOUR VEHICLE
Page 175 of 553
2. If a child from 2 to 12 years old (not in a rear-facing childrestraint) must ride in the front passenger seat, move the
seat as far back as possible and use the proper child
restraint (refer to “Child Restraints” in this section for
further information).
3. Children that are not big enough to wear the vehicle seat belt properly (refer to “Child Restraints” in this section
for further information) should be secured in the rear
seat of a vehicle with a rear seat in child restraints or
belt-positioning booster seats. Older children who do
not use child restraints or belt-positioning booster seats
should ride properly buckled up in the rear seat of a
vehicle with a rear seat.
4. Never allow children to slide the shoulder belt behind them or under their arm.
5. You should read the instructions provided with your child restraint to make sure that you are using it
properly.
6. All occupants should always wear their lap and shoul- der belts properly.
7. The driver and front passenger seats should be moved back as far as practical to allow the front air bags room
to inflate. 8. Do not lean against the door or window. If your vehicle
has side air bags, and deployment occurs, the side air
bags will inflate forcefully into the space between occu-
pants and the door and occupants could be injured.
9. If the air bag system in this vehicle needs to be modified to accommodate a disabled person, refer to the “Cus-
tomer Assistance” section for customer service contact
information.
WARNING!
•Never place a rear-facing child restraint in front of an
air bag. A deploying passenger front air bag can
cause death or serious injury to a child 12 years or
younger, including a child in a rear-facing child
restraint.
• Only use a rear-facing child restraint in the rear seat
of a vehicle with a rear seat.
Seat Belt Systems
Buckle up even though you are an excellent driver, even on
short trips. Someone on the road may be a poor driver and
could cause a collision that includes you. This can happen
far away from home or on your own street.
5
SAFETY 173
Page 192 of 553
area where the SAB inflates. Children are at an even greater
risk of injury from a deploying air bag.
WARNING!
Do not use accessory seat covers or place objects
between you and the Side Air Bags; the performance
could be adversely affected and/or objects could be
pushed into you, causing serious injury.
Supplemental Side Air Bag Inflatable Curtains (SABICs)
This vehicle is equipped with Supplemental Side Air Bag
Inflatable Curtains (SABICs).
Supplemental Side Air Bag Inflatable Curtains (SABICs)
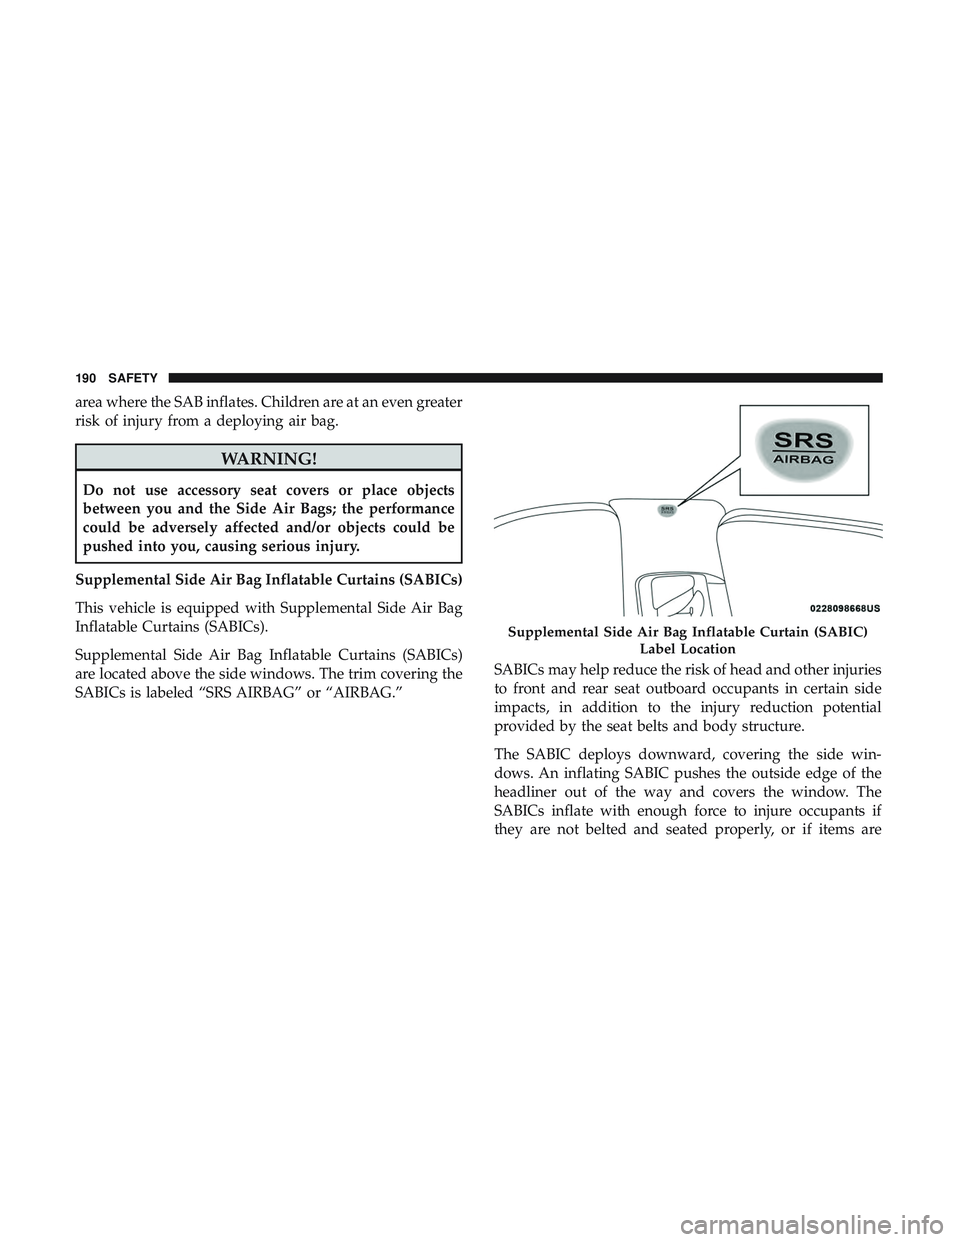
are located above the side windows. The trim covering the
SABICs is labeled “SRS AIRBAG” or “AIRBAG.” SABICs may help reduce the risk of head and other injuries
to front and rear seat outboard occupants in certain side
impacts, in addition to the injury reduction potential
provided by the seat belts and body structure.
The SABIC deploys downward, covering the side win-
dows. An inflating SABIC pushes the outside edge of the
headliner out of the way and covers the window. The
SABICs inflate with enough force to injure occupants if
they are not belted and seated properly, or if items are
Supplemental Side Air Bag Inflatable Curtain (SABIC)
Label Location
190 SAFETY
Page 193 of 553

positioned in the area where the SABICs inflate. Children
are at an even greater risk of injury from a deploying air
bag.
The SABICs may help reduce the risk of partial or complete
ejection of vehicle occupants through side windows in
certain side impact events.
WARNING!
•Do not mount equipment, or stack luggage or other
cargo up high enough to block the deployment of the
SABICs. The trim covering above the side windows
where the SABIC and its deployment path are lo-
cated should remain free from any obstructions.
• In order for the SABICs to work as intended, do not
install any accessory items in your vehicle which
could alter the roof. Do not add an aftermarket
sunroof to your vehicle. Do not add roof racks that
require permanent attachments (bolts or screws) for
installation on the vehicle roof. Do not drill into the
roof of the vehicle for any reason. Side Impacts
The Side Air Bags are designed to activate in certain side
impacts. The Occupant Restraint Controller (ORC) deter-
mines whether the deployment of the Side Air Bags in a
particular impact event is appropriate, based on the sever-
ity and type of collision. The side impact sensors aid the
ORC in determining the appropriate response to impact
events. The system is calibrated to deploy the Side Air Bags
on the impact side of the vehicle during impacts that
require Side Air Bag occupant protection. In side impacts,
the Side Air Bags deploy independently; a left side impact
deploys the left Side Air Bags only and a right-side impact
deploys the right Side Air Bags only. Vehicle damage by
itself is not a good indicator of whether or not Side Air
Bags should have deployed.
The Side Air Bags will not deploy in all side collisions,
including some collisions at certain angles, or some side
collisions that do not impact the area of the passenger
compartment. The Side Air Bags may deploy during
angled or offset frontal collisions where the front air bags
deploy.
5
SAFETY 191
Page 194 of 553
Side Air Bags are a supplement to the seat belt restraint
system. Side Air Bags deploy in less time than it takes to
blink your eyes.
WARNING!
•Occupants, including children, who are up against or
very close to Side Air Bags can be seriously injured
or killed. Occupants, including children, should
never lean on or sleep against the door, side win-
dows, or area where the side air bags inflate, even if
they are in an infant or child restraint.
• Seat belts (and child restraints where appropriate)
are necessary for your protection in all collisions.
They also help keep you in position, away from an
inflating Side Air Bag. To get the best protection
from the Side Air Bags, occupants must wear their
seat belts properly and sit upright with their backs
against the seats. Children must be properly re-
strained in a child restraint or booster seat that is
appropriate for the size of the child.
WARNING!
•Side Air Bags need room to inflate. Do not lean
against the door or window. Sit upright in the center
of the seat.
• Being too close to the Side Air Bags during deploy-
ment could cause you to be severely injured or
killed.
• Relying on the Side Air Bags alone could lead to
more severe injuries in a collision. The Side Air Bags
work with your seat belt to restrain you properly. In
some collisions, Side Air Bags won’t deploy at all.
Always wear your seat belt even though you have
Side Air Bags.
NOTE: Air bag covers may not be obvious in the interior
trim, but they will open during air bag deployment.
Rollover Events
Side Air Bags are designed to activate in certain rollover
events. The ORC determines whether the deployment of
the Side Air Bags in a particular rollover event is appro-
priate, based on the severity and type of collision. Vehicle
damage by itself is not a good indicator of whether or not
Side Air Bags should have deployed.
192 SAFETY