2018 DODGE CHARGER ignition
[x] Cancel search: ignitionPage 71 of 553
headlight switch. To turn off the front fog lights, either
push the headlight switch a second time or turn off the
headlight switch.
An indicator light in the instrument cluster display illumi-
nates when the fog lights are turned on.
NOTE:The fog lights will operate with the low beam
headlights or parking lights on. However, selecting the
high beam headlights will turn off the fog lights.
Turn Signals
Move the multifunction lever up or down and the arrows
on each side of the instrument cluster display flash to show
proper operation of the front and rear turn signal lights.
NOTE:
• If either light remains on and does not flash, or there is
a very fast flash rate, check for a defective outside light
bulb. If an indicator fails to light when the lever is
moved, it would suggest that the indicator bulb is
defective.
• A “Turn Signal On” message will appear in the instru-
ment cluster display and a continuous chime will sound
if the vehicle is driven more than 1 mile (1.6 km) with
either turn signal on.
Lane Change Assist — If Equipped
Tap the multifunction lever up or down once, without
moving beyond the detent, and the turn signal (right or
left) will flash three times then automatically turn off.
INTERIOR LIGHTS
The interior lights come on when a door is opened.
To protect the battery, the interior lights will turn off
automatically ten minutes after the ignition is moved to the
OFF position. This will occur if the interior lights were
switched on manually or are on because a door is open.
The Battery Protection also includes the glove compart-
ment light and the trunk light. To restore interior light
operation after automatic battery protection is enabled
(lights off), either place the ignition in the ON/RUN
position or cycle the light switch.
3
GETTING TO KNOW YOUR VEHICLE 69
Page 75 of 553
Parade Mode (Daytime Brightness Feature)
Rotate the instrument panel dimmer control upward to the
first detent. This feature brightens all text displays such as
the odometer, instrument cluster display, and radio when
the position lights or headlights are on.
WINDSHIELD WIPERS AND WASHERS
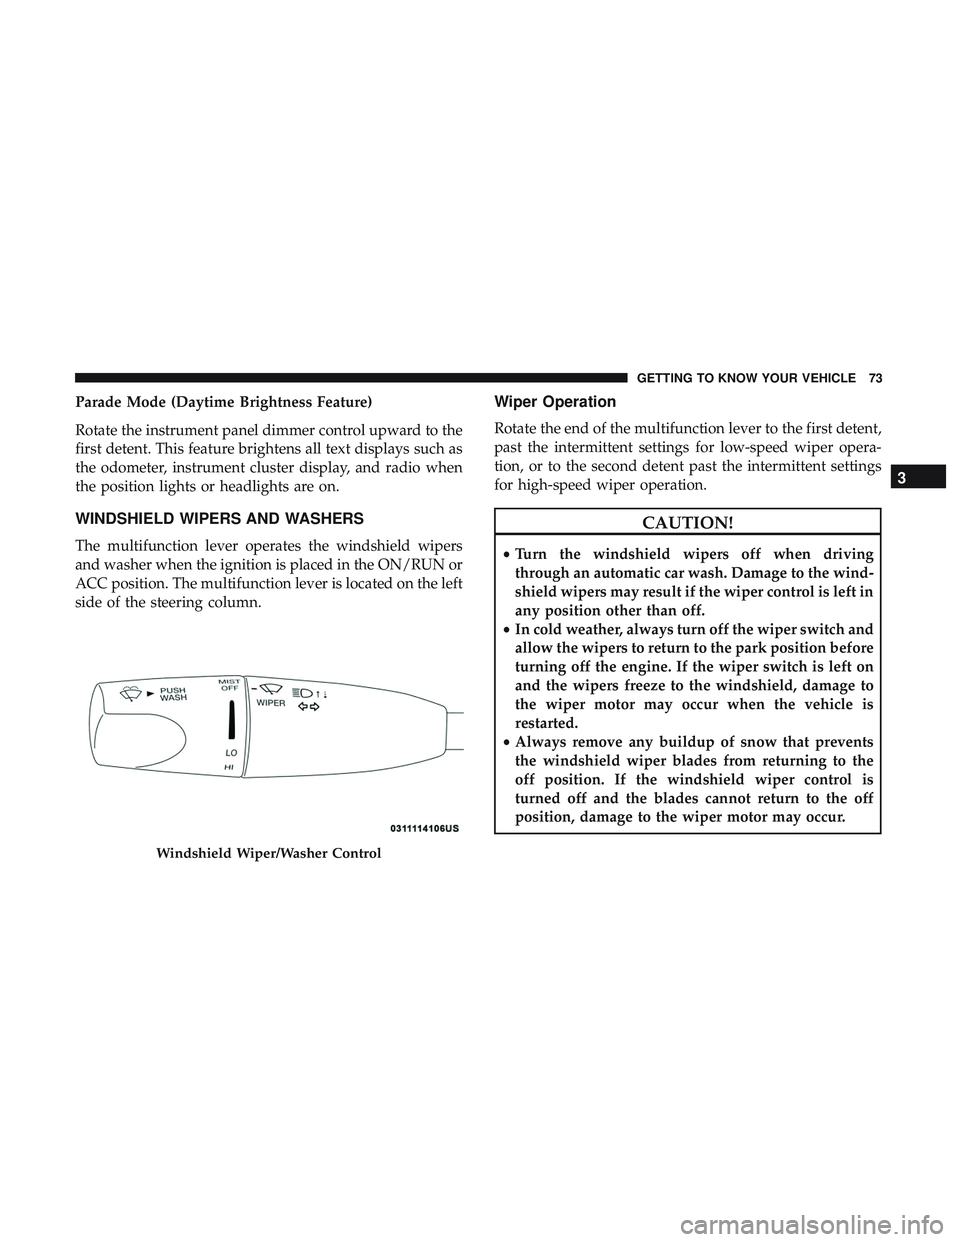
The multifunction lever operates the windshield wipers
and washer when the ignition is placed in the ON/RUN or
ACC position. The multifunction lever is located on the left
side of the steering column.
Wiper Operation
Rotate the end of the multifunction lever to the first detent,
past the intermittent settings for low-speed wiper opera-
tion, or to the second detent past the intermittent settings
for high-speed wiper operation.
CAUTION!
•Turn the windshield wipers off when driving
through an automatic car wash. Damage to the wind-
shield wipers may result if the wiper control is left in
any position other than off.
• In cold weather, always turn off the wiper switch and
allow the wipers to return to the park position before
turning off the engine. If the wiper switch is left on
and the wipers freeze to the windshield, damage to
the wiper motor may occur when the vehicle is
restarted.
• Always remove any buildup of snow that prevents
the windshield wiper blades from returning to the
off position. If the windshield wiper control is
turned off and the blades cannot return to the off
position, damage to the wiper motor may occur.
Windshield Wiper/Washer Control
3
GETTING TO KNOW YOUR VEHICLE 73
Page 77 of 553
from the windshield washers of the vehicle ahead. Rotate
the end of the multifunction lever to one of four settings to
activate this feature.
The sensitivity of the system can be adjusted with the
multifunction lever. Wiper delay position 1 is the least
sensitive, and wiper delay position 4 is the most sensitive.
Setting 3 should be used for normal rain conditions.
Settings 1 and 2 can be used if the driver desires less wiper
sensitivity. Setting 4 can be used if the driver desires more
sensitivity. Place the wiper switch in the off position when
not using the system.
NOTE:
•The Rain Sensing feature will not operate when the
wiper switch is in the low or high-speed position.
• The Rain Sensing feature may not function properly
when ice, or dried salt water is present on the wind-
shield.
• Use of Rain-X or products containing wax or silicone
may reduce Rain Sensing performance. The Rain Sensing system has protection features for the
wiper blades and arms, and will not operate under the
following conditions:
•
Low Ambient Temperature — When the ignition is first
turned ON, the Rain Sensing system will not operate
until the wiper switch is moved, vehicle speed is greater
than 0 mph (0 km/h), or the outside temperature is
greater than 32°F (0°C).
• Transmission In NEUTRAL Position — When the igni-
tion is ON, and the transmission is in the NEUTRAL
position, the Rain Sensing system will not operate until
the wiper switch is moved, vehicle speed is greater than
3 mph (5 km/h), or the gear selector is moved out of the
NEUTRAL position.
NOTE: Rain Sensing can be turned on and off using the
Uconnect System, refer to “Uconnect Settings” in “Multi-
media” for further information.
3
GETTING TO KNOW YOUR VEHICLE 75
Page 93 of 553
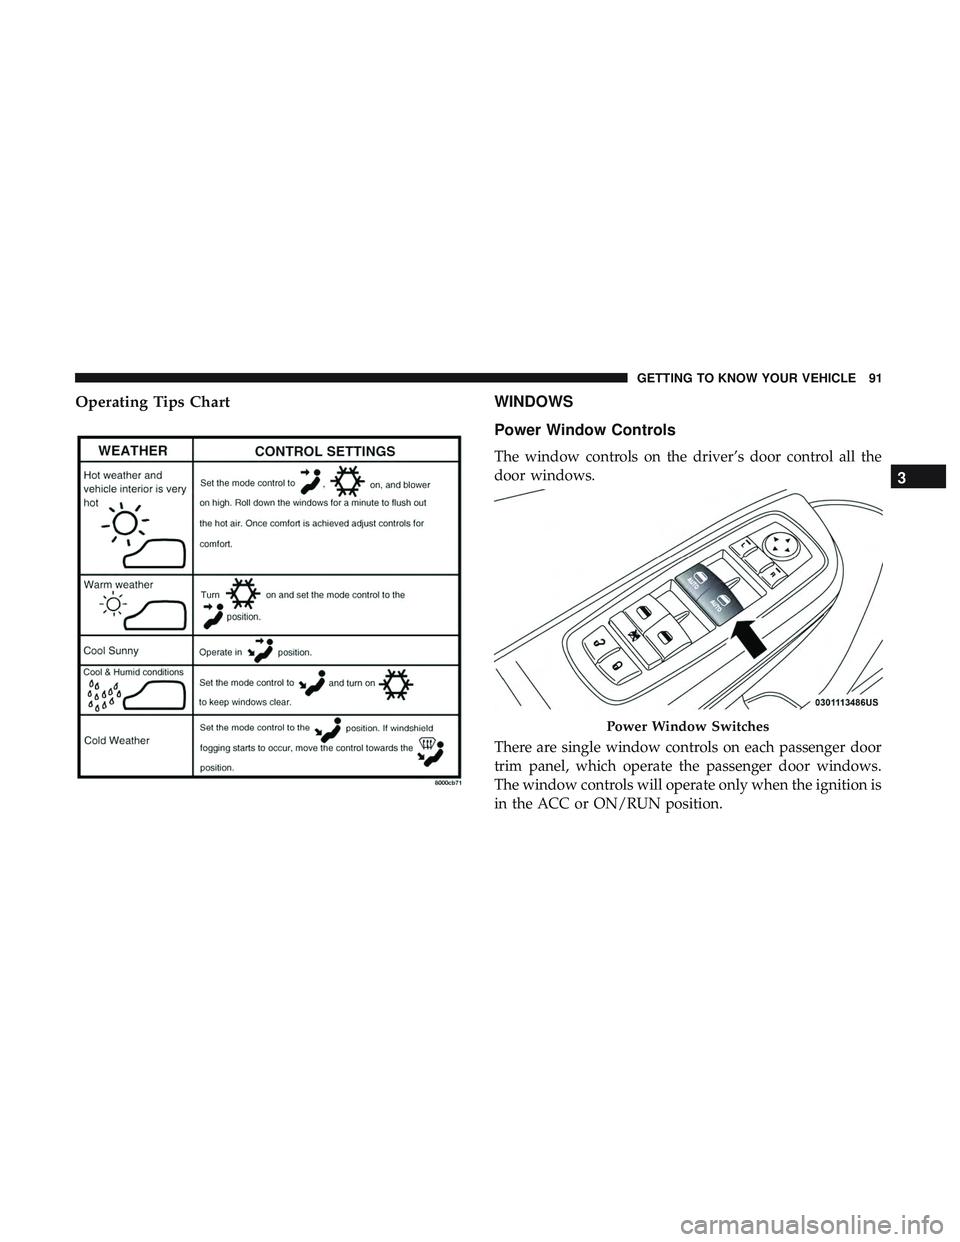
Operating Tips ChartWINDOWS
Power Window Controls
The window controls on the driver’s door control all the
door windows.
There are single window controls on each passenger door
trim panel, which operate the passenger door windows.
The window controls will operate only when the ignition is
in the ACC or ON/RUN position.
Power Window Switches
3
GETTING TO KNOW YOUR VEHICLE 91
Page 94 of 553
NOTE:For vehicles equipped with the Uconnect system,
the power window switches will remain active for up to
ten minutes after the ignition is placed in the OFF position.
Opening either front door will cancel this feature. The time
is programmable. Refer to “Uconnect Settings” in “Multi-
media” for further information.
WARNING!
Never leave children unattended in a vehicle, and do
not let children play with power windows. Do not
leave the key fob in or near the vehicle, or in a location
accessible to children, and do not leave the ignition of
a vehicle equipped with Keyless Enter-N-Go in the
ACC or ON/RUN mode. Occupants, particularly unat-
tended children, can become entrapped by the win-
dows while operating the power window switches.
Such entrapment may result in serious injury or death.
Auto-Down Feature
The driver and, in some models, passenger power window
switches have an Auto-Down feature. Push the window
switch to the second detent, release, and the window will
go down automatically.
To open the window part way, push the window switch to
the first detent and release it when you want the window
to stop.
To stop the window from going all the way down during
the Auto-Down operation, pull up on the switch briefly.
Auto-Up Feature With Anti-Pinch Protection — If
Equipped
Pull window up switch to second detent for at least a half
of a second and the window will go up automatically.
To stop the window during an Auto-Up operation, push or
pull the window switch again.
To close the window part way, pull and hold the window
switch briefly and release it when you want the window to
stop.
92 GETTING TO KNOW YOUR VEHICLE
Page 96 of 553
3. Push the window switch down firmly to the seconddetent to open the window completely and continue to
hold the switch down for an additional two seconds
after the window is fully open.
Wind Buffeting
Wind buffeting can be described as the perception of
pressure on the ears or a helicopter-type sound in the ears.
Your vehicle may exhibit wind buffeting with the windows
down, or the sunroof (if equipped) in certain open or
partially open positions. This is a normal occurrence and
can be minimized. If the buffeting occurs with the rear
windows open, open the front and rear windows together
to minimize the buffeting. If the buffeting occurs with the
sunroof open, adjust the sunroof opening to minimize the
buffeting or open any window.
POWER SUNROOF — IF EQUIPPED
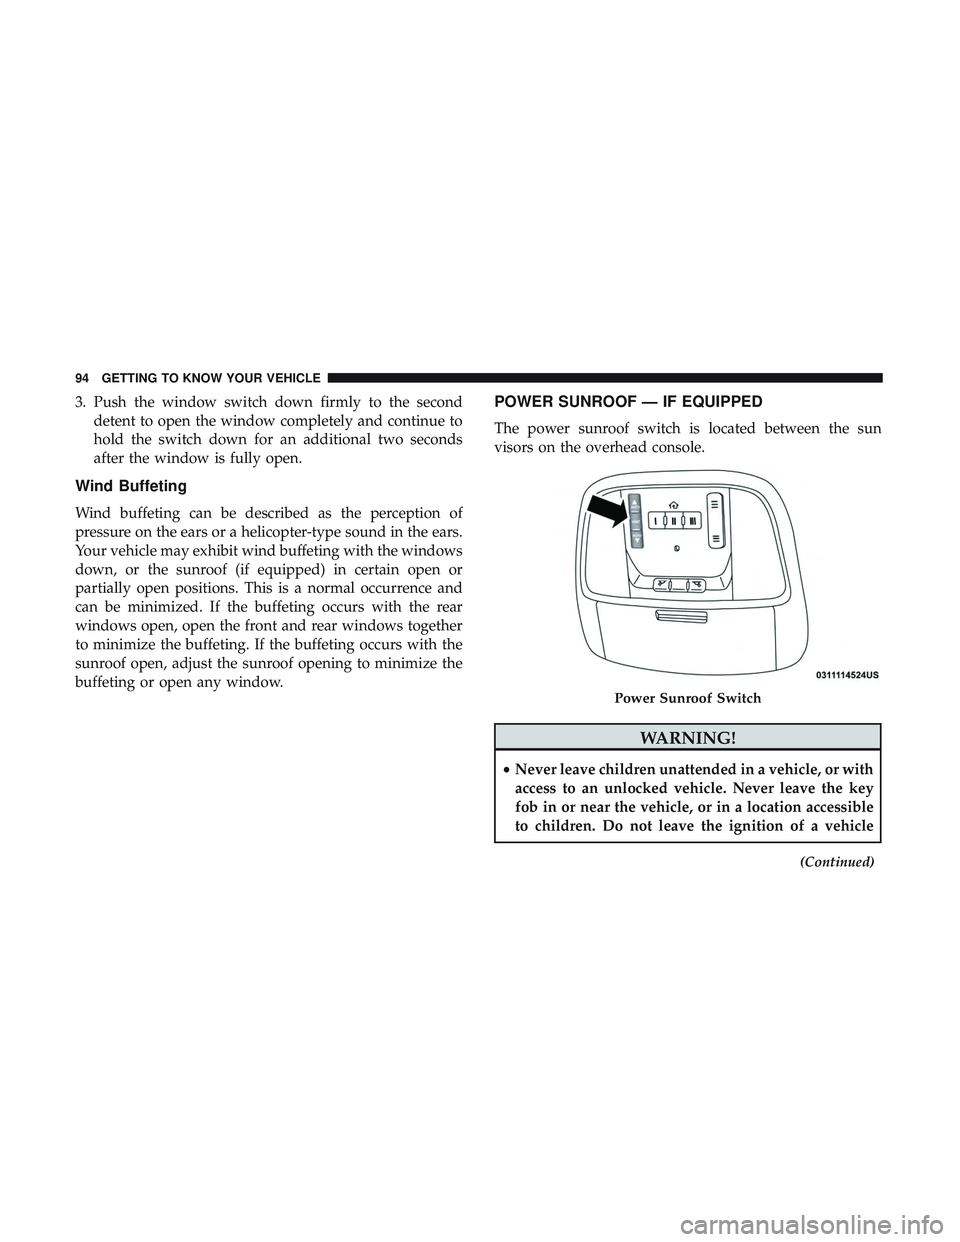
The power sunroof switch is located between the sun
visors on the overhead console.
WARNING!
•Never leave children unattended in a vehicle, or with
access to an unlocked vehicle. Never leave the key
fob in or near the vehicle, or in a location accessible
to children. Do not leave the ignition of a vehicle
(Continued)
Power Sunroof Switch
94 GETTING TO KNOW YOUR VEHICLE
Page 98 of 553
Wind Buffeting
Wind buffeting can be described as the perception of
pressure on the ears or a helicopter-type sound in the ears.
Your vehicle may exhibit wind buffeting with the windows
down, or the sunroof (if equipped) in certain open or
partially open positions. This is a normal occurrence and
can be minimized. If the buffeting occurs with the rear
windows open, then open the front and rear windows
together to minimize the buffeting. If the buffeting occurs
with the sunroof open, adjust the sunroof opening to
minimize the buffeting or open any window.
Venting Sunroof — Express
Push and release the Vent button within one half second
and the sunroof will open to the vent position. This is
called “Express Vent”, and it will occur regardless of
sunroof position. During Express Vent operation, any other
actuation of the switch will stop the sunroof.
Sunshade Operation
The sunshade can be opened manually. However, the
sunshade will open automatically as the sunroof opens.
NOTE:The sunshade cannot be closed if the sunroof is
open.
Pinch Protect Feature
This feature will detect an obstruction in the closing of the
sunroof during the Express Close operation. If an obstruc-
tion in the path of the sunroof is detected, the sunroof will
automatically retract. Remove the obstruction if this oc-
curs.
NOTE: If three consecutive sunroof close attempts result in
Pinch Protect reversals, Pinch Protect will disable and the
sunroof must be closed in Manual Mode.
Sunroof Maintenance
Use only a non-abrasive cleaner and a soft cloth to clean the
glass panel.
Ignition Off Operation
NOTE:
• The power sunroof switch can remain active in Acces-
sory Delay for up to approximately ten minutes after the
vehicle’s ignition is placed to the OFF position. Opening
either front door will cancel this feature.
• This feature is programmable using the Uconnect Sys-
tem. Refer to “Uconnect Settings” in “Multimedia” for
further information.
96 GETTING TO KNOW YOUR VEHICLE
Page 99 of 553
Relearn Procedure
For vehicles equipped with a sunroof, there is a relearn
procedure that allows you to calibrate the sunroof when
the “Express Operation” feature stops working. To reset the
sunroof, follow these steps:
1. Set the ignition to the ACC or the ON/RUN position.
2. Ensure that the sunroof is in the fully closed position.
3. Push and hold the close switch. The sunroof will hit thehard stop and move to the vent position after ten
seconds.
4. Release the close switch.
5. Push and hold the close switch again within five sec- onds to begin the teaching process. The sunroof will
complete one full cycle and return to the fully closed
position.
NOTE: If the close switch is released anytime during the
teach cycle, the procedure will need to be repeated starting
from the first step.
6. Once the sunroof has stopped in the fully closed posi- tion, release the close switch. The sunroof is now reset
and ready to use.
HOOD
To Open The Hood
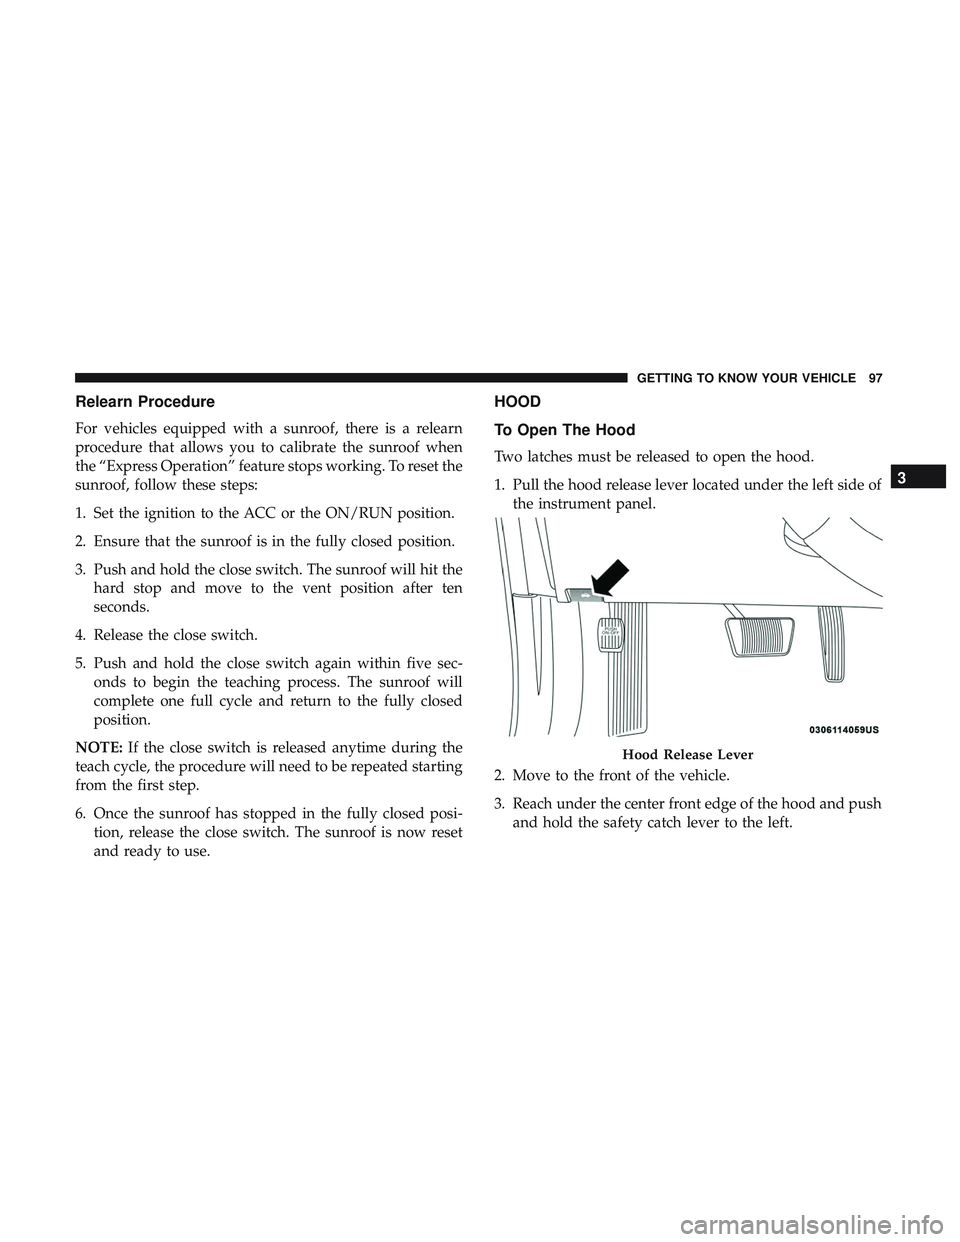
Two latches must be released to open the hood.
1. Pull the hood release lever located under the left side ofthe instrument panel.
2. Move to the front of the vehicle.
3. Reach under the center front edge of the hood and push and hold the safety catch lever to the left.
Hood Release Lever
3
GETTING TO KNOW YOUR VEHICLE 97