Page 44 of 516

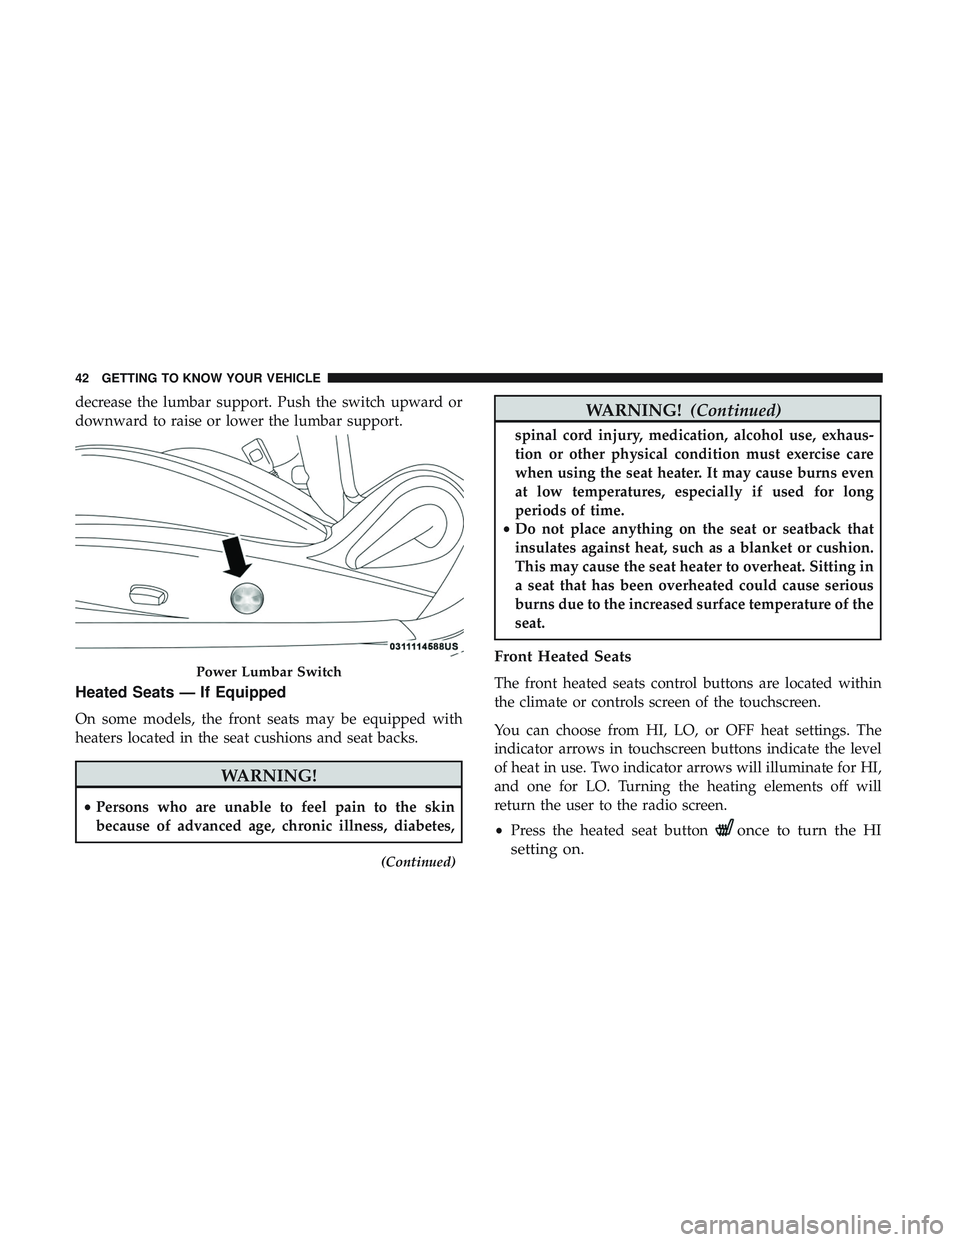
decrease the lumbar support. Push the switch upward or
downward to raise or lower the lumbar support.
Heated Seats — If Equipped
On some models, the front seats may be equipped with
heaters located in the seat cushions and seat backs.
WARNING!
•Persons who are unable to feel pain to the skin
because of advanced age, chronic illness, diabetes,
(Continued)
WARNING! (Continued)
spinal cord injury, medication, alcohol use, exhaus-
tion or other physical condition must exercise care
when using the seat heater. It may cause burns even
at low temperatures, especially if used for long
periods of time.
• Do not place anything on the seat or seatback that
insulates against heat, such as a blanket or cushion.
This may cause the seat heater to overheat. Sitting in
a seat that has been overheated could cause serious
burns due to the increased surface temperature of the
seat.
Front Heated Seats
The front heated seats control buttons are located within
the climate or controls screen of the touchscreen.
You can choose from HI, LO, or OFF heat settings. The
indicator arrows in touchscreen buttons indicate the level
of heat in use. Two indicator arrows will illuminate for HI,
and one for LO. Turning the heating elements off will
return the user to the radio screen.
• Press the heated seat button
once to turn the HI
setting on.
Power Lumbar Switch
42 GETTING TO KNOW YOUR VEHICLE
Page 403 of 516

MULTIMEDIA
CONTENTS
�UCONNECT SYSTEMS ...................403
� DRAG & DROP MENU BAR ................403
� CYBERSECURITY ...................... .404
� UCONNECT SETTINGS ...................405
▫ Uconnect 4 Settings .....................406
▫ Customer Programmable Features — Uconnect
4C/4C NAV Settings ....................427
▫ Performance Pages — If Equipped ...........448
▫ Performance Control — If Equipped .........458
� STEERING WHEEL AUDIO CONTROLS — IF
EQUIPPED ........................... .468
▫ Radio Operation ....................... .468
▫ Media Mode ......................... .468
� IPOD/USB/MP3 CONTROL — IF EQUIPPED . . .469 �
RADIO OPERATION AND MOBILE PHONES . . .469
▫ Regulatory And Safety Information ..........469
� UCONNECT VOICE RECOGNITION QUICK
TIPS ................................ .471
▫ Introducing Uconnect ....................471
▫ Get Started .......................... .472
▫ Basic Voice Commands ...................473
▫ Radio .............................. .473
▫ Media .............................. .474
▫ Phone .............................. .476
▫ Voice Text Reply ...................... .477
▫ Climate ............................. .478
▫ Navigation (4C NAV) ....................479
▫ SiriusXM Guardian (4C/4C NAV)— If
Equipped ........................... .480
10
Page 416 of 516

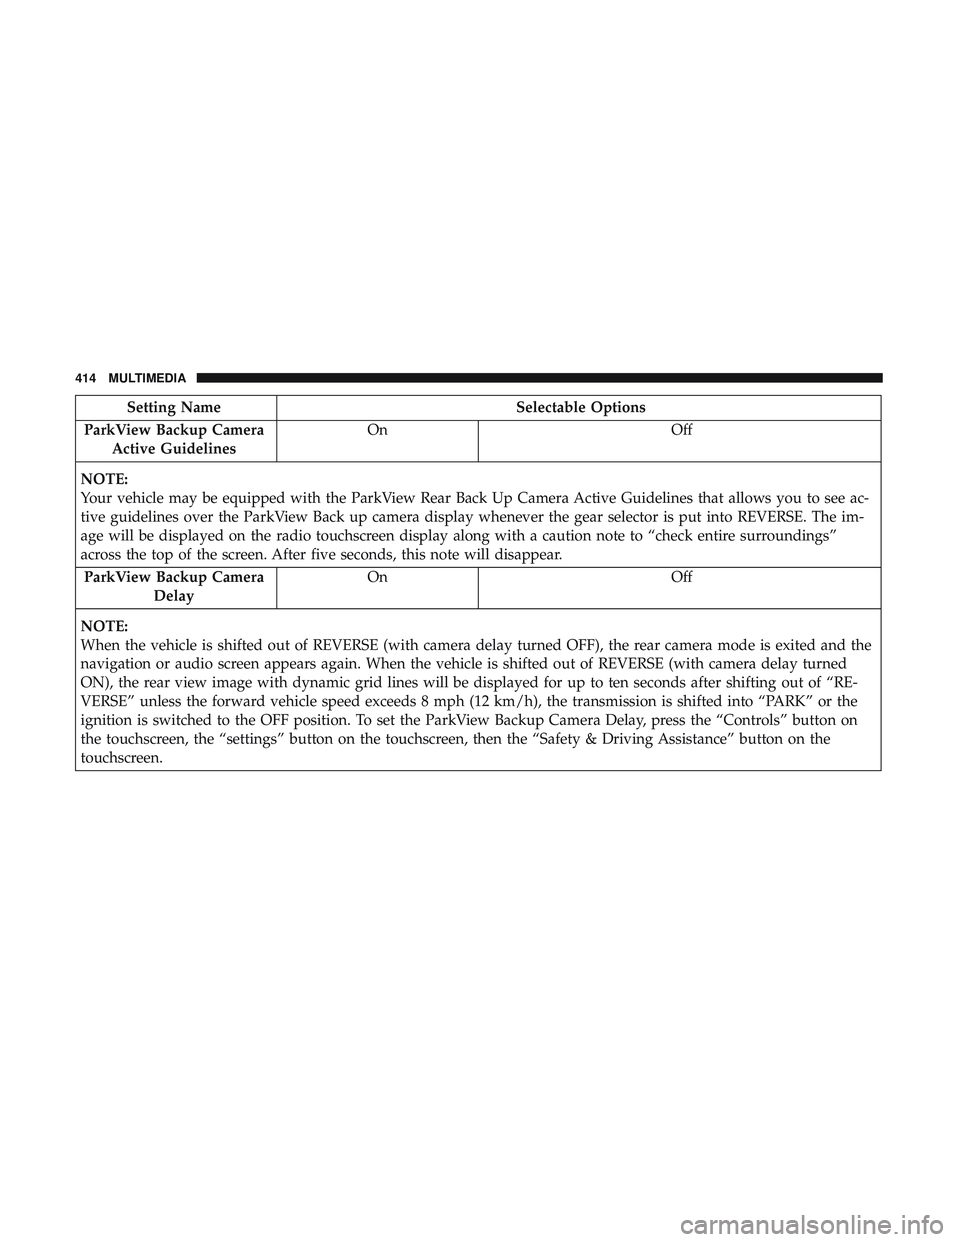
Setting NameSelectable Options
ParkView Backup Camera Active Guidelines On
Off
NOTE:
Your vehicle may be equipped with the ParkView Rear Back Up Camera Active Guidelines that allows you to see ac-
tive guidelines over the ParkView Back up camera display whenever the gear selector is put into REVERSE. The im-
age will be displayed on the radio touchscreen display along with a caution note to “check entire surroundings”
across the top of the screen. After five seconds, this note will disappear. ParkView Backup Camera Delay On
Off
NOTE:
When the vehicle is shifted out of REVERSE (with camera delay turned OFF), the rear camera mode is exited and the
navigation or audio screen appears again. When the vehicle is shifted out of REVERSE (with camera delay turned
ON), the rear view image with dynamic grid lines will be displayed for up to ten seconds after shifting out of “RE-
VERSE” unless the forward vehicle speed exceeds 8 mph (12 km/h), the transmission is shifted into “PARK” or the
ignition is switched to the OFF position. To set the ParkView Backup Camera Delay, press the “Controls” button on
the touchscreen, the “settings” button on the touchscreen, then the “Safety & Driving Assistance” button on the
touchscreen.
414 MULTIMEDIA
Page 470 of 516

STEERING WHEEL AUDIO CONTROLS — IF
EQUIPPED
The remote sound system controls are located on the rear
surface of the steering wheel. Reach behind the wheel to
access the switches.
The right-hand control is a rocker-type switch with a
push-button in the center and controls the volume and
mode of the sound system. Pushing the top of the rocker
switch will increase the volume, and pushing the bottom of
the rocker switch will decrease the volume.Pushing the center button will make the radio switch
between the various modes available (AM/FM/SAT/
AUX, etc.).
The left-hand control is a rocker-type switch with a push-
button in the center. The function of the left-hand control is
different depending on which mode you are in.
The following describes the left-hand control operation in
each mode.
Radio Operation
Pushing the top of the switch will “Seek” up for the next
listenable station and pushing the bottom of the switch will
“Seek” down for the next listenable station.
The button located in the center of the left-hand control
will tune to the next preset station that you have pro-
grammed in the radio preset button.
Media Mode
Pushing the top of the switch once goes to the next track on
the selected media (AUX/USB/Bluetooth). Pushing the
bottom of the switch once goes to the beginning of the
current track, or to the beginning of the previous track if it
is within eight seconds after the current track begins to
play.
Steering Wheel Audio Controls (Back View Of Steering
Wheel)
468 MULTIMEDIA