Page 60 of 516

Turn Signals
Move the multifunction lever up or down and the arrows
on each side of the instrument cluster display flash to show
proper operation of the front and rear turn signal lights.
NOTE:
•If either light remains on and does not flash, or there is
a very fast flash rate, check for a defective outside light
bulb. If an indicator fails to light when the lever is
moved, it would suggest that the indicator bulb is
defective.
• A “Turn Signal On” message will appear in the instru-
ment cluster display and a continuous chime will sound
if the vehicle is driven more than 1 mile (1.6 km) with
either turn signal on.
Lane Change Assist — If Equipped
Tap the multifunction lever up or down once, without
moving beyond the detent, and the turn signal (right or
left) will flash three times then automatically turn off.
INTERIOR LIGHTS
The interior lights come on when a door is opened.
To protect the battery, the interior lights will turn off
automatically ten minutes after the ignition is moved to the
OFF position. This will occur if the interior lights were
switched on manually or are on because a door is open.
The Battery Protection also includes the glove compart-
ment light and the trunk light. To restore interior light
operation after automatic battery protection is enabled
(lights off), either place the ignition in the ON/RUN
position or cycle the light switch.
Map/Reading Lights
These lights are mounted between the sun visors on the
overhead console. Each light is turned on by pushing the
lens. Push the lens a second time to turn off the light. These
lights also turn on when a door is opened, when the unlock
button on the remote keyless entry key fob is pushed, or
when the dimmer control is turned fully upward, past the
second detent.
58 GETTING TO KNOW YOUR VEHICLE
Page 61 of 516
Dimmer Controls
The dimmer control is part of the headlight switch and is
located on the left side of the instrument panel.
With the parking lights or headlights on, rotating the left
dimmer control upward will increase the brightness of the
instrument panel lights and lighted cupholders (if
equipped).
Overhead Console
Dimmer Controls
3
GETTING TO KNOW YOUR VEHICLE 59
Page 62 of 516
Dome Light Position
Rotate the dimmer control completely upward to the
second detent to turn on the interior lights. The interior
lights will remain on when the dimmer control is in this
position.
Interior Light Defeat (Off)
Rotate the instrument panel dimmer control to the extreme
bottom (O) off position. The interior lights will remain off
when the doors are open.Parade Mode (Daytime Brightness Feature)
Rotate the instrument panel dimmer control upward to the
first detent. This feature brightens all text displays such as
the odometer, instrument cluster display, and radio when
the position lights or headlights are on.
WINDSHIELD WIPERS AND WASHERS
The multifunction lever operates the windshield wipers
and washer when the ignition is placed in the ON/RUN or
ACC position. The multifunction lever is located on the left
side of the steering column.
Instrument Panel Dimmer
Windshield Wiper/Washer Control
60 GETTING TO KNOW YOUR VEHICLE
Page 70 of 516

IconDescription
Faceplate Knob
Touchscreen Buttons
Blower Control
Blower Control is used to regulate the amount of air forced through the climate system. There
are seven blower speeds available. The speeds can be selected using either the blower control
knob on the faceplate or the buttons on the touchscreen.
• Faceplate: The blower speed increases as you turn the blower control knob clockwise from
the lowest blower setting. The blower speed decreases as you turn the blower control knob
counterclockwise.
• Touchscreen: Use the small blower icon to reduce the blower setting, and the large blower
icon to increase the blower setting. Blower can also be selected by pressing the blower bar
area between the icons.
Panel ModePanel Mode
Air comes from the outlets in the instrument panel. Each of these outlets can be individually
adjusted to direct the flow of air. The air vanes of the center outlets and outboard outlets can be
moved up and down or side to side to regulate airflow direction. There is a shut-off wheel lo-
cated below the air vanes to shut off or adjust the amount of airflow from these outlets.
Bi-Level Mode
Bi-Level Mode
Air comes from the instrument panel outlets and floor outlets. A slight amount of air is directed
through the defrost and side window demister outlets.
NOTE: Bi-Level mode is designed under comfort conditions to provide cooler air out of the
panel outlets and warmer air from the floor outlets.
68 GETTING TO KNOW YOUR VEHICLE
Page 71 of 516

IconDescription
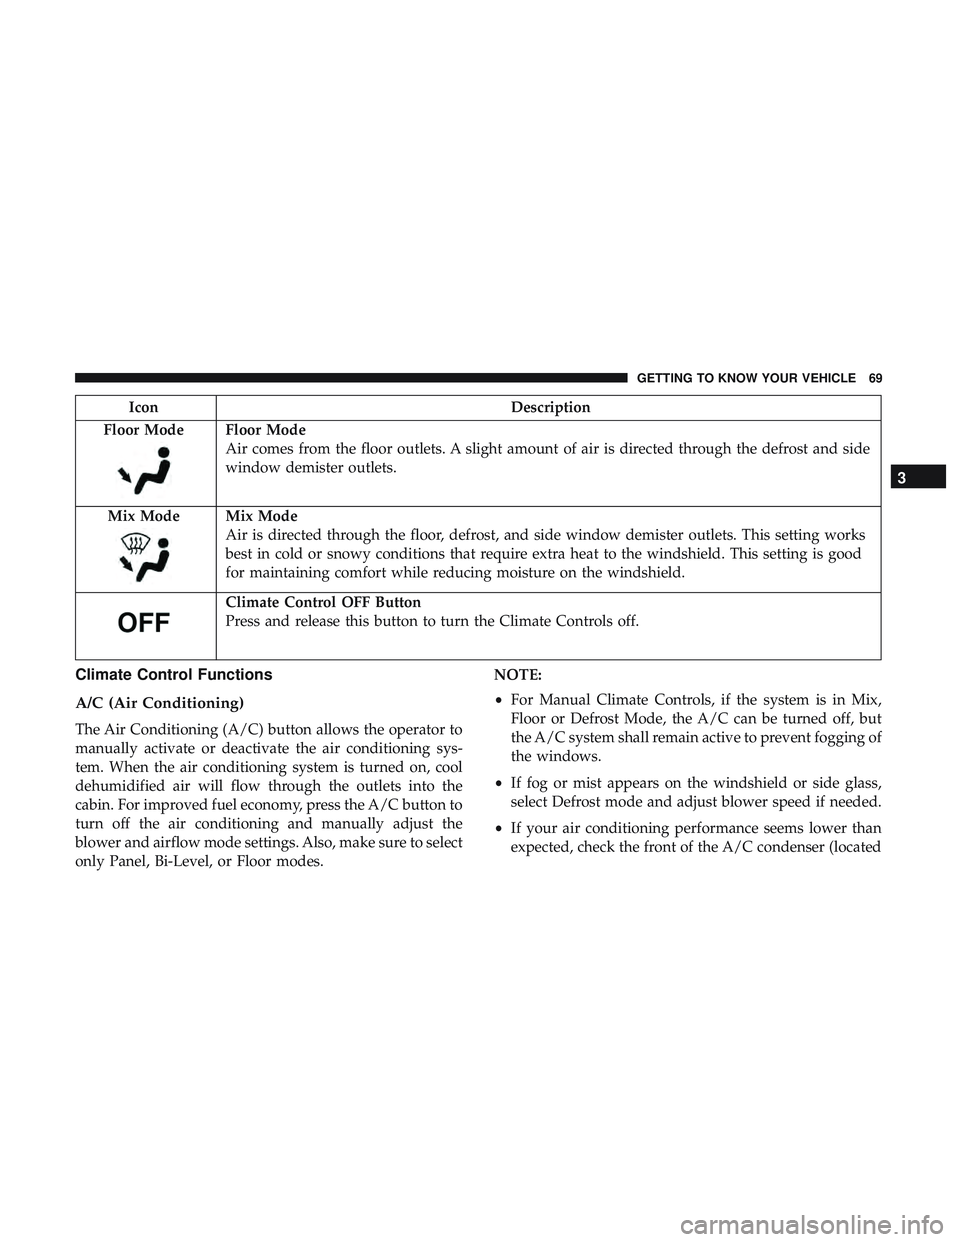
Floor Mode
Floor Mode
Air comes from the floor outlets. A slight amount of air is directed through the defrost and side
window demister outlets.
Mix Mode
Mix Mode
Air is directed through the floor, defrost, and side window demister outlets. This setting works
best in cold or snowy conditions that require extra heat to the windshield. This setting is good
for maintaining comfort while reducing moisture on the windshield.
Climate Control OFF Button
Press and release this button to turn the Climate Controls off.
Climate Control Functions
A/C (Air Conditioning)
The Air Conditioning (A/C) button allows the operator to
manually activate or deactivate the air conditioning sys-
tem. When the air conditioning system is turned on, cool
dehumidified air will flow through the outlets into the
cabin. For improved fuel economy, press the A/C button to
turn off the air conditioning and manually adjust the
blower and airflow mode settings. Also, make sure to select
only Panel, Bi-Level, or Floor modes. NOTE:
•
For Manual Climate Controls, if the system is in Mix,
Floor or Defrost Mode, the A/C can be turned off, but
the A/C system shall remain active to prevent fogging of
the windows.
• If fog or mist appears on the windshield or side glass,
select Defrost mode and adjust blower speed if needed.
• If your air conditioning performance seems lower than
expected, check the front of the A/C condenser (located
3
GETTING TO KNOW YOUR VEHICLE 69
Page 84 of 516

GARAGE DOOR OPENER — IF EQUIPPED
HomeLink replaces up to three hand-held transmitters that
operate devices such as garage door openers, motorized
gates, lighting, or home security systems. The HomeLink
unit is powered by your vehicle’s battery.
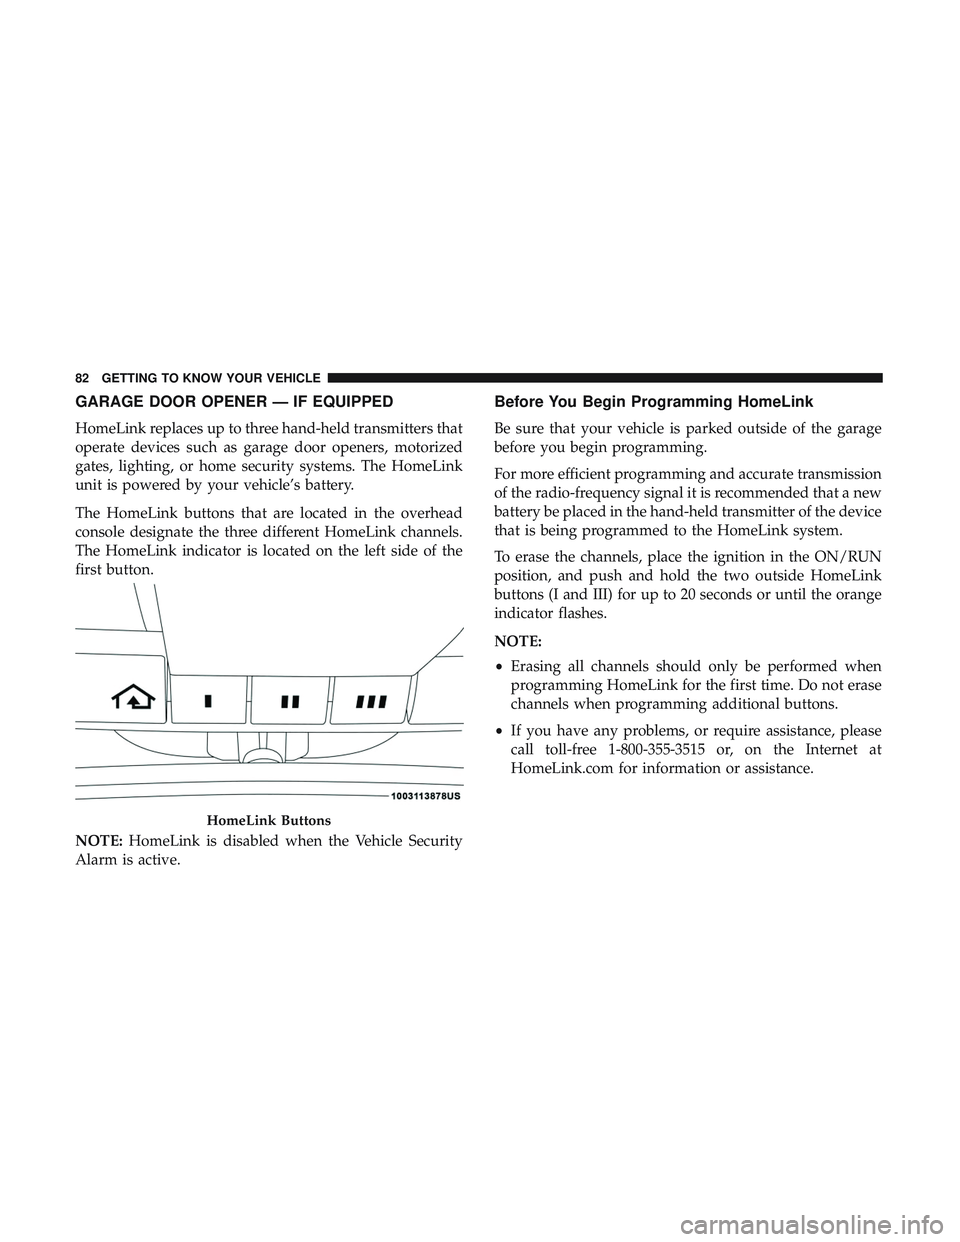
The HomeLink buttons that are located in the overhead
console designate the three different HomeLink channels.
The HomeLink indicator is located on the left side of the
first button.
NOTE:HomeLink is disabled when the Vehicle Security
Alarm is active.
Before You Begin Programming HomeLink
Be sure that your vehicle is parked outside of the garage
before you begin programming.
For more efficient programming and accurate transmission
of the radio-frequency signal it is recommended that a new
battery be placed in the hand-held transmitter of the device
that is being programmed to the HomeLink system.
To erase the channels, place the ignition in the ON/RUN
position, and push and hold the two outside HomeLink
buttons (I and III) for up to 20 seconds or until the orange
indicator flashes.
NOTE:
• Erasing all channels should only be performed when
programming HomeLink for the first time. Do not erase
channels when programming additional buttons.
• If you have any problems, or require assistance, please
call toll-free 1-800-355-3515 or, on the Internet at
HomeLink.com for information or assistance.
HomeLink Buttons
82 GETTING TO KNOW YOUR VEHICLE
Page 85 of 516
Programming A Rolling Code
For programming garage door openers that were manufac-
tured after 1995. These garage door openers can be identi-
fied by the “LEARN” or “TRAIN” button located where
the hanging antenna is attached to the garage door opener.
NOTE:It is NOT the button that is normally used to open
and close the door. The name and color of the button may
vary by manufacturer.
1. Place the ignition in the ON/RUN position.
2. Place the hand-held transmitter 1 to 3 inches (3 to 8 cm)away from the HomeLink button you wish to program
while keeping the HomeLink indicator light in view.
3. Push and hold the HomeLink button you want to program while you push and hold the hand-held trans-
mitter button.
Training The Garage Door Opener
1 — Door Opener
2 — Training Button
3
GETTING TO KNOW YOUR VEHICLE 83
Page 86 of 516

4. Continue to hold both buttons and observe the indicatorlight. The HomeLink indicator will flash slowly and
then rapidly after HomeLink has received the frequency
signal from the hand-held transmitter. Release both
buttons after the indicator light changes from slow to
rapid.
5. At the garage door opener motor (in the garage), locate the “LEARN” or “TRAINING” button. This can usually
be found where the hanging antenna wire is attached to
the garage door opener/device motor. Firmly push and
release the “LEARN” or “TRAINING” button. On some
garage door openers/devices there may be a light that
blinks when the garage door opener/device is in the
LEARN/TRAIN mode.
NOTE: You have 30 seconds in which to initiate the next
step after the LEARN button has been pushed.
6. Return to the vehicle and push the programmed HomeLink button twice (holding the button for two
seconds each time). If the garage door opener/device
activates, programming is complete.
NOTE: If the garage door opener/device does not activate,
push the button a third time (for two seconds) to complete
the training. To program the remaining two HomeLink buttons, repeat
each step for each remaining button. DO NOT erase the
channels.
Reprogramming A Single HomeLink Button (Rolling
Code)
To reprogram a channel that has been previously trained,
follow these steps:
1. Cycle the ignition to the ON/RUN position.
2. Push and hold the desired HomeLink button until the
indicator light begins to flash after 20 seconds. Do not
release the button.
3. Without releasing the button proceed with “Program- ming A Rolling Code” step 2 and follow all remaining
steps.�
Programming A Non-Rolling Code
For programming Garage Door Openers manufactured
before 1995.
1. Cycle the ignition to the ON/RUN position.
2. Place the hand-held transmitter 1 to 3 inches (3 to 8 cm)away from the HomeLink button you wish to program
while keeping the HomeLink indicator light in view.
84 GETTING TO KNOW YOUR VEHICLE