2018 DODGE CHALLENGER engine oil
[x] Cancel search: engine oilPage 341 of 516
3. Using a water and mild detergent clean the followinglocations.
— The water drain slot located at the front forward edge of
the shaker assembly.
— The seals attached to the scoop and air box.
— Lower water drains located in the lower shaker assem-
bly and air box as well as the hood interface areas for the
seals. Apply Mopar Leather, Rubber & Vinyl Protectant
after cleaning to seals.
4. Re-install shaker assembly.
Materials Added To Engine Oil
The manufacturer strongly recommends against the addi-
tion of any additives (other than leak detection dyes) to the
engine oil. Engine oil is an engineered product and its
performance may be impaired by supplemental additives.
Disposing Of Used Engine Oil And Oil Filters
Care should be taken in disposing of used engine oil and
oil filters from your vehicle. Used oil and oil filters,
indiscriminately discarded, can present a problem to the
environment. Contact an authorized dealer, service station
or governmental agency for advice on how and where used
oil and oil filters can be safely discarded in your area.
Engine Oil Filter
The engine oil filter should be replaced with a new filter at
every engine oil change.
Engine Oil Filter Selection
This manufacturer’s engines have a full-flow type dispos-
able oil filter. Use a filter of this type for replacement. The
quality of replacement filters varies considerably. Only
high quality filters should be used to assure most efficient
service. Mopar engine oil filters are high quality oil filters
and are recommended.
Engine Air Cleaner Filter
Refer to the “Maintenance Plan” in this section for the
proper maintenance intervals.
NOTE: Be sure to follow the “Severe Duty Conditions”
maintenance interval if applicable.
WARNING!
The air induction system (air cleaner, hoses, etc.) can
provide a measure of protection in the case of engine
backfire. Do not remove the air induction system (air
cleaner, hoses, etc.) unless such removal is necessary
(Continued)
8
SERVICING AND MAINTENANCE 339
Page 346 of 516
•Noise (objectionable squeal, squeak, or rumble is heard
or felt while drive belt is in operation)
Some conditions can be caused by a faulty component such
as a belt pulley. Belt pulleys should be carefully inspected
for damage and proper alignment.
Belt replacement on some models requires the use of
special tools, we recommend having your vehicle serviced
at an authorized dealer.
Body Lubrication
Locks and all body pivot points, including such items as
seat tracks, door hinge pivot points and rollers, liftgate,
tailgate, decklid, sliding doors and hood hinges, should be
lubricated periodically with a lithium based grease, such as
Mopar Spray White Lube to assure quiet, easy operation
and to protect against rust and wear. Prior to the applica-
tion of any lubricant, the parts concerned should be wiped
clean to remove dust and grit; after lubricating excess oil
and grease should be removed. Particular attention should
also be given to hood latching components to ensure
proper function. When performing other underhood ser-
vices, the hood latch, release mechanism and safety catch
should be cleaned and lubricated. The external lock cylinders should be lubricated twice a
year, preferably in the Fall and Spring. Apply a small
amount of a high quality lubricant, such as Mopar Lock
Cylinder Lubricant directly into the lock cylinder.
Windshield Wiper Blades
Clean the rubber edges of the wiper blades and the
windshield periodically with a sponge or soft cloth and a
mild nonabrasive cleaner. This will remove accumulations
of salt or road film.
Operation of the wipers on dry glass for long periods may
cause deterioration of the wiper blades. Always use washer
fluid when using the wipers to remove salt or dirt from a
dry windshield.
Avoid using the wiper blades to remove frost or ice from
the windshield. Keep the blade rubber out of contact with
petroleum products such as engine oil, gasoline, etc.
NOTE:
Life expectancy of wiper blades varies depending
on geographical area and frequency of use. Poor perfor-
mance of blades may be present with chattering, marks,
water lines or wet spots. If any of these conditions are
present, clean the wiper blades or replace as necessary.
344 SERVICING AND MAINTENANCE
Page 349 of 516
Installing The Front Wipers
1. Lift the wiper arm off of the glass, until the wiper arm isin the full up position.
2. Position the wiper blade under the hook on the tip of the wiper arm with the wiper locking tab open.
3. Insert the receiver bracket on the wiper assembly into the hook on the tip of the arm through the opening in
the wiper blade under the locking tab.
4. Slide the wiper blade up into the hook on the wiper arm until it is latched (engagement will be accompanied by
an audible click). Fold down the latch release tab and
snap it into its locked position.
5. Gently lower the wiper blade onto the glass.
Exhaust System
The best protection against carbon monoxide entry into the
vehicle body is a properly maintained engine exhaust
system.
If you notice a change in the sound of the exhaust system;
or if the exhaust fumes can be detected inside the vehicle;
or when the underside or rear of the vehicle is damaged; have an authorized technician inspect the complete ex-
haust system and adjacent body areas for broken, dam-
aged, deteriorated, or mispositioned parts. Open seams or
loose connections could permit exhaust fumes to seep into
the passenger compartment. In addition, have the exhaust
system inspected each time the vehicle is raised for lubri-
cation or oil change. Replace as required.
WARNING!
•
Exhaust gases can injure or kill. They contain carbon
monoxide (CO), which is colorless and odorless.
Breathing it can make you unconscious and can
eventually poison you. To avoid breathing CO, refer
to “Safety Tips” in “Safety” for further information.
• A hot exhaust system can start a fire if you park over
materials that can burn. Such materials might be
grass or leaves coming into contact with your exhaust
system. Do not park or operate your vehicle in areas
where your exhaust system can contact anything that
can burn.
8
SERVICING AND MAINTENANCE 347
Page 356 of 516

Clean the top of the master cylinder area before removing
the cap. Add fluid to bring the level up to the top of the
“FULL” mark on the side of the master cylinder reservoir.
Overfilling of fluid is not recommended because it may
cause leaking in the system.
Add enough fluid to bring the level up to the requirements
described on the brake fluid reservoir. With disc brakes,
fluid level can be expected to fall as the brake pads wear.
However, low fluid level may be caused by a leak and a
checkup may be needed.
Use only brake fluid that has been recommended by the
manufacturer, and has been kept in a tightly closed con-
tainer to avoid contamination from foreign matter or
moisture.
Refer to “Fluids And Lubricants” in “Technical Specifica-
tions” for further information.
WARNING!
•Use only manufacturer’s recommended brake fluid.
Refer to “Fluids And Lubricants” in “Technical
Specifications” for further information. Using the
(Continued)
WARNING! (Continued)
wrong type of brake fluid can severely damage your
brake system and/or impair its performance. The
proper type of brake fluid for your vehicle is also
identified on the original factory installed hydraulic
master cylinder reservoir.
• To avoid contamination from foreign matter or mois-
ture, use only new brake fluid or fluid that has been
in a tightly closed container. Keep the master cylin-
der reservoir cap secured at all times. Brake fluid in
a open container absorbs moisture from the air
resulting in a lower boiling point. This may cause it
to boil unexpectedly during hard or prolonged brak-
ing, resulting in sudden brake failure. This could
result in a collision.
• Overfilling the brake fluid reservoir can result in
spilling brake fluid on hot engine parts, causing the
brake fluid to catch fire. Brake fluid can also damage
painted and vinyl surfaces, care should be taken to
avoid its contact with these surfaces.
• Do not allow petroleum based fluid to contaminate
the brake fluid. Brake seal components could be
damaged, causing partial or complete brake failure.
This could result in a collision.
354 SERVICING AND MAINTENANCE
Page 399 of 516

U.S.Metric
Engine Oil With Filter
3.6L Engine (SAE 5W-20, API Certified) 6 Quarts5.6 Liters
5.7L Engine (SAE 5W-20, API Certified) 7 Quarts6.6 Liters
6.4L Engine (SAE 0W-40, Synthetic API Certified) 7 Quarts6.6 Liters
Cooling System*
3.6L Engine (Mopar Antifreeze/Engine Coolant 10 Year/150,000 Mile
Formula or equivalent) 11.1 Quarts
10.5 Liters
5.7L Engine (Mopar Antifreeze/Engine Coolant 10 Year/150,000 Mile
Formula or equivalent) 14.7 Quarts
13.9 Liters
6.4L Engine (Mopar Antifreeze/Engine Coolant 10 Year/150,000 Mile
Formula or equivalent) 15.2 Quarts
14.4 Liters
* Includes heater and coolant recovery bottle filled to MAX level.
9
TECHNICAL SPECIFICATIONS 397
Page 400 of 516

FLUIDS AND LUBRICANTS
Engine
ComponentFluid, Lubricant, or Genuine Part
Engine Coolant We recommend you use Mopar Antifreeze/Coolant 10 Year/
150,000 Mile Formula OAT (Organic Additive Technology).
Engine Oil – 3.6L & 5.7L Engine We recommend you use API Certified SAE 5W-20 Engine Oil,
meeting the requirements of FCA Material Standard MS-6395
such as Mopar, Pennzoil, and Shell Helix. Refer to your en-
gine oil filler cap for correct SAE grade.
Engine Oil – 6.4L Engine For best performance and maximum protection under all
types of operating conditions, the manufacturer only recom-
mends full synthetic engine oils.
The manufacturer recommends the use of Pennzoil Ultra
Platinum 0W-40 or equivalent Mopar engine oil meeting the
requirements of FCA Material Standard MS-12633 for use in
all operating temperatures.
Engine Oil Filter We recommend you use Mopar Engine Oil Filters.
Spark Plugs We recommend you use Mopar Spark Plugs.
Fuel Selection – 3.6 Engine 87 Octane, 0-15% Ethanol.
Fuel Selection – 5.7 Engine With Automatic Trans-
mission
89 Octane recommended – 87 Octane acceptable, 0-15% Ethanol.
Fuel Selection – 6.4L Engine & 5.7 Engine With
Manual Transmission 91 Octane or higher, 0-15% Ethanol.
398 TECHNICAL SPECIFICATIONS
Page 452 of 516
2. Select the following option from the menu:•Set Widget: Top Left
• Set Widget: Top Right
• Set Widget: Bottom Left
• Set Widget: Bottom Right
3. After selecting a Widget location: select the gauge or timer to display:
• Gauge: Oil Temp
• Gauge: Oil Pressure
• Gauge: Coolant Temp
• Gauge: Battery Voltage
• Gauge: Trans Temp
• Gauge: Intake Air Temp
• Gauge: Engine Torque
• Gauge: Engine Power •
Gauge: G-Force
• Gauge: Steering Angle
• Gauge: Current Gear
• Gauge: Current Speed
• Timer: 0–60 MPH
• Timer: 0–100 MPH
• Timer: 1/8 Mile
• Timer: 1/4 Mile
• Timer: Brake Distance
• Timer: Reaction Time
NOTE: Pressing the “Camera” icon in the upper right
corner of the Performance Pages screen will take a screen-
shot of the current screen and save it to a USB that is
connected.
450 MULTIMEDIA
Page 502 of 516
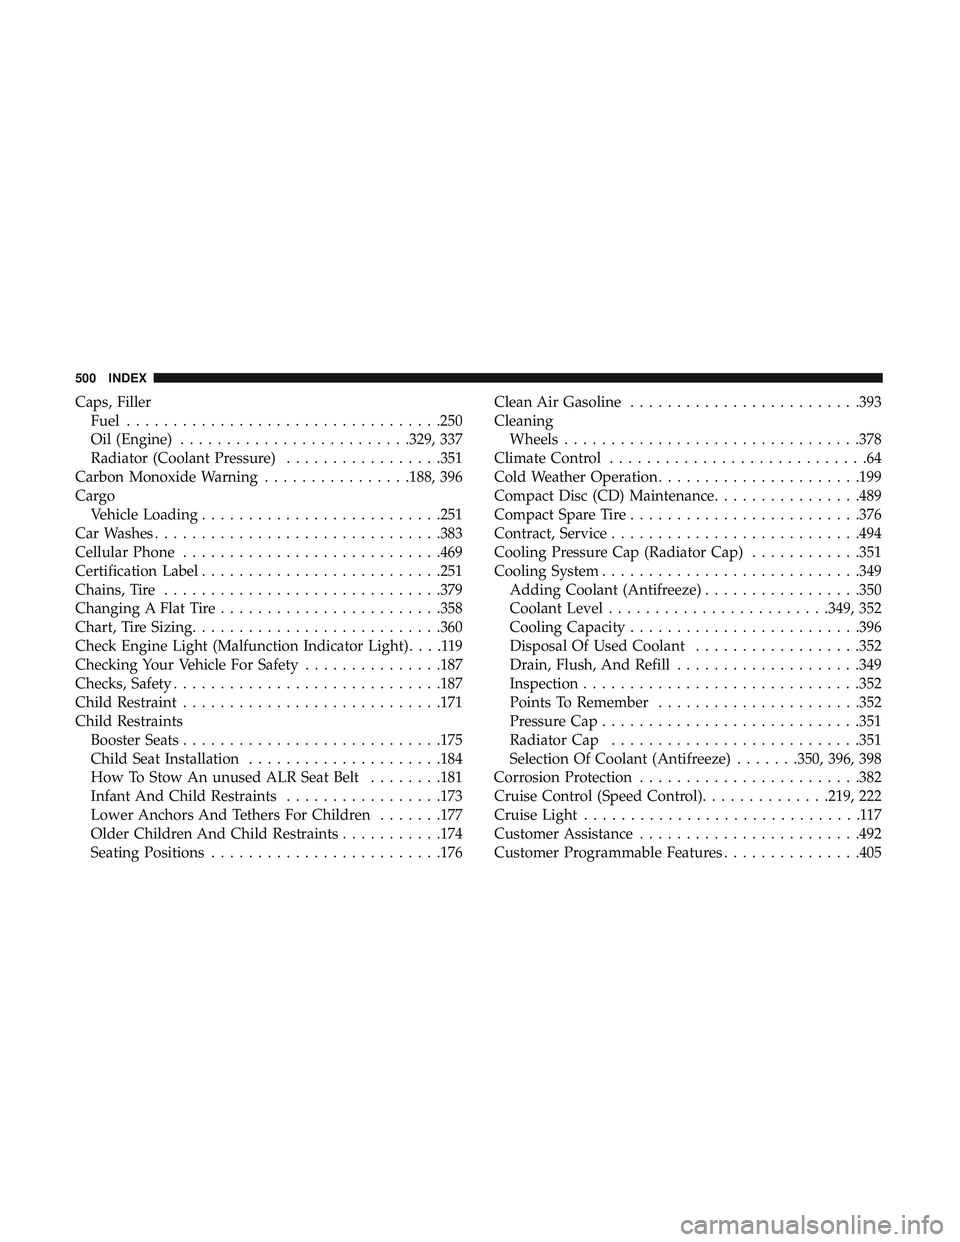
Caps, FillerFuel ................................. .250
Oil (Engine) ........................ .329, 337
Radiator (Coolant Pressure) .................351
Carbon Monoxide Warning ................188, 396
Cargo Vehicle Loading ......................... .251
Car Washes .............................. .383
Cellular Phone ........................... .469
Certification Label ......................... .251
Chains, Tire ............................. .379
Changing A Flat Tire ....................... .358
Chart, Tire Sizing .......................... .360
Check Engine Light (Malfunction Indicator Light) ....119
Checking Your Vehicle For Safety ...............187
Checks, Safety ............................ .187
Child Restraint ........................... .171
Child Restraints Booster Seats ........................... .175
Child Seat Installation .....................184
How To Stow An unused ALR Seat Belt ........181
Infant And Child Restraints .................173
Lower Anchors And Tethers For Children .......177
Older Children And Child Restraints ...........174
Seating Positions ........................ .176Clean Air Gasoline
........................ .393
Cleaning Wheels ............................... .378
Climate Control ............................64
Cold Weather Operation ..................... .199
Compact Disc (CD) Maintenance ................489
Compact Spare Tire ........................ .376
Contract, Service .......................... .494
Cooling Pressure Cap (Radiator Cap) ............351
Cooling System ........................... .349
Adding Coolant (Antifreeze) .................350
Coolant Level ....................... .349, 352
Cooling Capacity ........................ .396
Disposal
Of Used Coolant ..................352
Drain, Flush, And Refill ....................349
Inspection ............................. .352
Points To Remember ..................... .352
Pressure Cap ........................... .351
Radiator Cap .......................... .351
Selection Of Coolant (Antifreeze) .......350, 396, 398
Corrosion Protection ....................... .382
Cruise Control (Speed Control) ..............219, 222
Cruise Light ..............................117
Customer Assistance ....................... .492
Customer Programmable Features ...............405
500 INDEX