Page 146 of 614

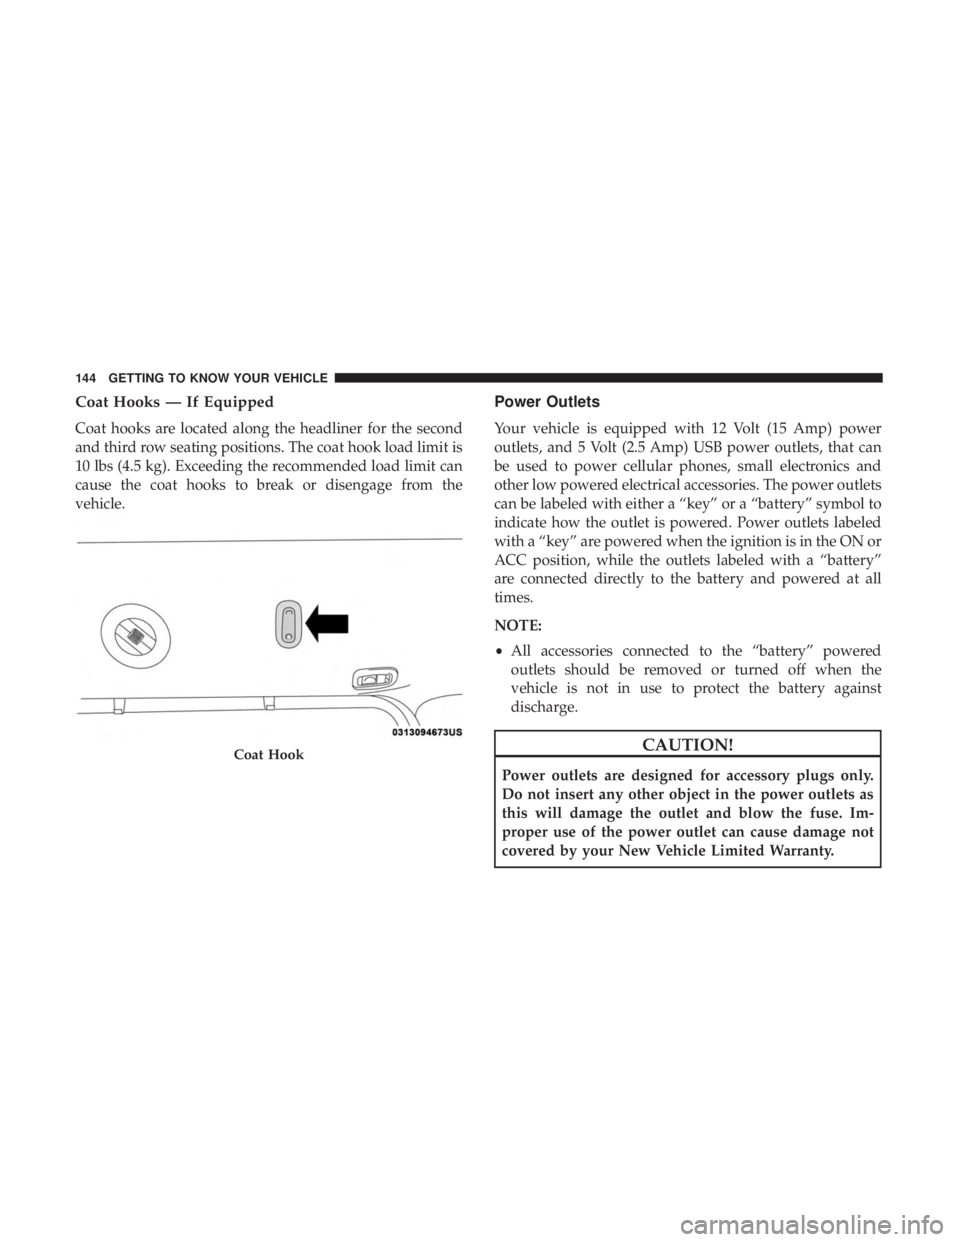
Coat Hooks — If Equipped
Coat hooks are located along the headliner for the second
and third row seating positions. The coat hook load limit is
10 lbs (4.5 kg). Exceeding the recommended load limit can
cause the coat hooks to break or disengage from the
vehicle.
Power Outlets
Your vehicle is equipped with 12 Volt (15 Amp) power
outlets, and 5 Volt (2.5 Amp) USB power outlets, that can
be used to power cellular phones, small electronics and
other low powered electrical accessories. The power outlets
can be labeled with either a “key” or a “battery” symbol to
indicate how the outlet is powered. Power outlets labeled
with a “key” are powered when the ignition is in the ON or
ACC position, while the outlets labeled with a “battery”
are connected directly to the battery and powered at all
times.
NOTE:
•All accessories connected to the “battery” powered
outlets should be removed or turned off when the
vehicle is not in use to protect the battery against
discharge.
CAUTION!
Power outlets are designed for accessory plugs only.
Do not insert any other object in the power outlets as
this will damage the outlet and blow the fuse. Im-
proper use of the power outlet can cause damage not
covered by your New Vehicle Limited Warranty.
Coat Hook
144 GETTING TO KNOW YOUR VEHICLE
Page 148 of 614
The rear power outlet is located in the right rear cargo area.
NOTE:The USB outlet in the bottom of the instrument
panel can be switched from “ignition” only to constant
“battery” powered all the time. See an authorized dealer
for details.
WARNING!
To avoid serious injury or death:
• Only devices designed for use in this type of outlet
should be inserted into any 12 Volt outlet.
• Do not touch with wet hands.
(Continued)
Rear Power Outlet
Power Outlet Fuse Locations
1 — F95A-F95B USB IP 10A
2 — F85 Cigar Lighter 20A
3 — F60 RR Cargo Power Outlet 20A
146 GETTING TO KNOW YOUR VEHICLE
Page 151 of 614

CAUTION!
Do not connect devices with power higher than 180
Watts (15 Amps) to the socket. Do not damage the
socket by using unsuitable adaptors. If the 180 Watt (15
Amp) power rating is exceeded the fuse protecting the
system will need to be replaced.
Smoker’s Package Kit — If Equipped
With the optional authorized dealer-installed Smoker’s
Package Kit, a removable ash receiver is inserted into one
of the two cupholders in the center floor console. To install
the ash receiver, align the receiver so the thumb grip on the
lid is facing rearward. Push the ash receiver into either of
the cup wells to secure. Pull upward on the ash receiver to
remove for cleaning and/or storage.
The left rear trim panel cupholder is designed to accom-
modate a second ash receiver, if desired.
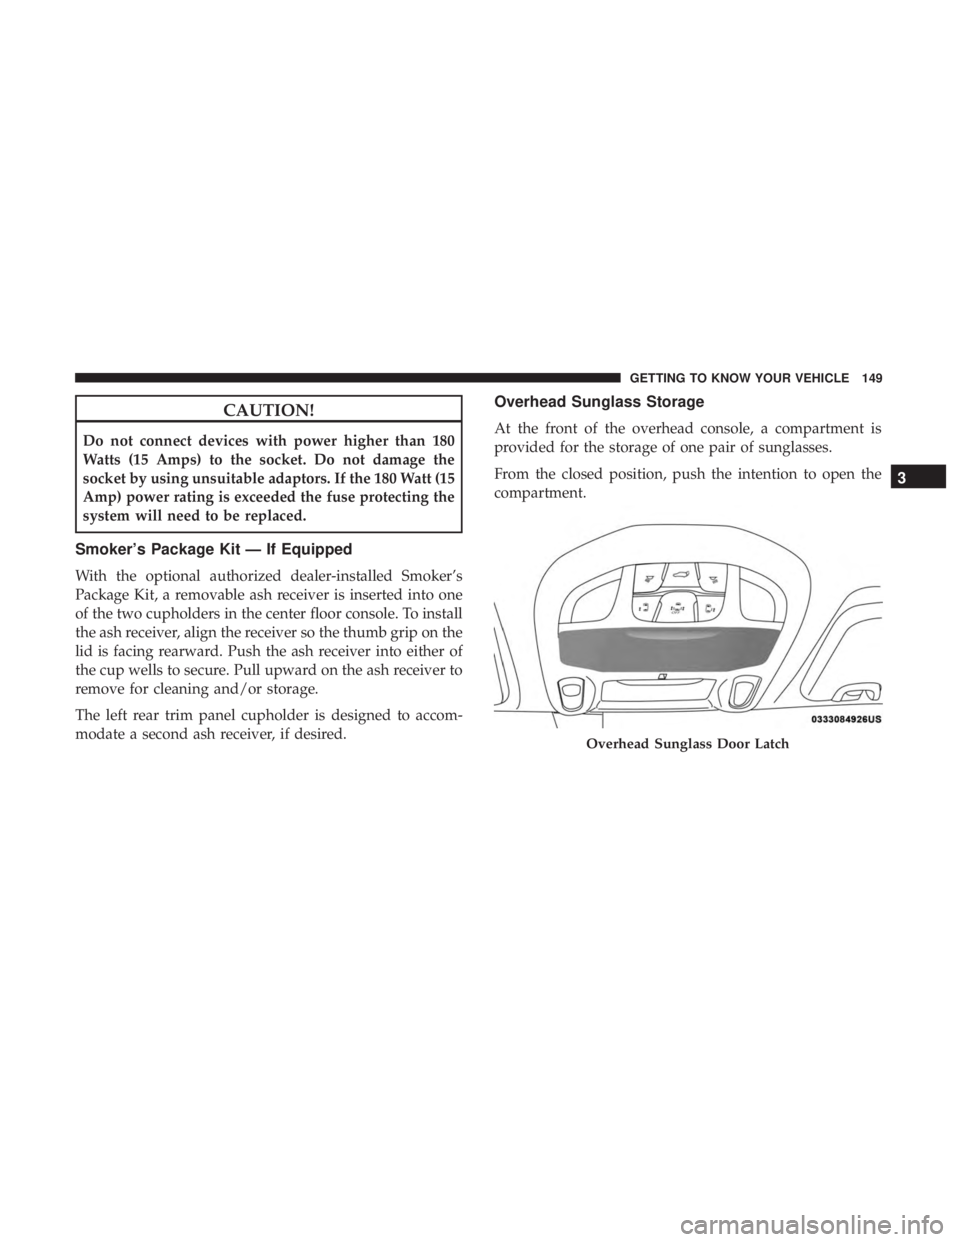
Overhead Sunglass Storage
At the front of the overhead console, a compartment is
provided for the storage of one pair of sunglasses.
From the closed position, push the intention to open the
compartment.
Overhead Sunglass Door Latch
3
GETTING TO KNOW YOUR VEHICLE 149
Page 379 of 614

IN CASE OF EMERGENCY
CONTENTS
�HAZARD WARNING FLASHERS ............378
� ASSIST AND SOS MIRROR — IF EQUIPPED . . . .378
� BULB REPLACEMENT ....................384
▫ Replacement Bulbs ..................... .384
▫ Replacing Exterior Bulbs ..................386
� FUSES ............................... .390
▫ General Information .....................391
▫ Fuse Location ........................ .391
▫ Underhood Fuses ...................... .392
� JACKING AND TIRE CHANGING ...........400
▫ Preparations For Jacking .................401
▫ Jacking Instructions .....................401
▫ Road Tire Installation ....................405 �
TIRE SERVICE KIT — IF EQUIPPED ..........407
� JUMP STARTING ....................... .418
▫ Preparations For Jump Start ...............420
▫ Jump Starting Procedure ..................421
� REFUELING IN EMERGENCY ..............422
� IF YOUR ENGINE OVERHEATS .............423
� FREEING A STUCK VEHICLE ..............424
� TOWING A DISABLED VEHICLE ............425
� ENHANCED ACCIDENT RESPONSE SYSTEM
(EARS) .............................. .428
� EVENT DATA RECORDER (EDR) ............428
7
Page 392 of 614

Rear Bodyside Mounted Taillamps
1. Raise the liftgate.
2. Remove two torx head screws on bodyside lamp usinga T30 screwdriver.
3. Remove lamp from vehicle body and locate bulb socket on rear of lamp. Rotate socket counter-clockwise.
4. Remove/replace bulb(s).
5. Reinstall the socket(s)
6. Reverse process to reinstall the lamp onto vehicle.
Center High-Mounted Stop Lamp (CHMSL)
The center high-mounted stop lamp is an LED assembly.
See your authorized dealer for replacement.
Rear License Lamp
The rear license lamps are LED. See your authorized dealer
for replacement.
FUSES
WARNING!
• When replacing a blown fuse, always use an appro-
priate replacement fuse with the same amp rating as
the original fuse. Never replace a fuse with another
fuse of higher amp rating. Never replace a blown
fuse with metal wires or any other material. Do not
place a fuse inside a circuit breaker cavity or vice
versa. Failure to use proper fuses may result in
serious personal injury, fire and/or property damage.
• Before replacing a fuse, make sure that the ignition is
off and that all the other services are switched off
and/or disengaged.
• If the replaced fuse blows again, contact an autho-
rized dealer.
• If a general protection fuse for safety systems (air
bag system, braking system), power unit systems
(engine system, transmission system) or steering
system blows, contact an authorized dealer.
390 IN CASE OF EMERGENCY
Page 393 of 614
General Information
The fuses protect electrical systems against excessive cur-
rent.
When a device does not work, you must check the fuse
element inside the blade fuse for a break/melt.
Also, please be aware that when using power outlets for
extended periods of time with the vehicle off may result in
vehicle battery discharge.
Fuse Location
The fuses are grouped into controllers located in the engine
compartment.
Blade Fuses
1 — Fuse Element
2 — Blade fuse with a good/functional fuse element.
3 — Blade fuse with NOT functional / BAD fuse element (blown
fuse)
7
IN CASE OF EMERGENCY 391
Page 394 of 614
Underhood Fuses
The Power Distribution Center is located in the engine
compartment near the battery. This center contains car-
tridge fuses, mini-fuses, micro-fuses, circuit breakers and
relays. A label that identifies each component is printed on
the inside of the cover.
Before any procedure is done on the PDC, make sure
engine is turned off.
Remove the cover by unlatching the two locks located at
each side of the PDC cover, avoid the usage of screw
drivers or any other tool to remove the cover, since they
may apply excessive force and result on a broken/
damaged part.After service is done, secure the cover with its two locks.
Cavity
Cartridge Fuse Blade FuseDescription
F06 –15 Amp Blue Low Temp Active Pump
F07 –25 Amp Clear Ignition Coil/Fuel Injector
F08 –25 Amp Clear Amplifier / ANC
F09 ––Not Used
F10 –15 Amp Blue High Temp Aux Pump &
HV Electric Coolant Htr Enable
Power Distribution Center
392 IN CASE OF EMERGENCY
Page 395 of 614
CavityCartridge Fuse Blade FuseDescription
F11 –15 Amp Blue ELCM / FTIV
F12 –5 Amp Tan Battery Sensor (IBS)
F13 ––Not Used
F14A –10 Amp Red Media Hub 1, 2, 3
F14B – Pwr Lumbar Switch
F15 40 Amp Green –CBC / Power Locks
F16 –20 Amp Yellow ECM
F17 ––Not Used
F18 40 Amp Green –CBC Feed #4 (Exterior
Lights #1)
F19 ––Not Used
F20 –10 Amp RedLow Temp Passive Pump
F21 20 Amp Blue –PIM - Park PAWL Motor
F22 ––Not Used
F23 ––Not used
F24 –20 Amp Yellow RR Wiper
F25A –10 Amp Red Handsfree (Lt & Rt Rear
Door Release Module)
F25B – Active Grill Shutter
F26 40 Amp Green –Front HVAC Blower Motor
7
IN CASE OF EMERGENCY 393