Page 362 of 614
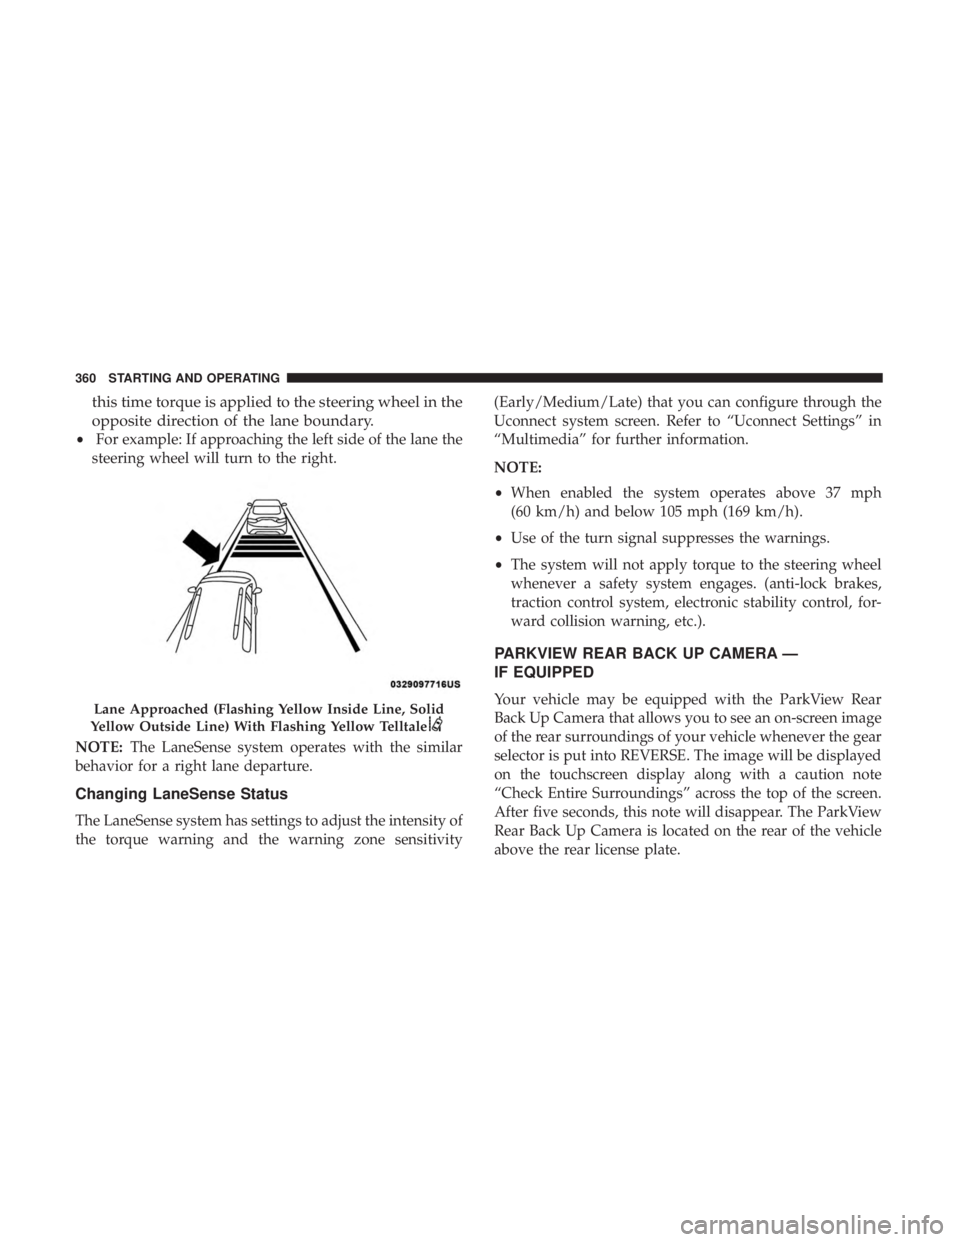
this time torque is applied to the steering wheel in the
opposite direction of the lane boundary.
•For example: If approaching the left side of the lane the
steering wheel will turn to the right.
NOTE: The LaneSense system operates with the similar
behavior for a right lane departure.
Changing LaneSense Status
The LaneSense system has settings to adjust the intensity of
the torque warning and the warning zone sensitivity (Early/Medium/Late) that you can configure through the
Uconnect system screen. Refer to “Uconnect Settings” in
“Multimedia” for further information.
NOTE:
•
When enabled the system operates above 37 mph
(60 km/h) and below 105 mph (169 km/h).
• Use of the turn signal suppresses the warnings.
• The system will not apply torque to the steering wheel
whenever a safety system engages. (anti-lock brakes,
traction control system, electronic stability control, for-
ward collision warning, etc.).
PARKVIEW REAR BACK UP CAMERA —
IF EQUIPPED
Your vehicle may be equipped with the ParkView Rear
Back Up Camera that allows you to see an on-screen image
of the rear surroundings of your vehicle whenever the gear
selector is put into REVERSE. The image will be displayed
on the touchscreen display along with a caution note
“Check Entire Surroundings” across the top of the screen.
After five seconds, this note will disappear. The ParkView
Rear Back Up Camera is located on the rear of the vehicle
above the rear license plate.Lane Approached (Flashing Yellow Inside Line, Solid
Yellow Outside Line) With Flashing Yellow Telltale
360 STARTING AND OPERATING
Page 364 of 614
The following table shows the approximate distances for
each zone:
ZoneDistance To The Rear Of The Vehicle
Red 0 - 1 ft (0 - 30 cm)
Yellow 1 ft - 6.5 ft (30 cm - 2 m)
Green 6.5 ft or greater (2 m or greater)
NOTE: If snow, ice, mud, or any foreign substance builds
up on the camera lens, clean the lens, rinse with water, and
dry with a soft cloth. Do not cover the lens.
WARNING!
Drivers must be careful when backing up even when
using the ParkView Rear Back Up Camera. Always
check carefully behind your vehicle, and be sure to
check for pedestrians, animals, other vehicles, obstruc-
tions, or blind spots before backing up. You are re-
sponsible for the safety of your surroundings and must
continue to pay attention while backing up. Failure to
do so can result in serious injury or death.
CAUTION!
• To avoid vehicle damage, ParkView should only be
used as a parking aid. The ParkView camera is
unable to view every obstacle or object in your drive
path.
• To avoid vehicle damage, the vehicle must be driven
slowly when using ParkView to be able to stop in
time when an obstacle is seen. It is recommended
that the driver look frequently over his/her shoulder
when using ParkView.
362 STARTING AND OPERATING
Page 368 of 614
Deactivation
The system can be deactivated in the following conditions:
•The speed of the vehicle reaches greater than 8 mph
(13 km/h).
• The vehicle shifted into PARK from a different gear.
• If the vehicle is in any gear other than REVERSE, press
the “X” button.
• The camera delay system is turned off manually through
the Uconnect settings menu. Refer to “Uconnect Set-
tings” in “Multimedia” for further information.
NOTE:
• If snow, ice, mud, or any foreign substance builds up on
the camera lenses, clean the lenses, rinse with water, and
dry with a soft cloth. Do not cover the lenses.
• If a malfunction with the system has occurred, see your
nearest authorized dealer.WARNING!
Drivers must be careful when backing up even when
using the Surround View Camera. Always check care-
fully behind your vehicle, and be sure to check for
pedestrians, animals, other vehicles, obstructions, or
blind spots before backing up. You are responsible for
the safety of your surroundings and must continue to
pay attention while backing up. Failure to do so can
result in serious injury or death.
CAUTION!
• To avoid vehicle damage, Surround View should
only be used as a parking aid. The Surround View
camera is unable to view every obstacle or object in
your drive path.
• To avoid vehicle damage, the vehicle must be driven
slowly when using Surround View to be able to stop
in time when an obstacle is seen. It is recommended
that the driver look frequently over his/her shoulder
when using Surround View.
366 STARTING AND OPERATING
Page 371 of 614
WARNING!
•Never have any smoking materials lit in or near the
vehicle when the fuel door is open or the tank is
being filled.
• Never add fuel when the engine is running. This is
in violation of most state and federal fire regulations
and may cause the “Malfunction Indicator Light” to
turn on.
• A fire may result if fuel is pumped into a portable
container that is inside of a vehicle. You could be
burned. Always place fuel containers on the ground
while filling.
CAUTION!
To avoid fuel spillage and overfilling, do not “top off”
the fuel tank after filling.
Emergency Fuel Door Release
1. Cycle the vehicle’s ignition to the RUN position (PSA not active)
NOTE: If this is not performed, then the tank vent valve
will not open. This will result in premature fuel pump
shutoffs. 2. Access the storage bin located behind the rear cargo trim
panel.
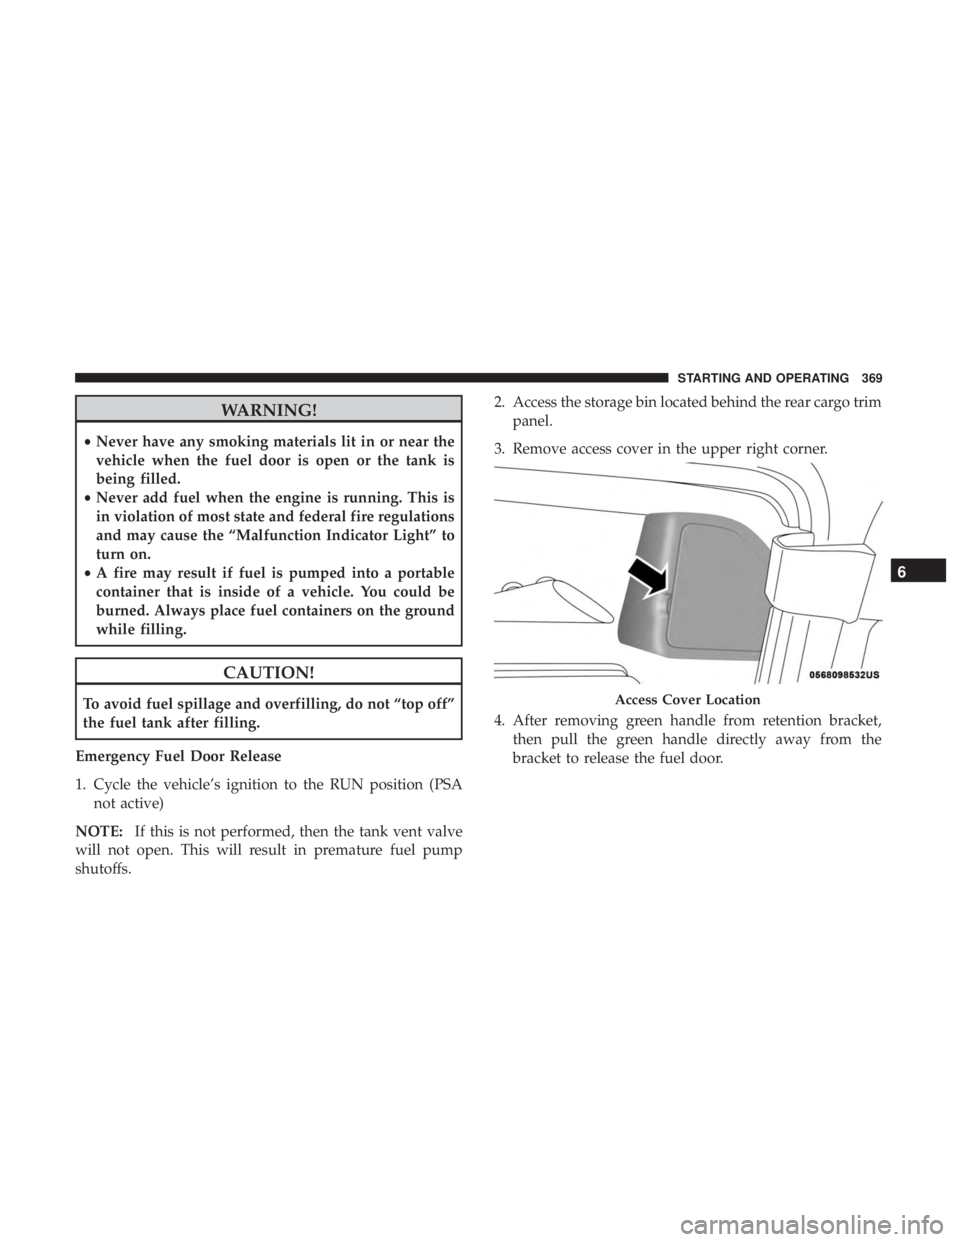
3. Remove access cover in the upper right corner.
4. After removing green handle from retention bracket, then pull the green handle directly away from the
bracket to release the fuel door.Access Cover Location
6
STARTING AND OPERATING 369
Page 376 of 614

7. Turn the ignition to the ON/RUN mode, but do not startthe vehicle.
8. Press and hold the brake pedal.
9. Release the park brake.
10. Turn the ignition OFF.
11. Release the brake pedal.
DRIVING TIPS
Driving On Slippery Surfaces
Information in this section will aid in safe controlled
launches in adverse conditions.
Acceleration
Rapid acceleration on snow covered, wet, or other slippery
surfaces may cause the driving wheels to pull erratically to
the right or left. This phenomenon occurs when there is a
difference in the surface traction under the front (driving)
wheels.
WARNING!
Rapid acceleration on slippery surfaces is dangerous.
Unequal traction can cause sudden pulling of the front
wheels. You could lose control of the vehicle and
possibly have a collision. Accelerate slowly and care-
fully whenever there is likely to be poor traction (ice,
snow, wet, mud, loose sand, etc.).
Traction
When driving on wet or slushy roads, it is possible for a
wedge of water to build up between the tire and road
surface. This is hydroplaning and may cause partial or
complete loss of vehicle control and stopping ability. To
reduce this possibility, the following precautions should be
observed:
• Slow down during rainstorms or when the roads are
slushy.
• Slow down if the road has standing water or puddles.
• Replace the tires when tread wear indicators first be-
come visible.
• Keep tires properly inflated.
374 STARTING AND OPERATING
Page 377 of 614
•Maintain sufficient distance between your vehicle and
the vehicle in front of you to avoid a collision in a
sudden stop.
Driving Through Water
Driving through water more than a few inches/centimeters
deep will require extra caution to ensure safety and pre-
vent damage to your vehicle.
Flowing/Rising Water
WARNING!
Do not drive on or across a road or path where water is
flowing and/or rising (as in storm run-off). Flowing
water can wear away the road or path’s surface and
cause your vehicle to sink into deeper water. Further-
more, flowing and/or rising water can carry your ve-
hicle away swiftly. Failure to follow this warning may
result in injuries that are serious or fatal to you, your
passengers, and others around you.
Shallow Standing Water
Although your vehicle is capable of driving through shal-
low standing water, consider the following Cautions and
Warnings before doing so.
WARNING!
• Driving through standing water limits your vehicle’s
traction capabilities. Do not exceed 5 mph (8 km/h)
when driving through standing water.
• Driving through standing water limits your vehicle’s
braking capabilities, which increases stopping dis-
tances. Therefore, after driving through standing
water, drive slowly and lightly press on the brake
pedal several times to dry the brakes.
• Failure to follow these warnings may result in inju-
ries that are serious or fatal to you, your passengers,
and others around you.
6
STARTING AND OPERATING 375
Page 379 of 614

IN CASE OF EMERGENCY
CONTENTS
�HAZARD WARNING FLASHERS ............378
� ASSIST AND SOS MIRROR — IF EQUIPPED . . . .378
� BULB REPLACEMENT ....................384
▫ Replacement Bulbs ..................... .384
▫ Replacing Exterior Bulbs ..................386
� FUSES ............................... .390
▫ General Information .....................391
▫ Fuse Location ........................ .391
▫ Underhood Fuses ...................... .392
� JACKING AND TIRE CHANGING ...........400
▫ Preparations For Jacking .................401
▫ Jacking Instructions .....................401
▫ Road Tire Installation ....................405 �
TIRE SERVICE KIT — IF EQUIPPED ..........407
� JUMP STARTING ....................... .418
▫ Preparations For Jump Start ...............420
▫ Jump Starting Procedure ..................421
� REFUELING IN EMERGENCY ..............422
� IF YOUR ENGINE OVERHEATS .............423
� FREEING A STUCK VEHICLE ..............424
� TOWING A DISABLED VEHICLE ............425
� ENHANCED ACCIDENT RESPONSE SYSTEM
(EARS) .............................. .428
� EVENT DATA RECORDER (EDR) ............428
7
Page 380 of 614
HAZARD WARNING FLASHERS
The Hazard Warning flasher switch is located in the lower
center area of the instrument panel.Push the switch to turn on the Hazard Warning
flasher. When the switch is activated, all direc-
tional turn signals will flash on and off to warn
oncoming traffic of an emergency. Push the
switch a second time to turn off the Hazard Warning
flashers.
This is an emergency warning system and it should not be
used when the vehicle is in motion. Use it when your
vehicle is disabled and it is creating a safety hazard for
other motorists.
When you must leave the vehicle to seek assistance, the
Hazard Warning flashers will continue to operate even
though the ignition is placed in the OFF position.
NOTE: With extended use, the Hazard Warning flashers
may wear down your battery.
ASSIST AND SOS MIRROR — IF EQUIPPED
If equipped, the rearview mirror contains an ASSIST and a
SOS button.
Assist And SOS Mirror
1 — SOS Button
2 — ASSIST Button
378 IN CASE OF EMERGENCY