2018 CHRYSLER 300 run flat
[x] Cancel search: run flatPage 95 of 492
Trunk Safety
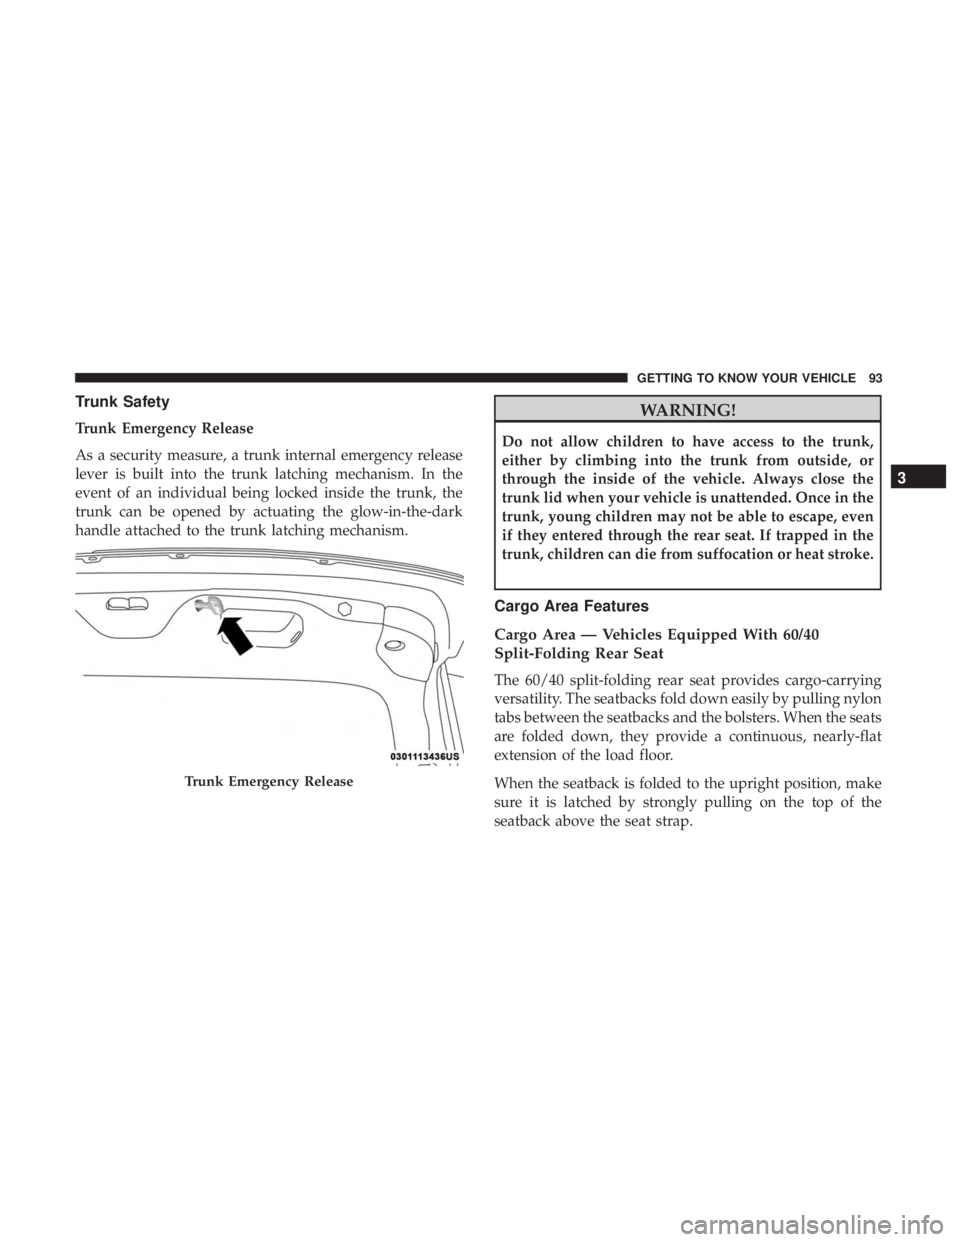
Trunk Emergency Release
As a security measure, a trunk internal emergency release
lever is built into the trunk latching mechanism. In the
event of an individual being locked inside the trunk, the
trunk can be opened by actuating the glow-in-the-dark
handle attached to the trunk latching mechanism.
WARNING!
Do not allow children to have access to the trunk,
either by climbing into the trunk from outside, or
through the inside of the vehicle. Always close the
trunk lid when your vehicle is unattended. Once in the
trunk, young children may not be able to escape, even
if they entered through the rear seat. If trapped in the
trunk, children can die from suffocation or heat stroke.
Cargo Area Features
Cargo Area — Vehicles Equipped With 60/40
Split-Folding Rear Seat
The 60/40 split-folding rear seat provides cargo-carrying
versatility. The seatbacks fold down easily by pulling nylon
tabs between the seatbacks and the bolsters. When the seats
are folded down, they provide a continuous, nearly-flat
extension of the load floor.
When the seatback is folded to the upright position, make
sure it is latched by strongly pulling on the top of the
seatback above the seat strap.
Trunk Emergency Release
3
GETTING TO KNOW YOUR VEHICLE 93
Page 133 of 492
— Electronic Stability Control (ESC) Off Warning
Light — If Equipped
This light indicates the Electronic Stability Control (ESC) is
off.
Each time the ignition is turned to ON/RUN or ACC/ON/
RUN, the ESC system will be on, even if it was turned off
previously.
— Low Washer Fluid Warning Light — If
Equipped
This warning light will illuminate when the windshield
washer fluid is low.
— Tire Pressure Monitoring System (TPMS)
Warning Light
The warning light switches on and a message is displayed
to indicate that the tire pressure is lower than the recom-
mended value and/or that slow pressure loss is occurring.
In these cases, optimal tire duration and fuel consumption
may not be guaranteed.
Should one or more tires be in the condition mentioned
above, the display will show the indications corresponding
to each tire in sequence.
CAUTION!
Do not continue driving with one or more flat tires as
handling may be compromised. Stop the vehicle,
avoiding sharp braking and steering. If a tire puncture
occurs, repair immediately using the dedicated tire
repair kit and contact your authorized dealer as soon as
possible.
Each tire, including the spare (if provided), should be
checked monthly when cold and inflated to the inflation
pressure recommended by the vehicle manufacturer on the
vehicle placard or tire inflation pressure label. (If your
vehicle has tires of a different size than the size indicated
on the vehicle placard or tire inflation pressure label, you
should determine the proper tire inflation pressure for
those tires.)
As an added safety feature, your vehicle has been
equipped with a Tire Pressure Monitoring System (TPMS)
that illuminates a low tire pressure telltale when one or
more of your tires is significantly under-inflated. Accord-
ingly, when the low tire pressure telltale illuminates, you
should stop and check your tires as soon as possible, and
inflate them to the proper pressure. Driving on a signifi-
cantly under-inflated tire causes the tire to overheat and
4
GETTING TO KNOW YOUR INSTRUMENT PANEL 131
Page 170 of 492
Enhanced Seat Belt Use Reminder System (BeltAlert)
Driver and Passenger BeltAlert (if equipped)
BeltAlert is a feature intended to remind the driver
and outboard front seat passenger (if equipped with
outboard front passenger seat BeltAlert) to buckle their
seat belts. The Belt Alert feature is active whenever the
ignition switch is in the START or ON/RUN position.
Initial Indication
If the driver is unbuckled when the ignition switch is first
in the START or ON/RUN position, a chime will signal for
a few seconds. If the driver or outboard front seat passen-
ger (if equipped with outboard front passenger seat
BeltAlert) is unbuckled when the ignition switch is first in
the START or ON/RUN position the Seat Belt Reminder
Light will turn on and remain on until both outboard front
seat belts are buckled. The outboard front passenger seat
BeltAlert is not active when an outboard front passenger
seat is unoccupied.
BeltAlert Warning Sequence
The BeltAlert warning sequence is activated when the
vehicle is moving above a specified vehicle speed range
and the driver or outboard front seat passenger is unbuck-
led (if equipped with outboard front passenger seat BeltAlert) (the outboard front passenger seat BeltAlert is
not active when the outboard front passenger seat is
unoccupied). The BeltAlert warning sequence starts by
blinking the Seat Belt Reminder Light and sounding an
intermittent chime. Once the BeltAlert warning sequence
has completed, the Seat Belt Reminder Light will remain on
until the seat belts are buckled. The BeltAlert warning
sequence may repeat based on vehicle speed until the
driver and occupied outboard front seat passenger seat
belts are buckled. The driver should instruct all occupants
to buckle their seat belts.
Change of Status
If the driver or outboard front seat passenger (if equipped
with outboard front passenger seat BeltAlert) unbuckles
their seat belt while the vehicle is traveling, the BeltAlert
warning sequence will begin until the seat belts are buck-
led again.
The outboard front passenger seat BeltAlert is not active
when the outboard front passenger seat is unoccupied.
BeltAlert may be triggered when an animal or other items
are placed on the outboard front passenger seat or when
the seat is folded flat (if equipped). It is recommended that
pets be restrained in the rear seat (if equipped) in pet
harnesses or pet carriers that are secured by seat belts, and
cargo is properly stowed.
168 SAFETY
Page 180 of 492

The air bag system must be ready to protect you in a
collision. The Occupant Restraint Controller (ORC) moni-
tors the internal circuits and interconnecting wiring asso-
ciated with the electrical Air Bag System Components.
Your vehicle may be equipped with the following Air Bag
System Components:
Air Bag System Components
•Occupant Restraint Controller (ORC)
• Air Bag Warning Light
•Steering Wheel and Column
• Instrument Panel
• Knee Impact Bolsters
• Driver and Front Passenger Air Bags
• Seat Belt Buckle Switch
• Supplemental Side Air Bags
• Supplemental Knee Air Bags
• Front and Side Impact Sensors
• Seat Belt Pretensioners
• Seat Track Position Sensors
Air Bag Warning Light
The ORC monitors the readiness of the electronic parts of
the air bag system whenever the ignition switch
is in the START or ON/RUN position. If the
ignition switch is in the OFF position or in the
ACC position, the air bag system is not on and
the air bags will not inflate.
The ORC contains a backup power supply system that may
deploy the air bag system even if the battery loses power or
it becomes disconnected prior to deployment.
The ORC turns on the Air Bag Warning Light in the
instrument panel for approximately four to eight seconds
for a self-check when the ignition switch is first in the
ON/RUN position. After the self-check, the Air Bag Warn-
ing Light will turn off. If the ORC detects a malfunction in
any part of the system, it turns on the Air Bag Warning
Light, either momentarily or continuously. A single chime
will sound to alert you if the light comes on again after
initial startup.
The ORC also includes diagnostics that will illuminate the
instrument panel Air Bag Warning Light if a malfunction is
detected that could affect the air bag system. The diagnos-
tics also record the nature of the malfunction. While the air
178 SAFETY
Page 181 of 492

bag system is designed to be maintenance free, if any of the
following occurs, have an authorized dealer service the air
bag system immediately.
•The Air Bag Warning Light does not come on during the
four to eight seconds when the ignition switch is first in
the ON/RUN position.
• The Air Bag Warning Light remains on after the four to
eight-second interval.
• The Air Bag Warning Light comes on intermittently or
remains on while driving.
NOTE: If the speedometer, tachometer, or any engine
related gauges are not working, the Occupant Restraint
Controller (ORC) may also be disabled. In this condition
the air bags may not be ready to inflate for your protection.
Have an authorized dealer service the air bag system
immediately.WARNING!
Ignoring the Air Bag Warning Light in your instrument
panel could mean you won’t have the air bag system to
protect you in a collision. If the light does not come on
as a bulb check when the ignition is first turned on,
stays on after you start the vehicle, or if it comes on as
you drive, have an authorized dealer service the air bag
system immediately.
Redundant Air Bag Warning Light
If a fault with the Air Bag Warning Light is detected, which could affect the Supplemental Restraint System
(SRS), the Redundant Air Bag Warning Light will
illuminate on the instrument panel. The Redun-
dant Air Bag Warning Light will stay on until the
fault is cleared. In addition, a single chime will sound to
alert you that the Redundant Air Bag Warning Light has
come on and a fault has been detected. If the Redundant
Air Bag Warning Light comes on intermittently or remains
on while driving have an authorized dealer service the
vehicle immediately.
For additional information regarding the Redundant Air
Bag Warning Light refer to “Getting To Know Your Instru-
ment Panel” section of this manual.
5
SAFETY 179
Page 192 of 492
Maintaining Your Air Bag System
WARNING!
•Modifications to any part of the air bag system could
cause it to fail when you need it. You could be
injured if the air bag system is not there to protect
you. Do not modify the components or wiring, in-
cluding adding any kind of badges or stickers to the
steering wheel hub trim cover or the upper passenger
side of the instrument panel. Do not modify the front
bumper, vehicle body structure, or add aftermarket
side steps or running boards.
• It is dangerous to try to repair any part of the air bag
system yourself. Be sure to tell anyone who works on
your vehicle that it has an air bag system.
• Do not attempt to modify any part of your air bag
system. The air bag may inflate accidentally or may
not function properly if modifications are made.
Take your vehicle to an authorized dealer for any air
bag system service. If your seat, including your trim
cover and cushion, needs to be serviced in any way
(including removal or loosening/tightening of seat
attachment bolts), take the vehicle to an authorized
(Continued)
WARNING! (Continued)
dealer. Only manufacturer approved seat accessories
may be used. If it is necessary to modify the air bag
system for persons with disabilities, contact an au-
thorized dealer.
Event Data Recorder (EDR)
This vehicle is equipped with an event data recorder
(EDR). The main purpose of an EDR is to record, in certain
crash or near crash-like situations, such as an air bag
deployment or hitting a road obstacle, data that will assist
in understanding how a vehicle’s systems performed. The
EDR is designed to record data related to vehicle dynamics
and safety systems for a short period of time, typically 30
seconds or less. The EDR in this vehicle is designed to
record such data as:
•How various systems in your vehicle were operating;
• Whether or not the driver and passenger safety belts
were buckled/fastened;
• How far (if at all) the driver was depressing the accel-
erator and/or brake pedal; and,
• How fast the vehicle was traveling.
190 SAFETY
Page 293 of 492

Towing Tips
Before setting out on a trip, practice turning, stopping, and
backing up the trailer in an area located away from heavy
traffic.
Automatic Transmission
Select the DRIVE range when towing. The transmission
controls include a drive strategy to avoid frequent shifting
when towing. However, if frequent shifting does occur
while in DRIVE, you can use the AutoStick shift control (if
equipped) to manually select a lower gear.
NOTE:Using a lower gear while operating the vehicle
under heavy loading conditions will improve performance
and extend transmission life by reducing excessive shifting
and heat buildup. This action will also provide better
engine braking.
Speed Control — If Equipped
• Do not use on hilly terrain or with heavy loads.
• When using the speed control, if you experience speed
drops greater than 10 mph (16 km/h), disengage until
you can get back to cruising speed.
• Use speed control in flat terrain and with light loads to
maximize fuel efficiency.
Seven-Pin Connector
1 — Battery 5 — Ground
2 — Backup Lamps 6 — Left Stop/Turn
3 — Right Stop/Turn 7 — Running Lamps
4 — Electric Brakes
6
STARTING AND OPERATING 291
Page 338 of 492
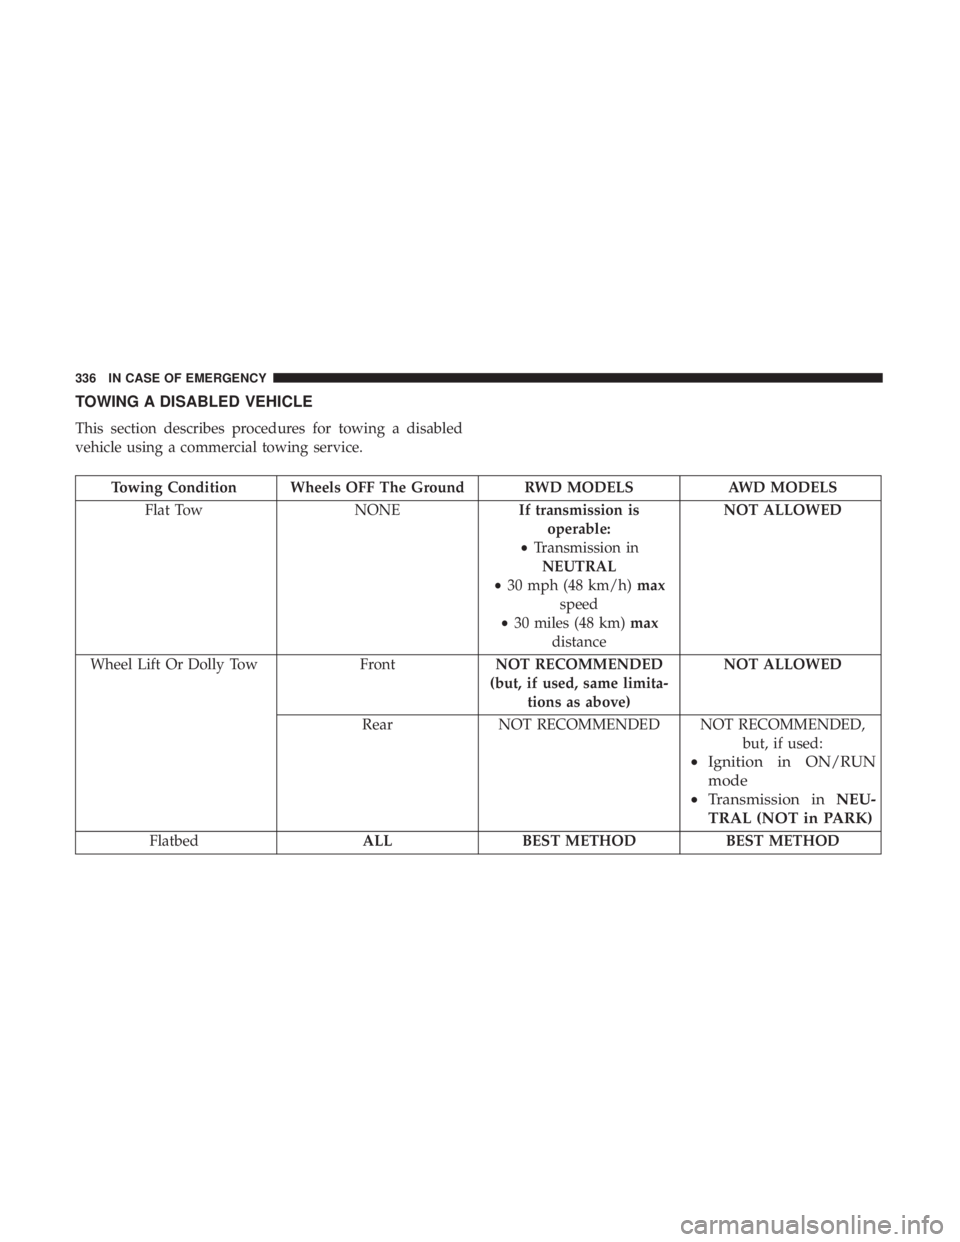
TOWING A DISABLED VEHICLE
This section describes procedures for towing a disabled
vehicle using a commercial towing service.
Towing Condition Wheels OFF The Ground RWD MODELSAWD MODELS
Flat Tow NONEIf transmission is
operable:
• Transmission in
NEUTRAL
• 30 mph (48 km/h) max
speed
• 30 miles (48 km) max
distance NOT ALLOWED
Wheel Lift Or Dolly Tow FrontNOT RECOMMENDED
(but, if used, same limita- tions as above) NOT ALLOWED
Rear NOT RECOMMENDED NOT RECOMMENDED,
but, if used:
•Ignition in ON/RUN
mode
• Transmission in NEU-
TRAL (NOT in PARK)
Flatbed ALL BEST METHOD BEST METHOD
336 IN CASE OF EMERGENCY