2018 CHEVROLET SILVERADO change time
[x] Cancel search: change timePage 285 of 501
Chevrolet Silverado Owner Manual (GMNA-Localizing-U.S./Canada/Mexico-
11349200) - 2018 - CRC - 2/27/18
284 Driving and Operating
{Warning
The Parking Assist system does
not detect children, pedestrians,
bicyclists, animals, or objects
located below the bumper or that
are too close or too far from the
vehicle. It is not available at
speeds greater than 8 km/h
(5 mph). To prevent injury, death,
or vehicle damage, even with
Parking Assist, always check the
area around the vehicle and
check all mirrors before moving
forward or backing.
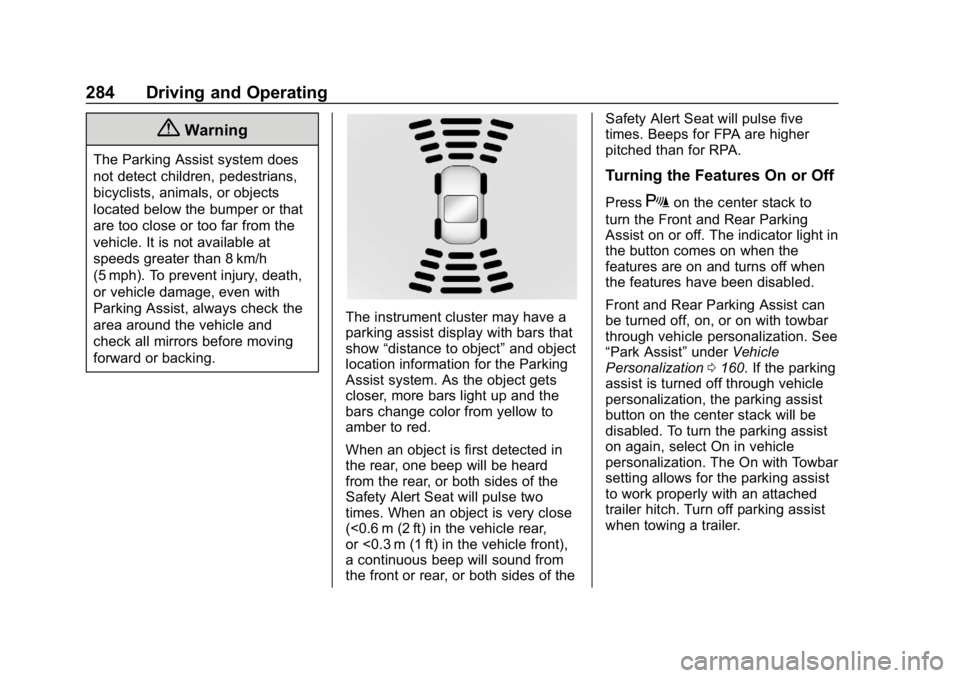
The instrument cluster may have a
parking assist display with bars that
show“distance to object” and object
location information for the Parking
Assist system. As the object gets
closer, more bars light up and the
bars change color from yellow to
amber to red.
When an object is first detected in
the rear, one beep will be heard
from the rear, or both sides of the
Safety Alert Seat will pulse two
times. When an object is very close
(<0.6 m (2 ft) in the vehicle rear,
or <0.3 m (1 ft) in the vehicle front),
a continuous beep will sound from
the front or rear, or both sides of the Safety Alert Seat will pulse five
times. Beeps for FPA are higher
pitched than for RPA.
Turning the Features On or Off
PressXon the center stack to
turn the Front and Rear Parking
Assist on or off. The indicator light in
the button comes on when the
features are on and turns off when
the features have been disabled.
Front and Rear Parking Assist can
be turned off, on, or on with towbar
through vehicle personalization. See
“Park Assist” underVehicle
Personalization 0160. If the parking
assist is turned off through vehicle
personalization, the parking assist
button on the center stack will be
disabled. To turn the parking assist
on again, select On in vehicle
personalization. The On with Towbar
setting allows for the parking assist
to work properly with an attached
trailer hitch. Turn off parking assist
when towing a trailer.
Page 287 of 501
Chevrolet Silverado Owner Manual (GMNA-Localizing-U.S./Canada/Mexico-
11349200) - 2018 - CRC - 2/27/18
286 Driving and Operating
Warning (Continued)
or ice, or if the windshield is
damaged. It may also not detect a
vehicle on winding or hilly roads,
or in conditions that can limit
visibility such as fog, rain,
or snow, or if the headlamps or
windshield are not cleaned or in
proper condition. Keep the
windshield, headlamps, and FCA
sensors clean and in good repair.
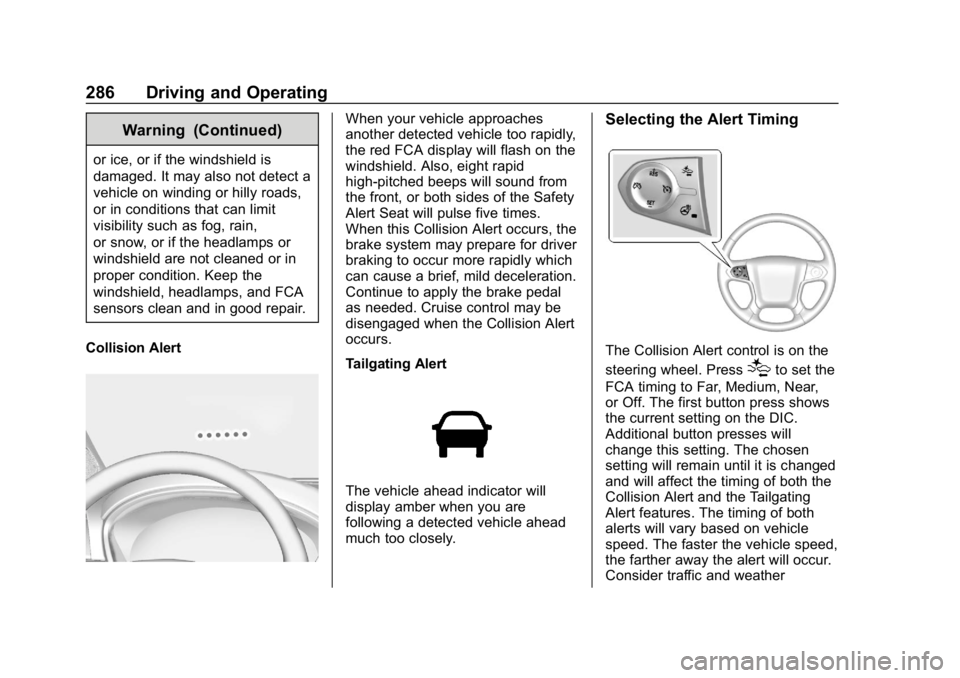
Collision Alert
When your vehicle approaches
another detected vehicle too rapidly,
the red FCA display will flash on the
windshield. Also, eight rapid
high-pitched beeps will sound from
the front, or both sides of the Safety
Alert Seat will pulse five times.
When this Collision Alert occurs, the
brake system may prepare for driver
braking to occur more rapidly which
can cause a brief, mild deceleration.
Continue to apply the brake pedal
as needed. Cruise control may be
disengaged when the Collision Alert
occurs.
Tailgating Alert
The vehicle ahead indicator will
display amber when you are
following a detected vehicle ahead
much too closely.
Selecting the Alert Timing
The Collision Alert control is on the
steering wheel. Press
[to set the
FCA timing to Far, Medium, Near,
or Off. The first button press shows
the current setting on the DIC.
Additional button presses will
change this setting. The chosen
setting will remain until it is changed
and will affect the timing of both the
Collision Alert and the Tailgating
Alert features. The timing of both
alerts will vary based on vehicle
speed. The faster the vehicle speed,
the farther away the alert will occur.
Consider traffic and weather
Page 290 of 501
Chevrolet Silverado Owner Manual (GMNA-Localizing-U.S./Canada/Mexico-
11349200) - 2018 - CRC - 2/27/18
Driving and Operating 289
Warning (Continued)
.Provide enough time to
avoid a crash.
. Detect lane markings under
poor weather or visibility
conditions. This can occur if
the windshield or
headlamps are blocked by
dirt, snow, or ice; if they are
not in proper condition; or if
the sun shines directly into
the camera.
. Detect road edges.
. Detect lanes on winding or
hilly roads.
If LDW only detects lane
markings on one side of the road,
it will only warn you when
departing the lane on the side
where it has detected a lane
marking. Always keep your
attention on the road and
maintain proper vehicle position
within the lane, or vehicle
damage, injury, or death could (Continued)
Warning (Continued)
occur. Always keep the
windshield, headlamps, and
camera sensors clean and in
good repair. Do not use LDW in
bad weather conditions.
How the System Works
The LDW camera sensor is on the
windshield ahead of the rearview
mirror.
To turn LDW on and off, press
@on
the center stack. The control
indicator will light when LDW is on.
When LDW is on,@is green if
LDW is available to warn of a lane
departure. If the vehicle crosses a
detected lane marking without using
the turn signal in that direction,
@
changes to amber and flashes.
Additionally, there may be three
beeps, or the driver seat may pulse
three times on the right or left,
depending on the lane departure
direction.
When the System Does Not
Seem to Work Properly
The system may not detect lanes as
well when there are:
. Close vehicles ahead.
. Sudden lighting changes, such
as when driving through tunnels.
. Banked roads.
If the LDW system is not functioning
properly when lane markings are
clearly visible, cleaning the
windshield may help.
LDW alerts may occur due to tar
marks, shadows, cracks in the road,
temporary or construction lane
markings, or other road
imperfections. This is normal system
operation; the vehicle does not need
service. Turn LDW off if these
conditions continue.
Page 292 of 501
Chevrolet Silverado Owner Manual (GMNA-Localizing-U.S./Canada/Mexico-
11349200) - 2018 - CRC - 2/27/18
Driving and Operating 291
How the System Works
The LKA camera sensor is on the
windshield ahead of the rearview
mirror.
To turn LKA on and off, press
A
on the center stack.
When on,
Ais green if LKA is
available to assist and provide LDW
alerts. It may assist by gently
turning the steering wheel and
display
Aas amber if the vehicle
approaches a detected lane marking
without using a turn signal in that
direction. It may also provide an
LDW alert by flashing
Aamber
as the lane marking is crossed.
Additionally, there may be three
beeps, or the driver seat may pulse
three times, on the right or left,
depending on the lane departure
direction. Take Steering
The LKA system does not
continuously steer the vehicle.
If LKA does not detect active driver
steering, an alert, chime, or DIC
message may be provided. Move
the steering wheel to dismiss.
When the System Does Not
Seem to Work Properly
The system performance may be
affected by:
.
Close vehicles ahead.
. Sudden lighting changes, such
as when driving through tunnels.
. Banked roads.
. Roads with poor lane markings,
such as two-lane roads.
If the LKA system is not functioning
properly when lane markings are
clearly visible, cleaning the
windshield may help. A camera blocked message may
display if the camera is blocked.
Cleaning the outside of the
windshield behind the rearview
mirror may correct the issue. Some
driver assistance systems may have
reduced performance or not work at
all. An LKA or LDW unavailable
message may display if the systems
are temporarily unavailable. This
message could be due to a blocked
camera. The LKA system does not
need service. Clean the outside of
the windshield behind the rearview
mirror.
LKA assistance and/or LDW alerts
may occur due to tar marks,
shadows, cracks in the road,
temporary or construction lane
markings, or other road
imperfections. This is normal system
operation; the vehicle does not need
service. Turn LKA off if these
conditions continue.
Page 326 of 501
Chevrolet Silverado Owner Manual (GMNA-Localizing-U.S./Canada/Mexico-
11349200) - 2018 - CRC - 2/27/18
Driving and Operating 325
panel allows adjustment to the
amount of output, referred to as
Trailer Gain, available to the trailer
brakes and allows manual
application of the trailer brakes. The
Trailer Brake Control Panel is used
along with the Trailer Brake Display
Page on the Driver Information
Center (DIC) to adjust and display
power output to the trailer brakes.
Trailer Brake DIC Display Page
The ITBC system displays
messages in the DIC.
The display page indicates Trailer
Gain setting, power output to the
trailer brakes, trailer connection, and
system operational status.
To display the Trailer Brake Display
Page, do any of the following:
.Scroll through the DIC menu
pages.
. Press a Trailer Gain button.
If the Trailer Brake Display Page
is not currently displayed, press
a Trailer Gain button to recall the
current Trailer Gain setting. Each press and release of the
gain buttons will then change the
Trailer Gain setting.
. Activate the Manual Trailer
Brake Apply Lever.
TRAILER GAIN: This setting can be
adjusted from 0.0 to 10.0 with either
a trailer connected or disconnected.
To adjust the Trailer Gain, press one
of the Trailer Gain Adjustment
buttons. Press and hold a gain
button to continuously adjust the
Trailer Gain. To turn the output to
the trailer off, adjust the Trailer Gain
setting to 0.0 (zero).
TRAILER OUTPUT: This displays
anytime a trailer with electric brakes
is connected. Output to the trailer
brakes is based on the amount of
vehicle braking present and relative
to the Trailer Gain setting. Output is
displayed from 0 to 100% for each
gain setting.
The Trailer Output will indicate
“- - - - - -” on the Trailer Brake
Display Page whenever the
following occur:
. No trailer is connected. .
A trailer without electric brakes
is connected (no DIC message
will display).
. A trailer with electric brakes has
become disconnected (a
CHECK TRAILER WIRING
message will also display on
the DIC).
. There is a fault present in the
wiring to the trailer brakes (a
CHECK TRAILER WIRING
message will also display on
the DIC).
. The ITBC system is not working
due to a fault (a SERVICE
TRAILER BRAKE SYSTEM
message will also display in
the DIC).
Manual Trailer Brake Apply
The Manual Trailer Brake Apply
Lever is used to apply the trailer ’s
electric brakes independent of the
vehicle’s brakes. Sliding the lever to
the left will apply only the trailer
brakes. Use this lever to adjust
Trailer Gain to properly adjust the
power output to the trailer brakes.
Page 327 of 501
Chevrolet Silverado Owner Manual (GMNA-Localizing-U.S./Canada/Mexico-
11349200) - 2018 - CRC - 2/27/18
326 Driving and Operating
The trailer's and the vehicle's brake
lamps will come on when either
vehicle brakes or manual trailer
brakes are applied.
Trailer Gain Adjustment Procedure
Trailer Gain should be set for a
specific trailering condition and must
be adjusted anytime vehicle loading,
trailer loading, or road surface
conditions change.
{Warning
Trailer brakes that are
over-gained or under-gained may
not stop the vehicle and the trailer
as intended and can result in a
crash. Always follow the
instructions to set the Trailer Gain
for the proper trailer stopping
performance.
Use the following to adjust Trailer
Gain for each towing condition: 1. Drive the vehicle with the trailer attached on a level road
surface representative of the
towing condition and free of traffic at about 32 to 40 km/h
(20 to 25 mph) and fully apply
the Manual Trailer Brake Apply
Lever.
Adjusting Trailer Gain at
speeds lower than 32 to
40 km/h (20 to 25 mph) may
result in an incorrect gain
setting.
2. Adjust the Trailer Gain, using the Trailer Gain Adjustment
Buttons, to just below the point
of trailer wheel lock-up,
indicated by trailer wheel
squeal or tire smoke when a
trailer wheel locks.
Trailer wheel lock-up may not
occur if towing a heavily loaded
trailer. In this case, adjust the
Trailer Gain to the highest
allowable setting for the towing
condition.
3. Readjust Trailer Gain anytime vehicle loading, trailer loading,
or road surface conditions
change or if trailer wheel
lock-up is noticed at any time
while towing. Other ITBC-Related DIC Messages
In addition to displaying TRAILER
GAIN and OUTPUT through the
DIC, trailer connection and ITBC
system status are displayed on
the DIC.
TRAILER CONNECTED: This
message will briefly display when a
trailer with electric brakes is first
connected to the vehicle. This
message will automatically turn off
in about 10 seconds. This message
can be acknowledged before it
automatically turns off.
CHECK TRAILER WIRING: This
message will display if:
.
The ITBC system first
determines connection to a
trailer with electric brakes and
then the trailer harness becomes
disconnected from the vehicle.
If the disconnect occurs while
the vehicle is stationary, this
message will automatically turn
off in about 30 seconds. This
message will also turn off if it is
acknowledged or if the trailer
harness is reconnected.
Page 344 of 501

Chevrolet Silverado Owner Manual (GMNA-Localizing-U.S./Canada/Mexico-
11349200) - 2018 - CRC - 2/27/18
Vehicle Care 343
1. Positive (+) Terminal. SeeJump Starting - North America
0421.
2. Battery - North America 0362.
3. Coolant Surge Tank and Pressure Cap. See Cooling
System 0352.
4. Engine Air Cleaner/Filter 0351.
5. Automatic Transmission Dipstick (If Equipped). See
“How to Check Automatic
Transmission Fluid” under
Automatic Transmission Fluid
(6-Speed Transmission) 0347
or Automatic Transmission
Fluid (8-Speed Transmission)
0 350.
6. Engine Oil Dipstick. See “Checking Engine Oil” under
Engine Oil 0343.
7. Engine Oil Fill Cap. See “When
to Add Engine Oil” under
Engine Oil 0343.
8. Engine Cooling Fan (Out of View). See Cooling System
0 352. 9. Remote Negative (–) Location.
See Jump Starting - North
America 0421.
10. Power Steering Fluid Reservoir. See Power Steering
Fluid (1500 Series) 0359 or
Power Steering Fluid (2500/
3500 Series) 0359.
11. Windshield Washer Fluid Reservoir. See “Adding Washer
Fluid” under Washer Fluid
0 359.
12. Brake Fluid Reservoir. See Brake Fluid 0361.
13. Clutch Fluid Reservoir (If Equipped). See Hydraulic
Clutch 0351.
14. Auxiliary Battery (If Equipped). SeeBattery - North America
0 362.
15. Engine Compartment Fuse
Block 0376.
If the vehicle has a diesel engine
and/or an Allison Transmission, see
the Duramax diesel supplement. For an eAssist vehicle, see the
Silverado/Sierra eAssist
supplement.
Engine Oil
For diesel engine vehicles, see
“Engine Oil”
in the Duramax diesel
supplement.
To ensure proper engine
performance and long life, careful
attention must be paid to engine oil.
Following these simple, but
important steps will help protect
your investment:
. Use engine oil approved to the
proper specification and of the
proper viscosity grade. See
“Selecting the Right Engine Oil”
in this section.
. Check the engine oil level
regularly and maintain the
proper oil level. See “Checking
Engine Oil” and“When to Add
Engine Oil” in this section.
. Change the engine oil at the
appropriate time. See Engine Oil
Life System 0346.
Page 347 of 501

Chevrolet Silverado Owner Manual (GMNA-Localizing-U.S./Canada/Mexico-
11349200) - 2018 - CRC - 2/27/18
346 Vehicle Care
Engine oil system flushes are not
recommended and could cause
engine damage not covered by the
vehicle warranty.
What to Do with Used Oil
Used engine oil contains certain
elements that can be unhealthy for
your skin and could even cause
cancer. Do not let used oil stay on
your skin for very long. Clean your
skin and nails with soap and water,
or a good hand cleaner. Wash or
properly dispose of clothing or rags
containing used engine oil. See the
manufacturer's warnings about the
use and disposal of oil products.
Used oil can be a threat to the
environment. If you change your
own oil, be sure to drain all the oil
from the filter before disposal. Never
dispose of oil by putting it in the
trash or pouring it on the ground,
into sewers, or into streams or
bodies of water. Recycle it by taking
it to a place that collects used oil.
Engine Oil Life System
When to Change Engine Oil
This vehicle has a computer system
that indicates when to change the
engine oil and filter. This is based
on a combination of factors which
include engine revolutions, engine
temperature, and miles driven.
Based on driving conditions, the
mileage at which an oil change is
indicated can vary considerably. For
the oil life system to work properly,
the system must be reset every time
the oil is changed.
On some vehicles, when the system
has calculated that oil life has been
diminished, a CHANGE ENGINE
OIL SOON message comes on to
indicate that an oil change is
necessary. Change the oil as soon
as possible within the next 1 000 km
(600 mi). It is possible that, if driving
under the best conditions, the oil life
system might indicate that an oil
change is not necessary for up to a
year. The engine oil and filter must
be changed at least once a year
and, at this time, the system mustbe reset. For vehicles without the
CHANGE ENGINE OIL SOON
message, an oil change is needed
when the OIL LIFE REMAINING
percentage is near 0%. Your dealer
has trained service people who will
perform this work and reset the
system. It is also important to check
the oil regularly over the course of
an oil drain interval and keep it at
the proper level.
If the system is ever reset
accidentally, the oil must be
changed at 5 000 km (3,000 mi)
since the last oil change.
Remember to reset the oil life
system whenever the oil is changed.
How to Reset the Engine Oil
Life System
Reset the system whenever the
engine oil is changed so that the
system can calculate the next
engine oil change. Always reset the
engine oil life to 100% after every oil
change. It will not reset itself. To
reset the engine oil life system: