2018 CHEVROLET SILVERADO 2500 brake light
[x] Cancel search: brake lightPage 276 of 489
Chevrolet Silverado LD 1500 and Silverado 2500/3500 Owner Manual (GMNA-
Localizing-U.S./Canada-12162993) - 2019 - crc - 4/4/18
Driving and Operating 275
To turn TCS and StabiliTrak/ESC on
again, press and release
g. The
traction off light
iand the
StabiliTrak/ESC OFF light
gin the
instrument cluster turn off.
StabiliTrak/ESC will automatically
turn on if the vehicle exceeds
56 km/h (35 mph). Traction control
will remain off.
The vehicle has a Trailer Sway
Control (TSC) feature and a Hill
Start Assist (HSA) feature.
See Trailer Sway Control (TSC)
0 315 orHill Start Assist (HSA)
0 272.
Adding accessories can affect the
vehicle performance. See
Accessories and Modifications
0 325.
Hill Descent
Control (HDC)
If equipped, Hill Descent Control
(HDC) sets and maintains vehicle
speed while driving down steep grades in a forward or reverse gear.
The HDC switch is on the center
stack, below the climate controls.
Press
5to enable or disable HDC.
Vehicle speed must be below
50 km/h (31 mph).
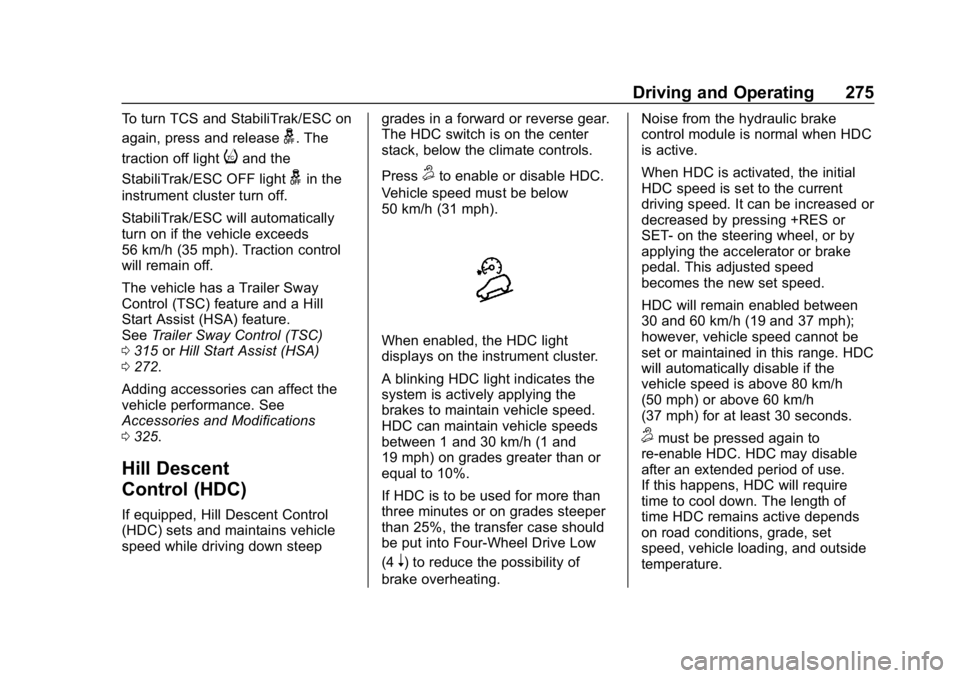
When enabled, the HDC light
displays on the instrument cluster.
A blinking HDC light indicates the
system is actively applying the
brakes to maintain vehicle speed.
HDC can maintain vehicle speeds
between 1 and 30 km/h (1 and
19 mph) on grades greater than or
equal to 10%.
If HDC is to be used for more than
three minutes or on grades steeper
than 25%, the transfer case should
be put into Four-Wheel Drive Low
(4
n) to reduce the possibility of
brake overheating. Noise from the hydraulic brake
control module is normal when HDC
is active.
When HDC is activated, the initial
HDC speed is set to the current
driving speed. It can be increased or
decreased by pressing +RES or
SET- on the steering wheel, or by
applying the accelerator or brake
pedal. This adjusted speed
becomes the new set speed.
HDC will remain enabled between
30 and 60 km/h (19 and 37 mph);
however, vehicle speed cannot be
set or maintained in this range. HDC
will automatically disable if the
vehicle speed is above 80 km/h
(50 mph) or above 60 km/h
(37 mph) for at least 30 seconds.
5must be pressed again to
re-enable HDC. HDC may disable
after an extended period of use.
If this happens, HDC will require
time to cool down. The length of
time HDC remains active depends
on road conditions, grade, set
speed, vehicle loading, and outside
temperature.
Page 278 of 489
Chevrolet Silverado LD 1500 and Silverado 2500/3500 Owner Manual (GMNA-
Localizing-U.S./Canada-12162993) - 2019 - crc - 4/4/18
Driving and Operating 277
5:Press to turn the system on or
off. The indicator light is white when
cruise control is on and turns off
when cruise control is off.
+RES : If there is a set speed in
memory, press briefly to resume to
that speed or press and hold to
accelerate. If cruise control is
already active, use to increase
vehicle speed.
SET− :Press briefly to set the
speed and activate cruise control.
If cruise control is already active,
use to decrease vehicle speed.
*: Press to disengage cruise
control without erasing the set
speed from memory.
Setting Cruise Control
If
5is on when not in use, SET− or
+RES could get pressed and go into
cruise when not desired. Keep
5
off when cruise is not being used.
1. Press
5to turn the cruise
system on.
2. Get up to the desired speed. 3. Press and release SET−.
4. Remove your foot from the
accelerator.
The cruise control indicator on the
instrument cluster turns green after
cruise control has been set to the
desired speed. See Instrument
Cluster 0136.
Resuming a Set Speed
If the cruise control is set at a
desired speed and then the brakes
are applied or
*is pressed, the
cruise control is disengaged without
erasing the set speed from memory.
Once the vehicle speed reaches
about 40 km/h (25 mph) or more,
briefly press +RES. The vehicle
returns to the previous set speed.
Increasing Speed While Using
Cruise Control
If the cruise control system is
already activated:
. Press and hold +RES until the
desired speed is reached, then
release it. .
To increase vehicle speed in
small increments, briefly press
+RES. For each press, the
vehicle goes about 1 km/h
(1 mph) faster.
The speedometer reading can be
displayed in either English or metric
units. See Instrument Cluster 0136.
The increment value used depends
on the units displayed.
Reducing Speed While Using
Cruise Control
If the cruise control system is
already activated:
. Press and hold SET– until the
desired lower speed is reached,
then release it.
. To slow down in small
increments, briefly press SET–.
For each press, the vehicle goes
about 1 km/h (1 mph) slower.
The speedometer reading can be
displayed in either English or metric
units. See Instrument Cluster 0136.
The increment value used depends
on the units displayed.
Page 279 of 489
Chevrolet Silverado LD 1500 and Silverado 2500/3500 Owner Manual (GMNA-
Localizing-U.S./Canada-12162993) - 2019 - crc - 4/4/18
278 Driving and Operating
Passing Another Vehicle While
Using Cruise Control
Use the accelerator pedal to
increase the vehicle speed. When
you take your foot off the pedal, the
vehicle will slow down to the
previous set cruise speed. While
pressing the accelerator pedal or
shortly following the release to
override cruise control, briefly
pressing SET–will result in cruise
control set to the current vehicle
speed.
Using Cruise Control on Hills
How well the cruise control works
on hills depends on the vehicle
speed, the load, and the steepness
of the hills. When going up steep
hills, pressing the accelerator pedal
may be necessary to maintain
vehicle speed.
While going downhill:
. Vehicles with a 6-speed
automatic transmission and a
gasoline engine have Cruise
Grade Braking to help maintain
driver selected speed. Cruise Grade Braking is enabled
when the vehicle is started and
cruise control is active. It is not
enabled in Range Selection
Mode. It assists in maintaining
driver selected speed when
driving on downhill grades by
using the engine and
transmission to slow the vehicle.
To disable and enable Cruise
Grade Braking for the current
ignition key cycle, press and
hold the Tow/Haul button for
five seconds. A DIC message
displays. See
Vehicle Messages
0 159.
. Vehicles with a diesel engine
have Cruise Grade Braking
enabled when Tow/Haul Mode is
on, the exhaust brake is on,
or both are on.
For other forms of descent control,
see Hill Descent Control (HDC)
0 275, Automatic Transmission
0 256, and Tow/Haul Mode 0261. Ending Cruise Control
There are four ways to end cruise
control:
.
Step lightly on the brake pedal.
. Press
*.
. Shift the transmission to
N (Neutral).
. To turn off cruise control,
press
5.
Erasing Speed Memory
The cruise control set speed is
erased from memory if
5is pressed
or the ignition is turned off.
Page 309 of 489
Chevrolet Silverado LD 1500 and Silverado 2500/3500 Owner Manual (GMNA-
Localizing-U.S./Canada-12162993) - 2019 - crc - 4/4/18
308 Driving and Operating
The hitch should be in the pickup
bed so that its centerline is over or
slightly in front of the rear axle. Take
care that it is not so far forward that
it will contact the back of the cab in
sharp turns. This is especially
important for short box pickups.
Trailer pin box extensions and
sliding fifth-wheel hitch assemblies
may be used. There should be at
least 15 cm (6 in) of clearance
between the top of the pickup box
and the bottom of the trailer shelf
that extends over the box.
Make sure the hitch is attached to
the tow vehicle frame rails. Do not
use the pickup box for support.
Safety Chains
Always attach safety chains
between the vehicle and the trailer.
Instructions about safety chains
may be provided by the hitch
manufacturer or by the trailer
manufacturer.
If the trailer being towed weighs up
to 2 271 kg (5,000 lb) with a
factory-installed step bumper, safety
chains may be attached to theattaching points on the bumper;
otherwise, safety chains should be
attached to holes on the trailer hitch.
Cross the safety chains under the
tongue of the trailer to help prevent
the tongue from contacting the road
if it becomes separated from the
hitch. Always leave enough slack in
the safety chains to allow the
combination to turn. Never allow
safety chains to drag on the ground.
Trailer Brakes
Loaded trailers over 900 kg
(2,000 lb) must be equipped with
brake systems and with brakes for
each axle. Trailer braking equipment
conforming to Canadian Standards
Association (CSA) requirement
CAN3-D313, or its equivalent, is
recommended.
State or local regulations may
require trailers to have their own
braking system if the loaded weight
of the trailer exceeds certain
minimums that can vary from state
to state. Read and follow the
instructions for the trailer brakes so
they are installed, adjusted, andmaintained properly. Never attempt
to tap into your vehicle's hydraulic
brake system. If you do, both the
vehicle anti-lock brakes and the
trailer brakes may not function,
which could result in a crash.
Auxiliary Battery
If equipped, the vehicle's auxiliary
battery can be used to supply
electrical power to additional
equipment that may be added, such
as a slide-in camper.
Locate the auxiliary battery
connector under the hood on the
driver's side of the vehicle, next to
the underhood electrical center.
Follow the proper installation
instructions included with any
electrical equipment that is installed.
Caution
To prevent draining the auxiliary
battery, always turn off electrical
equipment when not in use and
do not use any equipment that
(Continued)
Page 312 of 489
Chevrolet Silverado LD 1500 and Silverado 2500/3500 Owner Manual (GMNA-
Localizing-U.S./Canada-12162993) - 2019 - crc - 4/4/18
Driving and Operating 311
your dealer or a qualified service
center. If equipped, wiring
provisions for an aftermarket electric
trailer brake controller are included
with the vehicle as part of the trailer
wiring package. The harness
contains the following circuits:Electric Trailer
Brakes Blue
Battery Feed Red/Black or
Red/Blue
Brake Apply
Signal White/Blue
Ground Black
Refer to the aftermarket electric
trailer brake controller owner's
manual to determine wire color
coding of the electric trailer brake
controller. The wire colors on the
brake controller may be different
from the vehicle. The fuse for the
electric trailer brake circuit is in the
engine compartment fuse block, but
the wires may not be connected.
They should be connected by your
dealer or a qualified service center.Trailer Lamps
Always check all trailer lamps are
working at the beginning of each
trip, and periodically on longer trips.
Turn Signals When Towing a
Trailer
When properly connected, the trailer
turn signals should will illuminate to
indicate the vehicle is turning,
changing lanes, or stopping. When
towing a trailer, the arrows on the
instrument cluster will illuminate
even if the trailer is not properly
connected or the bulbs are
burned out.
Tow/Haul Mode
For instructions on how to enter
Tow/Haul mode, see Tow/Haul
Mode 0261.
Tow/Haul assists when pulling a
heavy trailer or a large or
heavy load.
Tow/Haul Mode is designed to be
most effective when the vehicle and
trailer combined weight is at least
75% of the vehicle's Gross Combined Weight Rating (GCWR).
See
“Weight of the Trailer” under
Trailer Towing 0298.
Tow/Haul Mode is most useful when
towing a heavy trailer or carrying a
large or heavy load:
. through rolling terrain.
. in stop-and-go traffic.
. in busy parking lots.
Operating the vehicle in Tow/Haul
Mode when lightly loaded or not
towing will not cause damage;
however, it is not recommended and
may result in unpleasant engine and
transmission driving characteristics
and reduced fuel economy.Integrated Trailer Brake
Control System
TThe vehicle may have an
Integrated Trailer Brake Control
(ITBC) system for use with electric
trailer brakes or most electric over
hydraulic trailer brake system
Page 317 of 489

Chevrolet Silverado LD 1500 and Silverado 2500/3500 Owner Manual (GMNA-
Localizing-U.S./Canada-12162993) - 2019 - crc - 4/4/18
316 Driving and Operating
If TSC is enabled, the Traction
Control System (TCS)/StabiliTrak
warning light will flash on the
instrument cluster. Reduce vehicle
speed by gradually removing your
foot from the accelerator. If trailer
sway continues, StabiliTrak can
reduce engine torque to help slow
the vehicle. TSC will not function if
StabiliTrak is turned off. See
Traction Control/Electronic Stability
Control.
{Warning
Trailer sway can result in a crash
and in serious injury or death,
even if the vehicle is equipped
with TSC.(Continued)
Warning (Continued)
If the trailer begins to sway,
reduce vehicle speed by
gradually removing your foot from
the accelerator. Then pull over to
check the trailer and vehicle to
help correct possible causes,
including an improperly or
overloaded trailer, unrestrained
cargo, improper trailer hitch
configuration, or improperly
inflated or incorrect vehicle or
trailer tires. SeeTowing
Equipment 0306 for trailer ratings
and hitch setup
recommendations.
Aftermarket Electronic Trailer
Sway Control Devices
Some trailers may come equipped
with an electronic device designed
to reduce or control trailer sway.
Aftermarket equipment
manufacturers also offer similar
devices that connect to the wiring
between the trailer and the vehicle.
These devices may interfere with the vehicle’
s trailer brake systems
or other systems, including
integrated anti-sway systems,
if equipped. Messages related to
trailer connections or trailer brakes
could appear on the DIC. The
effects of these aftermarket devices
on vehicle handling or trailer brake
performance is not known.
{Warning
Use of aftermarket electronic
trailer sway control devices could
result in reduced trailer brake
performance, loss of trailer
brakes, or other malfunctions, and
result in a crash. You or others
could be seriously injured or
killed. Before using one of these
devices:
. Ask the device or trailer
manufacturer if the device
has been thoroughly tested
for compatibility with the
make, model, and year of
(Continued)
Page 324 of 489
Chevrolet Silverado LD 1500 and Silverado 2500/3500 Owner Manual (GMNA-
Localizing-U.S./Canada-12162993) - 2019 - crc - 4/4/18
Vehicle Care 323
Vehicle Care
General Information
General Information . . . . . . . . . . 324
California Proposition65 Warning . . . . . . . . . . . . . . . . . 325
California Perchlorate Materials Requirements . . . . . 325
Accessories and Modifications . . . . . . . . . . . . . . . . 325
Vehicle Checks
Doing Your OwnService Work . . . . . . . . . . . . . . . 326
Hood . . . . . . . . . . . . . . . . . . . . . . . . . 326
Engine Compartment Overview . . . . . . . . . . . . . . . . . . . . 328
Engine Oil . . . . . . . . . . . . . . . . . . . . 331
Engine Oil Life System . . . . . . . 333
Automatic Transmission Fluid (6-Speed Transmission) . . . . . 335
Automatic Transmission Fluid (8-Speed Transmission) . . . . . 337
Engine Air Cleaner/Filter . . . . . . 338
Cooling System . . . . . . . . . . . . . . 339
Engine Overheating . . . . . . . . . . 343
Overheated Engine Protection Operating Mode . . . . . . . . . . . . . 344
Engine Fan . . . . . . . . . . . . . . . . . . . 345 Power Steering Fluid (1500
Series) . . . . . . . . . . . . . . . . . . . . . . 345
Power Steering Fluid (2500/ 3500 Series) . . . . . . . . . . . . . . . . 345
Washer Fluid . . . . . . . . . . . . . . . . . 346
Brakes . . . . . . . . . . . . . . . . . . . . . . . 347
Brake Fluid . . . . . . . . . . . . . . . . . . . 348
Battery - North America . . . . . . 349
Four-Wheel Drive . . . . . . . . . . . . . 350
Front Axle . . . . . . . . . . . . . . . . . . . . 350
Rear Axle . . . . . . . . . . . . . . . . . . . . 351
Noise Control System . . . . . . . . 352
Starter Switch Check . . . . . . . . . 354
Automatic Transmission Shift
Lock Control Function
Check . . . . . . . . . . . . . . . . . . . . . . . 354
Ignition Transmission Lock Check . . . . . . . . . . . . . . . . . . . . . . . 354
Park Brake and P (Park) Mechanism Check . . . . . . . . . . 354
Wiper Blade Replacement . . . . 355
Windshield Replacement . . . . . 356
Gas Strut(s) . . . . . . . . . . . . . . . . . . 356
Headlamp Aiming
Headlamp Aiming . . . . . . . . . . . . 357
Bulb Replacement
Bulb Replacement . . . . . . . . . . . . 357
Halogen Bulbs . . . . . . . . . . . . . . . . 357 High Intensity Discharge (HID)
Lighting . . . . . . . . . . . . . . . . . . . . . 358
LED Lighting . . . . . . . . . . . . . . . . . 358
Headlamps, Front Turn Signal, Sidemarker, and Parking
Lamps . . . . . . . . . . . . . . . . . . . . . . 358
Fog Lamps . . . . . . . . . . . . . . . . . . . 359
Taillamps (Chassis Cab Models) . . . . . . . . . . . . . . . . . . . . . 359
Taillamps, Turn Signal, Stoplamps, and Back-Up
Lamps . . . . . . . . . . . . . . . . . . . . . . 359
Center High-Mounted Stoplamp (CHMSL) and
Cargo Lamp . . . . . . . . . . . . . . . . . 361
Electrical System
Electrical System Overload . . . 361
Fuses and Circuit Breakers . . . 362
Engine Compartment FuseBlock . . . . . . . . . . . . . . . . . . . . . . . . 362
Instrument Panel Fuse Block (Right) . . . . . . . . . . . . . . . . . . . . . . 366
Instrument Panel Fuse Block (Left) . . . . . . . . . . . . . . . . . 367
Wheels and Tires
Tires . . . . . . . . . . . . . . . . . . . . . . . . . . 370
All-Season Tires . . . . . . . . . . . . . . 370
Winter Tires . . . . . . . . . . . . . . . . . . 371
Low-Profile Tires . . . . . . . . . . . . . 371
Page 348 of 489
Chevrolet Silverado LD 1500 and Silverado 2500/3500 Owner Manual (GMNA-
Localizing-U.S./Canada-12162993) - 2019 - crc - 4/4/18
Vehicle Care 347
Caution
.Do not use washer fluid that
contains any type of water
repellent coating. This can
cause the wiper blades to
chatter or skip.
. Do not use engine coolant
(antifreeze) in the
windshield washer. It can
damage the windshield
washer system and paint.
. Do not mix water with
ready-to-use washer fluid.
Water can cause the
solution to freeze and
damage the washer fluid
tank and other parts of the
washer system.
. When using concentrated
washer fluid, follow the
manufacturer instructions for
adding water.
. Fill the washer fluid tank
only three-quarters full when
it is very cold. This allows
(Continued)
Caution (Continued)
for fluid expansion if
freezing occurs, which could
damage the tank if it is
completely full.
Brakes
Disc brake pads have built-in wear
indicators that make a high-pitched
warning sound when the brake pads
are worn and new pads are needed.
The sound can come and go or be
heard all the time the vehicle is
moving, except when applying the
brake pedal firmly.
{Warning
The brake wear warning sound
means that soon the brakes will
not work well. That could lead to
a crash. When the brake wear
warning sound is heard, have the
vehicle serviced.
Caution
Continuing to drive with worn-out
brake pads could result in costly
brake repair.
Some driving conditions or climates
can cause a brake squeal when the
brakes are first applied or lightly
applied. This does not mean
something is wrong with the brakes.
Properly torqued wheel nuts are
necessary to help prevent brake
pulsation. When tires are rotated,
inspect brake pads for wear and
evenly tighten wheel nuts in the
proper sequence to torque
specifications in Capacities and
Specifications 0446.
Brake linings should always be
replaced as complete axle sets.
Brake Pedal Travel
See your dealer if the brake pedal
does not return to normal height,
or if there is a rapid increase in
pedal travel. This could be a sign
that brake service may be required.