2018 CHEVROLET SILVERADO 2500 check engine light
[x] Cancel search: check engine lightPage 271 of 489
Chevrolet Silverado LD 1500 and Silverado 2500/3500 Owner Manual (GMNA-
Localizing-U.S./Canada-12162993) - 2019 - crc - 4/4/18
270 Driving and Operating
After the transfer case has
shifted out of N (Neutral), the
N (Neutral) light will go out.
5. Release the parking brake.
6. Start the engine and shift the transmission to the
desired gear.Brakes
Antilock Brake
System (ABS)
This vehicle has an Antilock Brake
System (ABS), an advanced
electronic braking system that helps
prevent a braking skid.
When the vehicle begins to drive
away, ABS checks itself.
A momentary motor or clicking noise
may be heard while this test is going
on, and it may even be noticed that
the brake pedal moves a little. This
is normal.
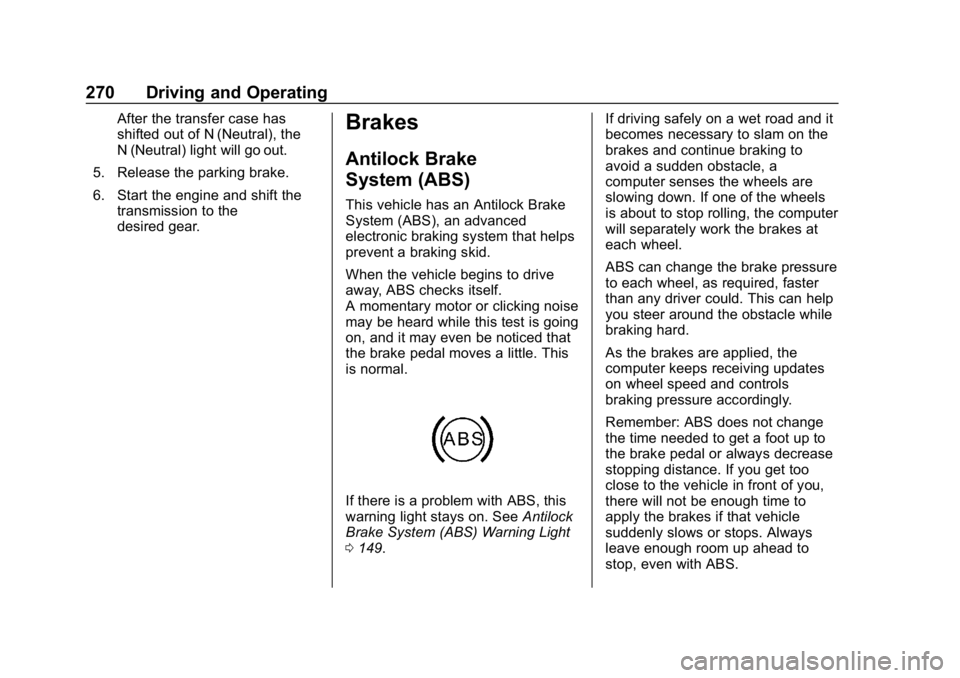
If there is a problem with ABS, this
warning light stays on. See Antilock
Brake System (ABS) Warning Light
0 149. If driving safely on a wet road and it
becomes necessary to slam on the
brakes and continue braking to
avoid a sudden obstacle, a
computer senses the wheels are
slowing down. If one of the wheels
is about to stop rolling, the computer
will separately work the brakes at
each wheel.
ABS can change the brake pressure
to each wheel, as required, faster
than any driver could. This can help
you steer around the obstacle while
braking hard.
As the brakes are applied, the
computer keeps receiving updates
on wheel speed and controls
braking pressure accordingly.
Remember: ABS does not change
the time needed to get a foot up to
the brake pedal or always decrease
stopping distance. If you get too
close to the vehicle in front of you,
there will not be enough time to
apply the brakes if that vehicle
suddenly slows or stops. Always
leave enough room up ahead to
stop, even with ABS.
Page 312 of 489
Chevrolet Silverado LD 1500 and Silverado 2500/3500 Owner Manual (GMNA-
Localizing-U.S./Canada-12162993) - 2019 - crc - 4/4/18
Driving and Operating 311
your dealer or a qualified service
center. If equipped, wiring
provisions for an aftermarket electric
trailer brake controller are included
with the vehicle as part of the trailer
wiring package. The harness
contains the following circuits:Electric Trailer
Brakes Blue
Battery Feed Red/Black or
Red/Blue
Brake Apply
Signal White/Blue
Ground Black
Refer to the aftermarket electric
trailer brake controller owner's
manual to determine wire color
coding of the electric trailer brake
controller. The wire colors on the
brake controller may be different
from the vehicle. The fuse for the
electric trailer brake circuit is in the
engine compartment fuse block, but
the wires may not be connected.
They should be connected by your
dealer or a qualified service center.Trailer Lamps
Always check all trailer lamps are
working at the beginning of each
trip, and periodically on longer trips.
Turn Signals When Towing a
Trailer
When properly connected, the trailer
turn signals should will illuminate to
indicate the vehicle is turning,
changing lanes, or stopping. When
towing a trailer, the arrows on the
instrument cluster will illuminate
even if the trailer is not properly
connected or the bulbs are
burned out.
Tow/Haul Mode
For instructions on how to enter
Tow/Haul mode, see Tow/Haul
Mode 0261.
Tow/Haul assists when pulling a
heavy trailer or a large or
heavy load.
Tow/Haul Mode is designed to be
most effective when the vehicle and
trailer combined weight is at least
75% of the vehicle's Gross Combined Weight Rating (GCWR).
See
“Weight of the Trailer” under
Trailer Towing 0298.
Tow/Haul Mode is most useful when
towing a heavy trailer or carrying a
large or heavy load:
. through rolling terrain.
. in stop-and-go traffic.
. in busy parking lots.
Operating the vehicle in Tow/Haul
Mode when lightly loaded or not
towing will not cause damage;
however, it is not recommended and
may result in unpleasant engine and
transmission driving characteristics
and reduced fuel economy.Integrated Trailer Brake
Control System
TThe vehicle may have an
Integrated Trailer Brake Control
(ITBC) system for use with electric
trailer brakes or most electric over
hydraulic trailer brake system
Page 317 of 489

Chevrolet Silverado LD 1500 and Silverado 2500/3500 Owner Manual (GMNA-
Localizing-U.S./Canada-12162993) - 2019 - crc - 4/4/18
316 Driving and Operating
If TSC is enabled, the Traction
Control System (TCS)/StabiliTrak
warning light will flash on the
instrument cluster. Reduce vehicle
speed by gradually removing your
foot from the accelerator. If trailer
sway continues, StabiliTrak can
reduce engine torque to help slow
the vehicle. TSC will not function if
StabiliTrak is turned off. See
Traction Control/Electronic Stability
Control.
{Warning
Trailer sway can result in a crash
and in serious injury or death,
even if the vehicle is equipped
with TSC.(Continued)
Warning (Continued)
If the trailer begins to sway,
reduce vehicle speed by
gradually removing your foot from
the accelerator. Then pull over to
check the trailer and vehicle to
help correct possible causes,
including an improperly or
overloaded trailer, unrestrained
cargo, improper trailer hitch
configuration, or improperly
inflated or incorrect vehicle or
trailer tires. SeeTowing
Equipment 0306 for trailer ratings
and hitch setup
recommendations.
Aftermarket Electronic Trailer
Sway Control Devices
Some trailers may come equipped
with an electronic device designed
to reduce or control trailer sway.
Aftermarket equipment
manufacturers also offer similar
devices that connect to the wiring
between the trailer and the vehicle.
These devices may interfere with the vehicle’
s trailer brake systems
or other systems, including
integrated anti-sway systems,
if equipped. Messages related to
trailer connections or trailer brakes
could appear on the DIC. The
effects of these aftermarket devices
on vehicle handling or trailer brake
performance is not known.
{Warning
Use of aftermarket electronic
trailer sway control devices could
result in reduced trailer brake
performance, loss of trailer
brakes, or other malfunctions, and
result in a crash. You or others
could be seriously injured or
killed. Before using one of these
devices:
. Ask the device or trailer
manufacturer if the device
has been thoroughly tested
for compatibility with the
make, model, and year of
(Continued)
Page 324 of 489
Chevrolet Silverado LD 1500 and Silverado 2500/3500 Owner Manual (GMNA-
Localizing-U.S./Canada-12162993) - 2019 - crc - 4/4/18
Vehicle Care 323
Vehicle Care
General Information
General Information . . . . . . . . . . 324
California Proposition65 Warning . . . . . . . . . . . . . . . . . 325
California Perchlorate Materials Requirements . . . . . 325
Accessories and Modifications . . . . . . . . . . . . . . . . 325
Vehicle Checks
Doing Your OwnService Work . . . . . . . . . . . . . . . 326
Hood . . . . . . . . . . . . . . . . . . . . . . . . . 326
Engine Compartment Overview . . . . . . . . . . . . . . . . . . . . 328
Engine Oil . . . . . . . . . . . . . . . . . . . . 331
Engine Oil Life System . . . . . . . 333
Automatic Transmission Fluid (6-Speed Transmission) . . . . . 335
Automatic Transmission Fluid (8-Speed Transmission) . . . . . 337
Engine Air Cleaner/Filter . . . . . . 338
Cooling System . . . . . . . . . . . . . . 339
Engine Overheating . . . . . . . . . . 343
Overheated Engine Protection Operating Mode . . . . . . . . . . . . . 344
Engine Fan . . . . . . . . . . . . . . . . . . . 345 Power Steering Fluid (1500
Series) . . . . . . . . . . . . . . . . . . . . . . 345
Power Steering Fluid (2500/ 3500 Series) . . . . . . . . . . . . . . . . 345
Washer Fluid . . . . . . . . . . . . . . . . . 346
Brakes . . . . . . . . . . . . . . . . . . . . . . . 347
Brake Fluid . . . . . . . . . . . . . . . . . . . 348
Battery - North America . . . . . . 349
Four-Wheel Drive . . . . . . . . . . . . . 350
Front Axle . . . . . . . . . . . . . . . . . . . . 350
Rear Axle . . . . . . . . . . . . . . . . . . . . 351
Noise Control System . . . . . . . . 352
Starter Switch Check . . . . . . . . . 354
Automatic Transmission Shift
Lock Control Function
Check . . . . . . . . . . . . . . . . . . . . . . . 354
Ignition Transmission Lock Check . . . . . . . . . . . . . . . . . . . . . . . 354
Park Brake and P (Park) Mechanism Check . . . . . . . . . . 354
Wiper Blade Replacement . . . . 355
Windshield Replacement . . . . . 356
Gas Strut(s) . . . . . . . . . . . . . . . . . . 356
Headlamp Aiming
Headlamp Aiming . . . . . . . . . . . . 357
Bulb Replacement
Bulb Replacement . . . . . . . . . . . . 357
Halogen Bulbs . . . . . . . . . . . . . . . . 357 High Intensity Discharge (HID)
Lighting . . . . . . . . . . . . . . . . . . . . . 358
LED Lighting . . . . . . . . . . . . . . . . . 358
Headlamps, Front Turn Signal, Sidemarker, and Parking
Lamps . . . . . . . . . . . . . . . . . . . . . . 358
Fog Lamps . . . . . . . . . . . . . . . . . . . 359
Taillamps (Chassis Cab Models) . . . . . . . . . . . . . . . . . . . . . 359
Taillamps, Turn Signal, Stoplamps, and Back-Up
Lamps . . . . . . . . . . . . . . . . . . . . . . 359
Center High-Mounted Stoplamp (CHMSL) and
Cargo Lamp . . . . . . . . . . . . . . . . . 361
Electrical System
Electrical System Overload . . . 361
Fuses and Circuit Breakers . . . 362
Engine Compartment FuseBlock . . . . . . . . . . . . . . . . . . . . . . . . 362
Instrument Panel Fuse Block (Right) . . . . . . . . . . . . . . . . . . . . . . 366
Instrument Panel Fuse Block (Left) . . . . . . . . . . . . . . . . . 367
Wheels and Tires
Tires . . . . . . . . . . . . . . . . . . . . . . . . . . 370
All-Season Tires . . . . . . . . . . . . . . 370
Winter Tires . . . . . . . . . . . . . . . . . . 371
Low-Profile Tires . . . . . . . . . . . . . 371
Page 339 of 489
Chevrolet Silverado LD 1500 and Silverado 2500/3500 Owner Manual (GMNA-
Localizing-U.S./Canada-12162993) - 2019 - crc - 4/4/18
338 Vehicle Care
transmission leak or overheated
transmission. This vehicle is not
equipped with a transmission fluid
level dipstick. There is a special
procedure for checking and
changing the transmission fluid in
these vehicles. Because this
procedure is difficult, this should be
done at the dealer. Contact the
dealer for additional information or
the procedure can be found in the
service manual. SeePublication
Ordering Information 0458.
Caution
Use of the incorrect automatic
transmission fluid may damage
the vehicle, and the damage may
not be covered by the vehicle
warranty. Always use the correct
automatic transmission fluid. See
Recommended Fluids and
Lubricants 0440.
Change the fluid and filter at the
scheduled maintenance intervals
listed in Maintenance Schedule
0 430. Be sure to use the transmission fluid listed in
Recommended Fluids and
Lubricants
0440.
Engine Air Cleaner/Filter
If the vehicle has a diesel engine,
see “8-Cylinder Pickup Models”
under “Engine Air Cleaner/Filter” in
the Duramax diesel supplement for
the correct inspection and
replacement procedures.
The engine air cleaner/filter is on
the passenger side of the engine
compartment. See Engine
Compartment Overview 0328.
When to Inspect the Engine Air
Cleaner/Filter
For intervals on changing and
inspecting the engine air filter, see
Maintenance Schedule 0430.
How to Inspect the Engine Air
Cleaner/Filter
Do not start the engine or have the
engine running with the engine air
cleaner/filter housing open. Before
removing the engine air cleaner/
filter, make sure that the engine air cleaner/filter housing and nearby
components are free of dirt and
debris. Remove the engine air
cleaner/filter. Lightly tap and shake
the engine air cleaner/filter (away
from the vehicle), to release loose
dust and dirt. Inspect the engine air
cleaner/filter for damage, and
replace if damaged. Do not clean
the engine air cleaner/filter or
components with water or
compressed air.
To inspect or replace the engine air
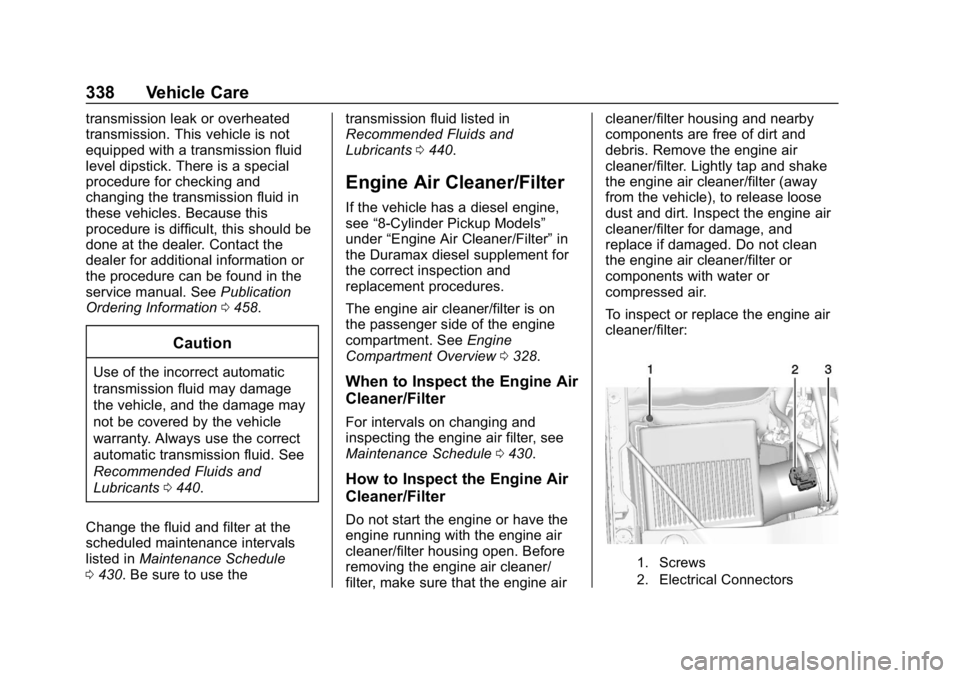
cleaner/filter:
1. Screws
2. Electrical Connectors
Page 349 of 489
Chevrolet Silverado LD 1500 and Silverado 2500/3500 Owner Manual (GMNA-
Localizing-U.S./Canada-12162993) - 2019 - crc - 4/4/18
348 Vehicle Care
Replacing Brake System Parts
Always replace brake system parts
with new, approved replacement
parts. If this is not done, the brakes
may not work properly. The braking
performance expected can change
in many other ways if the wrong
replacement brake parts are
installed or parts are improperly
installed.
Brake Fluid
The brake master cylinder reservoir
is filled with DOT 3 brake fluid. See
Engine Compartment Overview
0328 for the location of the
reservoir.
There are only two reasons why the
brake fluid level in the reservoir may
go down: .
Normal brake lining wear. When
new linings are installed, the
fluid level goes back up.
. A fluid leak in the brake
hydraulic system. Have the
brake hydraulic system fixed.
With a leak, the brakes will not
work well.
Always clean the brake fluid
reservoir cap and the area around
the cap before removing it.
Do not top off the brake fluid.
Adding fluid does not correct a leak.
If fluid is added when the linings are
worn, there will be too much fluid
when new brake linings are
installed. Add or remove fluid, as
necessary, only when work is done
on the brake hydraulic system.
{Warning
If too much brake fluid is added, it
can spill on the engine and burn,
if the engine is hot enough. You
or others could be burned, and
the vehicle could be damaged. (Continued)
Warning (Continued)
Add brake fluid only when work is
done on the brake hydraulic
system.
When the brake fluid falls to a low
level, the brake warning light comes
on. See Brake System Warning
Light 0148.
Brake fluid absorbs water over time.
Replace brake fluid at the specified
intervals to prevent increased
stopping distance. See Maintenance
Schedule 0430.
Checking Brake Fluid
Check brake fluid by looking at the
brake fluid reservoir. See Engine
Compartment Overview 0328.
Page 411 of 489
Chevrolet Silverado LD 1500 and Silverado 2500/3500 Owner Manual (GMNA-
Localizing-U.S./Canada-12162993) - 2019 - crc - 4/4/18
410 Vehicle Care
{Warning
Using a match near a battery can
cause battery gas to explode.
People have been hurt doing this,
and some have been blinded.
Use a flashlight if you need more
light.
Battery fluid contains acid that
can burn you. Do not get it on
you. If you accidentally get it in
your eyes or on your skin, flush
the place with water and get
medical help immediately.
{Warning
Fans or other moving engine
parts can injure you badly. Keep
your hands away from moving
parts once the engine is running.6. Check that the jumper cables
do not have loose or missing
insulation. If they do, you could
get a shock. The vehicles
could be damaged too.
Before you connect the cables,
here are some basic things you
should know. Positive (+) will
go to positive (+) or to a remote
positive (+) terminal if the
vehicle has one. Negative (−)
will go to a heavy, unpainted
metal engine part or to a
remote negative (−) terminal if
the vehicle has one.
Do not connect positive (+) to
negative (−) or you will get a
short that would damage the
battery and maybe other parts
too. And do not connect the
negative (−) cable to the
negative (−) terminal on the
dead battery because this can
cause sparks.
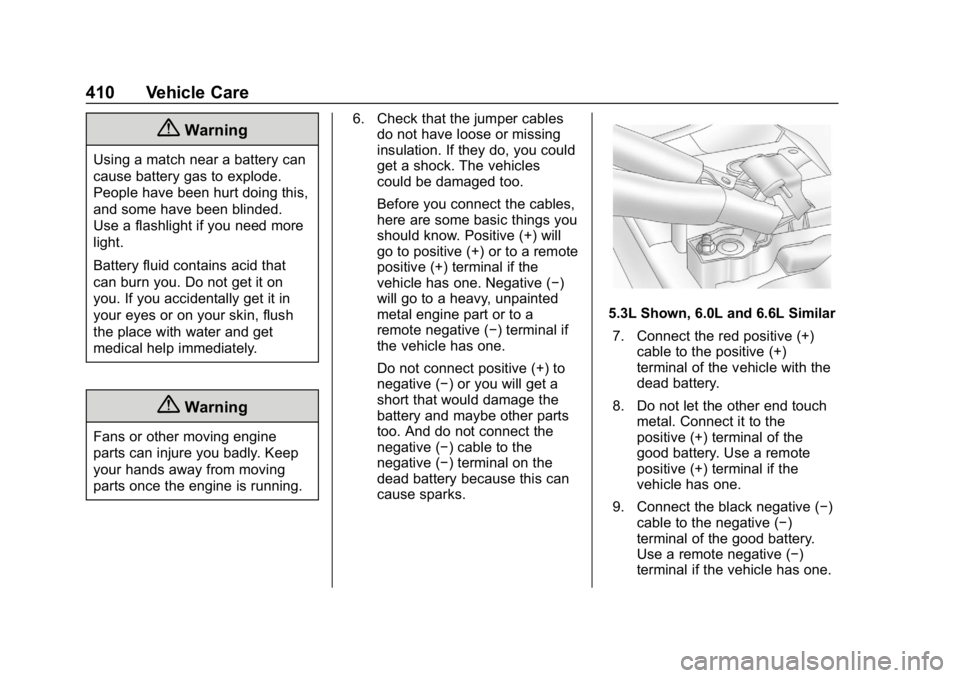
5.3L Shown, 6.0L and 6.6L Similar
7. Connect the red positive (+) cable to the positive (+)
terminal of the vehicle with the
dead battery.
8. Do not let the other end touch metal. Connect it to the
positive (+) terminal of the
good battery. Use a remote
positive (+) terminal if the
vehicle has one.
9. Connect the black negative (−) cable to the negative (−)
terminal of the good battery.
Use a remote negative (−)
terminal if the vehicle has one.
Page 438 of 489
Chevrolet Silverado LD 1500 and Silverado 2500/3500 Owner Manual (GMNA-
Localizing-U.S./Canada-12162993) - 2019 - crc - 4/4/18
Service and Maintenance 437
Additional
Maintenance and Care
Your vehicle is an important
investment and caring for it properly
may help to avoid future costly
repairs. To maintain vehicle
performance, additional
maintenance services may be
required.
It is recommended that your dealer
perform these services—their
trained dealer technicians know
your vehicle best. Your dealer can
also perform a thorough
assessment with a multi-point
inspection to recommend when your
vehicle may need attention.
The following list is intended to
explain the services and conditions
to look for that may indicate
services are required.
Battery
The 12-volt battery supplies power
to start the engine and operate any
additional electrical accessories. .
To avoid break-down or failure to
start the vehicle, maintain a
battery with full cranking power.
. Trained dealer technicians have
the diagnostic equipment to test
the battery and ensure that the
connections and cables are
corrosion-free.
Belts
. Belts may need replacing if they
squeak or show signs of
cracking or splitting.
. Trained dealer technicians have
access to tools and equipment
to inspect the belts and
recommend adjustment or
replacement when necessary.
Brakes
Brakes stop the vehicle and are
crucial to safe driving.
. Signs of brake wear may include
chirping, grinding, or squealing
noises, or difficulty stopping. .
Trained dealer technicians have
access to tools and equipment
to inspect the brakes and
recommend quality parts
engineered for the vehicle.
Fluids
Proper fluid levels and approved
fluids protect the vehicle’s systems
and components. See
Recommended Fluids and
Lubricants 0440 for GM approved
fluids.
. Engine oil and windshield
washer fluid levels should be
checked at every fuel fill.
. Instrument cluster lights may
come on to indicate that fluids
may be low and need to be
filled.
Hoses
Hoses transport fluids and should
be regularly inspected to ensure
that there are no cracks or leaks.
With a multi-point inspection, your
dealer can inspect the hoses and
advise if replacement is needed.