2018 CHEVROLET SILVERADO 1500 Z71 stop start
[x] Cancel search: stop startPage 276 of 501

Chevrolet Silverado Owner Manual (GMNA-Localizing-U.S./Canada/Mexico-
11349200) - 2018 - CRC - 2/27/18
Driving and Operating 275
Brake Assist
The Brake Assist feature is
designed to assist the driver in
stopping or decreasing vehicle
speed in emergency driving
conditions. This feature uses the
stability system hydraulic brake
control module to supplement the
power brake system under
conditions where the driver has
quickly and forcefully applied the
brake pedal in an attempt to quickly
stop or slow down the vehicle. The
stability system hydraulic brake
control module increases brake
pressure at each corner of the
vehicle until the ABS activates.
Minor brake pedal pulsation or
pedal movement during this time is
normal and the driver should
continue to apply the brake pedal as
the driving situation dictates The
Brake Assist feature will
automatically disengage when the
brake pedal is released or brake
pedal pressure is quickly
decreased.
Hill Start Assist (HSA)
This vehicle has a Hill Start Assist
(HSA) feature, which may be useful
when the vehicle is stopped on a
grade. This feature is designed to
prevent the vehicle from rolling,
either forward or rearward, during
vehicle drive off. After you
completely stop and hold the vehicle
in a complete standstill on a grade,
HSA will automatically activate.
During the transition period between
when you release the brake pedal
and start to accelerate to drive off
on a grade, HSA holds the braking
pressure for a maximum of
two seconds to ensure that there is
no rolling. The brakes will
automatically release when the
accelerator pedal is applied withinthe two-second window. If the
vehicle is equipped with the
Integrated Trailer Brake Control
(ITBC) system, HSA may also apply
the trailer brakes. It will not activate
if the vehicle is in a drive gear and
facing downhill or if the vehicle is
facing uphill and in R (Reverse).
There may be situations on minor
hills (less than 5% grade) with a
loaded vehicle or while pulling a
trailer where HSA may activate.
If you release the brake pedal and
then reapply the brake pedal while
HSA is activated, the brake pedal
typically feels firmer with less pedal
travel.
Page 278 of 501
Chevrolet Silverado Owner Manual (GMNA-Localizing-U.S./Canada/Mexico-
11349200) - 2018 - CRC - 2/27/18
Driving and Operating 277
indicate that the system is inactive
and is not assisting the driver in
maintaining control. The vehicle is
safe to drive, but driving should be
adjusted accordingly.
If
dcomes on and stays on:
1. Stop the vehicle.
2. Turn the engine off and wait 15 seconds.
3. Start the engine.
Drive the vehicle. If
dcomes on
and stays on, the vehicle may need
more time to diagnose the problem.
If the condition persists, see your
dealer.
Turning the Systems Off
and On
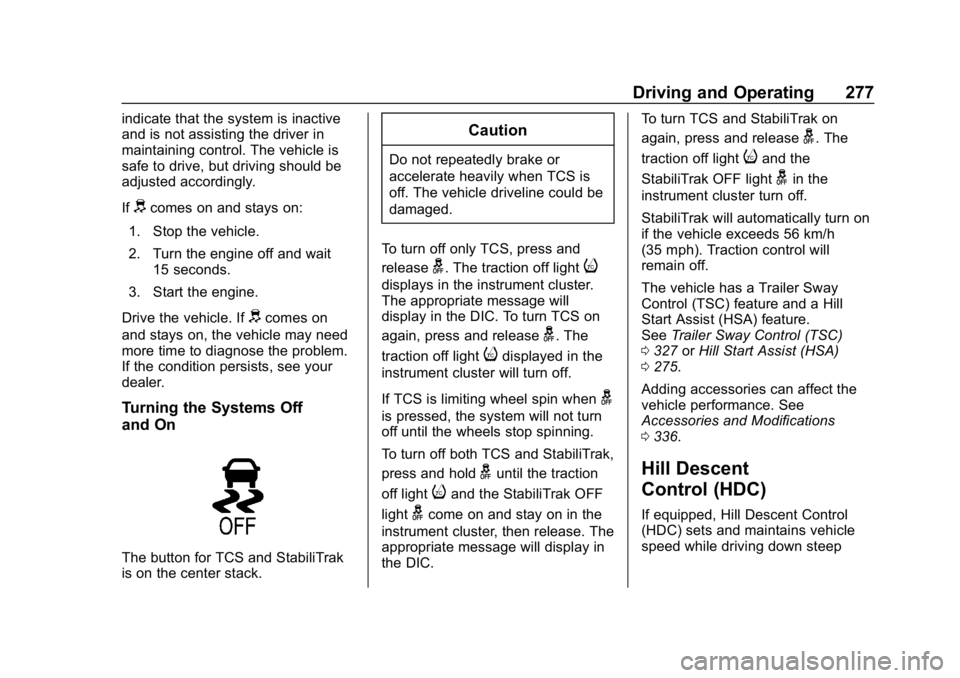
The button for TCS and StabiliTrak
is on the center stack.
Caution
Do not repeatedly brake or
accelerate heavily when TCS is
off. The vehicle driveline could be
damaged.
To turn off only TCS, press and
release
g. The traction off lighti
displays in the instrument cluster.
The appropriate message will
display in the DIC. To turn TCS on
again, press and release
g. The
traction off light
idisplayed in the
instrument cluster will turn off.
If TCS is limiting wheel spin when
g
is pressed, the system will not turn
off until the wheels stop spinning.
To turn off both TCS and StabiliTrak,
press and hold
guntil the traction
off light
iand the StabiliTrak OFF
light
gcome on and stay on in the
instrument cluster, then release. The
appropriate message will display in
the DIC. To turn TCS and StabiliTrak on
again, press and release
g. The
traction off light
iand the
StabiliTrak OFF light
gin the
instrument cluster turn off.
StabiliTrak will automatically turn on
if the vehicle exceeds 56 km/h
(35 mph). Traction control will
remain off.
The vehicle has a Trailer Sway
Control (TSC) feature and a Hill
Start Assist (HSA) feature.
See Trailer Sway Control (TSC)
0 327 orHill Start Assist (HSA)
0 275.
Adding accessories can affect the
vehicle performance. See
Accessories and Modifications
0 336.
Hill Descent
Control (HDC)
If equipped, Hill Descent Control
(HDC) sets and maintains vehicle
speed while driving down steep
Page 296 of 501
Chevrolet Silverado Owner Manual (GMNA-Localizing-U.S./Canada/Mexico-
11349200) - 2018 - CRC - 2/27/18
Driving and Operating 295
Warning (Continued)
.Fuel can spray out if the
refueling nozzle is inserted
too quickly. This spray can
happen if the tank is nearly
full, and is more likely in hot
weather. Insert the refueling
nozzle slowly and wait for
any hiss noise to stop prior
to beginning to flow fuel.
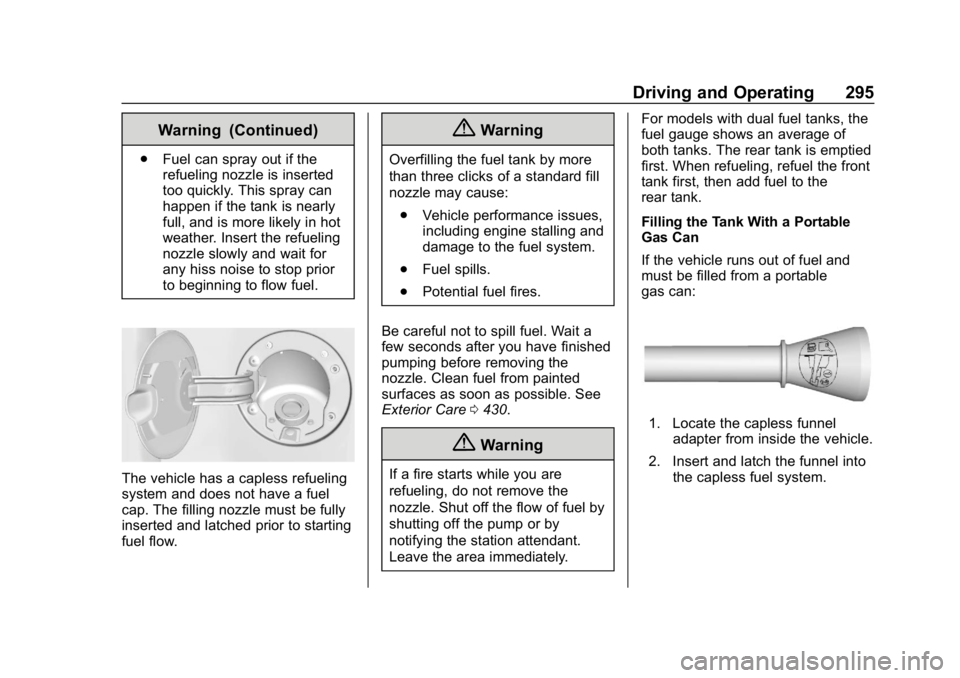
The vehicle has a capless refueling
system and does not have a fuel
cap. The filling nozzle must be fully
inserted and latched prior to starting
fuel flow.
{Warning
Overfilling the fuel tank by more
than three clicks of a standard fill
nozzle may cause:
. Vehicle performance issues,
including engine stalling and
damage to the fuel system.
. Fuel spills.
. Potential fuel fires.
Be careful not to spill fuel. Wait a
few seconds after you have finished
pumping before removing the
nozzle. Clean fuel from painted
surfaces as soon as possible. See
Exterior Care 0430.
{Warning
If a fire starts while you are
refueling, do not remove the
nozzle. Shut off the flow of fuel by
shutting off the pump or by
notifying the station attendant.
Leave the area immediately. For models with dual fuel tanks, the
fuel gauge shows an average of
both tanks. The rear tank is emptied
first. When refueling, refuel the front
tank first, then add fuel to the
rear tank.
Filling the Tank With a Portable
Gas Can
If the vehicle runs out of fuel and
must be filled from a portable
gas can:
1. Locate the capless funnel
adapter from inside the vehicle.
2. Insert and latch the funnel into the capless fuel system.
Page 299 of 501
Chevrolet Silverado Owner Manual (GMNA-Localizing-U.S./Canada/Mexico-
11349200) - 2018 - CRC - 2/27/18
298 Driving and Operating
The structure, tires, and brakes of
the trailer must be rated to carry the
load. Inadequate trailer equipment
can cause the combination to
operate in an unexpected or unsafe
manner.
Before starting, check all trailer hitch
parts and attachments, safety
chains, electrical connectors, lamps,
tires, and mirrors. Get familiar with
the handling and braking of the rig.
If the trailer has electric brakes, start
the combination moving and then
apply the trailer brake controller by
hand to be sure the brakes work.
During the trip, check occasionally
to be sure that the load is secure
and the lamps and any trailer
brakes still work.
Following Distance
Stay at least twice as far behind the
vehicle ahead as you would when
driving the vehicle without a trailer.
This can help to avoid heavy
braking and sudden turns.
Passing
More passing distance is needed
when towing a trailer. The
combination will not accelerate as
quickly and is longer so it is
necessary to go much farther
beyond the passed vehicle before
returning to the lane.
Backing Up
Hold the bottom of the steering
wheel with one hand. To move the
trailer to the left, move that hand to
the left. To move the trailer to the
right, move your hand to the right.
Always back up slowly and,
if possible, have someone
guide you.
Making TurnsCaution
Making very sharp turns while
trailering could cause the trailer to
come in contact with the vehicle.
The vehicle could be damaged.
Avoid making very sharp turns
while trailering. When turning with a trailer, make
wider turns than normal. Do this so
the trailer will not strike soft
shoulders, curbs, road signs, trees,
or other objects. Avoid jerky or
sudden maneuvers. Signal well in
advance.
If the trailer turn signal bulbs burn
out, the arrows on the instrument
cluster will still flash for turns. It is
important to check occasionally to
be sure the trailer bulbs are still
working.
Turn Signals When Towing a
Trailer
The turn signal indicators on the
instrument cluster flash whenever
signaling a turn or lane change.
Properly hooked up, the trailer
lamps also flash, telling other
drivers the vehicle is turning,
changing lanes, or stopping. When
towing a trailer, the arrows on the
instrument cluster flash for turns
even if the bulbs on the trailer are
burned out.
Page 335 of 501
Chevrolet Silverado Owner Manual (GMNA-Localizing-U.S./Canada/Mexico-
11349200) - 2018 - CRC - 2/27/18
334 Vehicle Care
Vehicle Care
General Information
General Information . . . . . . . . . . 335
California Proposition65 Warning . . . . . . . . . . . . . . . . . 336
California Perchlorate Materials Requirements . . . . . 336
Accessories and Modifications . . . . . . . . . . . . . . . . 336
Vehicle Checks
Doing Your OwnService Work . . . . . . . . . . . . . . . 337
Hood . . . . . . . . . . . . . . . . . . . . . . . . . 337
Engine Compartment Overview . . . . . . . . . . . . . . . . . . . . 338
Engine Oil . . . . . . . . . . . . . . . . . . . . 343
Engine Oil Life System . . . . . . . 346
Automatic Transmission Fluid (6-Speed Transmission) . . . . . 347
Automatic Transmission Fluid (8-Speed Transmission) . . . . . 350
Manual Transmission Fluid . . . 350
Hydraulic Clutch . . . . . . . . . . . . . . 351
Engine Air Cleaner/Filter . . . . . . 351
Cooling System . . . . . . . . . . . . . . 352
Engine Overheating . . . . . . . . . . 356 Overheated Engine Protection
Operating Mode . . . . . . . . . . . . . 358
Engine Fan . . . . . . . . . . . . . . . . . . . 358
Power Steering Fluid (1500 Series) . . . . . . . . . . . . . . . . . . . . . . 359
Power Steering Fluid (2500/ 3500 Series) . . . . . . . . . . . . . . . . 359
Washer Fluid . . . . . . . . . . . . . . . . . 359
Brakes . . . . . . . . . . . . . . . . . . . . . . . 360
Brake Fluid . . . . . . . . . . . . . . . . . . . 361
Battery - North America . . . . . . 362
Four-Wheel Drive . . . . . . . . . . . . . 363
Front Axle . . . . . . . . . . . . . . . . . . . . 364
Rear Axle . . . . . . . . . . . . . . . . . . . . 365
Noise Control System . . . . . . . . 366
Starter Switch Check . . . . . . . . . 367
Automatic Transmission Shift Lock Control Function
Check . . . . . . . . . . . . . . . . . . . . . . . 368
Ignition Transmission Lock Check . . . . . . . . . . . . . . . . . . . . . . . 368
Park Brake and P (Park) Mechanism Check . . . . . . . . . . 368
Wiper Blade Replacement . . . . 369
Windshield Replacement . . . . . 369
Gas Strut(s) . . . . . . . . . . . . . . . . . . 370
Headlamp Aiming
Headlamp Aiming . . . . . . . . . . . . 371
Bulb Replacement
Bulb Replacement . . . . . . . . . . . . 371
Halogen Bulbs . . . . . . . . . . . . . . . . 371
High Intensity Discharge (HID) Lighting . . . . . . . . . . . . . . . . . . . . . 371
LED Lighting . . . . . . . . . . . . . . . . . 371
Headlamps, Front Turn Signal,
Sidemarker, and Parking
Lamps . . . . . . . . . . . . . . . . . . . . . . 372
Fog Lamps . . . . . . . . . . . . . . . . . . . 373
Taillamps (Chassis Cab Models) . . . . . . . . . . . . . . . . . . . . . 373
Taillamps, Turn Signal, Stoplamps, and Back-Up
Lamps . . . . . . . . . . . . . . . . . . . . . . 373
Center High-Mounted Stoplamp (CHMSL) and
Cargo Lamp . . . . . . . . . . . . . . . . . 375
Electrical System
High Voltage Devices andWiring . . . . . . . . . . . . . . . . . . . . . . . 375
Electrical System Overload . . . 375
Fuses and Circuit Breakers . . . 376
Engine Compartment Fuse Block . . . . . . . . . . . . . . . . . . . . . . . . 376
Instrument Panel Fuse Block (Right) . . . . . . . . . . . . . . . . . . . . . . 380
Instrument Panel Fuse Block (Left) . . . . . . . . . . . . . . . . . 381
Page 357 of 501
Chevrolet Silverado Owner Manual (GMNA-Localizing-U.S./Canada/Mexico-
11349200) - 2018 - CRC - 2/27/18
356 Vehicle Care
Turn the pressure cap slowly
counterclockwise about one full
turn. If a hiss is heard, wait for
that to stop. A hiss means
there is still some pressure left.
2. Keep turning the pressure cap slowly, and remove it.
3. Fill the coolant surge tank with the proper mixture to the full
cold mark.
4. With the coolant surge tank pressure cap off, start the
engine and let it run until the
engine coolant temperature
gauge indicates approximately
90 °C (195 °F).
By this time, the coolant level
inside the coolant surge tank
may be lower. If the level is
lower, add more of the proper
mixture to the coolant surge
tank until the level reaches the
full cold mark.
5. Replace the pressure cap tightly. 6. Verify coolant level after the
engine is shut off and the
coolant is cold. If necessary,
repeat coolant fill procedure
Steps 1–6.
Caution
If the pressure cap is not tightly
installed, coolant loss and engine
damage may occur. Be sure the
cap is properly and tightly
secured.
Engine Overheating
If the vehicle has the Duramax
diesel engine, see the Duramax
diesel supplement.
Caution
Do not run the engine if there is a
leak in the engine cooling system.
This can cause a loss of all
coolant and can damage the
system and vehicle. Have any
leaks fixed right away. The vehicle has several indicators
to warn of engine overheating.
There is a coolant temperature
gauge in the vehicle's instrument
cluster. See
Engine Coolant
Temperature Gauge 0142.
In addition, there are ENGINE
OVERHEATED STOP ENGINE,
ENGINE OVERHEATED IDLE
ENGINE, and ENGINE POWER IS
REDUCED messages in the Driver
Information Center (DIC).
If the decision is made not to lift the
hood when this warning appears,
get service help right away. See
Roadside Assistance Program
0 465.
If the decision is made to lift the
hood, make sure the vehicle is
parked on a level surface.
4.3L V6, 5.3L V8, and 6.2L
V8 Engines
Check to see if the engine cooling
fans are running. If the engine is
overheating, the fans should be
Page 377 of 501
Chevrolet Silverado Owner Manual (GMNA-Localizing-U.S./Canada/Mexico-
11349200) - 2018 - CRC - 2/27/18
376 Vehicle Care
Headlamp Wiring
An electrical overload may cause
the lamps to go on and off, or in
some cases to remain off. Have the
headlamp wiring checked right away
if the lamps go on and off or
remain off.
Windshield Wipers
If the wiper motor overheats due to
heavy snow or ice, the windshield
wipers will stop until the motor cools
and will then restart.
Although the circuit is protected
from electrical overload, overload
due to heavy snow or ice may
cause wiper linkage damage.
Always clear ice and heavy snow
from the windshield before using the
windshield wipers.
If the overload is caused by an
electrical problem and not snow or
ice, be sure to get it fixed.
Fuses and Circuit
Breakers
The wiring circuits in the vehicle are
protected from short circuits by a
combination of fuses and circuit
breakers. This greatly reduces the
chance of damage caused by
electrical problems.
{Danger
Fuses and circuit breakers are
marked with their ampere rating.
Do not exceed the
specified amperage rating when
replacing fuses and circuit
breakers. Use of an oversized
fuse or circuit breaker can result
in a vehicle fire. You and others
could be seriously injured or
killed.
To check a fuse, look at the
silver-colored band inside the fuse.
If the band is broken or melted,
replace the fuse. Be sure to replace
a bad fuse with a new one of the
identical size and rating. Fuses of the same amperage can
be temporarily borrowed from
another fuse location, if a fuse goes
out. Replace the fuse as soon as
possible.
Engine Compartment
Fuse Block
If the vehicle has a diesel engine,
see the Duramax diesel
supplement.
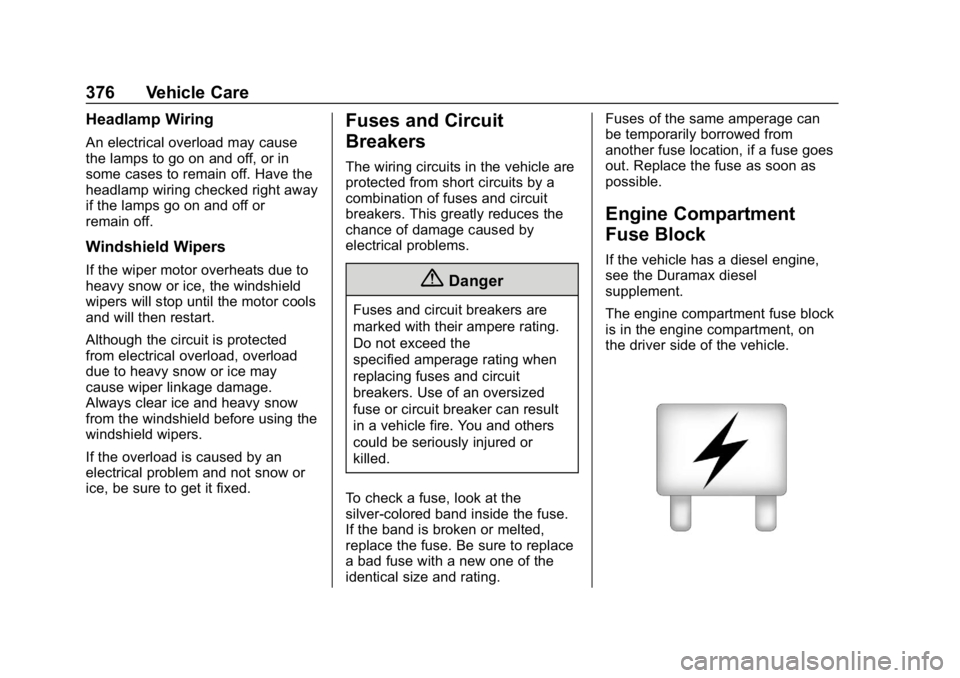
The engine compartment fuse block
is in the engine compartment, on
the driver side of the vehicle.
Page 379 of 501
Chevrolet Silverado Owner Manual (GMNA-Localizing-U.S./Canada/Mexico-
11349200) - 2018 - CRC - 2/27/18
378 Vehicle Care
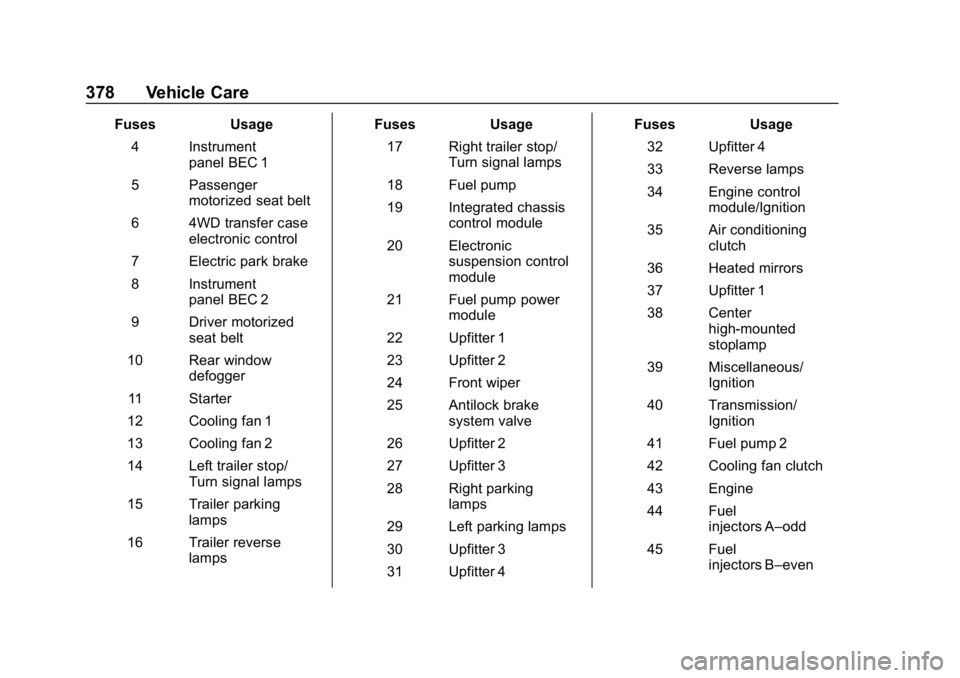
FusesUsage
4 Instrument panel BEC 1
5 Passenger motorized seat belt
6 4WD transfer case electronic control
7 Electric park brake
8 Instrument panel BEC 2
9 Driver motorized seat belt
10 Rear window defogger
11 Starter
12 Cooling fan 1
13 Cooling fan 2
14 Left trailer stop/ Turn signal lamps
15 Trailer parking lamps
16 Trailer reverse lamps Fuses
Usage
17 Right trailer stop/ Turn signal lamps
18 Fuel pump
19 Integrated chassis control module
20 Electronic suspension control
module
21 Fuel pump power module
22 Upfitter 1
23 Upfitter 2
24 Front wiper
25 Antilock brake system valve
26 Upfitter 2
27 Upfitter 3
28 Right parking lamps
29 Left parking lamps
30 Upfitter 3
31 Upfitter 4 Fuses
Usage
32 Upfitter 4
33 Reverse lamps
34 Engine control module/Ignition
35 Air conditioning clutch
36 Heated mirrors
37 Upfitter 1
38 Center high-mounted
stoplamp
39 Miscellaneous/ Ignition
40 Transmission/ Ignition
41 Fuel pump 2
42 Cooling fan clutch
43 Engine
44 Fuel injectors A–odd
45 Fuel injectors B–even