2018 CHEVROLET SILVERADO 1500 Z71 warning
[x] Cancel search: warningPage 265 of 501
Chevrolet Silverado Owner Manual (GMNA-Localizing-U.S./Canada/Mexico-
11349200) - 2018 - CRC - 2/27/18
264 Driving and Operating
You can shift into 1 (First) when you
are going less than 30 km/h
(20 mph). If you have come to a
complete stop and it is hard to shift
into 1 (First), put the shift lever in
Neutral and let up on the clutch.
Then press the clutch pedal back
down and shift into 1 (First).
2 (Second) :Press the clutch pedal
as you let up on the accelerator
pedal and shift into 2 (Second).
Then, slowly let up on the clutch
pedal as you press the accelerator
pedal.
3 (Third), 4 (Fourth), and 5 (Fifth) :
Shift into 3 (Third), 4 (Fourth), and
5 (Fifth) the same way you do for
2 (Second). Slowly let up on the
clutch pedal as you press the
accelerator pedal. To stop, let up on the accelerator
pedal and press the brake pedal.
Just before the vehicle stops, press
the clutch pedal and the brake
pedal, and shift to Neutral.
Neutral :
Use this position when
you start or idle the engine.
R (Reverse) : To back up, press the
clutch pedal. After the vehicle stops,
shift into R (Reverse). Slowly let up
on the clutch pedal as you press the
accelerator pedal. If it is hard to
shift, let the shift lever return to
Neutral and release the clutch
pedal. Then press the clutch again
and shift into R (Reverse). Do not
attempt to shift into 5 (Fifth) prior to
shifting into R (Reverse). The
transmission has a lock out feature,
which prevents a 5 (Fifth) gear to
R (Reverse) gear shift.Caution
Shifting to R (Reverse) while the
vehicle is moving forward could
damage the transmission. The
repairs would not be covered by
the vehicle warranty. Shift to
R (Reverse) only after the vehicle
is stopped.
Use R (Reverse), along with the
parking brake, for parking the
vehicle.
Shift Speeds
{Warning
If you skip a gear when
downshifting, you could lose
control of the vehicle. You could
injure yourself or others. Do not
shift down more than one gear at
a time when downshifting.
Page 266 of 501
Chevrolet Silverado Owner Manual (GMNA-Localizing-U.S./Canada/Mexico-
11349200) - 2018 - CRC - 2/27/18
Driving and Operating 265
Drive Systems
Four-Wheel Drive
If equipped, four-wheel drive
engages the front axle for extra
traction.
Read the appropriate section for
transfer case operation before
using.
Caution
Do not drive on clean, dry
pavement in 4
mand 4n(if
equipped) for an extended period
of time. These conditions may
cause premature wear on the
vehicle’s powertrain.
Driving on clean, dry pavement in
4
mor 4nmay:
. Cause a vibration to be felt in
the steering system.
. Cause tires to wear faster.
. Make the transfer case harder to
shift, and cause it to run noisier.
{Warning
If equipped with four-wheel drive,
the vehicle will be free to roll if the
transfer case is in N (Neutral),
even when the shift lever is in
P (Park). You or someone else
could be seriously injured. Be
sure the transfer case is in a drive
gear —2
m, 4m, or 4n—or set the
parking brake before placing the
transfer cas
e in N (Neutral). See Shifting Into
Park 0253.
Caution
Extended high-speed operation in
4
nmay damage or shorten the
life of the drivetrain.
Engagement noise and bump when
shifting between 4
nand 4mor from
N (Neutral), with the engine running,
is normal. Shifting into 4
nwill turn Traction
Control and StabiliTrak off. See
Traction Control/Electronic Stability
Control 0276.
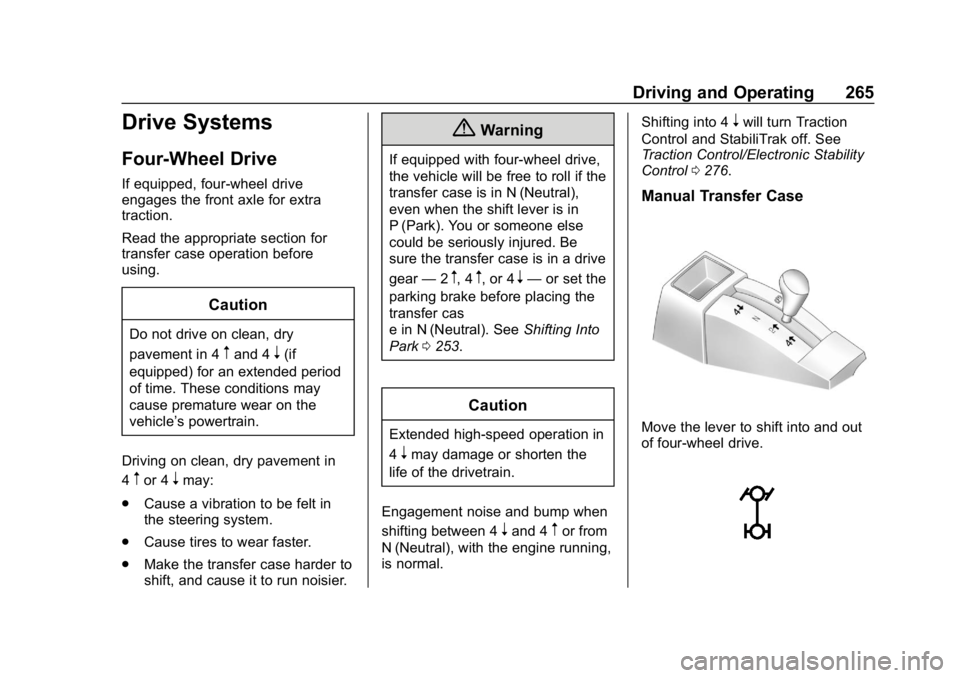
Manual Transfer Case
Move the lever to shift into and out
of four-wheel drive.
Page 274 of 501
Chevrolet Silverado Owner Manual (GMNA-Localizing-U.S./Canada/Mexico-
11349200) - 2018 - CRC - 2/27/18
Driving and Operating 273
Brakes
Antilock Brake
System (ABS)
This vehicle has an Antilock Brake
System (ABS), an advanced
electronic braking system that helps
prevent a braking skid.
When the vehicle begins to drive
away, ABS checks itself.
A momentary motor or clicking noise
may be heard while this test is going
on, and it may even be noticed that
the brake pedal moves a little. This
is normal.
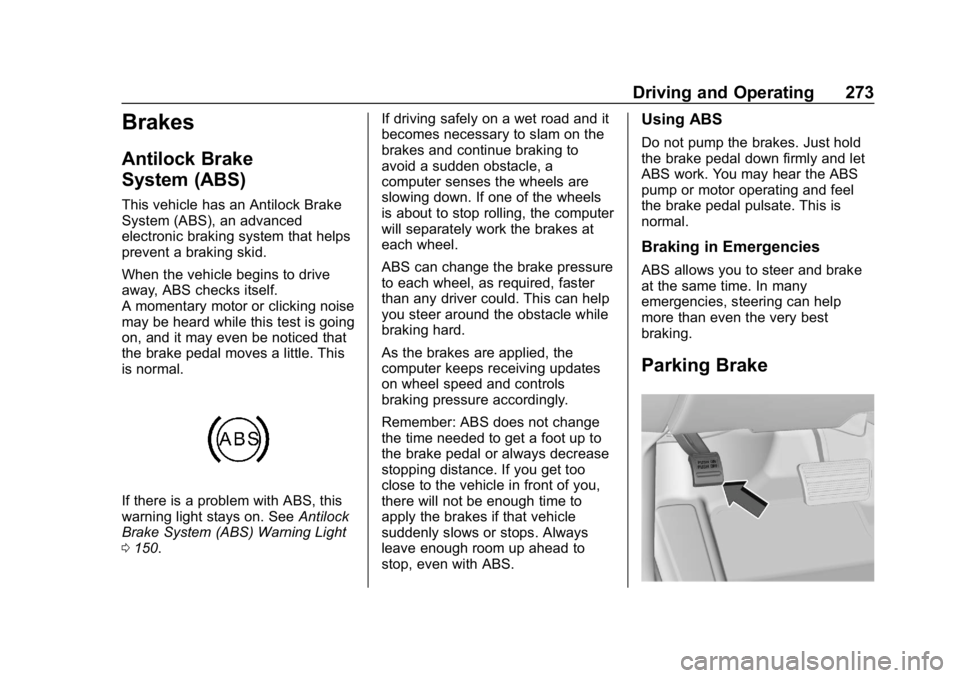
If there is a problem with ABS, this
warning light stays on. SeeAntilock
Brake System (ABS) Warning Light
0 150. If driving safely on a wet road and it
becomes necessary to slam on the
brakes and continue braking to
avoid a sudden obstacle, a
computer senses the wheels are
slowing down. If one of the wheels
is about to stop rolling, the computer
will separately work the brakes at
each wheel.
ABS can change the brake pressure
to each wheel, as required, faster
than any driver could. This can help
you steer around the obstacle while
braking hard.
As the brakes are applied, the
computer keeps receiving updates
on wheel speed and controls
braking pressure accordingly.
Remember: ABS does not change
the time needed to get a foot up to
the brake pedal or always decrease
stopping distance. If you get too
close to the vehicle in front of you,
there will not be enough time to
apply the brakes if that vehicle
suddenly slows or stops. Always
leave enough room up ahead to
stop, even with ABS.
Using ABS
Do not pump the brakes. Just hold
the brake pedal down firmly and let
ABS work. You may hear the ABS
pump or motor operating and feel
the brake pedal pulsate. This is
normal.
Braking in Emergencies
ABS allows you to steer and brake
at the same time. In many
emergencies, steering can help
more than even the very best
braking.
Parking Brake
Page 275 of 501
Chevrolet Silverado Owner Manual (GMNA-Localizing-U.S./Canada/Mexico-
11349200) - 2018 - CRC - 2/27/18
274 Driving and Operating
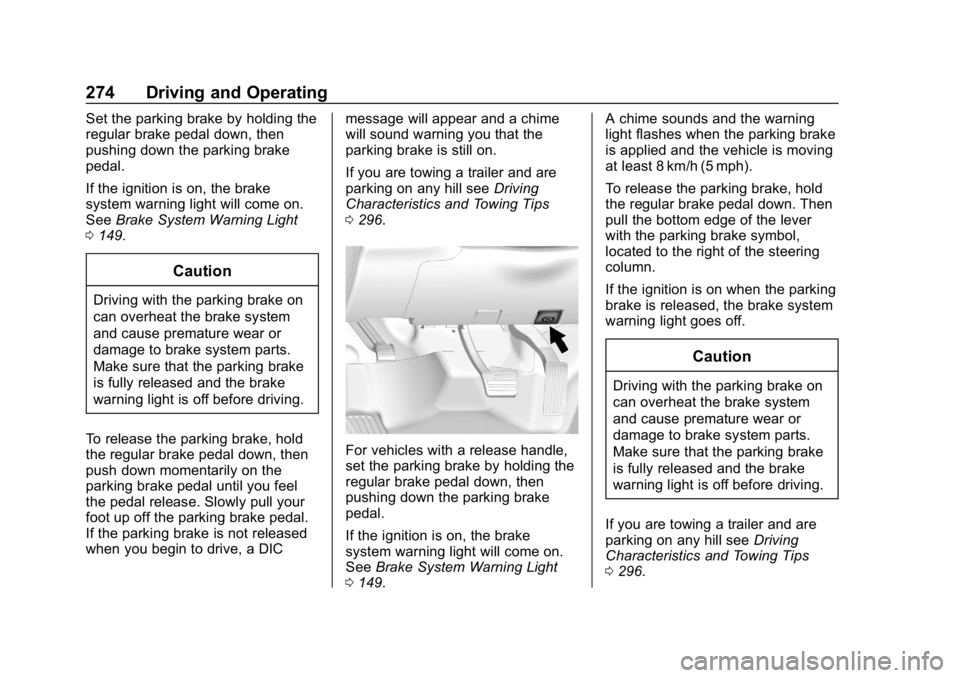
Set the parking brake by holding the
regular brake pedal down, then
pushing down the parking brake
pedal.
If the ignition is on, the brake
system warning light will come on.
SeeBrake System Warning Light
0 149.
Caution
Driving with the parking brake on
can overheat the brake system
and cause premature wear or
damage to brake system parts.
Make sure that the parking brake
is fully released and the brake
warning light is off before driving.
To release the parking brake, hold
the regular brake pedal down, then
push down momentarily on the
parking brake pedal until you feel
the pedal release. Slowly pull your
foot up off the parking brake pedal.
If the parking brake is not released
when you begin to drive, a DIC message will appear and a chime
will sound warning you that the
parking brake is still on.
If you are towing a trailer and are
parking on any hill see
Driving
Characteristics and Towing Tips
0 296.
For vehicles with a release handle,
set the parking brake by holding the
regular brake pedal down, then
pushing down the parking brake
pedal.
If the ignition is on, the brake
system warning light will come on.
See Brake System Warning Light
0 149. A chime sounds and the warning
light flashes when the parking brake
is applied and the vehicle is moving
at least 8 km/h (5 mph).
To release the parking brake, hold
the regular brake pedal down. Then
pull the bottom edge of the lever
with the parking brake symbol,
located to the right of the steering
column.
If the ignition is on when the parking
brake is released, the brake system
warning light goes off.
Caution
Driving with the parking brake on
can overheat the brake system
and cause premature wear or
damage to brake system parts.
Make sure that the parking brake
is fully released and the brake
warning light is off before driving.
If you are towing a trailer and are
parking on any hill see Driving
Characteristics and Towing Tips
0 296.
Page 280 of 501
Chevrolet Silverado Owner Manual (GMNA-Localizing-U.S./Canada/Mexico-
11349200) - 2018 - CRC - 2/27/18
Driving and Operating 279
Cruise Control
{Warning
Cruise control can be dangerous
where you cannot drive safely at
a steady speed. Do not use
cruise control on winding roads or
in heavy traffic.
Cruise control can be dangerous
on slippery roads. On such roads,
fast changes in tire traction can
cause excessive wheel slip, and
you could lose control. Do not use
cruise control on slippery roads.
With cruise control a speed of about
40 km/h (25 mph) or more can be
maintained without keeping your
foot on the accelerator. Cruise
control does not work at speeds
below about 40 km/h (25 mph).
If equipped with an Allison or
Hydra-Matic 6-speed automatic
transmission, see “Tow/Haul Mode
Grade Braking” underTow/Haul
Mode 0262 for an explanation of how cruise control interacts with the
Range Selection Mode, Tow/Haul
Mode, and Grade Braking systems.
If the cruise control is being used
and the Traction Control System
(TCS) or StabiliTrak begins to limit
wheel spin, the cruise control will
automatically disengage. See
Traction Control/Electronic Stability
Control
0276. When road
conditions allow you to safely use it
again, cruise control can be turned
back on.
If the brakes are applied, cruise
control disengages.
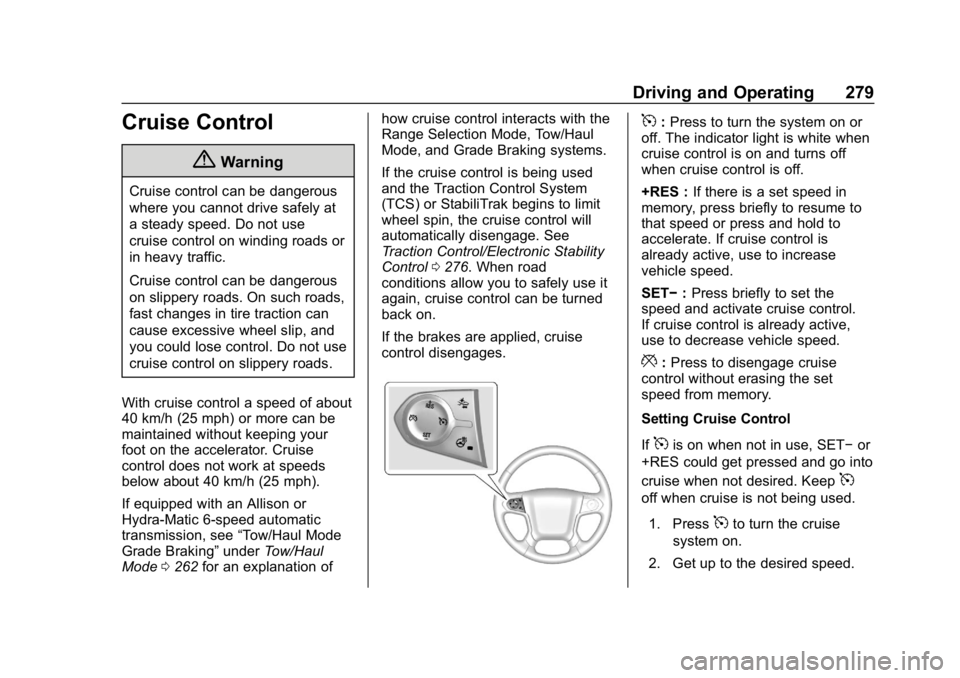
5: Press to turn the system on or
off. The indicator light is white when
cruise control is on and turns off
when cruise control is off.
+RES : If there is a set speed in
memory, press briefly to resume to
that speed or press and hold to
accelerate. If cruise control is
already active, use to increase
vehicle speed.
SET− :Press briefly to set the
speed and activate cruise control.
If cruise control is already active,
use to decrease vehicle speed.
*: Press to disengage cruise
control without erasing the set
speed from memory.
Setting Cruise Control
If
5is on when not in use, SET− or
+RES could get pressed and go into
cruise when not desired. Keep
5
off when cruise is not being used.
1. Press
5to turn the cruise
system on.
2. Get up to the desired speed.
Page 282 of 501
Chevrolet Silverado Owner Manual (GMNA-Localizing-U.S./Canada/Mexico-
11349200) - 2018 - CRC - 2/27/18
Driving and Operating 281
Cruise Grade Braking is enabled
when the vehicle is started and
cruise control is active. It is not
enabled in Range Selection
Mode. It assists in maintaining
driver selected speed when
driving on downhill grades by
using the engine and
transmission to slow the vehicle.
To disable and enable Cruise
Grade Braking for the current
ignition key cycle, press and
hold the Tow/Haul button for
five seconds. A DIC message
displays. SeeVehicle Messages
0 159.
. Vehicles with a diesel engine
have Cruise Grade Braking
enabled when Tow/Haul Mode is
on, the exhaust brake is on,
or both are on. For other forms of descent control,
see
Hill Descent Control (HDC)
0 277, Automatic Transmission
0 257, and Tow/Haul Mode 0262.
Ending Cruise Control
There are four ways to end cruise
control:
. Step lightly on the brake pedal.
. Press
*.
. Shift the transmission to
N (Neutral).
. To turn off cruise control,
press
5.
Erasing Speed Memory
The cruise control set speed is
erased from memory if
5is pressed
or the ignition is turned off.
Driver Assistance
Systems
This vehicle may have features that
work together to help avoid crashes
or reduce crash damage while
driving, backing, and parking. Read
this entire section before using
these systems.
{Warning
Do not rely on the Driver
Assistance Systems. These
systems do not replace the need
for paying attention and driving
safely. You may not hear or feel
alerts or warnings provided by
these systems. Failure to use
proper care when driving may
result in injury, death, or vehicle
damage. See Defensive Driving
0 228.
(Continued)
Page 283 of 501
Chevrolet Silverado Owner Manual (GMNA-Localizing-U.S./Canada/Mexico-
11349200) - 2018 - CRC - 2/27/18
282 Driving and Operating
Warning (Continued)
Under many conditions, these
systems will not:. Detect children,
pedestrians, bicyclists,
or animals.
. Detect vehicles or objects
outside the area monitored
by the system.
. Work at all driving speeds.
. Warn you or provide you
with enough time to avoid a
crash.
. Work under poor visibility or
bad weather conditions.
. Work if the detection sensor
is not cleaned or is covered
by ice, snow, mud, or dirt.
. Work if the detection sensor
is covered up, such as with
a sticker, magnet, or metal
plate.
(Continued)
Warning (Continued)
.Work if the area surrounding
the detection sensor is
damaged or not properly
repaired.
Complete attention is always
required while driving, and you
should be ready to take action
and apply the brakes and/or steer
the vehicle to avoid crashes.
Audible or Safety Alert Seat
Some driver assistance features
alert the driver of obstacles by
beeping. To change the volume of
the warning chime, see “Comfort
and Convenience” underVehicle
Personalization 0160.
If equipped with the Safety Alert
Seat, the driver seat cushion may
provide a vibrating pulse alert
instead of beeping. To change this,
see “Collision/Detection Systems”
under Vehicle Personalization
0 160.
Assistance Systems for
Parking or Backing
If equipped, the Rear Vision Camera
(RVC), Rear Parking Assist (RPA),
and Front Parking Assist (FPA) may
help the driver park or avoid objects.
Always check around the vehicle
when parking or backing.
The RVC and RPA will not work
properly if the tailgate is down. If the
tailgate is down, do not use these
systems.
Rear Vision Camera (RVC)
When the vehicle is shifted into
R (Reverse), the RVC displays an
image of the area behind the vehicle
in the infotainment display. The
previous screen displays when the
vehicle is shifted out of R (Reverse)
after a short delay. To return to the
previous screen sooner, press any
button on the infotainment system,
shift into P (Park), or reach a vehicle
speed of approximately
12 km/h (8 mph).
Page 284 of 501
Chevrolet Silverado Owner Manual (GMNA-Localizing-U.S./Canada/Mexico-
11349200) - 2018 - CRC - 2/27/18
Driving and Operating 283
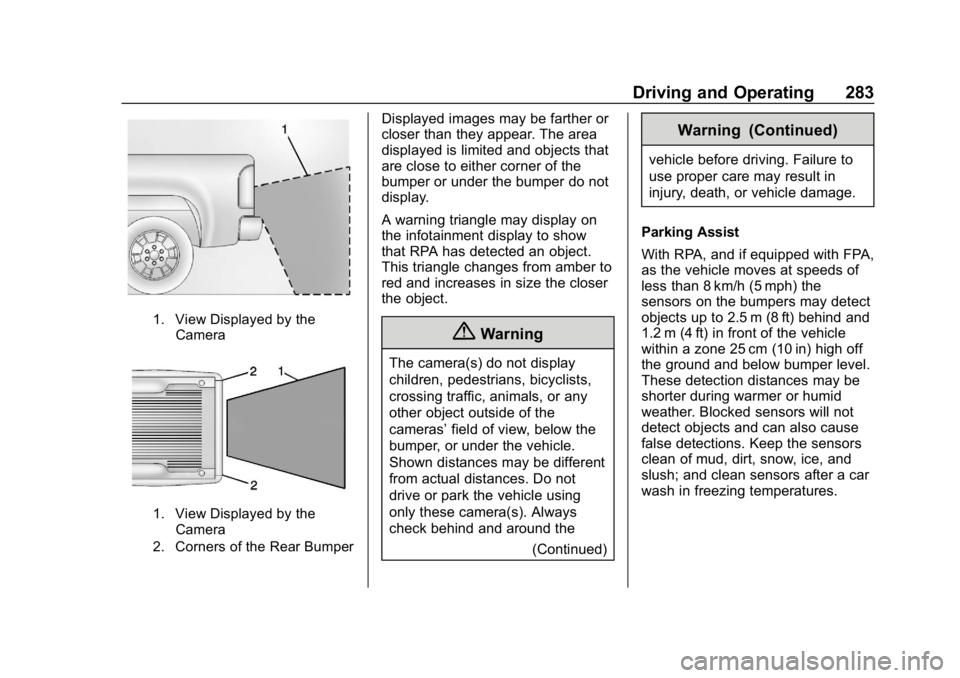
1. View Displayed by theCamera
1. View Displayed by theCamera
2. Corners of the Rear Bumper
Displayed images may be farther or
closer than they appear. The area
displayed is limited and objects that
are close to either corner of the
bumper or under the bumper do not
display.
A warning triangle may display on
the infotainment display to show
that RPA has detected an object.
This triangle changes from amber to
red and increases in size the closer
the object.
{Warning
The camera(s) do not display
children, pedestrians, bicyclists,
crossing traffic, animals, or any
other object outside of the
cameras’ field of view, below the
bumper, or under the vehicle.
Shown distances may be different
from actual distances. Do not
drive or park the vehicle using
only these camera(s). Always
check behind and around the
(Continued)
Warning (Continued)
vehicle before driving. Failure to
use proper care may result in
injury, death, or vehicle damage.
Parking Assist
With RPA, and if equipped with FPA,
as the vehicle moves at speeds of
less than 8 km/h (5 mph) the
sensors on the bumpers may detect
objects up to 2.5 m (8 ft) behind and
1.2 m (4 ft) in front of the vehicle
within a zone 25 cm (10 in) high off
the ground and below bumper level.
These detection distances may be
shorter during warmer or humid
weather. Blocked sensors will not
detect objects and can also cause
false detections. Keep the sensors
clean of mud, dirt, snow, ice, and
slush; and clean sensors after a car
wash in freezing temperatures.