2018 CHEVROLET SILVERADO 1500 fuse
[x] Cancel search: fusePage 4 of 501
Chevrolet Silverado Owner Manual (GMNA-Localizing-U.S./Canada/Mexico-
11349200) - 2018 - CRC - 2/27/18
Introduction 3
Danger, Warning, and
Caution
Warning messages found on vehicle
labels and in this manual describe
hazards and what to do to avoid or
reduce them.
{Danger
Danger indicates a hazard with a
high level of risk which will result
in serious injury or death.
{Warning
Warning indicates a hazard that
could result in injury or death.
Caution
Caution indicates a hazard that
could result in property or vehicle
damage.
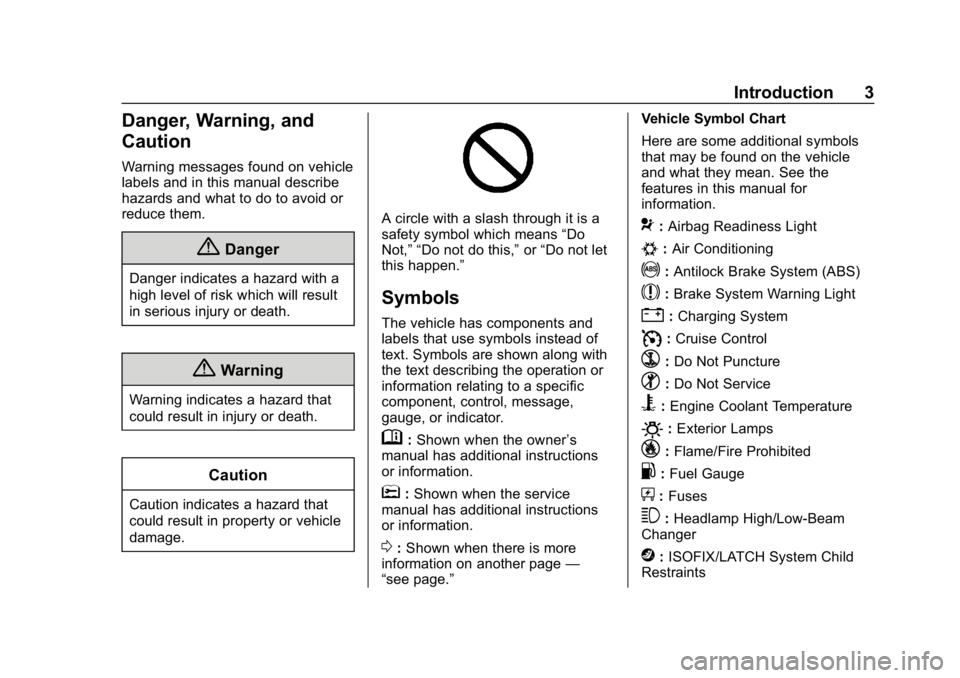
A circle with a slash through it is a
safety symbol which means“Do
Not,” “Do not do this,” or“Do not let
this happen.”
Symbols
The vehicle has components and
labels that use symbols instead of
text. Symbols are shown along with
the text describing the operation or
information relating to a specific
component, control, message,
gauge, or indicator.
M: Shown when the owner ’s
manual has additional instructions
or information.
*: Shown when the service
manual has additional instructions
or information.
0: Shown when there is more
information on another page —
“see page.” Vehicle Symbol Chart
Here are some additional symbols
that may be found on the vehicle
and what they mean. See the
features in this manual for
information.
9:
Airbag Readiness Light
#:Air Conditioning
!:Antilock Brake System (ABS)
$:Brake System Warning Light
":Charging System
I: Cruise Control
`:Do Not Puncture
^:Do Not Service
B:Engine Coolant Temperature
O:Exterior Lamps
_: Flame/Fire Prohibited
.:Fuel Gauge
+: Fuses
3:Headlamp High/Low-Beam
Changer
j: ISOFIX/LATCH System Child
Restraints
Page 48 of 501
Chevrolet Silverado Owner Manual (GMNA-Localizing-U.S./Canada/Mexico-
11349200) - 2018 - CRC - 2/27/18
Keys, Doors, and Windows 47
When trying to start the vehicle, the
security light comes on briefly when
the ignition is turned on.
If the engine does not start and the
security light stays on, there is a
problem with the system. Turn the
ignition off and try again.
If the engine still does not start, and
the key appears to be undamaged,
try another ignition key. It may be
necessary to check the fuse. See
Fuses and Circuit Breakers0376.
If the engine still does not start with
the other key, the vehicle needs
service. If the vehicle does start, the
first key may be faulty. See your
dealer. It is possible for the immobilizer
system to learn new or replacement
keys. Up to eight keys can be
programmed for the vehicle. To
program additional keys, see
Keys
0 34. To program additional
transmitters, see your dealer.
Do not leave the key or device that
disarms or deactivates the vehicle
theft system in the vehicle.
See your dealer to get a new key
blank cut exactly as the ignition key
that operates the system.Exterior Mirrors
Convex Mirrors
{Warning
A convex mirror can make things,
like other vehicles, look farther
away than they really are. If you
cut too sharply into the right lane,
you could hit a vehicle on the
right. Check the inside mirror or
glance over your shoulder before
changing lanes.
The passenger side mirror is convex
shaped. A convex mirror's surface is
curved so more can be seen from
the driver seat.
Manual Mirrors
If equipped, adjust manual mirrors
by moving the mirror up and down
or left to right to see a little of the
side of the vehicle and to have a
clear view behind the vehicle.
Page 134 of 501
Chevrolet Silverado Owner Manual (GMNA-Localizing-U.S./Canada/Mexico-
11349200) - 2018 - CRC - 2/27/18
Instruments and Controls 133
Caution
Leaving electrical equipment
plugged in for an extended period
of time while the vehicle is off will
drain the battery. Always unplug
electrical equipment when not in
use and do not plug in equipment
that exceeds the maximum
15 amp rating.
Certain power accessory plugs may
not be compatible with the
accessory power outlet and could
overload vehicle or adapter fuses.
If a problem is experienced, see
your dealer.
When adding electrical equipment,
be sure to follow the proper
installation instructions included with
the equipment. See Add-On
Electrical Equipment 0329.
Caution
Hanging heavy equipment from
the power outlet can cause
damage not covered by the
vehicle warranty. The power
outlets are designed for
accessory power plugs only, such
as cell phone charge cords.
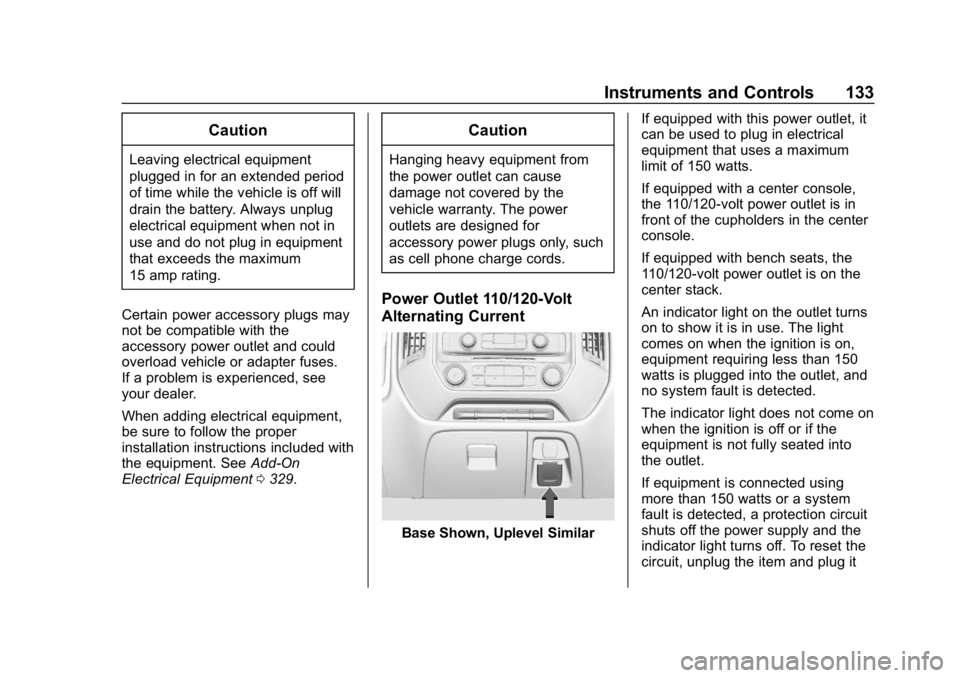
Power Outlet 110/120-Volt
Alternating Current
Base Shown, Uplevel Similar If equipped with this power outlet, it
can be used to plug in electrical
equipment that uses a maximum
limit of 150 watts.
If equipped with a center console,
the 110/120-volt power outlet is in
front of the cupholders in the center
console.
If equipped with bench seats, the
110/120-volt power outlet is on the
center stack.
An indicator light on the outlet turns
on to show it is in use. The light
comes on when the ignition is on,
equipment requiring less than 150
watts is plugged into the outlet, and
no system fault is detected.
The indicator light does not come on
when the ignition is off or if the
equipment is not fully seated into
the outlet.
If equipment is connected using
more than 150 watts or a system
fault is detected, a protection circuit
shuts off the power supply and the
indicator light turns off. To reset the
circuit, unplug the item and plug it
Page 177 of 501
Chevrolet Silverado Owner Manual (GMNA-Localizing-U.S./Canada/Mexico-
11349200) - 2018 - CRC - 2/27/18
176 Lighting
change. This causes the turn
signals to automatically flash three
times. It will flash six times if Tow/
Haul Mode is active. Holding the
turn signal lever for more than
one second will cause the turn
signals to flash until the lever is
released.
The lever returns to its starting
position whenever it is released.
If after signaling a turn or a lane
change the arrows flash rapidly or
do not come on, a signal bulb could
be burned out. If equipped with LED
turn signals, see your dealer.
Replace any burned out bulbs. If a
bulb is not burned out, check the
fuse. SeeFuses and Circuit
Breakers 0376.
Turn Signal On Chime
If the turn signal is left on for more
than 1.2 km (0.75 mi), a chime
sounds at each flash of the turn
signal. The message TURN
SIGNAL ON will also appear in the
Driver Information Center (DIC). To turn the chime and message off,
move the turn signal lever to the off
position.
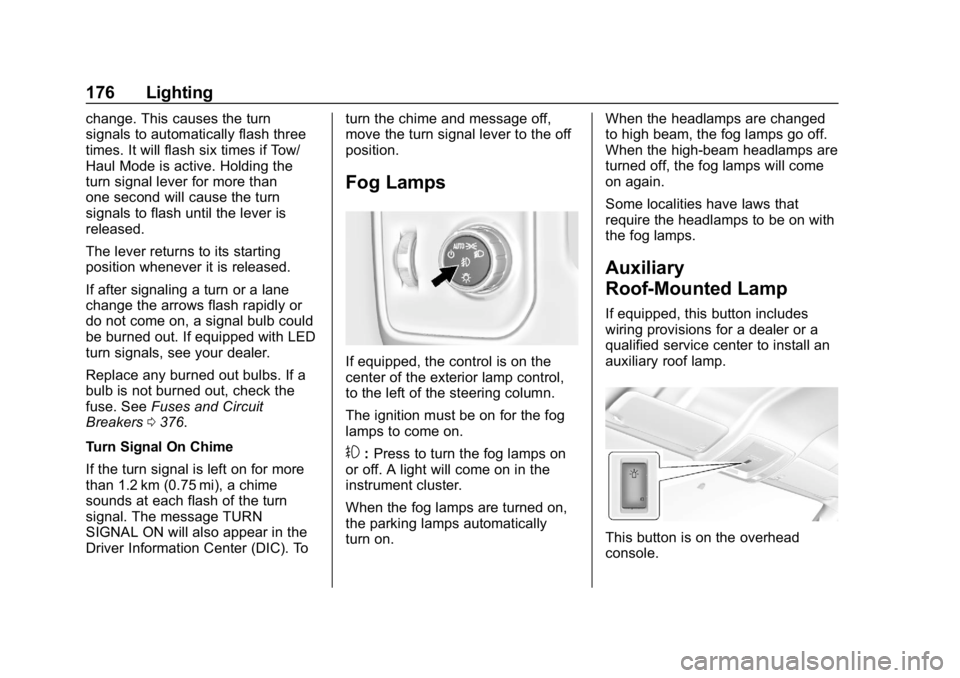
Fog Lamps
If equipped, the control is on the
center of the exterior lamp control,
to the left of the steering column.
The ignition must be on for the fog
lamps to come on.
#:
Press to turn the fog lamps on
or off. A light will come on in the
instrument cluster.
When the fog lamps are turned on,
the parking lamps automatically
turn on. When the headlamps are changed
to high beam, the fog lamps go off.
When the high-beam headlamps are
turned off, the fog lamps will come
on again.
Some localities have laws that
require the headlamps to be on with
the fog lamps.
Auxiliary
Roof-Mounted Lamp
If equipped, this button includes
wiring provisions for a dealer or a
qualified service center to install an
auxiliary roof lamp.
This button is on the overhead
console.
Page 178 of 501

Chevrolet Silverado Owner Manual (GMNA-Localizing-U.S./Canada/Mexico-
11349200) - 2018 - CRC - 2/27/18
Lighting 177
When the wiring is connected to an
auxiliary roof-mounted lamp,
pressing the bottom of the button
will activate the lamp and illuminate
an indicator light at the bottom of
this button. Pressing the top of the
button will turn off the roof-mounted
lamp and indicator.
The emergency roof lamp circuit is
fused at 30 amps, so the total
current draw of the attached lamps
should be less than this value. The
attachment points for the roof lamp
circuits are two blunt cut wires
above the overhead console: a dark
green with blue stripe switched
power wire and a black ground wire.
For information on roof-mounted
emergency lamp installation, see
www.gmupfitter.com or contact your
dealer.
If the vehicle has this button, the
vehicle may have the snow plow
prep package. SeeAdd-On
Electrical Equipment 0329.Interior Lighting
Instrument Panel
Illumination Control
This feature controls the brightness
of the steering wheel and instrument
panel lights. The instrument panel
illumination control is next to the
exterior lamp control.
D:Move the thumbwheel up or
down to brighten or dim the lights.
Cargo Lamp
The cargo lamp provides more light
in the cargo area or on the sides of
the vehicle, if needed. The lights
inside the pickup box and/or on the
outside mirrors also turn on,
if equipped.
Press the switch to turn the cargo
lamp on or off. An indicator light will
turn on when the lamp is turned on,
if equipped. The shift lever must be
in P (Park) to operate the cargo
lamp. The lights on the outside
rearview mirrors turn on if the shift
lever is in R (Reverse), N (Neutral),
or P (Park).
Page 253 of 501
Chevrolet Silverado Owner Manual (GMNA-Localizing-U.S./Canada/Mexico-
11349200) - 2018 - CRC - 2/27/18
252 Driving and Operating
turned from ON/RUN to LOCK/OFF,
the windows and sunroof continue
to work up to 10 minutes or until any
door is opened. The radio continues
to work for up to 10 minutes or until
the driver door is opened.
Accessory Power Outlets (APOs)
The vehicle may have Accessory
Power Outlets (APOs) in several
locations. SeePower Outlets0132.
The APOs in the console or center
seat position are powered by
Retained Accessory Power (RAP).
They will continue to work for up to
10 minutes after the key is turned
from ON/RUN to LOCK/OFF, or until
the driver door is opened.
The APOs on the center stack come
from the factory powered directly
from the vehicle battery, and supply
accessory power at all times,
regardless of ignition key position.
If electronic items are left plugged
into these APOs for long periods of
time with the vehicle off, the vehicle
battery could be drained. The vehicle may not start if the battery is
allowed to drain for an extended
period of time.
Engine Coolant Heater
The engine heater can provide
easier starting and better fuel
economy during engine warm-up in
cold weather conditions at or below
−18 °C (0 °F). Vehicles with an
engine heater should be plugged in
at least four hours before starting.
An internal thermostat in the
plug-end of the cord may exist,
which will prevent engine coolant
heater operation at temperatures
above
−18 °C (0 °F).
If the vehicle has a diesel engine,
see the Duramax diesel
supplement.
{Warning
Do not plug in the engine block
heater while the vehicle is parked
in a garage or under a carport.
Property damage or personal (Continued)
Warning (Continued)
injury may result. Always park the
vehicle in a clear open area away
from buildings or structures.
To Use the Engine Coolant
Heater
1. Turn off the engine.
2. Open the hood and unwrap theelectrical cord. The cord is
secured to the driver side
fender with a clip, next to the
engine compartment fuse
block. Carefully remove the
wire tie that bundles the
electrical plug. Do not cut the
electrical cord.
Check the heater cord for
damage. If it is damaged, do
not use it. See your dealer for
a replacement. Inspect the
cord for damage yearly.
3. Plug the cord into a normal, grounded 110-volt AC outlet.
Page 322 of 501
Chevrolet Silverado Owner Manual (GMNA-Localizing-U.S./Canada/Mexico-
11349200) - 2018 - CRC - 2/27/18
Driving and Operating 321
Trailer Wiring Harness
The vehicle is equipped with one of
the following wiring harnesses for
towing a trailer or hauling a slide-in
camper.
Basic Trailer Wiring
All regular, double cab, and crew
cab pickups have a seven-wire
trailer towing harness.
For vehicles not equipped with
heavy-duty trailering, the harness is
secured to the vehicle's frame
behind the spare tire mount. The
harness requires the installation of a
trailer connector, which is available
through your dealer.
Use only a round, seven-wire
connector with flat blade terminals
meeting SAE J2863 specifications
for proper electrical connectivity.
The seven-wire harness contains
the following trailer circuits:
.Green/Violet: Right Stop/Turn
Signal
. Yellow/Gray: Left Stop/Turn
Signal .
Gray/Brown: Taillamps/Parking
Lamps
. White/Green: Back-up Lamps
. Red/Green: Battery Feed
. White: Ground
. Blue: Electric Trailer Brake
The fuse for the electric trailer brake
circuit is installed in the underhood
electrical center, but the wires may
not be connected. They should be
connected by your dealer or a
qualified service center. To control
electric trailer brakes, a trailer brake
controller needs to be installed on
the vehicle by your dealer or a
qualified service center, see
“Electric Brake Control Wiring
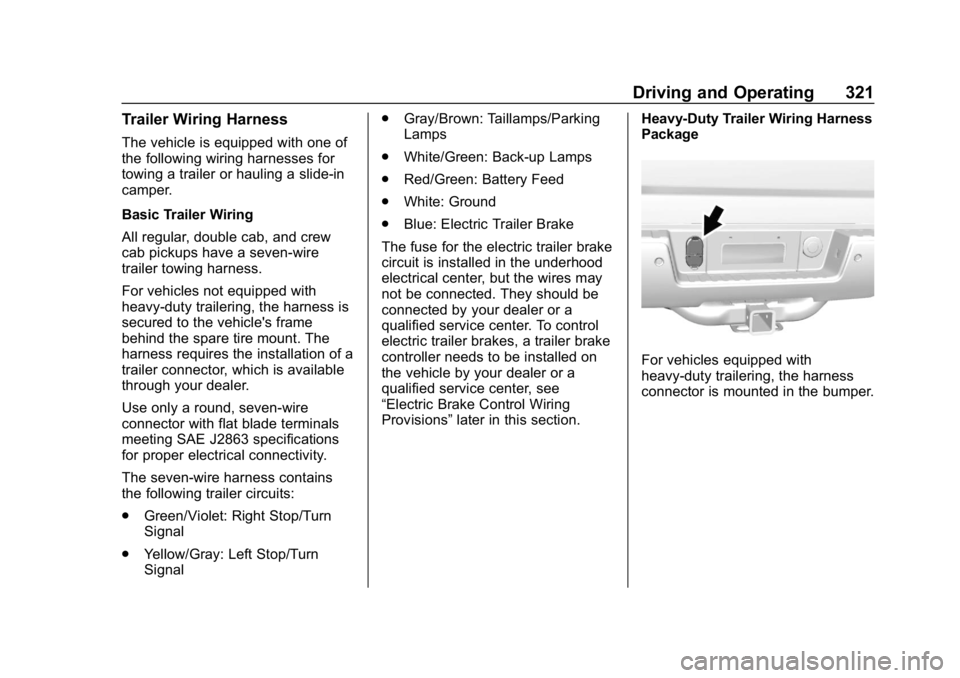
Provisions” later in this section. Heavy-Duty Trailer Wiring Harness
Package
For vehicles equipped with
heavy-duty trailering, the harness
connector is mounted in the bumper.
Page 335 of 501
Chevrolet Silverado Owner Manual (GMNA-Localizing-U.S./Canada/Mexico-
11349200) - 2018 - CRC - 2/27/18
334 Vehicle Care
Vehicle Care
General Information
General Information . . . . . . . . . . 335
California Proposition65 Warning . . . . . . . . . . . . . . . . . 336
California Perchlorate Materials Requirements . . . . . 336
Accessories and Modifications . . . . . . . . . . . . . . . . 336
Vehicle Checks
Doing Your OwnService Work . . . . . . . . . . . . . . . 337
Hood . . . . . . . . . . . . . . . . . . . . . . . . . 337
Engine Compartment Overview . . . . . . . . . . . . . . . . . . . . 338
Engine Oil . . . . . . . . . . . . . . . . . . . . 343
Engine Oil Life System . . . . . . . 346
Automatic Transmission Fluid (6-Speed Transmission) . . . . . 347
Automatic Transmission Fluid (8-Speed Transmission) . . . . . 350
Manual Transmission Fluid . . . 350
Hydraulic Clutch . . . . . . . . . . . . . . 351
Engine Air Cleaner/Filter . . . . . . 351
Cooling System . . . . . . . . . . . . . . 352
Engine Overheating . . . . . . . . . . 356 Overheated Engine Protection
Operating Mode . . . . . . . . . . . . . 358
Engine Fan . . . . . . . . . . . . . . . . . . . 358
Power Steering Fluid (1500 Series) . . . . . . . . . . . . . . . . . . . . . . 359
Power Steering Fluid (2500/ 3500 Series) . . . . . . . . . . . . . . . . 359
Washer Fluid . . . . . . . . . . . . . . . . . 359
Brakes . . . . . . . . . . . . . . . . . . . . . . . 360
Brake Fluid . . . . . . . . . . . . . . . . . . . 361
Battery - North America . . . . . . 362
Four-Wheel Drive . . . . . . . . . . . . . 363
Front Axle . . . . . . . . . . . . . . . . . . . . 364
Rear Axle . . . . . . . . . . . . . . . . . . . . 365
Noise Control System . . . . . . . . 366
Starter Switch Check . . . . . . . . . 367
Automatic Transmission Shift Lock Control Function
Check . . . . . . . . . . . . . . . . . . . . . . . 368
Ignition Transmission Lock Check . . . . . . . . . . . . . . . . . . . . . . . 368
Park Brake and P (Park) Mechanism Check . . . . . . . . . . 368
Wiper Blade Replacement . . . . 369
Windshield Replacement . . . . . 369
Gas Strut(s) . . . . . . . . . . . . . . . . . . 370
Headlamp Aiming
Headlamp Aiming . . . . . . . . . . . . 371
Bulb Replacement
Bulb Replacement . . . . . . . . . . . . 371
Halogen Bulbs . . . . . . . . . . . . . . . . 371
High Intensity Discharge (HID) Lighting . . . . . . . . . . . . . . . . . . . . . 371
LED Lighting . . . . . . . . . . . . . . . . . 371
Headlamps, Front Turn Signal,
Sidemarker, and Parking
Lamps . . . . . . . . . . . . . . . . . . . . . . 372
Fog Lamps . . . . . . . . . . . . . . . . . . . 373
Taillamps (Chassis Cab Models) . . . . . . . . . . . . . . . . . . . . . 373
Taillamps, Turn Signal, Stoplamps, and Back-Up
Lamps . . . . . . . . . . . . . . . . . . . . . . 373
Center High-Mounted Stoplamp (CHMSL) and
Cargo Lamp . . . . . . . . . . . . . . . . . 375
Electrical System
High Voltage Devices andWiring . . . . . . . . . . . . . . . . . . . . . . . 375
Electrical System Overload . . . 375
Fuses and Circuit Breakers . . . 376
Engine Compartment Fuse Block . . . . . . . . . . . . . . . . . . . . . . . . 376
Instrument Panel Fuse Block (Right) . . . . . . . . . . . . . . . . . . . . . . 380
Instrument Panel Fuse Block (Left) . . . . . . . . . . . . . . . . . 381