2018 CHEVROLET SILVERADO 1500 instrument cluster
[x] Cancel search: instrument clusterPage 300 of 501
Chevrolet Silverado Owner Manual (GMNA-Localizing-U.S./Canada/Mexico-
11349200) - 2018 - CRC - 2/27/18
Driving and Operating 299
When towing a trailer, the arrows on
the instrument cluster flash for turns
even if the bulbs on the trailer are
burned out.
Check occasionally to be sure the
trailer bulbs are still working.
Driving on Grades
Reduce speed and shift to a lower
gearbefore starting down a long or
steep downgrade. If the
transmission is not shifted down, the
brakes might get hot and no longer
work well.
Vehicles can tow in D (Drive). Shift
the transmission to a lower gear if
the transmission shifts too often
under heavy loads and/or hilly
conditions.
The Tow/Haul Mode may be used if
the transmission shifts too often.
See Tow/Haul Mode 0262.
When towing at high altitude on
steep uphill grades, consider the
following: Engine coolant will boil at
a lower temperature than at normal
altitudes. If the engine is turned off
immediately after towing at high altitude on steep uphill grades, the
vehicle may show signs similar to
engine overheating. To avoid this,
let the engine run while parked,
preferably on level ground, with the
transmission in P (Park) for a few
minutes before turning the engine
off. If the overheat warning comes
on, see
Engine Overheating 0356.
Parking on Hills
{Warning
Parking the vehicle on a hill with
the trailer attached can be
dangerous. If something goes
wrong, the rig could start to move.
People can be injured, and both
the vehicle and the trailer can be
damaged. When possible, always
park the rig on a flat surface.
If parking the rig on a hill: 1. Press the brake pedal, but do not shift into P (Park) yet. Turn
the wheels into the curb if
facing downhill or into traffic if
facing uphill. 2. Have someone place chocks
under the trailer wheels.
3. When the wheel chocks are in place, release the regular
brakes until the chocks absorb
the load.
4. Reapply the brake pedal. Then apply the parking brake and
shift into P (Park).
5. Release the brake pedal.
For vehicles with a manual
transmission, move the shift lever
into R (Reverse) if parking on a
downhill slope, use 1 (First) gear if
parking on an uphill slope.
Leaving After Parking on a Hill
1. Apply and hold the brake pedal.
.Start the engine.
. Shift into a gear.
. Release the parking brake.
2. Let up on the brake pedal.
3. Drive slowly until the trailer is clear of the chocks.
Page 324 of 501
Chevrolet Silverado Owner Manual (GMNA-Localizing-U.S./Canada/Mexico-
11349200) - 2018 - CRC - 2/27/18
Driving and Operating 323
.Black: Ground
Be sure to consult the aftermarket
electric brake controller owner ’s
manual to determine wire color
coding of the electric trailer brake
controller. The wire colors on the
brake controller may be different
from the vehicle.
The electric trailer brake controller
should be installed by your dealer or
a qualified service center.
Tow/Haul Mode
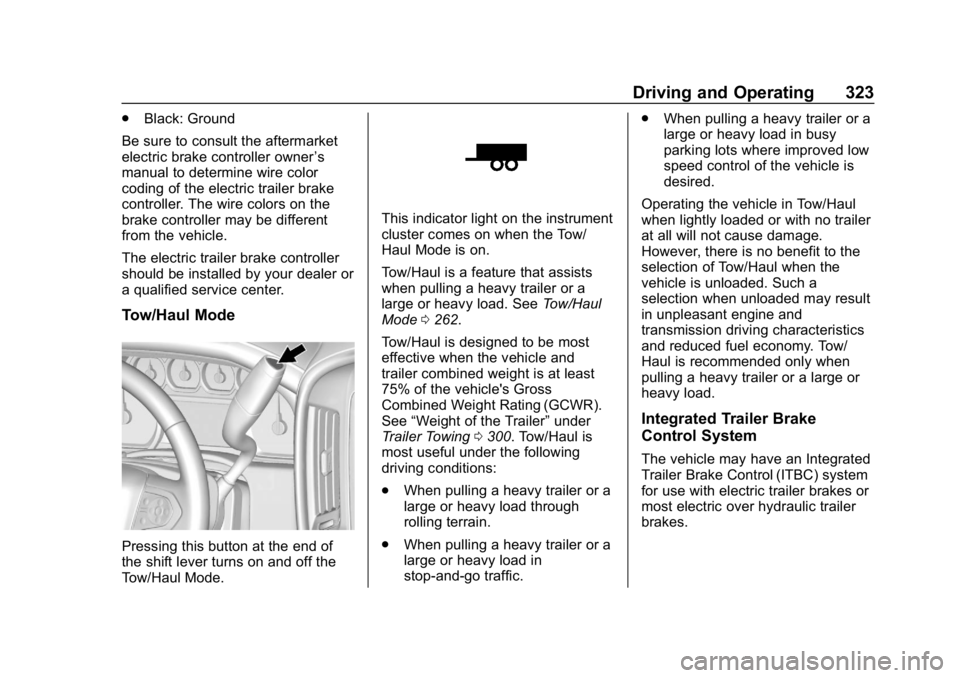
Pressing this button at the end of
the shift lever turns on and off the
Tow/Haul Mode.
This indicator light on the instrument
cluster comes on when the Tow/
Haul Mode is on.
Tow/Haul is a feature that assists
when pulling a heavy trailer or a
large or heavy load. See Tow/Haul
Mode 0262.
Tow/Haul is designed to be most
effective when the vehicle and
trailer combined weight is at least
75% of the vehicle's Gross
Combined Weight Rating (GCWR).
See “Weight of the Trailer” under
Trailer Towing 0300. Tow/Haul is
most useful under the following
driving conditions:
. When pulling a heavy trailer or a
large or heavy load through
rolling terrain.
. When pulling a heavy trailer or a
large or heavy load in
stop-and-go traffic. .
When pulling a heavy trailer or a
large or heavy load in busy
parking lots where improved low
speed control of the vehicle is
desired.
Operating the vehicle in Tow/Haul
when lightly loaded or with no trailer
at all will not cause damage.
However, there is no benefit to the
selection of Tow/Haul when the
vehicle is unloaded. Such a
selection when unloaded may result
in unpleasant engine and
transmission driving characteristics
and reduced fuel economy. Tow/
Haul is recommended only when
pulling a heavy trailer or a large or
heavy load.
Integrated Trailer Brake
Control System
The vehicle may have an Integrated
Trailer Brake Control (ITBC) system
for use with electric trailer brakes or
most electric over hydraulic trailer
brakes.
Page 329 of 501
Chevrolet Silverado Owner Manual (GMNA-Localizing-U.S./Canada/Mexico-
11349200) - 2018 - CRC - 2/27/18
328 Driving and Operating
instrument cluster. Vehicle speed
must be reduced. If trailer sway
continues, StabiliTrak can reduce
engine torque to help slow the
vehicle. SeeTraction Control/
Electronic Stability Control 0276.
{Warning
Even if the vehicle is equipped
with TSC, trailer sway could result
in loss of control and the vehicle
could crash. If excessive trailer
sway is detected, slow down to a
safe speed. Check the trailer and
vehicle to help correct possible
causes. These could include an
improperly or overloaded trailer,
unrestrained cargo, improper
trailer hitch configuration,
excessive vehicle-trailer speed,
or improperly inflated or incorrect
vehicle or trailer tires. See Towing
Equipment 0318 for trailer
ratings and hitch setup
recommendations. Adding non-dealer accessories can
affect the vehicle performance. See
Accessories and Modifications
0
336.
Electronic Trailer Sway Control
Devices
Some trailers may come equipped
with an electronic device designed
to reduce or control trailer sway.
Aftermarket equipment
manufacturers also offer similar
devices that connect to the wiring
between the trailer and the vehicle.
These devices may interfere with
the vehicle’ s trailer brake or other
systems, including integrated
anti-sway systems, if equipped.
Messages related to trailer
connections or trailer brakes could
appear on the Driver Information
Center (DIC). The effect that these
devices may have on vehicle
handling or trailer brake
performance is unknown.
{Warning
Use of electronic trailer sway
control devices could result in
reduced trailer brake
performance, loss of trailer
brakes, or other malfunctions, and
could cause a crash. You or
others could be injured or killed.
Before using one of these
devices:
. Ask the device or trailer
manufacturer if the device
has been thoroughly tested
for compatibility with the
make, model, and year of
the vehicle as well as
optional equipment installed
on the vehicle.
. Before driving on the open
roads, check that the trailer
brakes are working properly.
Drive the vehicle with the
trailer attached on a level
road surface that is free of
traffic at about 32-40 km/h
(Continued)
Page 357 of 501
Chevrolet Silverado Owner Manual (GMNA-Localizing-U.S./Canada/Mexico-
11349200) - 2018 - CRC - 2/27/18
356 Vehicle Care
Turn the pressure cap slowly
counterclockwise about one full
turn. If a hiss is heard, wait for
that to stop. A hiss means
there is still some pressure left.
2. Keep turning the pressure cap slowly, and remove it.
3. Fill the coolant surge tank with the proper mixture to the full
cold mark.
4. With the coolant surge tank pressure cap off, start the
engine and let it run until the
engine coolant temperature
gauge indicates approximately
90 °C (195 °F).
By this time, the coolant level
inside the coolant surge tank
may be lower. If the level is
lower, add more of the proper
mixture to the coolant surge
tank until the level reaches the
full cold mark.
5. Replace the pressure cap tightly. 6. Verify coolant level after the
engine is shut off and the
coolant is cold. If necessary,
repeat coolant fill procedure
Steps 1–6.
Caution
If the pressure cap is not tightly
installed, coolant loss and engine
damage may occur. Be sure the
cap is properly and tightly
secured.
Engine Overheating
If the vehicle has the Duramax
diesel engine, see the Duramax
diesel supplement.
Caution
Do not run the engine if there is a
leak in the engine cooling system.
This can cause a loss of all
coolant and can damage the
system and vehicle. Have any
leaks fixed right away. The vehicle has several indicators
to warn of engine overheating.
There is a coolant temperature
gauge in the vehicle's instrument
cluster. See
Engine Coolant
Temperature Gauge 0142.
In addition, there are ENGINE
OVERHEATED STOP ENGINE,
ENGINE OVERHEATED IDLE
ENGINE, and ENGINE POWER IS
REDUCED messages in the Driver
Information Center (DIC).
If the decision is made not to lift the
hood when this warning appears,
get service help right away. See
Roadside Assistance Program
0 465.
If the decision is made to lift the
hood, make sure the vehicle is
parked on a level surface.
4.3L V6, 5.3L V8, and 6.2L
V8 Engines
Check to see if the engine cooling
fans are running. If the engine is
overheating, the fans should be
Page 384 of 501
Chevrolet Silverado Owner Manual (GMNA-Localizing-U.S./Canada/Mexico-
11349200) - 2018 - CRC - 2/27/18
Vehicle Care 383
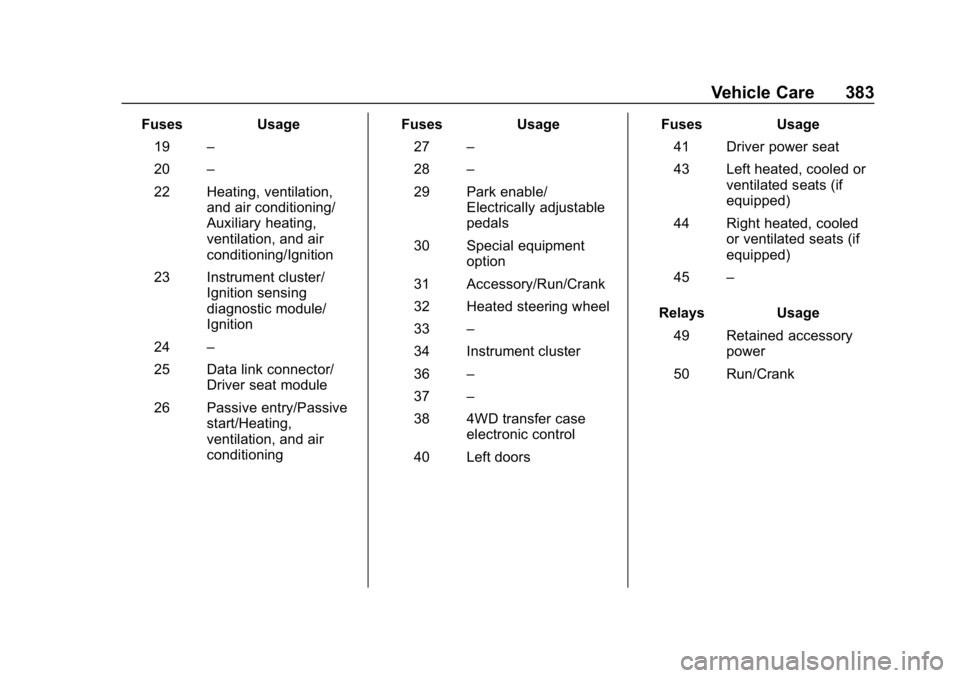
FusesUsage
19 –
20 –
22 Heating, ventilation, and air conditioning/
Auxiliary heating,
ventilation, and air
conditioning/Ignition
23 Instrument cluster/ Ignition sensing
diagnostic module/
Ignition
24 –
25 Data link connector/ Driver seat module
26 Passive entry/Passive start/Heating,
ventilation, and air
conditioning Fuses
Usage
27 –
28 –
29 Park enable/ Electrically adjustable
pedals
30 Special equipment option
31 Accessory/Run/Crank
32 Heated steering wheel
33 –
34 Instrument cluster
36 –
37 –
38 4WD transfer case electronic control
40 Left doors Fuses
Usage
41 Driver power seat
43 Left heated, cooled or ventilated seats (if
equipped)
44 Right heated, cooled or ventilated seats (if
equipped)
45 –
Relays Usage
49 Retained accessory power
50 Run/Crank
Page 397 of 501
Chevrolet Silverado Owner Manual (GMNA-Localizing-U.S./Canada/Mexico-
11349200) - 2018 - CRC - 2/27/18
396 Vehicle Care
When a low tire pressure condition
is detected, the TPMS illuminates
the low tire pressure warning light
located on the instrument cluster.
If the warning light comes on, stop
as soon as possible and inflate the
tires to the recommended pressure
shown on the Tire and Loading
Information label. SeeVehicle Load
Limits 0239.
A message to check the pressure in
a specific tire displays in the Driver
Information Center (DIC). The low
tire pressure warning light and the
DIC warning message come on at
each ignition cycle until the tires are
inflated to the correct inflation
pressure. If the vehicle has DIC
buttons, tire pressure levels can be
viewed. For additional information
and details about the DIC operation
and displays, see Driver Information
Center (DIC) (Base Level) 0155 or
Driver Information Center (DIC)
(Uplevel) 0156.
The low tire pressure warning light
may come on in cool weather when
the vehicle is first started, and then
turn off as the vehicle is driven. This could be an early indicator that the
air pressure is getting low and
needs to be inflated to the proper
pressure.
A Tire and Loading Information label
shows the size of the original
equipment tires and the correct
inflation pressure for the tires when
they are cold. See
Vehicle Load
Limits 0239, for an example of the
Tire and Loading Information label
and its location. Also see Tire
Pressure 0392.
The TPMS can warn about a low
tire pressure condition but it does
not replace normal tire
maintenance. See Tire Inspection
0 399, Tire Rotation 0400 andTires
0 384.
Caution
Tire sealant materials are not all
the same. A non-approved tire
sealant could damage the TPMS
sensors. TPMS sensor damage
caused by using an incorrect tire
(Continued)
Caution (Continued)
sealant is not covered by the
vehicle warranty. Always use only
the GM approved tire sealant
available through your dealer or
included in the vehicle.
TPMS Malfunction Light and
Message
The TPMS will not function properly
if one or more of the TPMS sensors
are missing or inoperable. When the
system detects a malfunction, the
low tire pressure warning light
flashes for about one minute and
then stays on for the remainder of
the ignition cycle. A DIC warning
message also displays. The
malfunction light and DIC warning
message come on at each ignition
cycle until the problem is corrected.
Some of the conditions that can
cause these to come on are:
.One of the road tires has been
replaced with the spare tire. The
spare tire does not have a
TPMS sensor. The malfunction
Page 437 of 501
Chevrolet Silverado Owner Manual (GMNA-Localizing-U.S./Canada/Mexico-
11349200) - 2018 - CRC - 2/27/18
436 Vehicle Care
Finish Damage
Quickly repair minor chips and
scratches with touch-up materials
available from your dealer to avoid
corrosion. Larger areas of finish
damage can be corrected in your
dealer's body and paint shop.
Chemical Paint Spotting
Airborne pollutants can fall upon
and attack painted vehicle surfaces
causing blotchy, ring-shaped
discolorations, and small, irregular
dark spots etched into the paint
surface. Refer to“Finish Care”
previously in this section.
Interior Care
To prevent dirt particle abrasions,
regularly clean the vehicle's interior.
Immediately remove any soils.
Newspapers or dark garments can
transfer color to the vehicle’s
interior.
Use a soft bristle brush to remove
dust from knobs and crevices on the
instrument cluster. Using a mild
soap solution, immediately remove hand lotions, sunscreen, and insect
repellent from all interior surfaces or
permanent damage may result.
Use cleaners specifically designed
for the surfaces being cleaned to
prevent permanent damage. Apply
cleaners directly to the cleaning
cloth. Do not spray cleaners on any
switches or controls. Remove
cleaners quickly.
Before using cleaners, read and
follow all safety instructions on the
label. While cleaning the interior,
open the doors and windows to get
proper ventilation.
To prevent damage, do not clean
the interior using the following
cleaners or techniques:
.
Never use a razor or any other
sharp object to remove soil from
any interior surface.
. Never use a brush with stiff
bristles.
. Never rub any surface
aggressively or with too much
pressure. .
Do not use laundry detergents or
dishwashing soaps with
degreasers. For liquid cleaners,
use approximately 20 drops per
3.8 L (1 gal) of water.
A concentrated soap solution will
create streaks and attract dirt.
Do not use solutions that contain
strong or caustic soap.
. Do not heavily saturate the
upholstery when cleaning.
. Do not use solvents or cleaners
containing solvents.
Interior Glass
To clean, use a terry cloth fabric
dampened with water. Wipe droplets
left behind with a clean dry cloth.
If necessary, use a commercial
glass cleaner after cleaning with
plain water.
Page 450 of 501
Chevrolet Silverado Owner Manual (GMNA-Localizing-U.S./Canada/Mexico-
11349200) - 2018 - CRC - 2/27/18
Service and Maintenance 449
Battery
The 12-volt battery supplies power
to start the engine and operate any
additional electrical accessories.
.To avoid break-down or failure to
start the vehicle, maintain a
battery with full cranking power.
. Trained dealer technicians have
the diagnostic equipment to test
the battery and ensure that the
connections and cables are
corrosion-free.
Belts
. Belts may need replacing if they
squeak or show signs of
cracking or splitting.
. Trained dealer technicians have
access to tools and equipment
to inspect the belts and
recommend adjustment or
replacement when necessary. Brakes
Brakes stop the vehicle and are
crucial to safe driving.
.
Signs of brake wear may include
chirping, grinding, or squealing
noises, or difficulty stopping.
. Trained dealer technicians have
access to tools and equipment
to inspect the brakes and
recommend quality parts
engineered for the vehicle.
Fluids
Proper fluid levels and approved
fluids protect the vehicle’s systems
and components. See
Recommended Fluids and
Lubricants 0451 for GM approved
fluids.
. Engine oil and windshield
washer fluid levels should be
checked at every fuel fill.
. Instrument cluster lights may
come on to indicate that fluids
may be low and need to be
filled. Hoses
Hoses transport fluids and should
be regularly inspected to ensure
that there are no cracks or leaks.
With a multi-point inspection, your
dealer can inspect the hoses and
advise if replacement is needed.
Lamps
Properly working headlamps,
taillamps, and brake lamps are
important to see and be seen on
the road.
.
Signs that the headlamps need
attention include dimming, failure
to light, cracking, or damage.
The brake lamps need to be
checked periodically to ensure
that they light when braking.
. With a multi-point inspection,
your dealer can check the lamps
and note any concerns.