Page 296 of 404
Chevrolet Cruze Owner Manual (GMNA-Localizing-U.S./Canada/Mexico-
11348462) - 2018 - crc - 5/15/17
Vehicle Care 295
FusesUsage
1 Transmission control module (vehicles
with automatic
transmission only)
2 Fuel pump
3 Engine control module
4 Power supply
Instrument Panel Fuse
Block
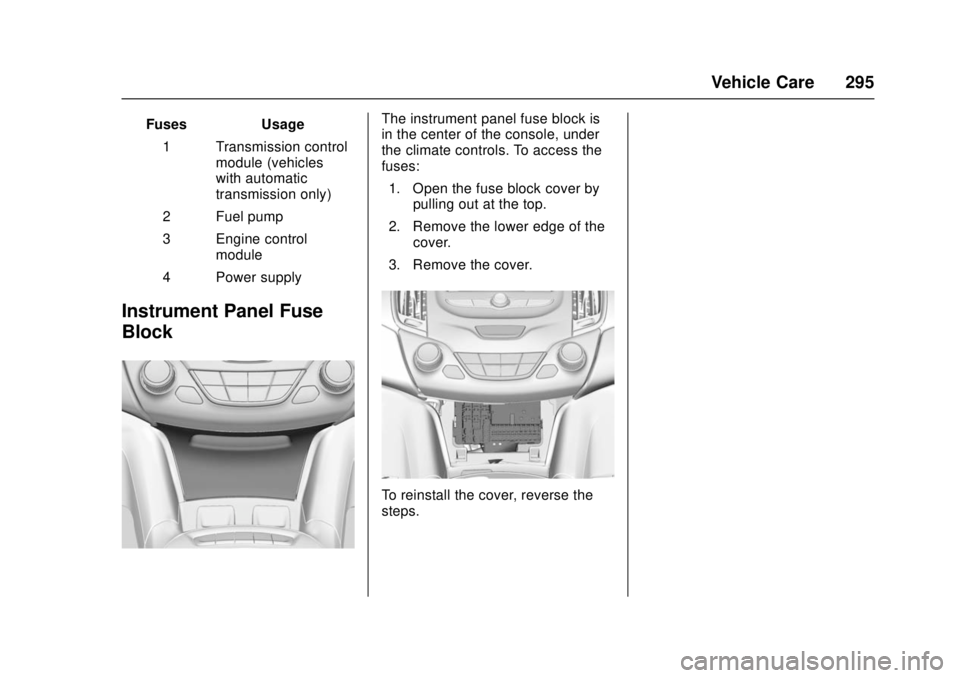
The instrument panel fuse block is
in the center of the console, under
the climate controls. To access the
fuses: 1. Open the fuse block cover by pulling out at the top.
2. Remove the lower edge of the cover.
3. Remove the cover.
To reinstall the cover, reverse the
steps.
Page 298 of 404
Chevrolet Cruze Owner Manual (GMNA-Localizing-U.S./Canada/Mexico-
11348462) - 2018 - crc - 5/15/17
Vehicle Care 297
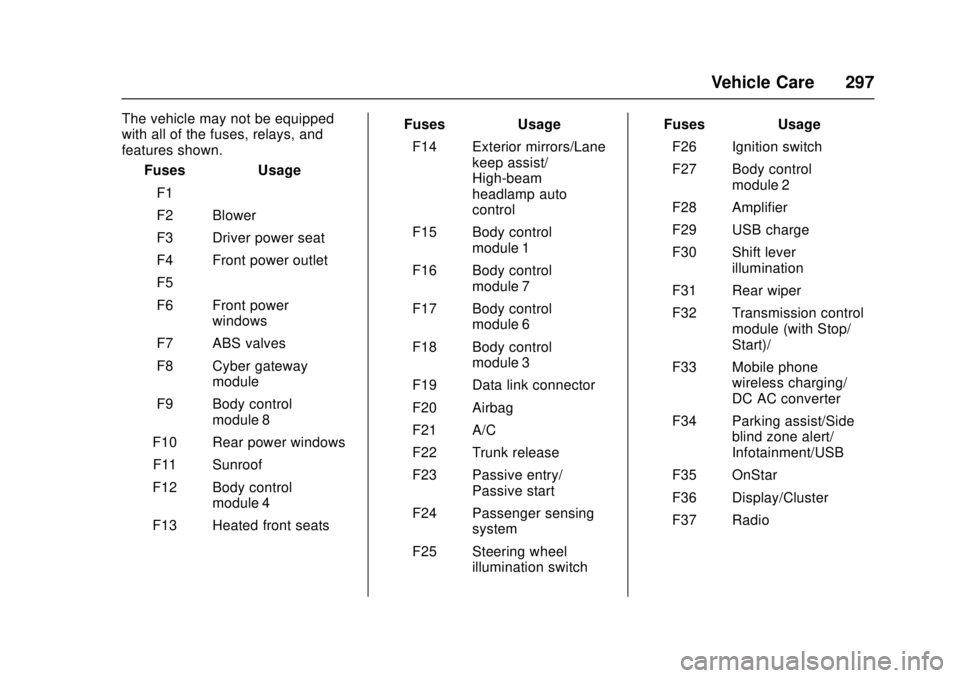
The vehicle may not be equipped
with all of the fuses, relays, and
features shown.Fuses Usage
F1 –
F2 Blower
F3 Driver power seat
F4 Front power outlet
F5 –
F6 Front power windows
F7 ABS valves
F8 Cyber gateway module
F9 Body control module 8
F10 Rear power windows
F11 Sunroof
F12 Body control module 4
F13 Heated front seats Fuses Usage
F14 Exterior mirrors/Lane keep assist/
High-beam
headlamp auto
control
F15 Body control module 1
F16 Body control module 7
F17 Body control module 6
F18 Body control module 3
F19 Data link connector
F20 Airbag
F21 A/C
F22 Trunk release
F23 Passive entry/ Passive start
F24 Passenger sensing system
F25 Steering wheel illumination switch Fuses Usage
F26 Ignition switch
F27 Body control module 2
F28 Amplifier
F29 USB charge
F30 Shift lever illumination
F31 Rear wiper
F32 Transmission control module (with Stop/
Start)/–
F33 Mobile phone wireless charging/
DC AC converter
F34 Parking assist/Side blind zone alert/
Infotainment/USB
F35 OnStar
F36 Display/Cluster
F37 Radio
Page 303 of 404
Chevrolet Cruze Owner Manual (GMNA-Localizing-U.S./Canada/Mexico-
11348462) - 2018 - crc - 5/15/17
302 Vehicle Care
Tire Designations
Tire Size
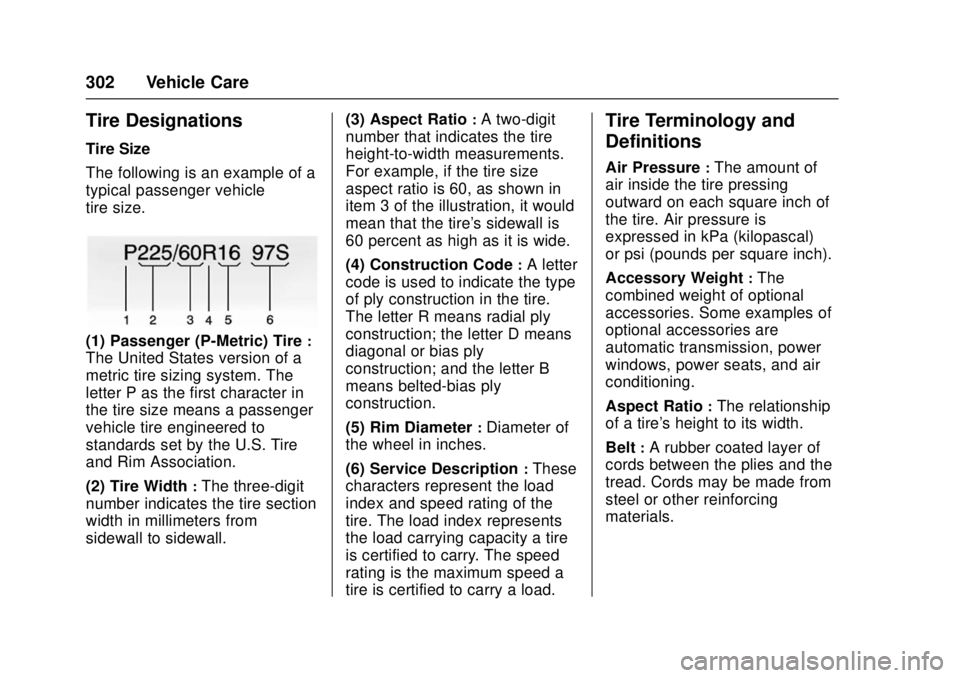
The following is an example of a
typical passenger vehicle
tire size.
(1) Passenger (P-Metric) Tire:
The United States version of a
metric tire sizing system. The
letter P as the first character in
the tire size means a passenger
vehicle tire engineered to
standards set by the U.S. Tire
and Rim Association.
(2) Tire Width
:The three-digit
number indicates the tire section
width in millimeters from
sidewall to sidewall. (3) Aspect Ratio
:A two-digit
number that indicates the tire
height-to-width measurements.
For example, if the tire size
aspect ratio is 60, as shown in
item 3 of the illustration, it would
mean that the tire's sidewall is
60 percent as high as it is wide.
(4) Construction Code
:A letter
code is used to indicate the type
of ply construction in the tire.
The letter R means radial ply
construction; the letter D means
diagonal or bias ply
construction; and the letter B
means belted-bias ply
construction.
(5) Rim Diameter
:Diameter of
the wheel in inches.
(6) Service Description
:These
characters represent the load
index and speed rating of the
tire. The load index represents
the load carrying capacity a tire
is certified to carry. The speed
rating is the maximum speed a
tire is certified to carry a load.
Tire Terminology and
Definitions
Air Pressure:The amount of
air inside the tire pressing
outward on each square inch of
the tire. Air pressure is
expressed in kPa (kilopascal)
or psi (pounds per square inch).
Accessory Weight
:The
combined weight of optional
accessories. Some examples of
optional accessories are
automatic transmission, power
windows, power seats, and air
conditioning.
Aspect Ratio
:The relationship
of a tire's height to its width.
Belt
:A rubber coated layer of
cords between the plies and the
tread. Cords may be made from
steel or other reinforcing
materials.
Page 320 of 404

Chevrolet Cruze Owner Manual (GMNA-Localizing-U.S./Canada/Mexico-
11348462) - 2018 - crc - 5/15/17
Vehicle Care 319
Warning (Continued)
be badly injured or killed if the
vehicle slips off the jack. If a jack
is provided with the vehicle, only
use it for changing a flat tire.
If a tire goes flat, avoid further tire
and wheel damage by driving slowly
to a level place, well off the road,
if possible. Turn on the hazard
warning flashers. See Hazard
Warning Flashers 0156.
{Warning
Changing a tire can be
dangerous. The vehicle can slip
off the jack and roll over or fall
causing injury or death. Find a
level place to change the tire. To
help prevent the vehicle from
moving:
1. Set the parking brake firmly. (Continued)
Warning (Continued)
2. Put an automatictransmission in P (Park) or a
manual transmission in
1 (First) or R (Reverse).
3. Turn off the engine and do not restart while the vehicle
is raised.
4. Do not allow passengers to remain in the vehicle.
5. Place wheel blocks, if equipped, on both sides of
the tire at the opposite
corner of the tire being
changed.
When the vehicle has a flat tire (2),
use the following example as a
guide to assist in the placement of
the wheel blocks (1), if equipped.
1. Wheel Block (If Equipped)
2. Flat Tire
The following information explains
how to repair or change a tire.
Tire Sealant and
Compressor Kit
{Warning
Idling a vehicle in an enclosed
area with poor ventilation is
dangerous. Engine exhaust may
enter the vehicle. Engine exhaust
contains carbon monoxide (CO)
which cannot be seen or smelled.
It can cause unconsciousness
and even death. Never run the (Continued)
Page 335 of 404

Chevrolet Cruze Owner Manual (GMNA-Localizing-U.S./Canada/Mexico-
11348462) - 2018 - crc - 5/15/17
334 Vehicle Care
2. Discharged BatteryNegative Grounding
Terminal
3. Good Battery Negative Terminal
4. Good Battery Positive Terminal
The jump start remote negative
grounding terminal (2) for the
discharged battery is on the driver
side shock tower.
The jump start positive terminal on
the discharged battery (1) is located
in the engine compartment on the
driver side of the vehicle.
The jump start positive terminal (4)
and negative terminal (3) are on the
battery of the vehicle providing the
jump start.
The positive jump start connection
for the discharged battery is under a
trim cover. Open the cover to
expose the terminal.
1. Check the other vehicle. It must have a 12-volt battery
with a negative ground system.
Caution
If the other vehicle does not have
a 12-volt system with a negative
ground, both vehicles can be
damaged. Only use a vehicle that
has a 12-volt system with a
negative ground for jump starting.
2. Position the two vehicles so that they are not touching.
3. Set the parking brake firmly and put the shift lever in
P (Park) with an automatic
transmission, or Neutral with a
manual transmission. See
Shifting Into Park (Automatic
Transmission) 0215 with an
automatic transmission,
or Parking (Manual
Transmission) 0216 with a
manual transmission.
Caution
If any accessories are left on or
plugged in during the jump
starting procedure, they could be
damaged. The repairs would not
be covered by the vehicle
warranty. Whenever possible, turn
off or unplug all accessories on
either vehicle when jump starting.
4. Turn the ignition off. Turn off all lights and accessories in both
vehicles, except the hazard
warning flashers if needed.
{Warning
An electric fan can start up even
when the engine is not running
and can injure you. Keep hands,
clothing, and tools away from any
underhood electric fan.
Page 338 of 404

Chevrolet Cruze Owner Manual (GMNA-Localizing-U.S./Canada/Mexico-
11348462) - 2018 - crc - 5/15/17
Vehicle Care 337
towing. Dinghy towing is towing the
vehicle with all four wheels on the
ground. Dolly towing is towing the
vehicle with two wheels on the
ground and two wheels up on a
device known as a dolly.
Here are some important things to
consider before recreational vehicle
towing:
.The towing capacity of the
towing vehicle. Be sure to read
the tow vehicle manufacturer's
recommendations.
. How far the vehicle will be
towed. Some vehicles have
restrictions on how far and how
long they can tow.
. The proper towing equipment.
See your dealer or trailering
professional for additional advice
and equipment
recommendations.
. Whether the vehicle is ready to
be towed. Just as preparing the
vehicle for a long trip, make sure
the vehicle is prepared to be
towed.Caution
Use of a shield mounted in front
of the vehicle grille could restrict
airflow and cause damage to the
transmission. The repairs would
not be covered by the vehicle
warranty. If using a shield, only
use one that attaches to the
towing vehicle.
Dinghy Towing (with Automatic
Transmission)
Caution
If the vehicle is towed with all four
wheels on the ground, the
drivetrain components could be
damaged. The repairs would not
be covered by the vehicle
warranty. Do not tow the vehicle
with all four wheels on the
ground.
Vehicles with an automatic
transmission should not be towed
with all four wheels on the ground.
If the vehicle must be towed, a dolly
should be used. See "Dolly Towing"
later in this section.
Page 339 of 404
Chevrolet Cruze Owner Manual (GMNA-Localizing-U.S./Canada/Mexico-
11348462) - 2018 - crc - 5/15/17
338 Vehicle Care
Dinghy Towing (with Manual
Transmission)
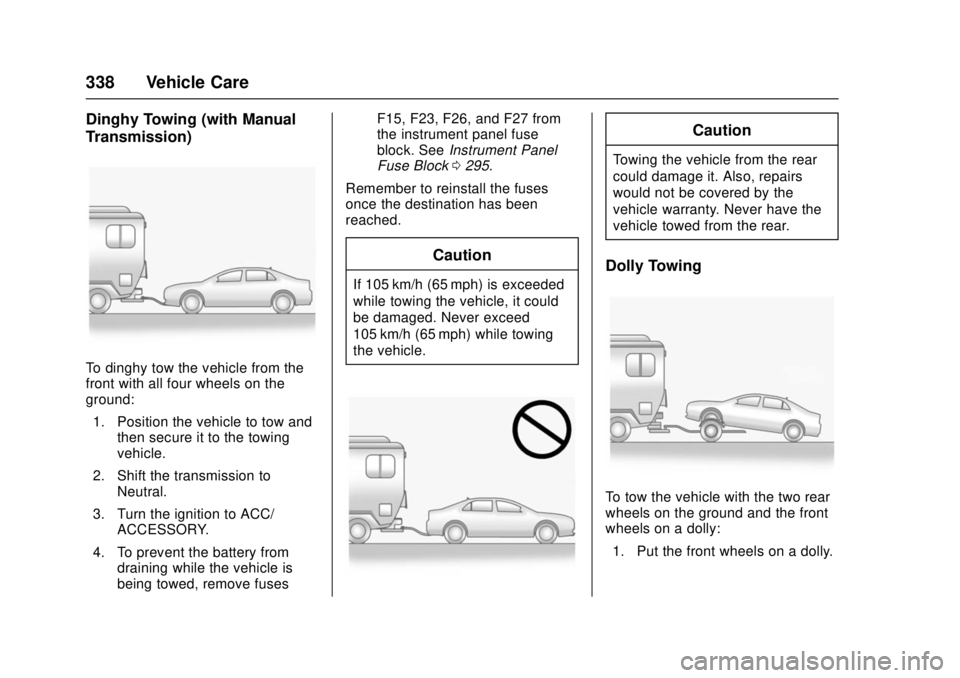
To dinghy tow the vehicle from the
front with all four wheels on the
ground:1. Position the vehicle to tow and then secure it to the towing
vehicle.
2. Shift the transmission to Neutral.
3. Turn the ignition to ACC/ ACCESSORY.
4. To prevent the battery from draining while the vehicle is
being towed, remove fuses F15, F23, F26, and F27 from
the instrument panel fuse
block. See
Instrument Panel
Fuse Block 0295.
Remember to reinstall the fuses
once the destination has been
reached.
Caution
If 105 km/h (65 mph) is exceeded
while towing the vehicle, it could
be damaged. Never exceed
105 km/h (65 mph) while towing
the vehicle.
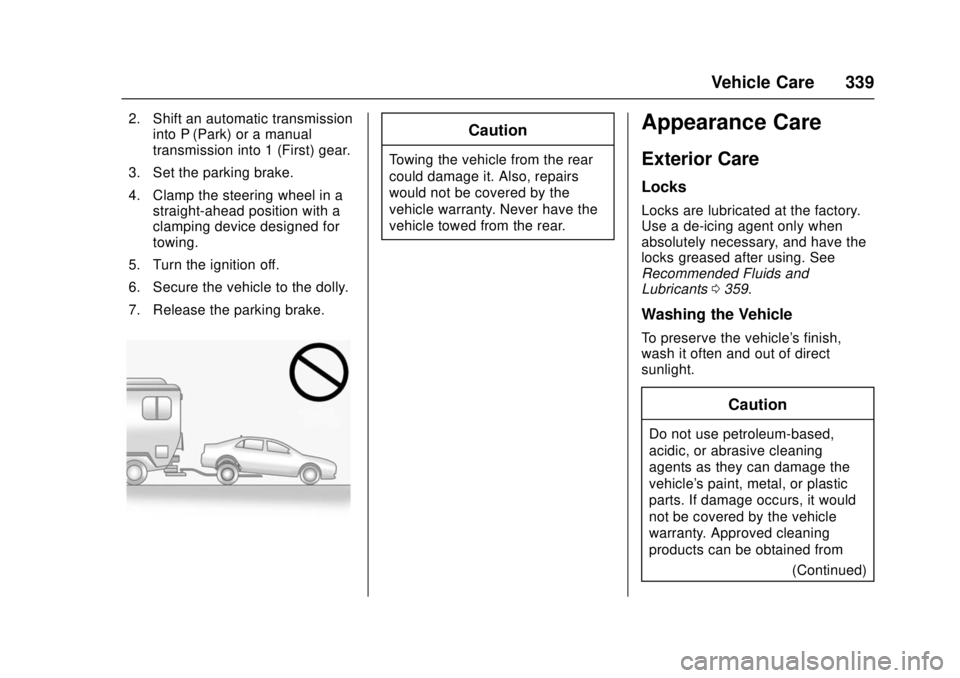
Caution
Towing the vehicle from the rear
could damage it. Also, repairs
would not be covered by the
vehicle warranty. Never have the
vehicle towed from the rear.
Dolly Towing
To tow the vehicle with the two rear
wheels on the ground and the front
wheels on a dolly: 1. Put the front wheels on a dolly.
Page 340 of 404
Chevrolet Cruze Owner Manual (GMNA-Localizing-U.S./Canada/Mexico-
11348462) - 2018 - crc - 5/15/17
Vehicle Care 339
2. Shift an automatic transmissioninto P (Park) or a manual
transmission into 1 (First) gear.
3. Set the parking brake.
4. Clamp the steering wheel in a straight-ahead position with a
clamping device designed for
towing.
5. Turn the ignition off.
6. Secure the vehicle to the dolly.
7. Release the parking brake.Caution
Towing the vehicle from the rear
could damage it. Also, repairs
would not be covered by the
vehicle warranty. Never have the
vehicle towed from the rear.
Appearance Care
Exterior Care
Locks
Locks are lubricated at the factory.
Use a de-icing agent only when
absolutely necessary, and have the
locks greased after using. See
Recommended Fluids and
Lubricants 0359.
Washing the Vehicle
To preserve the vehicle's finish,
wash it often and out of direct
sunlight.
Caution
Do not use petroleum-based,
acidic, or abrasive cleaning
agents as they can damage the
vehicle's paint, metal, or plastic
parts. If damage occurs, it would
not be covered by the vehicle
warranty. Approved cleaning
products can be obtained from
(Continued)