2018 CHEVROLET CRUZE transmission fluid
[x] Cancel search: transmission fluidPage 228 of 404
Chevrolet Cruze Owner Manual (GMNA-Localizing-U.S./Canada/Mexico-
11348462) - 2018 - crc - 5/15/17
Driving and Operating 227
Manual Transmission
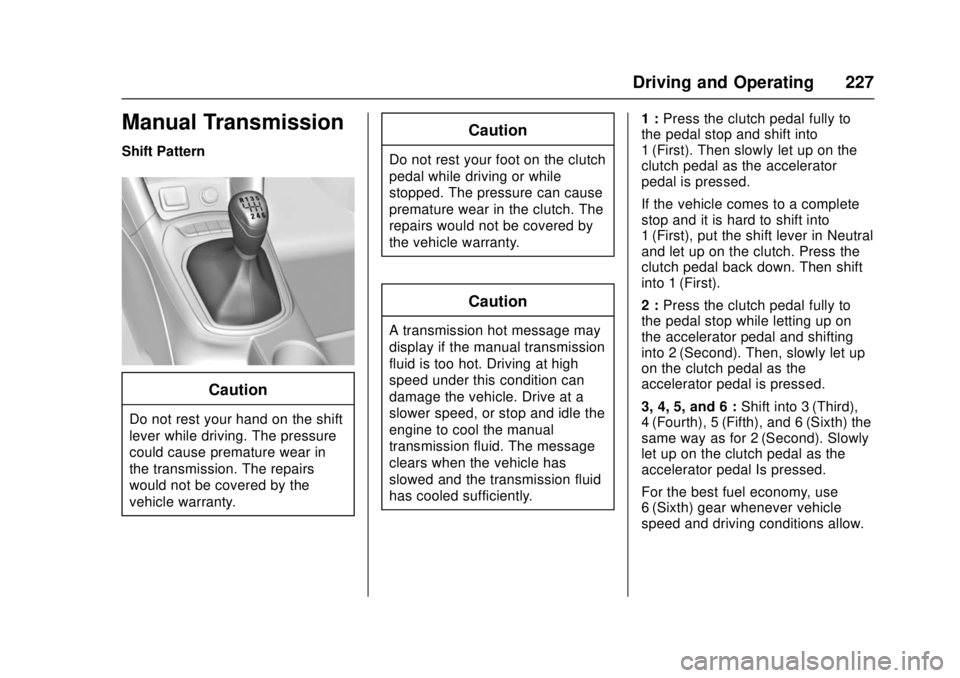
Shift Pattern
Caution
Do not rest your hand on the shift
lever while driving. The pressure
could cause premature wear in
the transmission. The repairs
would not be covered by the
vehicle warranty.
Caution
Do not rest your foot on the clutch
pedal while driving or while
stopped. The pressure can cause
premature wear in the clutch. The
repairs would not be covered by
the vehicle warranty.
Caution
A transmission hot message may
display if the manual transmission
fluid is too hot. Driving at high
speed under this condition can
damage the vehicle. Drive at a
slower speed, or stop and idle the
engine to cool the manual
transmission fluid. The message
clears when the vehicle has
slowed and the transmission fluid
has cooled sufficiently.1 :
Press the clutch pedal fully to
the pedal stop and shift into
1 (First). Then slowly let up on the
clutch pedal as the accelerator
pedal is pressed.
If the vehicle comes to a complete
stop and it is hard to shift into
1 (First), put the shift lever in Neutral
and let up on the clutch. Press the
clutch pedal back down. Then shift
into 1 (First).
2 : Press the clutch pedal fully to
the pedal stop while letting up on
the accelerator pedal and shifting
into 2 (Second). Then, slowly let up
on the clutch pedal as the
accelerator pedal is pressed.
3, 4, 5, and 6 : Shift into 3 (Third),
4 (Fourth), 5 (Fifth), and 6 (Sixth) the
same way as for 2 (Second). Slowly
let up on the clutch pedal as the
accelerator pedal Is pressed.
For the best fuel economy, use
6 (Sixth) gear whenever vehicle
speed and driving conditions allow.
Page 247 of 404
Chevrolet Cruze Owner Manual (GMNA-Localizing-U.S./Canada/Mexico-
11348462) - 2018 - crc - 5/15/17
246 Driving and Operating
the fuel tank at every engine oil
change, can help. GM Fuel System
Treatment Cleaner is the only
gasoline additive recommended by
General Motors. It is available at
your dealer.
Fuel for Diesel Engines
The selection of a high quality fuel
is important for maintaining optimum
performance. Do not use diesel fuel
with more than 15 ppm sulfur
content. Do not use a diesel blend
containing more than 20% biodiesel
by volume. Both diesel and
biodiesel blends must meet all the
requirements as defined in the most
current versions of the local fuel
standards. See the recommended
fuels underWhat Fuel to Use in the
U.S. (Diesel) 0246 andWhat Fuel
to Use in Canada (Diesel) 0248.
Caution
Engine damage may occur if
recommended fuels are not used,
which may void the vehicle
warranty. Some improper
fuels are:
. Diesel fuel with the addition
of gasoline.
. Diesel fuel mixed with
engine oil or automatic
transmission fluid.
. Triglyceride fuels, such as
raw vegetable oil or animal
fat, in any form, including
with blends of diesel or
biodiesel.
. Marine diesel fuel and
fuel oils.
. Diesel-water emulsions,
such as Aquazole.
. Aftermarket diesel fuel
additives, which contain
alcohols, organo-metallic
additives, or water
emulsifiers.
(Continued)
Caution (Continued)
.Diesel fuel with sulfur
greater than 15 ppm.
. Diesel-biodiesel blends not
within the required
specification.
Some conditions, such as dirty fuel,
may decrease fuel filter life and a
CHANGE FUEL FILTER message
may come on in the Driver
Information Center (DIC).
What Fuel to Use in the
U.S. (Diesel)
Use of diesel fuel with ultra low
sulfur content (15 ppm, maximum) is
required. Look for service station
fuel dispensers with this label in
green:
Page 259 of 404
Chevrolet Cruze Owner Manual (GMNA-Localizing-U.S./Canada/Mexico-
11348462) - 2018 - crc - 5/15/17
258 Vehicle Care
Vehicle Care
General Information
General Information . . . . . . . . . . 259
California Proposition65 Warning . . . . . . . . . . . . . . . . . 259
California Perchlorate Materials Requirements . . . . . 260
Accessories and Modifications . . . . . . . . . . . . . . . . 260
Vehicle Checks
Doing Your OwnService Work . . . . . . . . . . . . . . . 260
Hood . . . . . . . . . . . . . . . . . . . . . . . . . 261
Engine Compartment Overview . . . . . . . . . . . . . . . . . . . . 262
Engine Oil . . . . . . . . . . . . . . . . . . . . 265
Engine Oil Life System . . . . . . . 268
Automatic Transmission Fluid . . . . . . . . . . . . . . . . . . . . . . . . 269
Manual Transmission Fluid . . . 270
Hydraulic Clutch . . . . . . . . . . . . . . 270
Engine Air Cleaner/Filter . . . . . . 270
Cooling System . . . . . . . . . . . . . . 272
Engine Overheating . . . . . . . . . . 275
Washer Fluid . . . . . . . . . . . . . . . . . 276
Brakes . . . . . . . . . . . . . . . . . . . . . . . 277
Brake Fluid . . . . . . . . . . . . . . . . . . . 278
Battery - North America . . . . . . 279 Fuel Filter . . . . . . . . . . . . . . . . . . . . 280
Starter Switch Check . . . . . . . . . 280
Automatic Transmission Shift
Lock Control Function
Check . . . . . . . . . . . . . . . . . . . . . . . 281
Ignition Transmission Lock Check . . . . . . . . . . . . . . . . . . . . . . . 281
Park Brake and P (Park) Mechanism Check . . . . . . . . . . 281
Wiper Blade Replacement . . . . 282
Gas Strut(s) . . . . . . . . . . . . . . . . . . 283
Headlamp Aiming
Headlamp Aiming . . . . . . . . . . . . 284
Bulb Replacement
Bulb Replacement . . . . . . . . . . . . 284
Halogen Bulbs . . . . . . . . . . . . . . . . 284
High Intensity Discharge (HID) Lighting . . . . . . . . . . . . . . . . . . . . . 285
Headlamps and Front Turn Signal . . . . . . . . . . . . . . . . . . . . . . . 285
Taillamps and Back-Up Lamps . . . . . . . . . . . . . . . . . . . . . . 286
License Plate Lamp (Liftgate Models) . . . . . . . . . . . . . . . . . . . . . 289
Electrical System
Electrical System Overload . . . 290
Fuses and Circuit Breakers . . . 290
Engine Compartment FuseBlock . . . . . . . . . . . . . . . . . . . . . . . . 291 Instrument Panel Fuse
Block . . . . . . . . . . . . . . . . . . . . . . . . 295
Wheels and Tires
Tires . . . . . . . . . . . . . . . . . . . . . . . . . . 298
All-Season Tires . . . . . . . . . . . . . . 298
Winter Tires . . . . . . . . . . . . . . . . . . 299
Low-Profile Tires . . . . . . . . . . . . . 299
Tire Sidewall Labeling . . . . . . . . 300
Tire Designations . . . . . . . . . . . . . 302
Tire Terminology andDefinitions . . . . . . . . . . . . . . . . . . 302
Tire Pressure . . . . . . . . . . . . . . . . . 305
Tire Pressure for High-Speed Operation . . . . . . . . . . . . . . . . . . . 306
Tire Pressure Monitor System . . . . . . . . . . . . . . . . . . . . . . 307
Tire Pressure Monitor Operation . . . . . . . . . . . . . . . . . . . 308
Tire Inspection . . . . . . . . . . . . . . . . 311
Tire Rotation . . . . . . . . . . . . . . . . . . 311
When It Is Time for New Tires . . . . . . . . . . . . . . . . . . . . . . . . 312
Buying New Tires . . . . . . . . . . . . . 313
Different Size Tires and Wheels . . . . . . . . . . . . . . . . . . . . . . 314
Uniform Tire Quality Grading . . . . . . . . . . . . . . . . . . . . . 315
Wheel Alignment and Tire Balance . . . . . . . . . . . . . . . . . . . . . 316
Wheel Replacement . . . . . . . . . . 316
Page 270 of 404

Chevrolet Cruze Owner Manual (GMNA-Localizing-U.S./Canada/Mexico-
11348462) - 2018 - crc - 5/15/17
Vehicle Care 269
change is not necessary for up to a
year. The engine oil and filter must
be changed at least once a year
and, at this time, the system must
be reset. Your dealer has trained
service people who will perform this
work and reset the system. It is also
important to check the oil regularly
over the course of an oil drain
interval and keep it at the proper
level.
If the system is ever reset
accidentally, the oil must be
changed at 5 000 km (3,000 mi)
since the last oil change.
Remember to reset the oil life
system whenever the oil is changed.
How to Reset the Engine Oil
Life System
Reset the system whenever the
engine oil is changed so that the
system can calculate the next
engine oil change. To reset the
system:Resetting the Oil Life System
(Base Level Cluster)
1. Display the REMAINING OIL LIFE on the DIC.
See Driver Information Center
(DIC) (Base) 0138 orDriver
Information Center (DIC)
(Uplevel) 0141.
2. Press and hold SET/CLR on the turn signal lever while the
Oil Life display is active. The
oil life will change to 100%.
Resetting the Oil Life System
(Uplevel Cluster) 1. Display the REMAINING OIL LIFE on the DIC.
See Driver Information Center
(DIC) (Base) 0138 orDriver
Information Center (DIC)
(Uplevel) 0141.
2. Press and hold
Von the DIC
while the Oil Life display is
active. The oil life will change
to 100%. The oil life system can also be reset
as follows:
1. Turn the ignition on with the engine off.
See Ignition Positions (Key
Access) 0206 orIgnition
Positions (Keyless Access)
0 208.
2. Fully press and release the accelerator pedal three times
within five seconds.
The system is reset when the
CHANGE ENGINE OIL SOON
message goes off.
If the CHANGE ENGINE OIL SOON
message comes back on when the
vehicle is started, the engine oil life
system has not been reset. Repeat
the procedure.Automatic Transmission
Fluid
How to Check Automatic
Transmission Fluid
It is not necessary to check the
transmission fluid level.
A transmission fluid leak is the only
Page 271 of 404
Chevrolet Cruze Owner Manual (GMNA-Localizing-U.S./Canada/Mexico-
11348462) - 2018 - crc - 5/15/17
270 Vehicle Care
reason for fluid loss. If a leak
occurs, take the vehicle to your
dealer and have it repaired as soon
as possible.
The vehicle is not equipped with a
transmission fluid level dipstick.
There is a special procedure for
checking and changing the
transmission fluid. Because this
procedure is difficult, this should be
done at the dealer. Contact the
dealer for additional information.
Change the fluid at the intervals
listed inMaintenance Schedule
0 350, and be sure to use the fluid
listed in Recommended Fluids and
Lubricants 0359.
Manual Transmission
Fluid
How to Check Manual
Transmission Fluid
It is not necessary to check the
manual transmission fluid level.
A transmission fluid leak is the only
reason for fluid loss. If a leak
occurs, take the vehicle to your
dealer and have it repaired as soon as possible. See
Recommended
Fluids and Lubricants 0359 for the
proper fluid to use.
Hydraulic Clutch
For vehicles with a manual
transmission, it is not necessary to
regularly check brake/clutch fluid
unless there is a leak suspected.
Adding fluid will not correct a leak.
A fluid loss in this system could
indicate a problem. Have the
system inspected and repaired.
When to Check and What
to Use
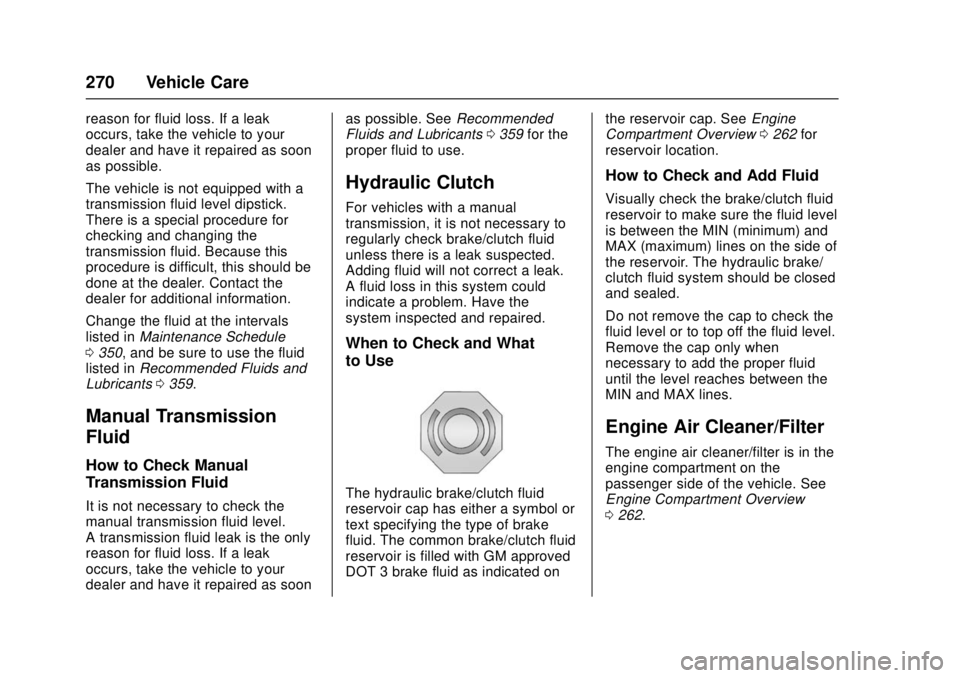
The hydraulic brake/clutch fluid
reservoir cap has either a symbol or
text specifying the type of brake
fluid. The common brake/clutch fluid
reservoir is filled with GM approved
DOT 3 brake fluid as indicated on the reservoir cap. See
Engine
Compartment Overview 0262 for
reservoir location.
How to Check and Add Fluid
Visually check the brake/clutch fluid
reservoir to make sure the fluid level
is between the MIN (minimum) and
MAX (maximum) lines on the side of
the reservoir. The hydraulic brake/
clutch fluid system should be closed
and sealed.
Do not remove the cap to check the
fluid level or to top off the fluid level.
Remove the cap only when
necessary to add the proper fluid
until the level reaches between the
MIN and MAX lines.
Engine Air Cleaner/Filter
The engine air cleaner/filter is in the
engine compartment on the
passenger side of the vehicle. See
Engine Compartment Overview
0 262.
Page 279 of 404
Chevrolet Cruze Owner Manual (GMNA-Localizing-U.S./Canada/Mexico-
11348462) - 2018 - crc - 5/15/17
278 Vehicle Care
proper sequence to torque
specifications inCapacities and
Specifications 0364.
If the vehicle has rear drum brakes,
they do not have wear indicators,
but if a rear brake rubbing noise is
heard, have the rear brake linings
inspected immediately. Rear brake
drums should be removed and
inspected each time the tires are
removed for rotation or changing.
Drum brakes have an inspection
hole to inspect lining wear during
scheduled maintenance. When the
front brake pads are replaced, have
the rear brakes inspected, too.
Brake linings should always be
replaced as complete axle sets.
Brake Pedal Travel
See your dealer if the brake pedal
does not return to normal height,
or if there is a rapid increase in
pedal travel. This could be a sign
that brake service may be required.
Replacing Brake System Parts
Always replace brake system parts
with new, approved replacement
parts. If this is not done, the brakes may not work properly. The braking
performance expected can change
in many other ways if the wrong
replacement brake parts are
installed or parts are improperly
installed.
Brake Fluid
The brake/clutch master cylinder
reservoir is filled with GM approved
DOT 3 brake fluid as indicated on
the reservoir cap. See
Engine
Compartment Overview 0262 for
the location of the reservoir.
Checking Brake Fluid
Place the vehicle in P (Park) or
Neutral with the parking brake
applied if equipped with a manual
transmission. On a level surface,
the brake fluid level should be between the minimum and
maximum marks on the brake fluid
reservoir.
There are only two reasons why the
brake fluid level in the reservoir may
go down:
.
Normal brake lining wear. When
new linings are installed, the
fluid level goes back up.
. A fluid leak in the brake/clutch
hydraulic system. Have the
brake/clutch hydraulic system
fixed. With a leak, the brakes will
not work well.
Always clean the brake fluid
reservoir cap and the area around
the cap before removing it.
Do not top off the brake/clutch fluid.
Adding fluid does not correct a leak.
If fluid is added when the linings are
worn, there will be too much fluid
when new brake linings are
installed. Add or remove fluid, as
necessary, only when work is done
on the brake/clutch hydraulic
system.
Page 340 of 404
Chevrolet Cruze Owner Manual (GMNA-Localizing-U.S./Canada/Mexico-
11348462) - 2018 - crc - 5/15/17
Vehicle Care 339
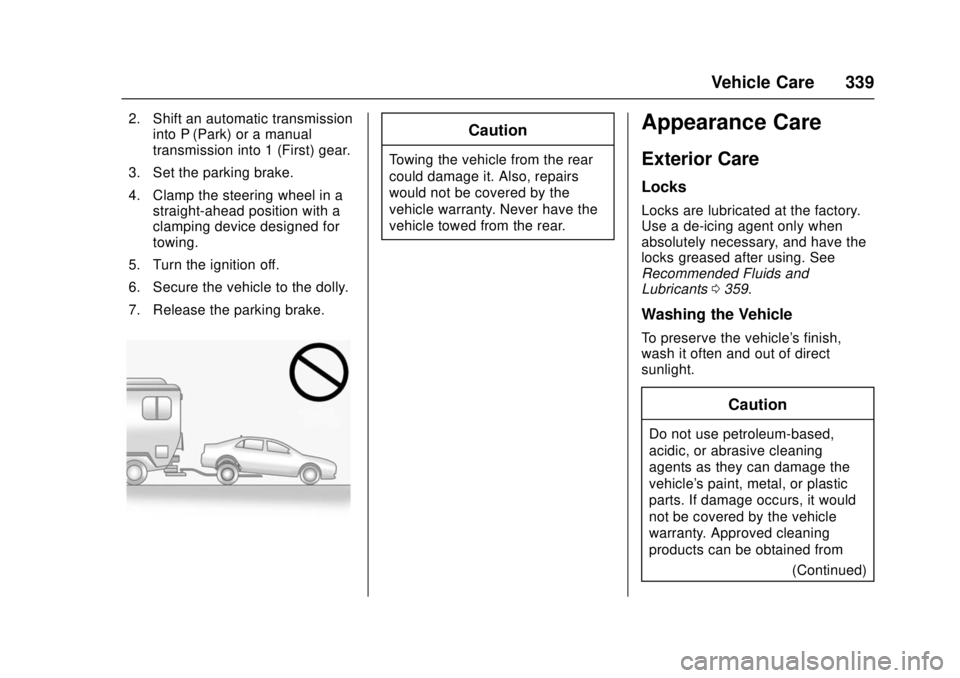
2. Shift an automatic transmissioninto P (Park) or a manual
transmission into 1 (First) gear.
3. Set the parking brake.
4. Clamp the steering wheel in a straight-ahead position with a
clamping device designed for
towing.
5. Turn the ignition off.
6. Secure the vehicle to the dolly.
7. Release the parking brake.Caution
Towing the vehicle from the rear
could damage it. Also, repairs
would not be covered by the
vehicle warranty. Never have the
vehicle towed from the rear.
Appearance Care
Exterior Care
Locks
Locks are lubricated at the factory.
Use a de-icing agent only when
absolutely necessary, and have the
locks greased after using. See
Recommended Fluids and
Lubricants 0359.
Washing the Vehicle
To preserve the vehicle's finish,
wash it often and out of direct
sunlight.
Caution
Do not use petroleum-based,
acidic, or abrasive cleaning
agents as they can damage the
vehicle's paint, metal, or plastic
parts. If damage occurs, it would
not be covered by the vehicle
warranty. Approved cleaning
products can be obtained from
(Continued)
Page 352 of 404
Chevrolet Cruze Owner Manual (GMNA-Localizing-U.S./Canada/Mexico-
11348462) - 2018 - crc - 5/15/17
Service and Maintenance 351
Engine Oil Change
When the CHANGE ENGINE OIL
SOON DIC message displays, have
the engine oil and filter changed
within the next 1 000 km/600 mi.
If driven under the best conditions,
the engine oil life system may not
indicate the need for vehicle service
for up to a year. The engine oil and
filter must be changed at least once
a year and the oil life system must
be reset. Your trained dealer
technician can perform this work.
If the engine oil life system is reset
accidentally, service the vehicle
within 5 000 km/3,000 mi since the
last service. Reset the oil life
system when the oil is changed.
SeeEngine Oil Life System 0268.
Tire Rotation and Required
Services Every 12 000 km/
7,500 mi
Rotate the tires, if recommended for
the vehicle, and perform the
following services. See Tire
Rotation 0311. .
Check engine oil level and oil
life percentage. If needed,
change engine oil and filter, and
reset oil life system.
See Engine Oil 0265 and
Engine Oil Life System 0268.
. Check engine coolant level. See
Cooling System 0272.
. Check windshield washer fluid
level. See Washer Fluid 0276.
. Visually inspect windshield wiper
blades for wear, cracking,
or contamination. See Exterior
Care 0339. Replace worn or
damaged wiper blades. See
Wiper Blade Replacement
0 282.
. Check tire inflation pressures.
See Tire Pressure 0305.
. Inspect tire wear. See Tire
Inspection 0311.
. Visually check for fluid leaks.
. Inspect engine air cleaner filter.
See Engine Air Cleaner/Filter
0 270.
. Inspect brake system. See
Exterior Care 0339. .
Visually inspect steering,
suspension, and chassis
components for damaged, loose,
or missing parts or signs of
wear. See Exterior Care 0339.
. Check restraint system
components. See Safety System
Check 074.
. Visually inspect fuel system for
damage or leaks.
. Visually inspect exhaust system
and nearby heat shields for
loose or damaged parts.
. Lubricate body components. See
Exterior Care 0339.
. Check starter switch. See Starter
Switch Check 0280.
. Check automatic transmission
shift lock control function. See
Automatic Transmission Shift
Lock Control Function Check
0281.
. Check ignition transmission lock.
See Ignition Transmission Lock
Check 0281.