2018 CHEVROLET CRUZE clock
[x] Cancel search: clockPage 254 of 404
Chevrolet Cruze Owner Manual (GMNA-Localizing-U.S./Canada/Mexico-
11348462) - 2018 - crc - 5/15/17
Driving and Operating 253
5. Retighten the drain plug byturning it clockwise.
6. Properly dispose of the water contaminated fuel.
7. Start the engine and let it run for a few minutes. During the
draining process, air may have
entered the fuel system. If the
engine stalls, the fuel system
may need to be primed. See
“Fuel Priming” following.
Fuel Priming
For the fuel system to work properly,
air cannot be in the fuel lines. If air
gets in, the engine may not start
and the fuel lines will need to be
primed before operating the vehicle.
If air is present, the following may
have happened:
. The vehicle ran out of fuel.
. The fuel filter was removed.
. The fuel lines were removed or
disconnected.
. The fuel filter water drain valve
was opened while the engine
was running. To prime the fuel system:
1. With the engine off, press and hold ENGINE START/STOP
without applying the brake for
five seconds to place the
vehicle in Service Mode. Wait
for 30 seconds to allow fuel to
fully cycle. Press ENGINE
START/STOP again to turn it
off. Do this step three times or
more while the engine is off.
2. Press ENGINE START/STOP with the brake applied for a
maximum of 40 seconds at a
time, with five seconds
between ignition attempts, until
the engine starts. If the engine
tries to run, but does not run
smoothly, increase the RPMs
slightly by using the accelerator
pedal. This will help force air
through the system.
3. Repeat Step 2 if the engine stalls and will not restart.
4. After a few attempts, if the engine still does not start, see
your dealer.Running Out of Fuel
(Diesel)
{Warning
Diesel fuel is flammable. It could
start a fire if something ignites it,
and people could be burned. Do
not let it get on hot engine parts,
and keep matches or other
ignition sources away.
If the engine has stalled due to
running out of fuel, add at least
7.6 L (2 gal) of fuel if parked on a
level surface, or up to 18.9 L (5 gal)
of fuel if parked on a slope, and
perform the procedure under “Fuel
Priming” previously in this section.
Page 255 of 404
Chevrolet Cruze Owner Manual (GMNA-Localizing-U.S./Canada/Mexico-
11348462) - 2018 - crc - 5/15/17
254 Driving and Operating
Fuel Filter Replacement
(Diesel)
{Warning
Diesel fuel is flammable. It could
start a fire if something ignites it,
and people could be burned. Do
not let it get on hot engine parts,
and keep matches or other
ignition sources away.
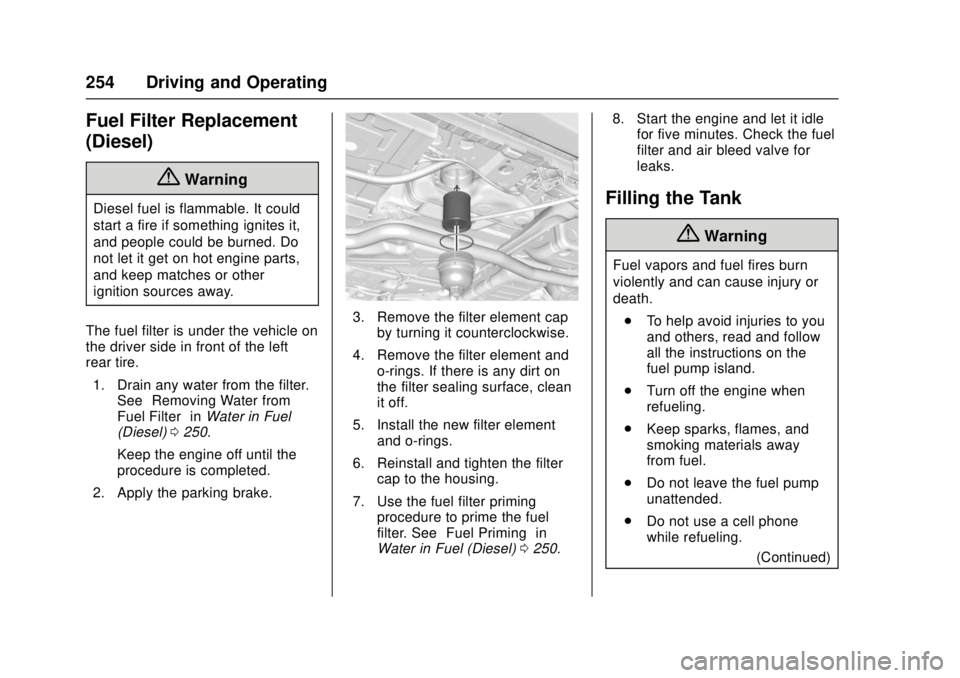
The fuel filter is under the vehicle on
the driver side in front of the left
rear tire. 1. Drain any water from the filter. See “Removing Water from
Fuel Filter” inWater in Fuel
(Diesel) 0250.
Keep the engine off until the
procedure is completed.
2. Apply the parking brake.
3. Remove the filter element cap by turning it counterclockwise.
4. Remove the filter element and o-rings. If there is any dirt on
the filter sealing surface, clean
it off.
5. Install the new filter element and o-rings.
6. Reinstall and tighten the filter cap to the housing.
7. Use the fuel filter priming procedure to prime the fuel
filter. See “Fuel Priming” in
Water in Fuel (Diesel) 0250. 8. Start the engine and let it idle
for five minutes. Check the fuel
filter and air bleed valve for
leaks.
Filling the Tank
{Warning
Fuel vapors and fuel fires burn
violently and can cause injury or
death.
. To help avoid injuries to you
and others, read and follow
all the instructions on the
fuel pump island.
. Turn off the engine when
refueling.
. Keep sparks, flames, and
smoking materials away
from fuel.
. Do not leave the fuel pump
unattended.
. Do not use a cell phone
while refueling.
(Continued)
Page 256 of 404
Chevrolet Cruze Owner Manual (GMNA-Localizing-U.S./Canada/Mexico-
11348462) - 2018 - crc - 5/15/17
Driving and Operating 255
Warning (Continued)
.Do not re-enter the vehicle
while pumping fuel.
. Keep children away from
the fuel pump and never let
children pump fuel.
. Fuel can spray out if the fuel
cap is opened too quickly.
This spray can happen if the
tank is nearly full, and is
more likely in hot weather.
Open the fuel cap slowly
and wait for any hiss noise
to stop, then unscrew the
cap all the way.
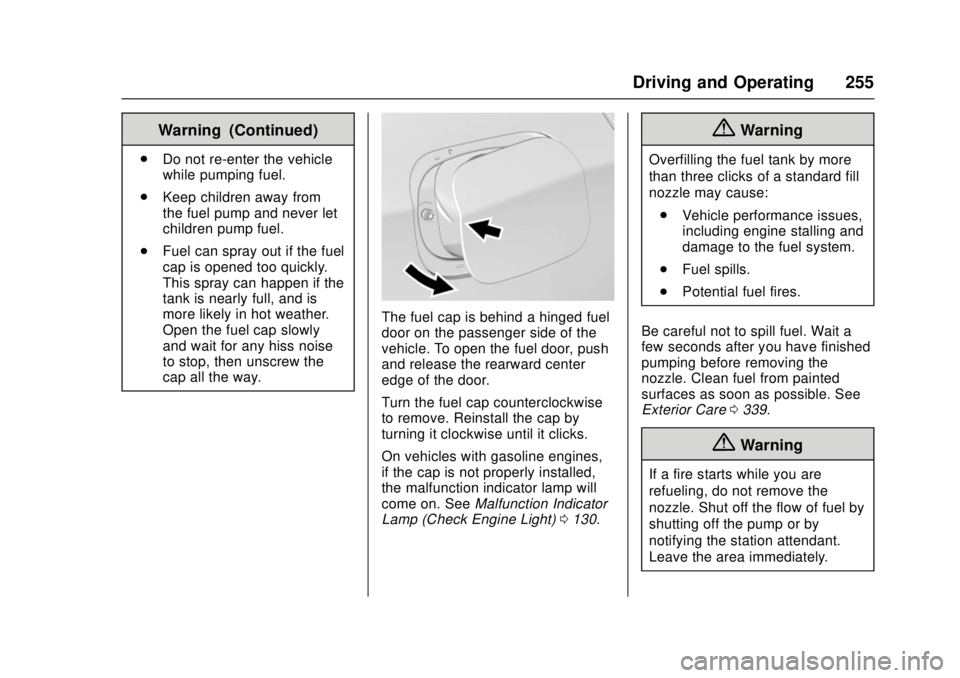
The fuel cap is behind a hinged fuel
door on the passenger side of the
vehicle. To open the fuel door, push
and release the rearward center
edge of the door.
Turn the fuel cap counterclockwise
to remove. Reinstall the cap by
turning it clockwise until it clicks.
On vehicles with gasoline engines,
if the cap is not properly installed,
the malfunction indicator lamp will
come on. See Malfunction Indicator
Lamp (Check Engine Light) 0130.
{Warning
Overfilling the fuel tank by more
than three clicks of a standard fill
nozzle may cause:
. Vehicle performance issues,
including engine stalling and
damage to the fuel system.
. Fuel spills.
. Potential fuel fires.
Be careful not to spill fuel. Wait a
few seconds after you have finished
pumping before removing the
nozzle. Clean fuel from painted
surfaces as soon as possible. See
Exterior Care 0339.
{Warning
If a fire starts while you are
refueling, do not remove the
nozzle. Shut off the flow of fuel by
shutting off the pump or by
notifying the station attendant.
Leave the area immediately.
Page 275 of 404
Chevrolet Cruze Owner Manual (GMNA-Localizing-U.S./Canada/Mexico-
11348462) - 2018 - crc - 5/15/17
274 Vehicle Care
The coolant surge tank is located in
the engine compartment on the
driver side of the vehicle. See
Engine Compartment Overview
0262.
How to Add Coolant to the
Coolant Surge Tank
{Warning
Steam and scalding liquids from a
hot cooling system are under
pressure. Turning the pressure
cap, even a little, can cause them
to come out at high speed and
you could be burned. Never turn
the cap when the cooling system,
including the pressure cap, is hot.
Wait for the cooling system and
pressure cap to cool.
{Warning
Plain water, or other liquids such
as alcohol, can boil before the
proper coolant mixture will. With
(Continued)
Warning (Continued)
plain water or the wrong mixture,
the engine could get too hot but
there would not be an overheat
warning. The engine could catch
fire and you or others could be
burned.
{Warning
Spilling coolant on hot engine
parts can burn you. Coolant
contains ethylene glycol and it will
burn if the engine parts are hot
enough.
Caution
Failure to follow the specific
coolant fill procedure could cause
the engine to overheat and could
cause system damage. If coolant
is not visible in the surge tank,
contact your dealer. If no problem is found, check to see
if coolant is visible in the coolant
surge tank. If coolant is visible but
the coolant level is not at or above
the indicated mark, add a 50/
50 mixture of clean, drinkable water
and DEX-COOL coolant. Be sure
the cooling system, including the
coolant surge tank pressure cap, is
cool before you do it.
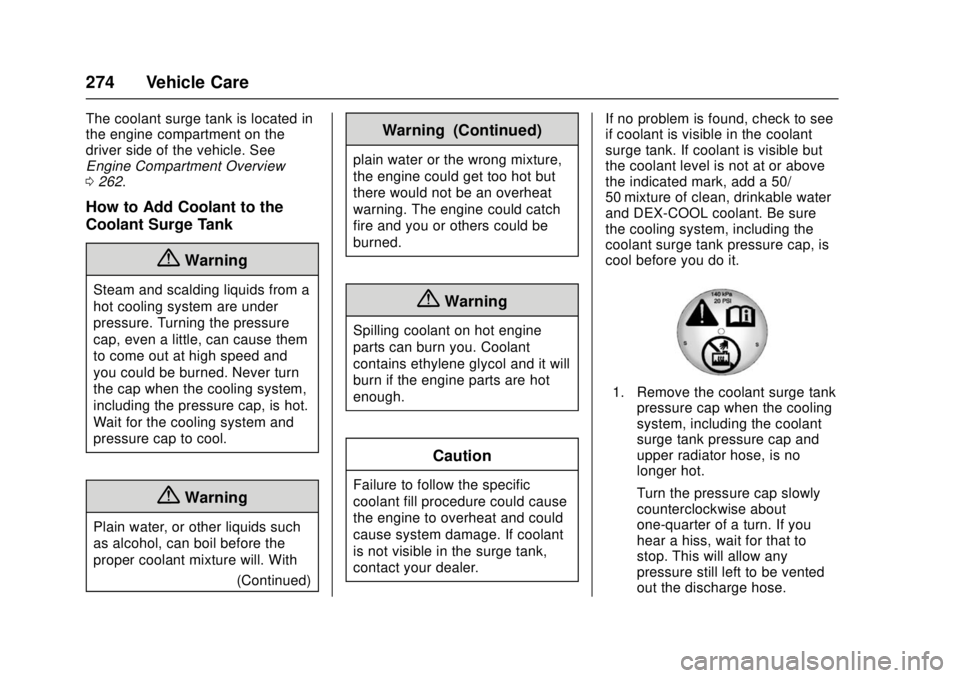
1. Remove the coolant surge tank
pressure cap when the cooling
system, including the coolant
surge tank pressure cap and
upper radiator hose, is no
longer hot.
Turn the pressure cap slowly
counterclockwise about
one-quarter of a turn. If you
hear a hiss, wait for that to
stop. This will allow any
pressure still left to be vented
out the discharge hose.
Page 287 of 404
Chevrolet Cruze Owner Manual (GMNA-Localizing-U.S./Canada/Mexico-
11348462) - 2018 - crc - 5/15/17
286 Vehicle Care
3. For the passenger side,disengage the air cleaner, and
push it aside to allow easier
access to the bulb cover.
4. Remove the bulb cover by turning counterclockwise.
5. Remove the bulb socket from the headlamp assembly by
turning counterclockwise.
6. Remove the bulb socket from the plug connector.
7. Attach the new bulb socket to the plug connector.
8. Install the bulb socket from the headlamp assembly by turning
clockwise.
9. Install the bulb cover by turning clockwise.
10. For the driver side, reinstall the windshield washer bottle filler
neck by firmly pushing it
straight into the bottle and
reattaching it to the tie bar.
11. For the passenger side, reattach the air cleaner.Turn Signal Lamp
1. Open the hood. See Hood
0 261.
2. For the driver side bulb, remove the windshield washer
bottle filler neck by unclipping it
from the tie bar and firmly
pulling it straight up and out of
the bottle.
3. Remove the bulb socket by turning counterclockwise.
4. Remove the bulb from the socket by pulling it straight out.
5. Install the new bulb by pushing it into the bulb socket.
6. Install the bulb socket to the headlamp assembly by turning
clockwise.
7. For the driver side, reinstall the windshield washer bottle filler
neck by firmly pushing it
straight into the bottle and
reattaching it to the tie bar.
Taillamps and Back-Up
Lamps
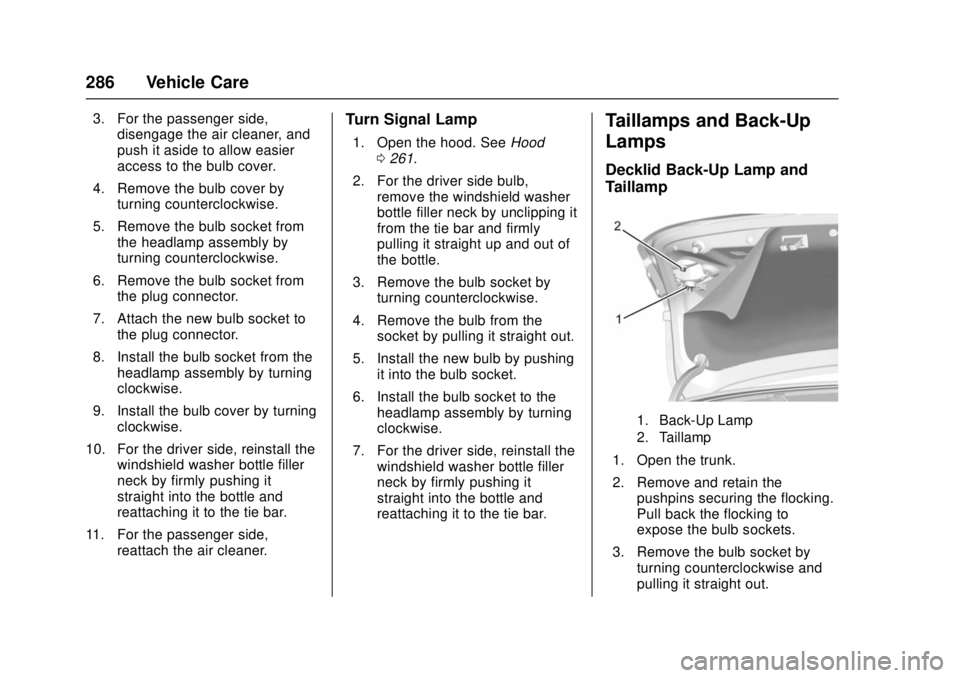
Decklid Back-Up Lamp and
Taillamp
1. Back-Up Lamp
2. Taillamp
1. Open the trunk.
2. Remove and retain thepushpins securing the flocking.
Pull back the flocking to
expose the bulb sockets.
3. Remove the bulb socket by turning counterclockwise and
pulling it straight out.
Page 288 of 404
Chevrolet Cruze Owner Manual (GMNA-Localizing-U.S./Canada/Mexico-
11348462) - 2018 - crc - 5/15/17
Vehicle Care 287
4. Remove the bulb from thesocket by pulling it straight out.
5. Install the new bulb in the bulb socket.
6. Install the bulb socket by turning clockwise.
7. Push the flocking back into place and secure with the
retained pushpins.
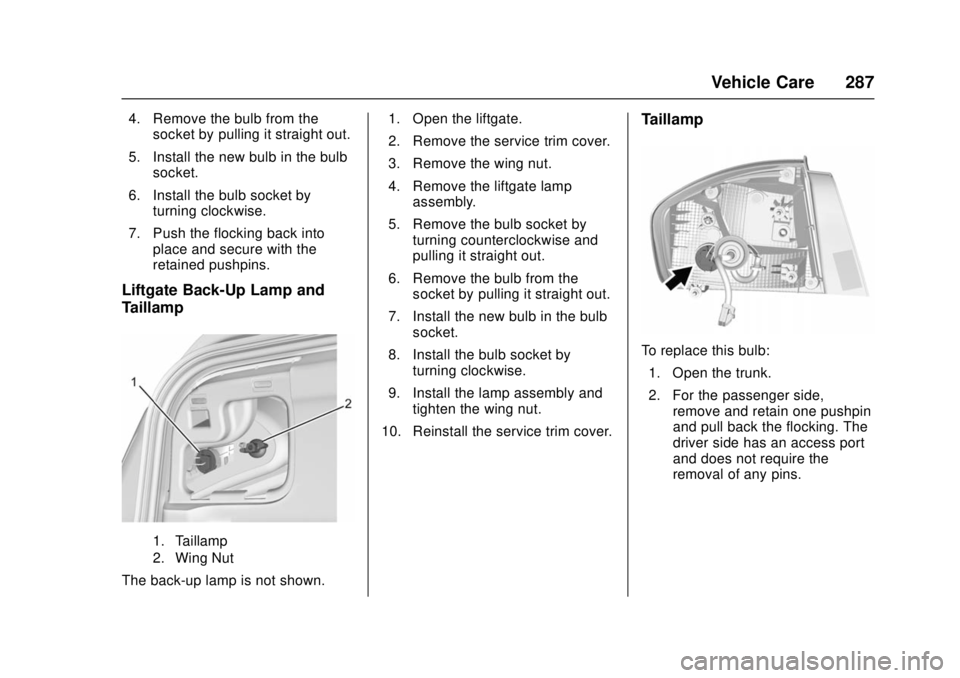
Liftgate Back-Up Lamp and
Taillamp
1. Taillamp
2. Wing Nut
The back-up lamp is not shown. 1. Open the liftgate.
2. Remove the service trim cover.
3. Remove the wing nut.
4. Remove the liftgate lamp
assembly.
5. Remove the bulb socket by turning counterclockwise and
pulling it straight out.
6. Remove the bulb from the socket by pulling it straight out.
7. Install the new bulb in the bulb socket.
8. Install the bulb socket by turning clockwise.
9. Install the lamp assembly and tighten the wing nut.
10. Reinstall the service trim cover.
Taillamp
To replace this bulb: 1. Open the trunk.
2. For the passenger side, remove and retain one pushpin
and pull back the flocking. The
driver side has an access port
and does not require the
removal of any pins.
Page 289 of 404
Chevrolet Cruze Owner Manual (GMNA-Localizing-U.S./Canada/Mexico-
11348462) - 2018 - crc - 5/15/17
288 Vehicle Care
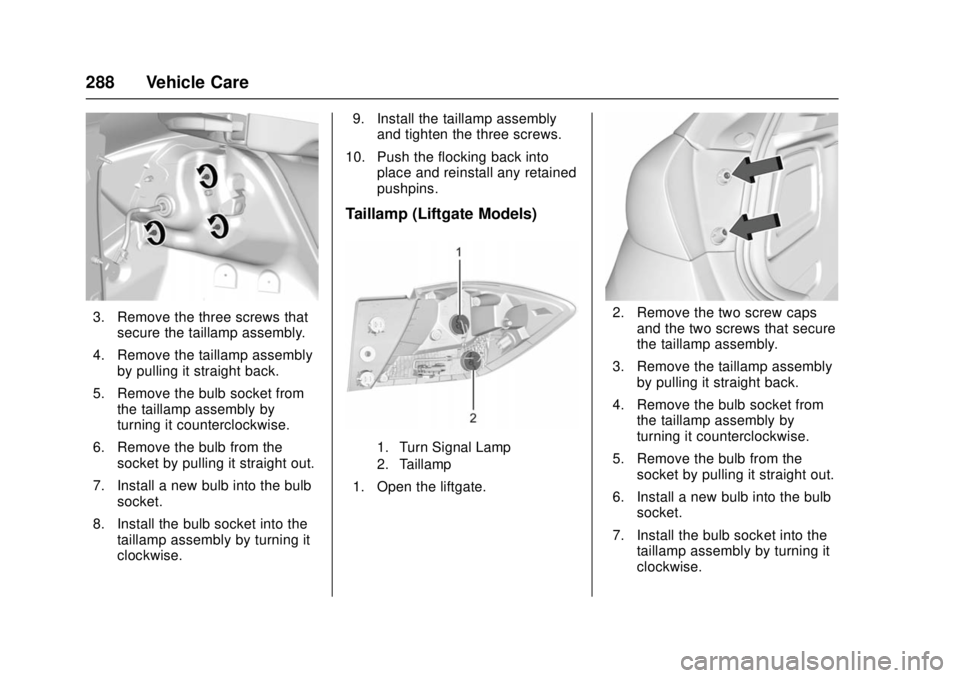
3. Remove the three screws thatsecure the taillamp assembly.
4. Remove the taillamp assembly by pulling it straight back.
5. Remove the bulb socket from the taillamp assembly by
turning it counterclockwise.
6. Remove the bulb from the socket by pulling it straight out.
7. Install a new bulb into the bulb socket.
8. Install the bulb socket into the taillamp assembly by turning it
clockwise. 9. Install the taillamp assembly
and tighten the three screws.
10. Push the flocking back into place and reinstall any retained
pushpins.
Taillamp (Liftgate Models)
1. Turn Signal Lamp
2. Taillamp
1. Open the liftgate.
2. Remove the two screw capsand the two screws that secure
the taillamp assembly.
3. Remove the taillamp assembly by pulling it straight back.
4. Remove the bulb socket from the taillamp assembly by
turning it counterclockwise.
5. Remove the bulb from the socket by pulling it straight out.
6. Install a new bulb into the bulb socket.
7. Install the bulb socket into the taillamp assembly by turning it
clockwise.
Page 290 of 404
Chevrolet Cruze Owner Manual (GMNA-Localizing-U.S./Canada/Mexico-
11348462) - 2018 - crc - 5/15/17
Vehicle Care 289
8. Install the taillamp assemblyand tighten the two screws.
9. Install the two screw covers.License Plate Lamp
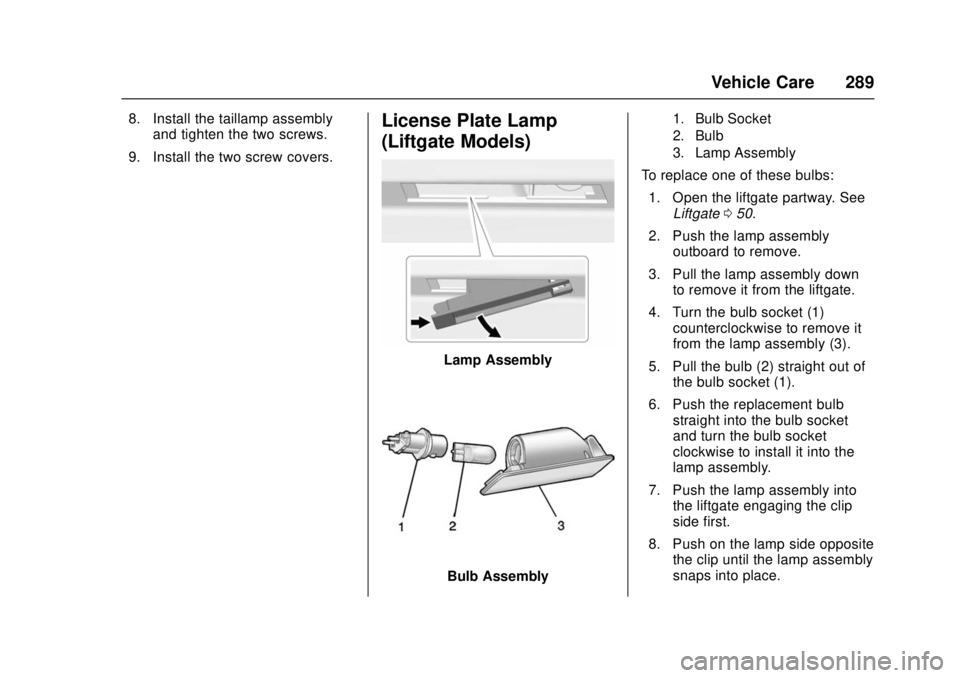
(Liftgate Models)
Lamp Assembly
Bulb Assembly
1. Bulb Socket
2. Bulb
3. Lamp Assembly
To replace one of these bulbs: 1. Open the liftgate partway. See Liftgate 050.
2. Push the lamp assembly outboard to remove.
3. Pull the lamp assembly down to remove it from the liftgate.
4. Turn the bulb socket (1) counterclockwise to remove it
from the lamp assembly (3).
5. Pull the bulb (2) straight out of the bulb socket (1).
6. Push the replacement bulb straight into the bulb socket
and turn the bulb socket
clockwise to install it into the
lamp assembly.
7. Push the lamp assembly into the liftgate engaging the clip
side first.
8. Push on the lamp side opposite the clip until the lamp assembly
snaps into place.