2018 CHEVROLET CRUZE ABS
[x] Cancel search: ABSPage 202 of 404
Chevrolet Cruze Owner Manual (GMNA-Localizing-U.S./Canada/Mexico-
11348462) - 2018 - crc - 5/15/17
Driving and Operating 201
Winter Driving
Driving on Snow or Ice
Snow or ice between the tires and
the road creates less traction or
grip, so drive carefully. Wet ice can
occur at about 0 °C (32 °F) when
freezing rain begins to fall. Avoid
driving on wet ice or in freezing rain
until roads can be treated.
For Slippery Road Driving:
.Accelerate gently. Accelerating
too quickly causes the wheels to
spin and makes the surface
under the tires slick.
. Turn on Traction Control. See
Traction Control/Electronic
Stability Control 0231.
. The Antilock Brake System
(ABS) improves vehicle stability
during hard stops, but the
brakes should be applied sooner
than when on dry pavement.
See Antilock Brake System
(ABS) 0228.
. Allow greater following distance
and watch for slippery spots. Icy
patches can occur on otherwise clear roads in shaded areas.
The surface of a curve or an
overpass can remain icy when
the surrounding roads are clear.
Avoid sudden steering
maneuvers and braking while
on ice.
. Turn off cruise control.
Blizzard Conditions
Stop the vehicle in a safe place and
signal for help. Stay with the vehicle
unless there is help nearby.
If possible, use Roadside
Assistance. See Roadside
Assistance Program 0371. To get
help and keep everyone in the
vehicle safe:
. Turn on the hazard warning
flashers.
. Tie a red cloth to an outside
mirror.
{Warning
Snow can trap engine exhaust
under the vehicle. This may
cause exhaust gases to get
inside. Engine exhaust contains
carbon monoxide (CO), which
cannot be seen or smelled. It can
cause unconsciousness and even
death.
If the vehicle is stuck in snow:
. Clear snow from the base of
the vehicle, especially any
blocking the exhaust pipe.
. Open a window about 5 cm
(2 in) on the vehicle side
that is away from the wind,
to bring in fresh air.
. Fully open the air outlets on
or under the instrument
panel.
. Adjust the climate control
system to circulate the air
inside the vehicle and set
(Continued)
Page 229 of 404
Chevrolet Cruze Owner Manual (GMNA-Localizing-U.S./Canada/Mexico-
11348462) - 2018 - crc - 5/15/17
228 Driving and Operating
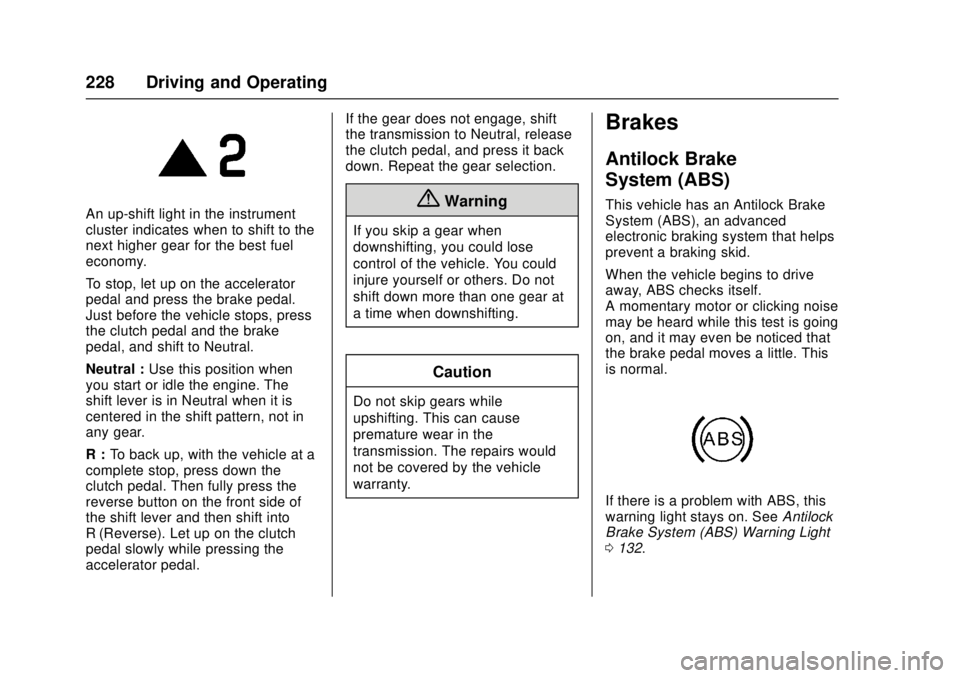
An up-shift light in the instrument
cluster indicates when to shift to the
next higher gear for the best fuel
economy.
To stop, let up on the accelerator
pedal and press the brake pedal.
Just before the vehicle stops, press
the clutch pedal and the brake
pedal, and shift to Neutral.
Neutral :Use this position when
you start or idle the engine. The
shift lever is in Neutral when it is
centered in the shift pattern, not in
any gear.
R : To back up, with the vehicle at a
complete stop, press down the
clutch pedal. Then fully press the
reverse button on the front side of
the shift lever and then shift into
R (Reverse). Let up on the clutch
pedal slowly while pressing the
accelerator pedal. If the gear does not engage, shift
the transmission to Neutral, release
the clutch pedal, and press it back
down. Repeat the gear selection.{Warning
If you skip a gear when
downshifting, you could lose
control of the vehicle. You could
injure yourself or others. Do not
shift down more than one gear at
a time when downshifting.
Caution
Do not skip gears while
upshifting. This can cause
premature wear in the
transmission. The repairs would
not be covered by the vehicle
warranty.
Brakes
Antilock Brake
System (ABS)
This vehicle has an Antilock Brake
System (ABS), an advanced
electronic braking system that helps
prevent a braking skid.
When the vehicle begins to drive
away, ABS checks itself.
A momentary motor or clicking noise
may be heard while this test is going
on, and it may even be noticed that
the brake pedal moves a little. This
is normal.
If there is a problem with ABS, this
warning light stays on. See
Antilock
Brake System (ABS) Warning Light
0 132.
Page 230 of 404
Chevrolet Cruze Owner Manual (GMNA-Localizing-U.S./Canada/Mexico-
11348462) - 2018 - crc - 5/15/17
Driving and Operating 229
If driving safely on a wet road and it
becomes necessary to slam on the
brakes and continue braking to
avoid a sudden obstacle, a
computer senses the wheels are
slowing down. If one of the wheels
is about to stop rolling, the computer
will separately work the brakes at
each wheel.
ABS can change the brake pressure
to each wheel, as required, faster
than any driver could. This can help
you steer around the obstacle while
braking hard.
As the brakes are applied, the
computer keeps receiving updates
on wheel speed and controls
braking pressure accordingly.
Remember: ABS does not change
the time needed to get a foot up to
the brake pedal or always decrease
stopping distance. If you get too
close to the vehicle in front of you,
there will not be enough time to
apply the brakes if that vehicle
suddenly slows or stops. Always
leave enough room up ahead to
stop, even with ABS.Using ABS
Do not pump the brakes. Just hold
the brake pedal down firmly and let
ABS work. You may hear the ABS
pump or motor operating and feel
the brake pedal pulsate. This is
normal.
Braking in Emergencies
ABS allows you to steer and brake
at the same time. In many
emergencies, steering can help
more than even the very best
braking.
Parking Brake
The vehicle is equipped with a
parking brake lever or a parking
brake pedal.
Lever Apply
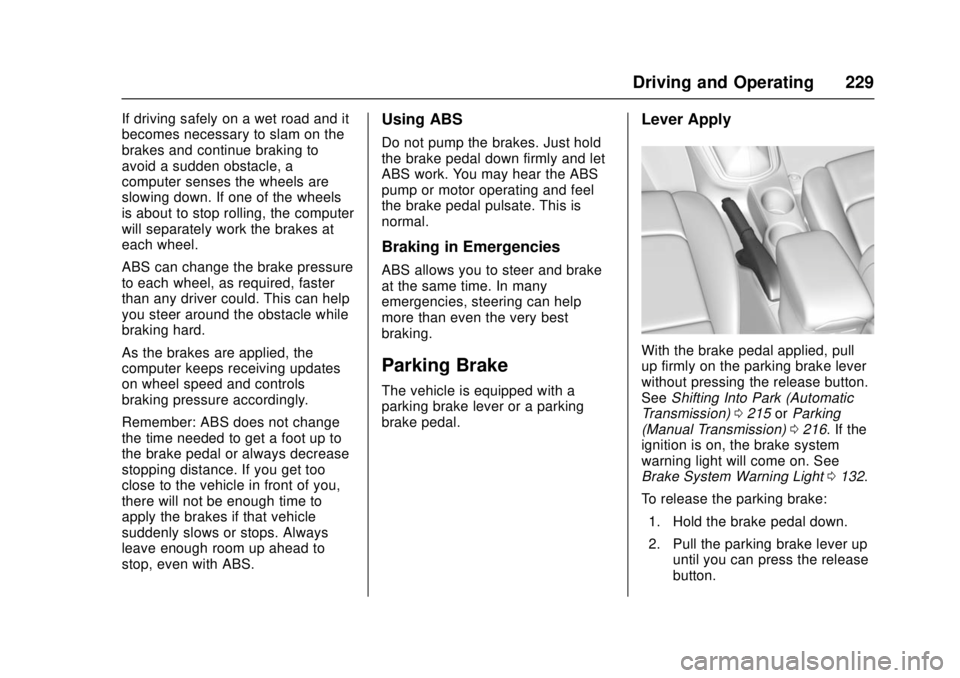
With the brake pedal applied, pull
up firmly on the parking brake lever
without pressing the release button.
SeeShifting Into Park (Automatic
Transmission) 0215 orParking
(Manual Transmission) 0216. If the
ignition is on, the brake system
warning light will come on. See
Brake System Warning Light 0132.
To release the parking brake: 1. Hold the brake pedal down.
2. Pull the parking brake lever up until you can press the release
button.
Page 232 of 404
Chevrolet Cruze Owner Manual (GMNA-Localizing-U.S./Canada/Mexico-
11348462) - 2018 - crc - 5/15/17
Driving and Operating 231
Brake Assist
The Brake Assist feature is
designed to assist the driver in
stopping or decreasing vehicle
speed in emergency driving
conditions. This feature uses the
stability system hydraulic brake
control module to supplement the
power brake system under
conditions where the driver has
quickly and forcefully applied the
brake pedal in an attempt to quickly
stop or slow down the vehicle. The
stability system hydraulic brake
control module increases brake
pressure at each corner of the
vehicle until the ABS activates.
Minor brake pedal pulsation or
pedal movement during this time is
normal and the driver should
continue to apply the brake pedal as
the driving situation dictates. The
Brake Assist feature will
automatically disengage when the
brake pedal is released or brake
pedal pressure is quickly
decreased.
Ride Control Systems
Traction Control/
Electronic Stability
Control
System Operation
The vehicle has a Traction Control
System (TCS) and StabiliTrak, an
electronic stability control system.
These systems help limit wheel slip
and assist the driver in maintaining
control, especially on slippery road
conditions.
TCS activates if it senses that any
of the drive wheels are spinning or
beginning to lose traction. When this
happens, TCS applies the brakes to
the spinning wheels and reduces
engine power to limit wheel spin.
StabiliTrak activates when the
vehicle senses a difference between
the intended path and the direction
the vehicle is actually traveling.
StabiliTrak selectively applies
braking pressure to any one of thevehicle wheel brakes to assist the
driver in keeping the vehicle on the
intended path.
If cruise control is being used and
traction control or StabiliTrak begins
to limit wheel spin, cruise control will
disengage. Cruise control may be
turned back on when road
conditions allow.
Both systems come on
automatically when the vehicle is
started and begins to move. The
systems may be heard or felt while
they are operating or while
performing diagnostic checks. This
is normal and does not mean there
is a problem with the vehicle.
It is recommended to leave both
systems on for normal driving
conditions, but it may be necessary
to turn TCS off if the vehicle gets
stuck in sand, mud, ice, or snow.
See
If the Vehicle Is Stuck 0202
and “Turning the Systems Off and
On” later in this section.
Page 280 of 404
Chevrolet Cruze Owner Manual (GMNA-Localizing-U.S./Canada/Mexico-
11348462) - 2018 - crc - 5/15/17
Vehicle Care 279
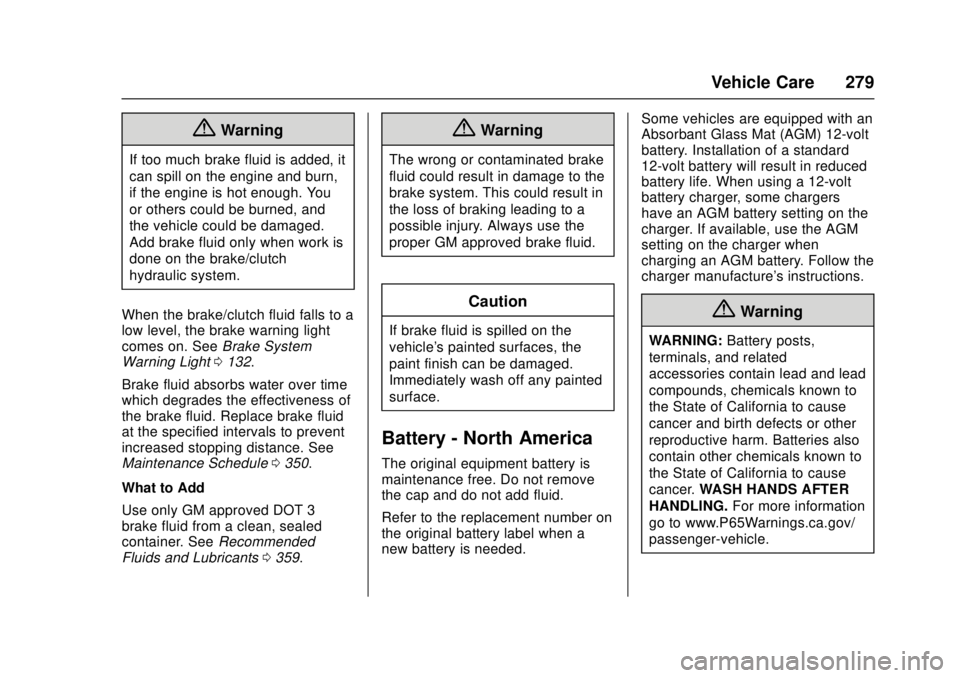
{Warning
If too much brake fluid is added, it
can spill on the engine and burn,
if the engine is hot enough. You
or others could be burned, and
the vehicle could be damaged.
Add brake fluid only when work is
done on the brake/clutch
hydraulic system.
When the brake/clutch fluid falls to a
low level, the brake warning light
comes on. See Brake System
Warning Light 0132.
Brake fluid absorbs water over time
which degrades the effectiveness of
the brake fluid. Replace brake fluid
at the specified intervals to prevent
increased stopping distance. See
Maintenance Schedule 0350.
What to Add
Use only GM approved DOT 3
brake fluid from a clean, sealed
container. See Recommended
Fluids and Lubricants 0359.
{Warning
The wrong or contaminated brake
fluid could result in damage to the
brake system. This could result in
the loss of braking leading to a
possible injury. Always use the
proper GM approved brake fluid.
Caution
If brake fluid is spilled on the
vehicle's painted surfaces, the
paint finish can be damaged.
Immediately wash off any painted
surface.
Battery - North America
The original equipment battery is
maintenance free. Do not remove
the cap and do not add fluid.
Refer to the replacement number on
the original battery label when a
new battery is needed. Some vehicles are equipped with an
Absorbant Glass Mat (AGM) 12-volt
battery. Installation of a standard
12-volt battery will result in reduced
battery life. When using a 12-volt
battery charger, some chargers
have an AGM battery setting on the
charger. If available, use the AGM
setting on the charger when
charging an AGM battery. Follow the
charger manufacture's instructions.
{Warning
WARNING:
Battery posts,
terminals, and related
accessories contain lead and lead
compounds, chemicals known to
the State of California to cause
cancer and birth defects or other
reproductive harm. Batteries also
contain other chemicals known to
the State of California to cause
cancer. WASH HANDS AFTER
HANDLING. For more information
go to www.P65Warnings.ca.gov/
passenger-vehicle.
Page 294 of 404
Chevrolet Cruze Owner Manual (GMNA-Localizing-U.S./Canada/Mexico-
11348462) - 2018 - crc - 5/15/17
Vehicle Care 293
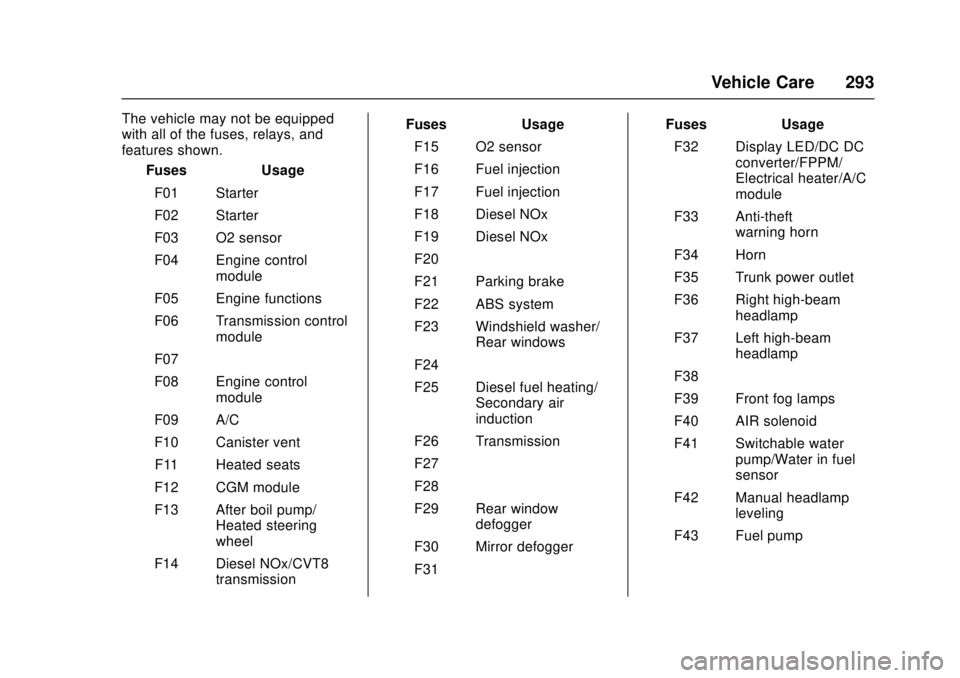
The vehicle may not be equipped
with all of the fuses, relays, and
features shown.Fuses Usage
F01 Starter
F02 Starter
F03 O2 sensor
F04 Engine control module
F05 Engine functions
F06 Transmission control module
F07 –
F08 Engine control module
F09 A/C
F10 Canister vent F11 Heated seats
F12 CGM module
F13 After boil pump/ Heated steering
wheel
F14 Diesel NOx/CVT8 transmission Fuses Usage
F15 O2 sensor
F16 Fuel injection
F17 Fuel injection
F18 Diesel NOx
F19 Diesel NOx
F20 –
F21 Parking brake
F22 ABS system
F23 Windshield washer/ Rear windows
F24 –
F25 Diesel fuel heating/ Secondary air
induction
F26 Transmission
F27 –
F28 –
F29 Rear window defogger
F30 Mirror defogger
F31 – Fuses Usage
F32 Display LED/DC DC converter/FPPM/
Electrical heater/A/C
module
F33 Anti-theft warning horn
F34 Horn
F35 Trunk power outlet
F36 Right high-beam headlamp
F37 Left high-beam headlamp
F38 –
F39 Front fog lamps
F40 AIR solenoid
F41 Switchable water pump/Water in fuel
sensor
F42 Manual headlamp leveling
F43 Fuel pump
Page 298 of 404
Chevrolet Cruze Owner Manual (GMNA-Localizing-U.S./Canada/Mexico-
11348462) - 2018 - crc - 5/15/17
Vehicle Care 297
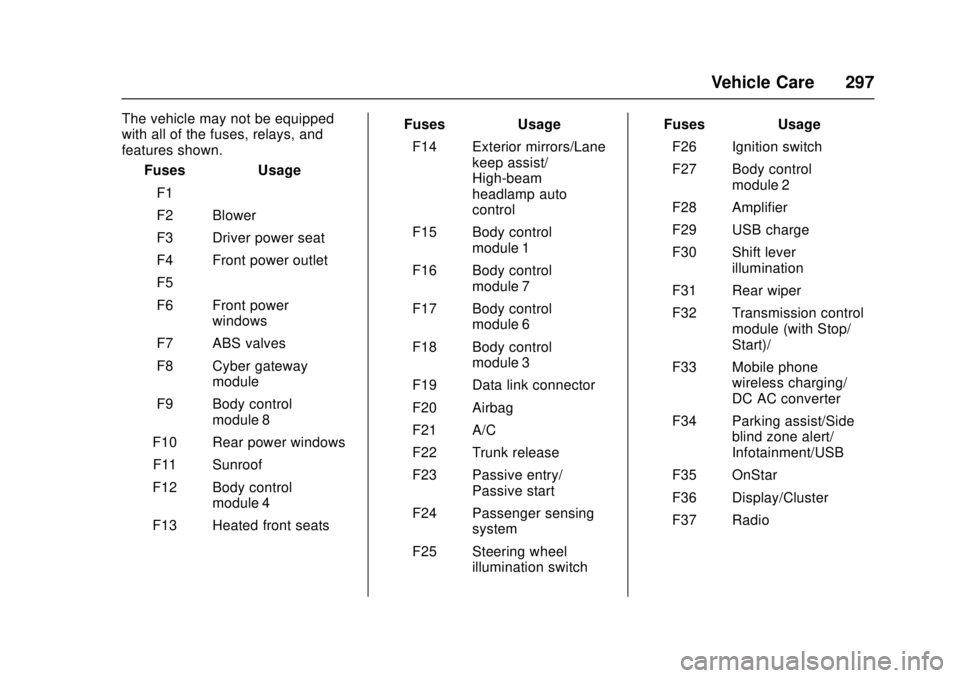
The vehicle may not be equipped
with all of the fuses, relays, and
features shown.Fuses Usage
F1 –
F2 Blower
F3 Driver power seat
F4 Front power outlet
F5 –
F6 Front power windows
F7 ABS valves
F8 Cyber gateway module
F9 Body control module 8
F10 Rear power windows
F11 Sunroof
F12 Body control module 4
F13 Heated front seats Fuses Usage
F14 Exterior mirrors/Lane keep assist/
High-beam
headlamp auto
control
F15 Body control module 1
F16 Body control module 7
F17 Body control module 6
F18 Body control module 3
F19 Data link connector
F20 Airbag
F21 A/C
F22 Trunk release
F23 Passive entry/ Passive start
F24 Passenger sensing system
F25 Steering wheel illumination switch Fuses Usage
F26 Ignition switch
F27 Body control module 2
F28 Amplifier
F29 USB charge
F30 Shift lever illumination
F31 Rear wiper
F32 Transmission control module (with Stop/
Start)/–
F33 Mobile phone wireless charging/
DC AC converter
F34 Parking assist/Side blind zone alert/
Infotainment/USB
F35 OnStar
F36 Display/Cluster
F37 Radio
Page 333 of 404
Chevrolet Cruze Owner Manual (GMNA-Localizing-U.S./Canada/Mexico-
11348462) - 2018 - crc - 5/15/17
332 Vehicle Care
Storing the Spare Tire and Tools
—Vehicles with a Liftgate
Reverse the directions for removing
the jack, tools, and spare tire.
The compact spare is for temporary
use only. Replace the compact
spare tire with a full-size tire as
soon as you can.
Compact Spare Tire
{Warning
Driving with more than one
compact spare tire at a time could
result in loss of braking and
handling. This could lead to a
crash and you or others could be
injured. Use only one compact
spare tire at a time.
If this vehicle has a compact spare
tire, it was fully inflated when new;
however, it can lose air over time.
Check the inflation pressure
regularly. It should be 420 kPa
(60 psi). Stop as soon as possible and check
that the spare tire is correctly
inflated after being installed on the
vehicle. The compact spare tire is
designed for temporary use only.
The vehicle will perform differently
with the spare tire installed and it is
recommended that the vehicle
speed be limited to 80 km/h
(50 mph). To conserve the tread of
the spare tire, have the standard tire
repaired or replaced as soon as
convenient and return the spare tire
to the storage area.
When using a compact spare tire,
the AWD (if equipped), ABS, and
Traction Control systems may
engage until the spare tire is
recognized by the vehicle,
especially on slippery roads. Adjust
driving to reduce possible
wheel slip.
Caution
When the compact spare is
installed, do not take the vehicle
through an automatic car wash
with guide rails. The compact
spare can get caught on the rails
which can damage the tire, wheel,
and other parts of the vehicle.
Do not use the compact spare on
other vehicles.
Do not mix the compact spare tire or
wheel with other wheels or tires.
They will not fit. Keep the spare tire
and its wheel together.
Caution
Tire chains will not fit the compact
spare. Using them can damage
the vehicle and the chains. Do not
use tire chains on the compact
spare.