Page 33 of 74
 - 2018 - crc - 7/12/17
32 Navigation
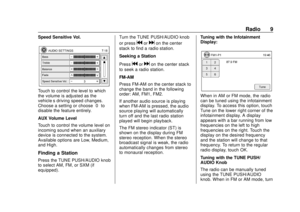
There are some options available
when inputting characters.
123/ABC :Touch to ch")
Chevrolet City Express Infotainment System (GMNA-Localizing-U.S./Canada-
11683801) - 2018 - crc - 7/12/17
32 Navigation
There are some options available
when inputting characters.
123/ABC :Touch to change the
character set to numbers.
Space : Touch to insert a space.
Delete : Touch to delete the last
character entered. Touch and hold
to delete all of the characters.
OK : Touch to complete the
character input.
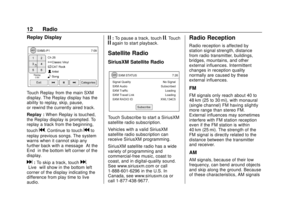
Setting a Destination
Press NAV on the center stack. The
methods for setting a destination
are shown.
If route guidance it active, you can
choose how to use the new
destination. Select Add as Waypoint
to keep the current destination and to add the current destination as a
waypoint along the route. Select
Replace to cancel the current route
and replace the current destination
with the new destination.
Available Destination Setting
Methods
.
Street Address
. Points of Interest
. My Points of Interest
. Address Book
. Intersection
. City Center
Setting a Destination from a Street
Address 1. Press NAV on the center stack.
2. Touch Street Address.
3. If the state or province shown on the display is correct,
proceed to Step 5. If the state
or province showing on the
display is not correct, touch
Change State or Province.
4. Enter the name of the state orprovince. The display shows
the touch keyboard.
Page 34 of 74
 - 2018 - crc - 7/12/17
Navigation 33
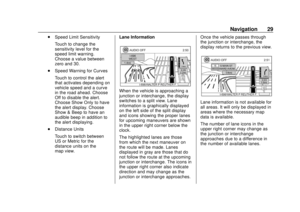
The keyboard has an intelligent
spelling setting, so it excludes
non-existing co")
Chevrolet City Express Infotainment System (GMNA-Localizing-U.S./Canada-
11683801) - 2018 - crc - 7/12/17
Navigation 33
The keyboard has an intelligent
spelling setting, so it excludes
non-existing combinations. On
the top right of the display, the
number of matches is shown.
At any time, touch List to
display a list of possible names
based on the letters currently
entered. When the number of
matches is reduced to six or
fewer, a list will be shown
automatically.
5. Touch City.
It is possible to choose House
Number & Street at this step to
manually enter the street
name. However, the system
can automatically narrow down
the street in most cases when
you enter the city name first.
Entering by city can also be
useful if you are unsure of the
street’ s correct spelling.
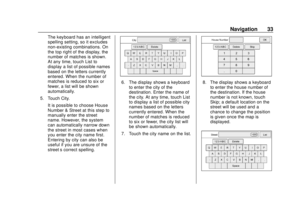
6. The display shows a keyboard
to enter the city of the
destination. Enter the name of
the city. At any time, touch List
to display a list of possible city
names based on the letters
currently entered. When the
number of matches is reduced
to six or fewer, the city list will
be shown automatically.
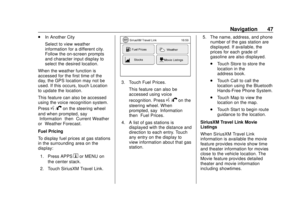
7. Touch the city name on the list.8. The display shows a keyboard to enter the house number of
the destination. If the house
number is not known, touch
Skip; a default location on the
street will be used and a
chance to change the position
is given once the map is
displayed.
Page 35 of 74
 - 2018 - crc - 7/12/17
34 Navigation
9. The display shows a keyboardto enter the street name. Enter
the name of the s")
Chevrolet City Express Infotainment System (GMNA-Localizing-U.S./Canada-
11683801) - 2018 - crc - 7/12/17
34 Navigation
9. The display shows a keyboardto enter the street name. Enter
the name of the street. At any
time, touch List to display a list
of possible street names based
on the letters currently entered.
When the number of matches
is reduced to six or fewer, the
street list will be shown
automatically.
10. Touch the street name on the list.
11. If the house number entered in Step 8 does not exist on the
street in the chosen city, “The
entered house number is not
available” will be displayed.
Select Show Map or Change
Number.
There will be a chance to
change the position from the
default location once the map
is displayed.
12. A map of the destination is displayed on the display. Touch
Start to calculate the route. The map of the destination is
always displayed in 2D North
Up. Touch Start to return the
system to the current map
settings.
If the exact street address was
not entered earlier in the
process, the system will have
chosen a default location,
either along the street or within
a range of addresses on that
street. To move the map from
that default position, touch
Move. A message will be
displayed asking if a new
location is wanted for the
destination. Touch OK when
complete.
Touch Store to store the
location in the address book.
Setting a New Entry to the
Address Book
A destination can also be set from a
street address using voice
recognition. 1. Pressg/Von the steering
wheel. The system provides
prompts and waits for voice
commands.
2. Say “Navigation.”
3. Say “Enter.”
4. When prompted, say the name of the state or province. If the
system cannot clearly interpret
the name of the state or
province, a list is provided with
possible matches. Speak the
number of the state or province
showing on the display or say
“Spell State” to spell the name
of the state.
5. When prompted, say the name of the city. If the system cannot
clearly interpret the name of
the city, a list is provided with
possible matches. Speak the
number of the city showing on
the display or say “Spell City”
to spell the name of the city.
6. When prompted, say the name of the street. If the system
cannot clearly interpret the
name of the street, a list is
Page 36 of 74
 - 2018 - crc - 7/12/17
Navigation 35
provided with possible
matches. Speak the number of
the street showing on the
di")
Chevrolet City Express Infotainment System (GMNA-Localizing-U.S./Canada-
11683801) - 2018 - crc - 7/12/17
Navigation 35
provided with possible
matches. Speak the number of
the street showing on the
display or say“Spell Street”to
spell the name of the street.
7. When prompted, say the house number or say “No House
Number” to display a default
location on the chosen street
within the chosen city. If the
house number spoken is not on
the chosen street, the system
will notify that the number is
out of range and ask for it to be
restated. If the number is
unknown, say "No House
Number."
If a route is active, say
“Replace Destination” to
replace the current destination
with the new street address,
or say “Set as Waypoint” to set
the new street address as a
waypoint on the current route.
If a route is not set, say “Set as
Destination” to set the new
street address as the
destination and begin route
guidance. Say
“Show on Map” to display
the new street address on
the map.
Setting a Destination from
Points of Interest
The system features a database of
points of interest such as
restaurants, hotels, banks, and
more to assist in navigation. These
points of interest can be set as
destinations and the system can
then calculate a route.
Search for Nearby Restaurants or
Gas Stations
While a wide variety of places can
be searched in the system, shortcut
icons are available for restaurants
and gas stations.
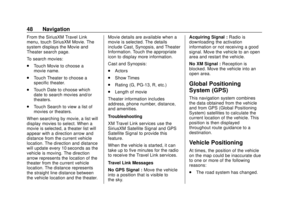
1. Press NAV on the center stack.
2. Touch Points of Interest.
3. Touch Nearby Restaurants, Nearby Gas Stations, Nearby
Parking, or Nearby ATMs.
4. The system searches for destinations within 80 km
(50 mi) of the current position.
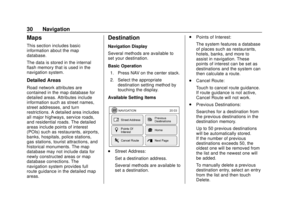
5. Places are shown based on the straight line distance to the
current position. The arrow on
Page 37 of 74
 - 2018 - crc - 7/12/17
36 Navigation
the right shows the direction of
the destination. Touch the
desired destination")
Chevrolet City Express Infotainment System (GMNA-Localizing-U.S./Canada-
11683801) - 2018 - crc - 7/12/17
36 Navigation
the right shows the direction of
the destination. Touch the
desired destination on the list.
A maximum of 200 destinations
will be listed when searching
with this method.
6. A detailed description is provided.
.Press BACK on the center
stack to go back and pick
another destination.
. Touch Call to call the
destination if the phone
number is available using
the Bluetooth Hands-Free
Phone system.
. Touch Map to show a map
of the destination.
. Touch Start to calculate the
route to the destination.
Searching for Places Near Current
Location 1. Press NAV on the center stack.
2. Touch Points of Interest.
3. Touch Search By Category.
4. Touch Near Current Location.
When searching by category,
browse destinations from a
variety of categories and
subcategories, including:
.Automotive
. Banking & Business .
Emergency
. Hotel/Motel
. Leisure
. Public Places
. Restaurant
. Shopping
. Travel
. If Search By Name is
chosen, search for places
using a specific name. The
touch keyboard is shown.
. When using Search By
Category, the system will
search for up to
200 matches within 80 km
(50 mi) of the current
position.
. When using Search By
Name, the system will
search for up to 30 matches
within 80 km (50 mi) of the
current position.
Page 38 of 74
 - 2018 - crc - 7/12/17
Navigation 37
.If the destination is not
found within the 80 km
(50 mi) search radius,
search")
Chevrolet City Express Infotainment System (GMNA-Localizing-U.S./Canada-
11683801) - 2018 - crc - 7/12/17
Navigation 37
.If the destination is not
found within the 80 km
(50 mi) search radius,
search for places around a
specific city name.
5. Destinations are shown based on the distance to the selected
position. The arrow on the right
shows the direction of the
destination. The distance
shown is a straight line
distance.
Touch the desired destination
from the list.
6. A detailed description of the destination is provided.
Press BACK on the center
stack to go back and pick
another destination or touch
Start to have the system
calculate the route to the
destination.
Searching for Points of Interest in
Another City 1. Press NAV on the center stack.
2. Touch Points of Interest. 3. Touch Search By Category or
Search By Name.
4. Touch In Another City.
5. Touch Change State/Province if the state or province shown
is not correct.
6. If necessary, enter the name of the state or province.
The display shows the touch
keyboard.
The keyboard has an intelligent
spelling setting, so it excludes
non-existing combinations. On
the top right of the display, the
number of matches is shown.
7. Touch City.
8. A touch keyboard is displayed. Enter the name of the
desired city.
Touch List at any time to
display a list of remaining
cities. Select the desired city. 9. If Search By Category is
chosen in Step 3, browse
destinations from a list of
categories and subcategories.
.When using Search By
Category, the system will
search for up to
200 matches within 80 km
(50 mi) of the chosen city.
. When using Search By
Name, the system will
search for up to 30 matches
within 80 km (50 mi) of the
chosen city. If no matches
are found, touch Change
Name to search for
another name.
10. Destinations are shown based on the distance from the
selected position. The arrow on
the right shows the direction of
the destination. The distance
shown is a straight line
distance from the city center.
Touch the desired destination
from the list.
Page 39 of 74
 - 2018 - crc - 7/12/17
38 Navigation
11. A detailed description of thedestination is provided.
Press BACK on the cent")
Chevrolet City Express Infotainment System (GMNA-Localizing-U.S./Canada-
11683801) - 2018 - crc - 7/12/17
38 Navigation
11. A detailed description of thedestination is provided.
Press BACK on the center
stack to go back and pick
another destination or touch
Start to have the system
calculate the route to the
destination.
Searching for Places Using Voice
Recognition
Places can be set as destinations
using voice recognition.
1. Press
g/Von the steering
wheel. The system provides
prompts and waits for voice
commands.
2. Say “Navigation.”
3. Say “Points of Interest”
followed by a brand name.
4. Say the number of the point of interest from the available list
on the display. 5. There are up to four options to
search for a point of interest:
.Say “Along Route” to
search for the desired
places along the current
route.
. Say “Nearby” to search for
the desired places close to
the vehicle’ s current
location.
. Say “Near Destination” to
search for the desired
places near the route’s
destination.
. Say “In Another City” to
search for the desired
places in another city.
Selecting this option will
lead to a series of other
steps.
6. The system displays a list of results fitting the search
criteria. Say the number of the
desired entry on the list.
If a route is not set, say “Replace
Destination” to replace the current
destination with the new street address or say
“Set as Waypoint” to
set the new street address as a
waypoint on the current route.
If a route is not set, say “Set as
Destination” to set the new street
address as a waypoint on the
current route.
Say “Show on Map” to display the
new street address on the map.
My Points of Interest/User-Defined
Points of Interest (POIs)
A POI in the My Points of Interest
database is a specific location of
interest such as a gas station or
bank. The POI consists of a
longitude value, a latitude value,
and a name.
Additional POIs can be added to the
system using the vehicle’s
USB port.
The POIs can be set as a
destination or can be set up to
activate POI warnings that display a
pop-up message when the vehicle
approaches certain areas such as
hazard spot warnings.
Page 40 of 74
 - 2018 - crc - 7/12/17
Navigation 39
.In order to save the user-defined
points of interest data, a USB
mass storage d")
Chevrolet City Express Infotainment System (GMNA-Localizing-U.S./Canada-
11683801) - 2018 - crc - 7/12/17
Navigation 39
.In order to save the user-defined
points of interest data, a USB
mass storage device is required.
The user-defined points of
interest data cannot be saved on
the SD card that contains the
navigation data.
. User-defined points of interest
are not shown in the map
representation.
. The system recognizes the
user-defined POI data and then
displays a pop-up message to
ask whether the data needs to
be downloaded into the system.
. If the download is confirmed, the
available user POIs in the
system internal memory will be
deleted and the new ones in the
USB mass storage device will be
downloaded into the internal
memory of the system.
. The progress of the download is
shown by a progress bar. When
the download is finished, the
system indicates that the USB
mass storage device can be
removed. Creating User-Defined Points of
Interest (POIs)
.
Longitude
. Latitude
. Name
. Location/Folder to save
. File name
POI data can be downloaded from
the Internet or created in a simple
text editor in Comma Separated
Values (CSV) file format.
There are two kinds of POI data
supported by the system:
. User POIs –user-defined points
of interest (POIs) that can later
be set as a destination and
found using route guidance.
. POI-Warnings –user-supplied
areas such as hazard spots that
the system displays in a pop-up
window when the vehicle is
approaching the
designated area. To create your own User POIs:
1. Connect a USB mass storage device to your personal
computer.
2. Use a standard software program to create a list of
POIs. Make sure the software
can support the CSV file
format.
3. In the first column, enter the longitude value of the position
of the POI.
4. In the second column, enter the latitude value of the
position of the POI.
5. In the third column, enter the name of the POI. Information
entered in the fourth column,
such as address or phone
number, will be appended to
the name of the POI.
6. Add more rows if necessary.