2018 CADILLAC XTS 12 v power plug
[x] Cancel search: 12 v power plugPage 24 of 370

Cadillac XTS Owner Manual (GMNA-Localizing-U.S./Canada-11354412) -
2018 - crc - 11/16/17
IN BRIEF 23
SeeAssistance Systems for Parking or
Backing 0207.
Power Outlets
The accessory power outlets can be
used to plug in electrical equipment,
such as a cell phone or MP3 player.
The vehicle has three accessory power
outlets:
.
Inside the front storage area below
the climate control system
. Inside the center console
Lift the cover to access the accessory
power outlet.
See Power Outlets 0113.
Universal Remote System
If equipped, this system provides a
way to replace up to three remote
control transmitters used to activate
devices such as garage door openers,
security systems, and home
automation devices.
Read the instructions completely
before attempting to program the
Universal Remote system. Because of
the steps involved, it may be helpful
to have another person available to
assist you with programming the
Universal Remote system.
See Universal Remote System 0148.
Sunroof
If equipped with a sunroof, the
ignition must be on or in ACC/
ACCESSORY, or Retained Accessory
Power (RAP) must be active to operate
the sunroof and power sunshade.
See Ignition Positions 0181 and
Retained Accessory Power (RAP) 0185.
1. Sunroof Switch
2. Sunshade Switch
Page 114 of 370

Cadillac XTS Owner Manual (GMNA-Localizing-U.S./Canada-11354412) -
2018 - crc - 11/16/17
INSTRUMENTS AND CONTROLS 113
Wiper Arm Assembly Protection
When using an automatic car wash,
move the windshield wiper lever to
OFF. This disables the automatic
Rainsense windshield wipers.
With Rainsense, if the transmission is
in N (Neutral) and the vehicle speed is
very slow, the wipers will
automatically stop at the base of the
windshield.
The wiper operations return to normal
when the transmission is no longer in
N (Neutral) or the vehicle speed has
increased.
nL: Pull the windshield wiper lever
toward you to spray windshield
washer fluid and activate the wipers.
The wipers will continue until the
lever is released or the maximum
wash time is reached. When the
windshield wiper lever is released,
additional wipes may occur depending
on how long the windshield washer
had been activated. See Washer Fluid
0 251 for information on filling the
windshield washer fluid reservoir.
{Warning
In freezing weather, do not use the
washer until the windshield is
warmed. Otherwise the washer fluid
can form ice on the windshield,
blocking your vision.
Compass
The vehicle may have a compass
display on the Driver Information
Center (DIC). The compass receives its
heading and other information from
the Global Positioning System (GPS)
antenna, StabiliTrak, and vehicle
speed information.
The compass system is designed to
operate for a certain number of miles
or degrees of turn before needing a
signal from the GPS satellites. When
the compass display shows CAL, drive
the vehicle for a short distance in an
open area where it can receive a GPS
signal. The compass system will
automatically determine when a GPS
signal is restored and provide a
heading again.
Clock
The time and date for the clock can be
set using the infotainment system. See
“Time/Date ”in “System“under
“Settings ”in the infotainment manual.
Power Outlets
Power Outlets 12-Volt Direct
Current
The accessory power outlets can be
used to plug in electrical equipment,
such as a cell phone or MP3 player.
The vehicle has two accessory power
outlets:
.
Inside the front storage area below
the climate control system.
. Inside the center console.
Lift the cover to access the accessory
power outlet.
The vehicle has two charging only
USB ports on the rear of the center
storage console.
Page 115 of 370

Cadillac XTS Owner Manual (GMNA-Localizing-U.S./Canada-11354412) -
2018 - crc - 11/16/17
114 INSTRUMENTS AND CONTROLS
Certain accessory power plugs may
not be compatible with the accessory
power outlet and could overload
vehicle or adapter fuses. If a problem
is experienced, see your dealer.
When adding electrical equipment, be
sure to follow the proper installation
instructions included with the
equipment. SeeAdd-On Electrical
Equipment 0230.
Caution
Hanging heavy equipment from the
power outlet can cause damage not
covered by the vehicle warranty.
The power outlets are designed for
accessory power plugs only, such as
cell phone charge cords.
Always unplug electrical equipment
when not in use and do not plug in
equipment that exceeds the maximum
20 amps rating.
Power Outlet 110/120-Volt
Alternating Current
If equipped with this power outlet on
the rear of the center console, it can
be used to plug in electrical
equipment that uses a maximum limit
of 150 watts.
An indicator light on the outlet turns
on to show it is in use. The light
comes on when the ignition is on,
equipment requiring less than 150
watts is plugged into the outlet, and
no system fault is detected. The indicator light does not come on
when the ignition is off or if the
equipment is not fully seated into the
outlet.
If equipment is connected using more
than 150 watts or a system fault is
detected, a protection circuit shuts off
the power supply and the indicator
light turns off. To reset the circuit,
unplug the item and plug it back in or
turn the Retained Accessory Power
(RAP) off and then back on. See
Retained Accessory Power (RAP)
0185.
The power restarts when equipment
using 150 watts or less is plugged into
the outlet and a system fault is not
detected.
The power outlet is not designed for
the following and may not work
properly, if this equipment is
plugged in:
. Equipment with high initial peak
wattage, such as
compressor-driven refrigerators
and electric power tools
Page 186 of 370

Cadillac XTS Owner Manual (GMNA-Localizing-U.S./Canada-11354412) -
2018 - crc - 11/16/17
DRIVING AND OPERATING 185
4. Before starting the engine, besure to unplug and store the cord
as it was before to keep it away
from moving engine parts.
The length of time the heater should
remain plugged in depends on several
factors. Ask a dealer in the area where
you will be parking the vehicle for the
best advice on this.
Retained Accessory
Power (RAP)
Some vehicle accessories may be used
after the ignition is turned off.
The power windows and sunroof,
if equipped, will continue to work for
up to 10 minutes or until any door is
opened.
The infotainment system will continue
to work for 10 minutes, until the
driver door is opened, or until the
ignition is turned on or placed in
ACC/ACCESSORY.
Shifting Into Park
1. Hold the brake pedal down and apply the parking brake. See
Electric Parking Brake 0191.
2. Move the shift lever into P (Park) by pushing the lever all the way
toward the front of the vehicle.
3. Turn the ignition off.
Leaving the Vehicle with the
Engine Running
{Warning
It can be dangerous to leave the
vehicle with the engine running.
It could overheat and catch fire.
It is dangerous to get out of the
vehicle if the shift lever is not fully
in P (Park) with the parking brake
firmly set. The vehicle can roll.
Do not leave the vehicle when the
engine is running. If you have left
the engine running, the vehicle can
move suddenly. You or others could (Continued)
Warning (Continued)
be injured. To be sure the vehicle
will not move, even when you are
on fairly level ground, always set
the parking brake and move the
shift lever to P (Park). See Shifting
Into Park 0185. If you are towing a
trailer, see Driving Characteristics
and Towing Tips 0226.
If you have to leave the vehicle with
the engine running, be sure the
vehicle is in P (Park) and the parking
brake is firmly set before you leave it.
After you have moved the shift lever
into P (Park), hold down the regular
brake pedal. See if you can move the
shift lever away from P (Park) without
first pulling it toward you. If you can,
it means that the shift lever was not
fully locked into P (Park).
Torque Lock
Torque lock is when the weight of the
vehicle puts too much force on the
parking pawl in the transmission. This
happens when parking on a hill and
Page 290 of 370

Cadillac XTS Owner Manual (GMNA-Localizing-U.S./Canada-11354412) -
2018 - crc - 11/16/17
VEHICLE CARE 289
The tire sealant and compressor can
be used to temporarily seal punctures
up to 6 mm (0.25 in) in the tread area
of the tire. It can also be used to
inflate an underinflated tire.
If the tire has been separated from the
wheel, has damaged sidewalls, or has
a large puncture, the tire is too
severely damaged for the tire sealant
and compressor kit to be effective. See
Roadside Service0338.
Read and follow all of the tire sealant
and compressor kit instructions.
The kit includes:
1. Selector Switch (Sealant/Air or Air Only)
2. On/Off Button
3. Pressure Gauge 4. Pressure Deflation Button
5. Tire Sealant Canister
6. Sealant/Air Hose (Clear)
7. Air Only Hose (Black)
8. Power Plug
9. Canister Release Button
(Under Sealant/Air Hose)
Tire Sealant
Read and follow the safe handling
instructions on the label adhered to
the sealant canister.
Check the tire sealant expiration date
on the sealant canister. The sealant
canister should be replaced before its
expiration date. Replacement sealant
canisters are available at your local
dealer. See “Removal and Installation
of the Sealant Canister” following.
There is only enough sealant to seal
one tire. After usage, the sealant
canister and sealant/air hose assembly
must be replaced. See “Removal and
Installation of the Sealant Canister”
following.
Page 291 of 370

Cadillac XTS Owner Manual (GMNA-Localizing-U.S./Canada-11354412) -
2018 - crc - 11/16/17
290 VEHICLE CARE
Using the Tire Sealant and
Compressor Kit to Temporarily
Seal and Inflate a
Punctured Tire
Follow the directions closely for
correct sealant usage.
1. Selector Switch (Sealant/Airor Air Only)
2. On/Off Button
3. Pressure Gauge 4. Pressure Deflation Button
5. Tire Sealant Canister
6. Sealant/Air Hose (Clear)
7. Air Only Hose (Black)
8. Power Plug
9. Canister Release Button
(Under Sealant/Air Hose)
When using the tire sealant and
compressor kit during cold
temperatures, warm the kit in a
heated environment for five minutes.
This will help to inflate the tire faster.
If a tire goes flat, avoid further tire
and wheel damage by driving slowly
to a level place. Turn on the hazard
warning flashers. See Hazard Warning
Flashers 0155.
See If a Tire Goes Flat 0286 for other
important safety warnings.
Do not remove any objects that have
penetrated the tire.
1. Remove the tire sealant and compressor kit from its storage
location. See Storing the Tire
Sealant and Compressor Kit 0295.
2. Unwrap the sealant/air hose (6) and the power plug (8).
Page 292 of 370

Cadillac XTS Owner Manual (GMNA-Localizing-U.S./Canada-11354412) -
2018 - crc - 11/16/17
VEHICLE CARE 291
3. Place the kit on the ground.Make sure the tire valve stem is
positioned close to the ground so
the hose will reach it.
4. Remove the valve stem cap from the flat tire by turning it
counterclockwise.
5. Attach the sealant/air hose (6) onto the tire valve stem. Turn it
clockwise until it is tight.
6. Plug the power plug (8) into the accessory power outlet in the
vehicle. Unplug all items from
other accessory power outlets.
See Power Outlets 0113.
If the vehicle has an accessory
power outlet, do not use the
cigarette lighter.
If the vehicle only has a cigarette
lighter, use the cigarette lighter.
Do not pinch the power plug
cord in the door or window.
7. Start the vehicle. The vehicle must be running while using the
air compressor. 8. Press and turn the selector
switch (1) counterclockwise to
the Sealant + Air position.
9. Press the on/off button (2) to turn the tire sealant and
compressor kit on.
The compressor will inject
sealant and air into the tire.
The pressure gauge (3) will
initially show a high pressure
while the compressor pushes the
sealant into the tire. Once the
sealant is completely dispersed
into the tire, the pressure will
quickly drop and start to rise
again as the tire inflates with
air only.
10. Inflate the tire to the recommended inflation pressure
using the pressure gauge (3). The
recommended inflation pressure
can be found on the Tire and
Loading Information label. See
Tire Pressure 0274.
The pressure gauge (3) may read
higher than the actual tire
pressure while the compressor is
on. Turn the compressor off to get an accurate pressure reading.
The compressor may be turned
on/off until the correct pressure
is reached.
Caution
If the recommended pressure
cannot be reached after
approximately 25 minutes, the
vehicle should not be driven farther.
The tire is too severely damaged
and the tire sealant and compressor
kit cannot inflate the tire. Remove
the power plug from the accessory
power outlet and unscrew the
inflating hose from the tire valve.
See
Roadside Service 0338.
11. Press the on/off button (2) to turn the tire sealant and
compressor kit off.
The tire is not sealed and will
continue to leak air until the
vehicle is driven and the sealant
is distributed in the tire,
therefore, Steps 12–18 must be
done immediately after Step 11.
Page 293 of 370
Cadillac XTS Owner Manual (GMNA-Localizing-U.S./Canada-11354412) -
2018 - crc - 11/16/17
292 VEHICLE CARE
Be careful while handling the tire
sealant and compressor kit as it
could be warm after usage.
12. Unplug the power plug (8) from the accessory power outlet in the
vehicle.
13. Turn the sealant/air hose (6) counterclockwise to remove it
from the tire valve stem.
14. Replace the tire valve stem cap.
15. Replace the sealant/air hose (6), and the power plug (8) back in
their original location.
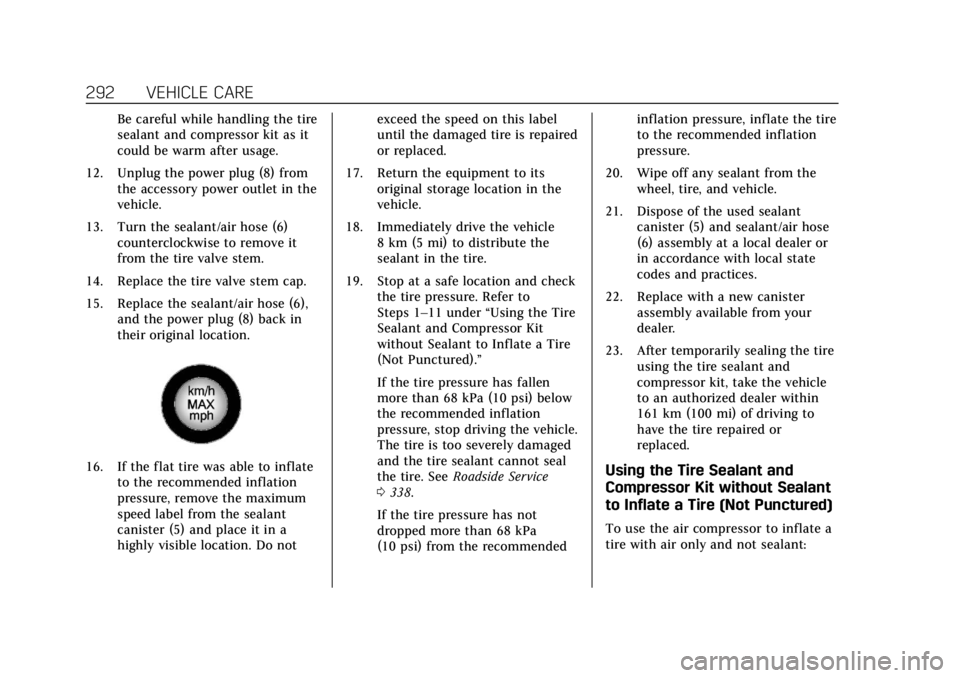
16. If the flat tire was able to inflateto the recommended inflation
pressure, remove the maximum
speed label from the sealant
canister (5) and place it in a
highly visible location. Do not exceed the speed on this label
until the damaged tire is repaired
or replaced.
17. Return the equipment to its original storage location in the
vehicle.
18. Immediately drive the vehicle 8 km (5 mi) to distribute the
sealant in the tire.
19. Stop at a safe location and check the tire pressure. Refer to
Steps 1–11 under “Using the Tire
Sealant and Compressor Kit
without Sealant to Inflate a Tire
(Not Punctured).”
If the tire pressure has fallen
more than 68 kPa (10 psi) below
the recommended inflation
pressure, stop driving the vehicle.
The tire is too severely damaged
and the tire sealant cannot seal
the tire. See Roadside Service
0 338.
If the tire pressure has not
dropped more than 68 kPa
(10 psi) from the recommended inflation pressure, inflate the tire
to the recommended inflation
pressure.
20. Wipe off any sealant from the wheel, tire, and vehicle.
21. Dispose of the used sealant canister (5) and sealant/air hose
(6) assembly at a local dealer or
in accordance with local state
codes and practices.
22. Replace with a new canister assembly available from your
dealer.
23. After temporarily sealing the tire using the tire sealant and
compressor kit, take the vehicle
to an authorized dealer within
161 km (100 mi) of driving to
have the tire repaired or
replaced.Using the Tire Sealant and
Compressor Kit without Sealant
to Inflate a Tire (Not Punctured)
To use the air compressor to inflate a
tire with air only and not sealant: