2018 Acura RDX low power mode
[x] Cancel search: low power modePage 11 of 453

10
Quick Reference Guide
Instrument Panel (P 67)
CanadaU.S.
Turn Signal and Hazard
Warning Indicators
All-Wheel Drive (
AWD)
with Intelligent Control
System Indicator
*
System Indicators
Malfunction
Indicator Lamp
Low Oil Pressure
Indicator
Charging System
Indicator
Anti-lock Brake System
( ABS ) Indicator
Vehicle Stability
Assist (VSA ®) System
Indicator
VSA ® OFF Indicator
Low Tire Pressure/
TPMS Indicator
Lights Indicators
Lights On Indicator
High Beam Indicator
Fog Light Indicator
*
Immobilizer System
Indicator Seat Belt Reminder
Indicator
System Indicators
CRUISE CONTROL
Indicator*
Parking Brake and
Brake System
Indicator (Red) Supplemental Restraint
System Indicator
Door and Tailgate
Open Indicator
*
CRUISE MAIN
Indicator*
Tachometer
Speedometer
Fuel Gauge
Security System Alarm
Indicator
Shift Lever
Position
Indicator Low Fuel Indicator
Gauges (P 95)/Multi-Information Display (P 96)/System Indicators (P 68)
System Message
IndicatorBrake System
Indicator (Amber)
Temperature
Gauge
Electric Power Steering
(EPS) System Indicator
Canada
U.S.
Keyless Access System
Indicator
Lane Departure
Warning (LDW)
Indicator
*
Blind spot information
(BSI) System Indicator*
Collision Mitigation
Braking SystemTM
(CMBSTM) Indicator*
Lane Keeping Assist System
( LKAS) Indicator*/CRUISE
CONTROL Indicator*
Multi-Information Display
(M (Sequential Shift mode)
Indicator/Gear Position
Indicator
Models without
full color display
Adaptive Cruise Control ( ACC)
Indicator*/ CRUISE MAIN
Indicator*
Page 12 of 453

11
Quick Reference Guide
Controls (P 119)
Clock (P 120)
aPress and hold the CLOCK (AUX)
button until Adjust Clock appears.
bPress Preset (4 (Hour) or (5 (Minute)
to set the time.
cPress the CLOCK button again to set
the time.
To set the time to the nearest hour: Press
and hold the CLOCK button until Adjust
Clock appears, then press the
(6 (Reset)
button.
Depending on the displayed time, the clock
sets forward or backward.
Example:
1:06 will reset to 1:00
1:53 will reset to 2:00
The navigation system receives signals from
GPS satellites, updating the clock
automatically.
Models without navigation system
Models with navigation system
ENGINE START/STOP
Button
(P 146)
Press the button to ch ange the vehicle’s
power mode.
Turn Signals (P 149)
Turn Signal Control Lever
Right
Left
Lights (P 149)
Light Control Switches
Low Beam High Beam
Flashing
* Not available on all models
Page 13 of 453

12
Quick Reference Guide
Wipers and Washers (P 153)
AUTO should always be turned OFF before
the following situation in order to prevent
severe damage to the wiper system:
● Cleaning the windshield
● Driving through a car wash
● No rain present
Wiper/Washer Control Lever
Adjustment Ring
(-: Low Sensitivity*1
: Lower speed, fewer sweeps*2
(+: High Sensitivity*1
: Higher speed, more sweeps*2
MIST
OFF
AUTO
*1: Wiper speed varies automatically
INT*2: Low speed with intermittent
LO : Low speed wipe
HI: High speed wipe Pull toward
you to spray
washer fluid.
*1 : Models with automatic intermittent wipers
*2 : Models without automatic intermittent
wipers
Models with automatic intermittent wipers
Steering Wheel (P 160)
● To adjust, pull the adjustment lever
towards you, adjust to the desired
position, then lock the lever back in place.
Unlocking the Front Doors
from the Inside
(P 130)
● Pull either front door inner handle to
unlock and open it at the same time.
Tailgate (P 133)
● Press the tailgate release button to
unlock and open the tailgate.
● Press the power tailgate button on the
instrument panel or the remote
transmitter to open and close the power
tailgate.
Page 23 of 453

22
Quick Reference Guide
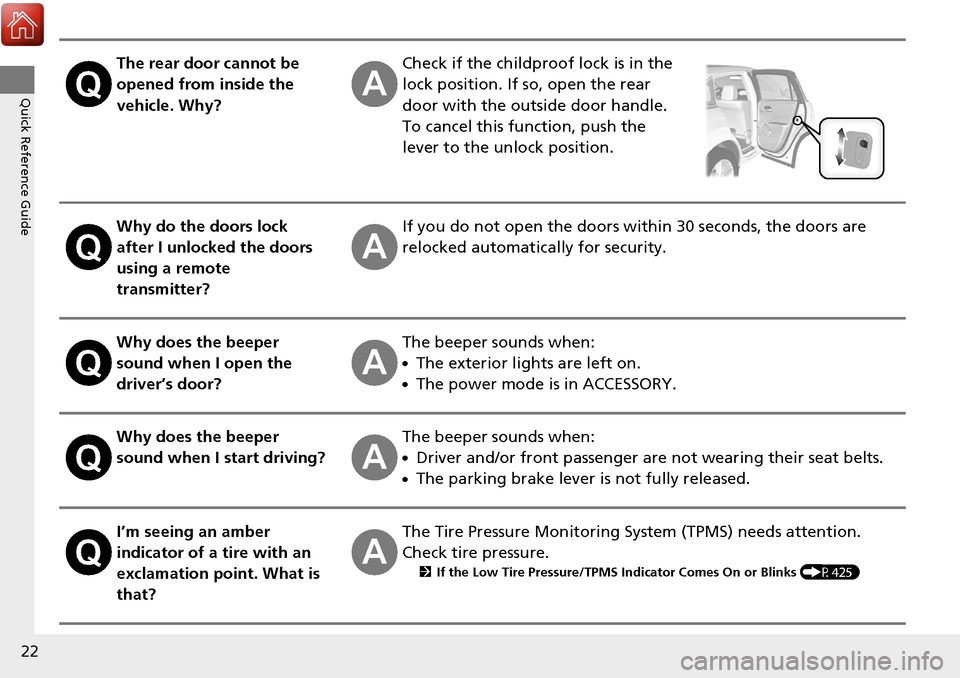
The rear door cannot be
opened from inside the
vehicle. Why?Check if the childproof lock is in the
lock position. If so, open the rear
door with the outside door handle.
To cancel this function, push the
lever to the unlock position.
Why do the doors lock
after I unlocked the doors
using a remote
transmitter?If you do not open the doors within 30 seconds, the doors are
relocked automatically for security.
Why does the beeper
sound when I open the
driver’s door?The beeper sounds when:
●The exterior lights are left on.
●The power mode is in ACCESSORY.
Why does the beeper
sound when I start driving?The beeper sounds when:
●Driver and/or front passenger are not wearing their seat belts.
●The parking brake lever is not fully released.
I’m seeing an amber
indicator of a tire with an
exclamation point. What is
that?The Tire Pressure Monitoring System (TPMS) needs attention.
Check tire pressure.
2 If the Low Tire Pressure/TPMS Indicator Comes On or Blinks (P425)
Page 33 of 453

uuSeat Belts uAbout Your Seat Belts
32
Safe Driving
■Proper use of seat belts
Follow these guidelines for proper use:
• All occupants should sit upright, well back in the seat, and remain in that position
for the duration of the trip. Slouching an d leaning reduces the effectiveness of
the belt and can increase the chance of serious injury in a crash.
• Never place the shoulder part of a lap/shoulder seat belt under your arm or
behind your back. This could cause very serious injuries in a crash.
• Two people should never use the same seat belt. If they do, they could be very
seriously injured in a crash.
• Do not put any accessories on the seat be lts. Devices intended to improve comfort
or reposition the shoulder part of a seat be lt can reduce the protective capability
and increase the chance of serious injury in a crash.
Your vehicle monitors front seat belt use. If
the power mode is set to ON before the
driver’s seat belt is fastened, a beeper will
sound and the indicator will blink. If the driver
does not fasten the belt before the beeper
stops, the indicator will remain on.
The beeper will also periodically sound and
the indicator will blink while driving until the
driver’s and front passenger’s seat belts are
fastened.
■Seat Belt Reminder
1 About Your Seat Belts
If a rear seat passenger moves around and extends
the seat belt, the lockable retractor may activate. If
this happens, release the retractor by unfastening the
seat belt and allow the belt to retract completely.
Then refasten the belt.
1Seat Belt Reminder
The indicator will also come on if a front passenger
does not fasten their seat be lt within 6 seconds after
the power mode is set to ON.
When no one is sitting in th e front passenger’s seat,
or a child or small adult is riding there, the indicator
will not come on.
This is because the weight sensors in the seat cannot
detect their presence.
Models with
full color
displayModels
without full
color display
Page 43 of 453

42
uuAirbags uTypes of Airbags
Safe Driving
Types of Airbags
Your vehicle is equipped with three types of airbags:
• Front airbags: Airbags in front of the driver ’s and front passenger’s seats.
• Side airbags: Airbags in the driver’s and front passenger’s seat-backs.
• Side curtain airbags: Airbags above the side windows.
Each is discussed in the following pages.
Front Airbags (SRS)
The front SRS airbags inflate in a moderate-to -severe frontal collision to help protect
the head and chest of the driver and/or front passenger.
SRS (Supplemental Restraint System) indica tes that the airbags are designed to
supplement seat belts, not replace them. Seat belts are the occupant’s primary
restraint system.
The front airbags are housed in the center of the steering wheel for the driver, and
in the dashboard for the front pass enger. Both airbags are marked SRS AIRBAG.
■Housing Locations
1Types of Airbags
The airbags can inflate whenever the power mode is
in ON.
After an airbag inflates in a crash, you may see a
small amount of smoke. This is from the combustion
process of the infl ator material and is not harmful.
People with respiratory pr oblems may experience
some temporary discomfort. If this occurs, get out of
the vehicle as soon as it is safe to do so.
1 Front Airbags (SRS)
During a frontal crash severe enough to cause one or
both front airbags to deploy, the airbags can inflate
at different rates, dependi ng on the severity of the
crash, whether or not the se at belts are latched, and/
or other factors. Frontal airbags are designed to
supplement the seat belts to help reduce the
likelihood of head and chest injuries in frontal
crashes.
Page 69 of 453

68
Instrument Panel
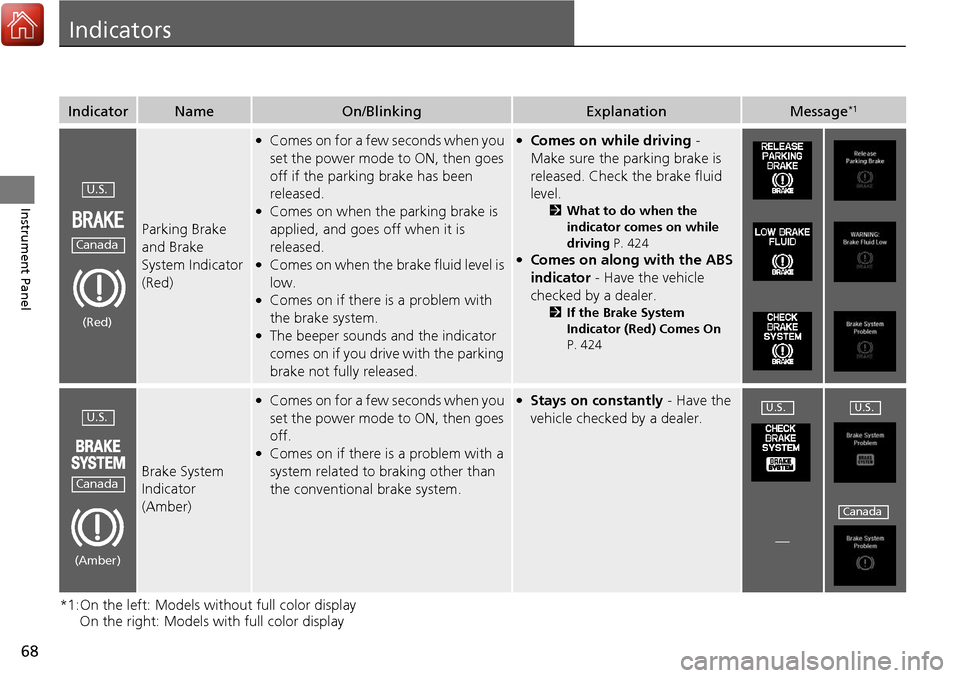
Indicators
*1:On the left: Models without full color display On the right: Models with full color display
IndicatorNameOn/BlinkingExplanationMessage*1
Parking Brake
and Brake
System Indicator
(Red)
●Comes on for a few seconds when you
set the power mode to ON, then goes
off if the parking brake has been
released.
●Comes on when the parking brake is
applied, and goes off when it is
released.
●Comes on when the brake fluid level is
low.
●Comes on if there is a problem with
the brake system.
●The beeper sounds and the indicator
comes on if you drive with the parking
brake not fully released.
●Comes on while driving -
Make sure the parking brake is
released. Check the brake fluid
level.
2 What to do when the
indicator comes on while
driving P. 424
●Comes on along with the ABS
indicator - Have the vehicle
checked by a dealer.
2 If the Brake System
Indicator (Red) Comes On
P. 424
Brake System
Indicator
(Amber)
●Comes on for a few seconds when you
set the power mode to ON, then goes
off.
●Comes on if there is a problem with a
system related to braking other than
the conventional brake system.
●Stays on constantly - Have the
vehicle checked by a dealer.
—
U.S.
Canada
(Red)
U.S.
Canada
(Amber)
U.S.U.S.
Canada
Page 70 of 453

69
uuIndicators u
Continued
Instrument Panel
*1:On the left: Models wi thout full color display
On the right: Models with full color display
IndicatorNameOn/BlinkingExplanationMessage*1
Low Oil Pressure
Indicator
●Comes on when you set the power
mode to ON, and goes off when the
engine starts.
●Comes on when the engine oil
pressure is low.
●Comes on while driving -
Immediately stop in a safe place.
2If the Low Oil Pressure
Indicator Comes On P. 422
Malfunction
Indicator Lamp
●Comes on when you set the power
mode to ON, and goes off either when
the engine starts or after several
seconds if the engine does not start. If
“readiness codes” have not been set,
it blinks five times before it goes off.
●Comes on if there is a problem with
the emissions control system.
●Blinks when a misfire in the engine’s
cylinders is detected.
●Readiness codes are part of the
on board diagnostics for the
emissions control systems.
2Testing of Readiness Codes
P. 437
●Comes on while driving - Have
the vehicle checked by a dealer.
●Blinks while driving - Stop in a
safe place where there are no
flammable objects. Stop the
engine for 10 minutes or more,
and wait for it to cool down.
Then, take the vehicle to a dealer.
2 If the Malfunction Indicator
Lamp Comes On or Blinks
P. 423