2018.75 OPEL GRANDLAND X information system
[x] Cancel search: information systemPage 147 of 273

Driving and operating145AdBlue
General information
The selective catalytic reduction
(BlueInjection) is a method to
substantially reduce the nitrogen
oxides in the exhaust emission. This
is achieved by injecting a Diesel
Exhaust Fluid (DEF) into the exhaust
system. The ammonia released by
the fluid reacts with nitrous gases
(NO x) from the exhaust and turns it
into nitrogen and water.
The designation of this fluid is
AdBlue ®
. It is a non-toxic, non-
flammable, colourless and odourless
fluid which consists of 32% urea and
68% water.9 Warning
Avoid contact of your eyes or skin
with AdBlue.
In case of eye or skin contact,
rinse off with water.
Caution
Avoid contact of the paintwork with AdBlue.
In case of contact, rinse off with water.
AdBlue freezes at a temperature of
approx. -11 °C. As the vehicle is
equipped with an AdBlue pre-heater,
the emissions reduction at low
temperatures is ensured. The AdBlue
pre-heater works automatically.
The typical AdBlue consumption is
approx. 0.85 l per 1000 km, but can
also be higher depending on driving
behaviour (e.g. high load or towing).
Level warnings
Depending on the calculated range of
AdBlue, different messages are
displayed in the Driver Information
Centre. The messages and the
restrictions are a legal requirement.
1. The first possible warning is Top
up emissions additive: Starting
prevented in 2400 km .
When switching on the ignition,
this warning will show up once
briefly with the calculated range.
Additionally, control indicator u
will illuminate and a chime will
sound. Driving is possible without
any restrictions.
When driving, the message is
displayed every 300 km until the
additive tank has been topped-up.
2. The next warning level is entered with a range below 600 km. Themessage with the current range
will always be displayed when
ignition is switched on.
Additionally, control indicator u
will flash and a chime will sound.
Refill AdBlue before entering the
next warning level.
When driving, the message is
displayed every 30 seconds until
the additive tank has been
topped-up.
3. The last warning level is entered when the AdBlue tank is empty.
Restart of the engine is not
possible. The following warning
message will be displayed:
Page 148 of 273

146Driving and operatingTop up emissions additive:
Starting prevented
Additionally, control indicator u
will flash and a chime will sound.
Refill the tank to a level of at least
5 l of AdBlue, otherwise restarting
of the engine is not possible.
High emission warnings In the event of a fault with the
emissions control system, different
messages are displayed in the Driver Information Centre. The messages
and the restrictions are a legal
requirement.
1. If a fault is detected for the first time, the warning Emissions fault
is displayed.
Additionally, control indicators u,
R and Z will illuminate and a
chime will sound. Driving is
possible without any restrictions.
If it is a temporary fault, the alert
disappears during the next
journey, after self-diagnosis of the emissions control system.2. If the fault is confirmed by the emission control system, thefollowing message will be
displayed:
Emissions fault: Starting
prevented in 1100 km .
Additionally, control indicators u,
R and Z will illuminate and a
chime will sound.
When driving, the message is
displayed every 30 seconds while
the fault persists.
3. If the last warning level is entered,
the following warning message
will be displayed:
Emissions fault: Starting
prevented
Additionally, control indicators u,
R and Z will illuminate and a
chime will sound.
Consult a workshop for
assistance.Refilling AdBlueCaution
Only use AdBlue that complies
with European standards
DIN 70 070 and ISO 22241-1.
Do not use additives.
Do not dilute AdBlue.
Otherwise the selective catalytic
reduction system could be
damaged.
Note
Whenever a filling pump with a
nozzle for passenger cars is not
available at a filling station, use only
AdBlue bottles or canisters with a
sealed refill adapter for refilling, to
prevent splashback and overspill,
and in order to ensure that the fumes
from the tank are captured and do
not emerge. AdBlue in bottles or
canisters is available in many filling
Page 153 of 273

Driving and operating151
3. Push down the button and movethe selector lever out of P. Have
the cause of the power supply
interruption remedied by a
workshop.
4. Mount the selector lever trim onto
the centre console and refit.
Manual transmission
To engage reverse on 6-speed
transmission, depress the clutch
pedal, pull the ring under the selector
lever and move the selector lever
quite to the left and front.
If the gear does not engage, set the
selector lever to neutral, release the
clutch pedal and depress again. Then
repeat gear selection.
Do not slip the clutch unnecessarily.
When operating, depress the clutch
pedal completely. Do not use the
pedal as a foot rest.
When clutch slip is detected for a specific time, the engine power will be reduced. A warning is displayed in the
Driver Information Centre. Release
the clutch.Caution
It is not advisable to drive with the hand resting on the selector lever.
Gear shift indication 3 97.
Stop-start system 3 140.
Page 155 of 273
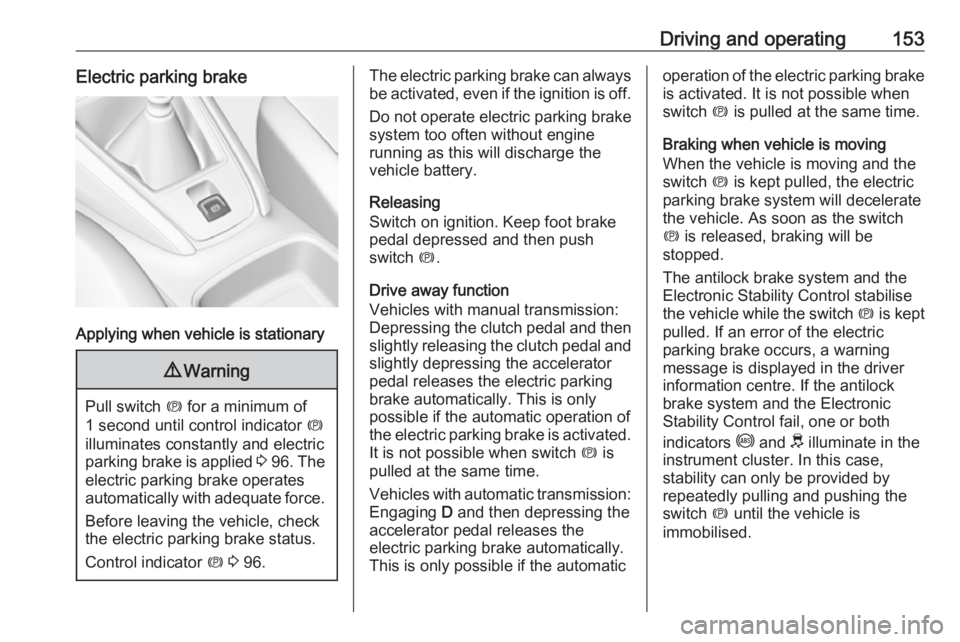
Driving and operating153Electric parking brake
Applying when vehicle is stationary
9Warning
Pull switch m for a minimum of
1 second until control indicator m
illuminates constantly and electric
parking brake is applied 3 96 . The
electric parking brake operates automatically with adequate force.
Before leaving the vehicle, check
the electric parking brake status.
Control indicator m 3 96.
The electric parking brake can always
be activated, even if the ignition is off.
Do not operate electric parking brake
system too often without engine
running as this will discharge the
vehicle battery.
Releasing
Switch on ignition. Keep foot brake
pedal depressed and then push
switch m.
Drive away function
Vehicles with manual transmission:
Depressing the clutch pedal and then slightly releasing the clutch pedal and
slightly depressing the accelerator
pedal releases the electric parking
brake automatically. This is only
possible if the automatic operation of
the electric parking brake is activated. It is not possible when switch m is
pulled at the same time.
Vehicles with automatic transmission: Engaging D and then depressing the
accelerator pedal releases the
electric parking brake automatically.
This is only possible if the automaticoperation of the electric parking brake
is activated. It is not possible when
switch m is pulled at the same time.
Braking when vehicle is moving
When the vehicle is moving and the
switch m is kept pulled, the electric
parking brake system will decelerate
the vehicle. As soon as the switch
m is released, braking will be
stopped.
The antilock brake system and the Electronic Stability Control stabilise
the vehicle while the switch m is kept
pulled. If an error of the electric
parking brake occurs, a warning
message is displayed in the driver
information centre. If the antilock
brake system and the Electronic
Stability Control fail, one or both
indicators i and J illuminate in the
instrument cluster. In this case,
stability can only be provided by
repeatedly pulling and pushing the
switch m until the vehicle is
immobilised.
Page 156 of 273

154Driving and operatingAutomatic operation
Automatic operation includes
automatic application and automatic
release of the electric parking brake.
The electric parking brake can also be
applied or released manually by using
the switch m.
Automatic application: ● The electric parking brake is automatically applied when the
vehicle is stationary and the
ignition is switched off.
● j illuminates in the instrument
cluster and a display message
pops up to confirm the
application.
Automatic release: ● Parking brake releases automatically after moving off.
● j extinguishes in the instrument
cluster and a display message
pops up to confirm the release.
If the vehicle is equipped with an
automatic transmission and the brake is not released automatically, make
sure the front doors are correctly
closed.Deactivation of automatic operation 1. Start the engine.
2. If the parking brake is released, apply the parking brake pulling the
switch m.
3. Take your foot off the brake pedal.
4. Press the switch m for at least
10 seconds and maximum
15 seconds.
5. Release the switch m.
6. Press and hold the brake pedal. 7. Pull the switch m for 2 seconds.
The deactivation of the automatic
operation of the electric parking brake
is confirmed by o illuminating in the
instrument cluster 3 96. The electric
parking brake can only be applied and released manually.
To reactivate the automatic
operation, repeat the steps described
above.
Functionality check
When the vehicle is not moving, the
electric parking brake might be
applied automatically. This is done to
check the system.Fault
Failure mode of electric parking brake
is indicated by a control indicator j
and by a vehicle message which is
displayed in the Driver Information Centre.
Vehicle messages 3 105.
Apply electric parking brake: pull and
hold the switch m for more than
5 seconds. If control indicator m
illuminates, electric parking brake is
applied.
Release electric parking brake: push and hold the switch m for more than
2 seconds. If control indicator m
extinguishes, electric parking brake is released.
Control indicator m flashes: electric
parking brake is not fully applied or released. When continuously
flashing, release electric parking
brake and retry applying.
Brake assist If brake pedal is depressed quickly
and forcefully, maximum brake force
is automatically applied.
Page 158 of 273

156Driving and operatingDeactivation
ESC and TC can be deactivated,
everytime it is required: press a.
The LED in the button a illuminates.
A status message appears in the
Driver Information Centre when ESC
and TC are deactivated.
ESC and TC are reactivated by
pressing the a button again, by
applying the brake or in the case that
the vehicle is driven faster than
50 km/h.
The LED in the button a extinguishes
when ESC and TC are reactivated.
ESC and TC are also reactivated the
next time the ignition is switched on.
Fault
If there is a fault in the system, the control indicator b illuminates
continuously and a message appears
in the Driver Information Centre. The
system is not operational.
Have the cause of the fault remedied
by a workshop.
Selective ride controlCaution
The vehicle is designed to drive
principally on-road, but it also
enables driving off-road
occasionally.
However, do not drive on terrain
where the vehicle could be
damaged due to obstacles, such
as stones among others and on
terrain with steep inclines and
poor grip.
Do not cross waters.
Caution
When driving off-road, sudden
motion and manoeuvres can
cause a collision or losing control.
Selective ride control is designed to
optimise traction in low-grip
conditions (snow, mud and sand).
It adapts to the terrain by acting on the
front wheels, in doing so this saves
the weight normally associated with a more conventional four wheel drive
system.
Page 159 of 273

Driving and operating157Selective ride control allows to
choose between five driving modes:
● ESC off mode 9
● standard mode 2
● snow mode 3
● mud mode 4
● sand mode 1
The several modes can be activated by turning the control.
A LED illuminates and a status
message appears in the Driver
Information Centre to confirm the
chosen mode.
ESC off mode 9
The ESC and Traction Control are
deactivated in this mode.
A LED in the button a illuminates.
ESC and Traction Control are
reactivated automatically from
50 km/h or everytime the ignition is
switched on.Standard mode 2
This mode is calibrated for a low level
of wheel spin, based on the different
types of grip generally encountered in normal day to day driving.
Everytime the ignition is switched off,
the system is automatically reset to
this mode.
Snow mode 3
This mode adapts to the grip
conditions encountered by each
wheel when starting.
When advancing, the system
optimises wheel spin to guarantee the
best acceleration based on the
available traction. Recommended in
cases of deep snow and steep
inclines.
This mode is active up to a speed of
50 km/h.
Mud mode 4
This mode allows considerable wheel
spin at start-up for the wheel with the
least grip, this removes mud and re- establishes traction.Simultaneously, the wheel with the
most grip is provided with the most
torque possible.
This mode is active up to a speed of 80 km/h.
Sand mode 1
This mode allows a small amount of simultaneous wheel spin on the two
drive wheels, enabling the vehicle to
advance and reduce the risk of
sinking.
This mode is active up to a speed of
120 km/h.Caution
Do not use the other modes on
sand as the vehicle may become
stuck.
Page 160 of 273

158Driving and operatingSport mode
Sport mode adapts the settings of
some vehicle systems to a sportier
driving style.
Activation
Press SPORT when engine is
running.
LED in the button illuminates when
sport mode is active and a status
message appears in the Driver
Information Centre.
Deactivation
Briefly press SPORT. Sport mode is
deactivated the next time the ignition
is switched on.Driver assistance
systems9 Warning
Driver assistance systems are
developed to support the driver
and not to replace the driver's
attention.
The driver accepts full
responsibility when driving the
vehicle.
When using driver assistance
systems, always take care
regarding the current traffic
situation.
Cruise control
The cruise control can store and
maintain speeds above 40 km/h.
Additionally at least the third gear
must be engaged on manual
transmission, on automatic
transmission position D or the second
or a higher gear in position M must be
selected.