2018.5 VAUXHALL MOKKA X parking brake
[x] Cancel search: parking brakePage 207 of 255

Vehicle care205If the wheel covers and tyres used are
not factory-approved, the tyres must
not have a rim protection ridge.
Wheel covers must not impair brake
cooling.9 Warning
Use of unsuitable tyres or wheel
covers could lead to sudden
pressure loss and thereby
accidents.
Vehicles with alloy wheels: When
mounting steel wheels with alloy
wheel nuts, e.g. when changing to
winter tyres, the wheel covers cannot
be attached to the steel wheels.
Tyre chains
Use tyre chains only on front wheels.
9 Warning
Damage may lead to tyre blowout.
Tyre chains are permitted on tyres of
size 215/65 R16, 215/60 R17 and
215/55 R18.
On tyres of size 215/65 R16 and
215/60 R17 always use fine mesh
chains suitable for sport utility
vehicles that add no more than
9 mm to the tyre tread and the inboard sides (including chain lock).
On tyres of size 215/55 R18 only usespecial snow chains which are
permitted for Vauxhall Mokka and
tyres of these sizes. For further
information contact a workshop.
The use of tyre chains is not permitted on the temporary spare wheel.
Tyre repair kit Minor damage to the tyre tread can be
repaired with the tyre repair kit.
Do not remove foreign bodies from
the tyres.
Tyre damage exceeding 4 mm or that is at tyre's sidewall cannot be repairedwith the tyre repair kit.9 Warning
Do not drive faster than 50 mph.
Do not use for a lengthy period.
Steering and handling may be
affected.
If you have a flat tyre:
Apply the parking brake and engage
first gear, reverse gear or P.
Page 210 of 255
208Vehicle care
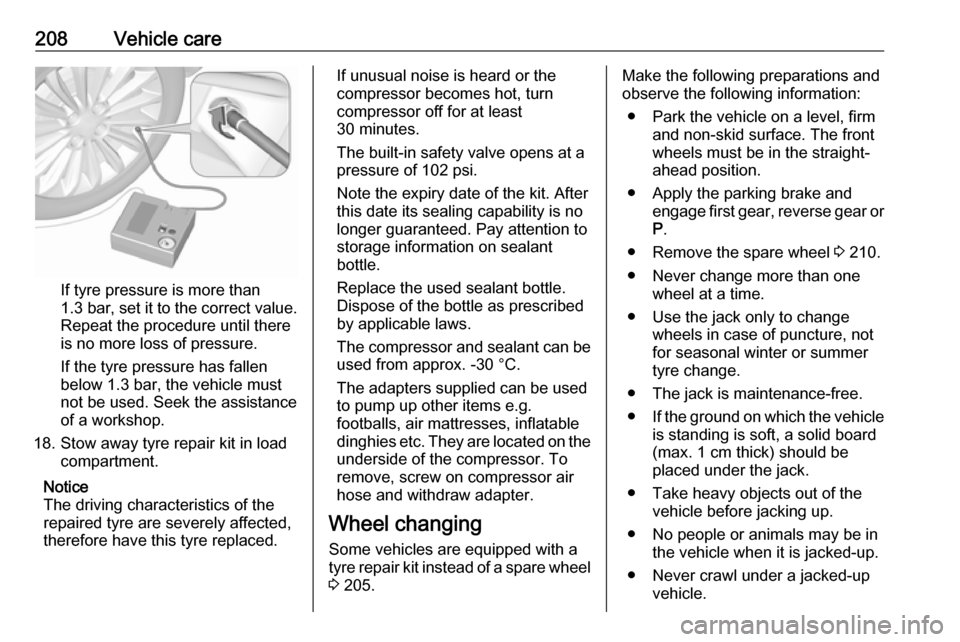
If tyre pressure is more than
1.3 bar , set it to the correct value.
Repeat the procedure until there
is no more loss of pressure.
If the tyre pressure has fallen
below 1.3 bar, the vehicle must
not be used. Seek the assistance
of a workshop.
18. Stow away tyre repair kit in load compartment.
Notice
The driving characteristics of the
repaired tyre are severely affected,
therefore have this tyre replaced.
If unusual noise is heard or the
compressor becomes hot, turn
compressor off for at least
30 minutes.
The built-in safety valve opens at a
pressure of 102 psi.
Note the expiry date of the kit. After
this date its sealing capability is no
longer guaranteed. Pay attention to
storage information on sealant
bottle.
Replace the used sealant bottle. Dispose of the bottle as prescribed
by applicable laws.
The compressor and sealant can be used from approx. -30 °C.
The adapters supplied can be used
to pump up other items e.g.
footballs, air mattresses, inflatable
dinghies etc. They are located on the
underside of the compressor. To
remove, screw on compressor air
hose and withdraw adapter.
Wheel changing
Some vehicles are equipped with a
tyre repair kit instead of a spare wheel 3 205.Make the following preparations and
observe the following information:
● Park the vehicle on a level, firm and non-skid surface. The front
wheels must be in the straight- ahead position.
● Apply the parking brake and engage first gear, reverse gear or
P .
● Remove the spare wheel 3 210.
● Never change more than one wheel at a time.
● Use the jack only to change wheels in case of puncture, not
for seasonal winter or summer
tyre change.
● The jack is maintenance-free.
● If the ground on which the vehicle
is standing is soft, a solid board
(max. 1 cm thick) should be
placed under the jack.
● Take heavy objects out of the vehicle before jacking up.
● No people or animals may be in the vehicle when it is jacked-up.
● Never crawl under a jacked-up vehicle.
Page 215 of 255

Vehicle care213●A discharged battery can already
freeze at a temperature of 0 °C.
Defrost the frozen battery before
connecting jump leads.
● Wear eye protection and protective clothing when
handling a battery.
● Use a booster battery with the same voltage (12 V). Its capacity
(Ah) must not be much less than
that of the discharged battery.
● Use jump leads with insulated terminals and a cross section of
at least 16 mm 2
(25 mm 2
for
diesel engines).
● Do not disconnect the discharged
battery from the vehicle.
● Switch off all unnecessary electrical consumers.
● Do not lean over the battery during jump starting.
● Do not allow the terminals of one
lead to touch those of the other
lead.
● The vehicles must not come into contact with each other during
the jump starting process.● Apply the parking brake, transmission in neutral,
automatic transmission in P.
● Open the positive terminal protection caps of both batteries.
Lead connection order:
1. Connect the red lead to the positive terminal of the booster
battery.
2. Connect the other end of the red lead to the positive terminal of the
discharged battery.
3. Connect the black lead to the negative terminal of the booster
battery.
4. Connect the other end of the black
lead to a vehicle grounding point,
such as the engine block or an
engine mounting bolt. Connect as far away from the discharged
battery as possible, however at
least 60 cm.
Route the leads so that they cannot
catch on rotating parts in the engine
compartment.
To start the engine: 1. Start the engine of the vehicle providing the jump.
2. After 5 min, start the other engine.
Start attempts should be made for
no longer than 15 s at an interval
of 1 min.
3. Allow both engines to idle for approx. three minutes with the
leads connected.
Page 216 of 255

214Vehicle care4. Switch on electrical consumers(e.g. headlights, heated rear
window) of the vehicle receiving
the jump start.
5. Reverse above sequence exactly when removing leads.Towing
Towing the vehicle
Wrap a cloth around the tip of a flat
screwdriver to prevent paint damage.
Insert the screwdriver in the slot at the
lower part of the cap. Release the cap by carefully moving the screwdriver
downwards.
The towing eye is stowed with the
vehicle tools 3 197.
Screw in the towing eye as far as it will
go until it stops in a horizontal
position.
Attach a tow rope – or better still a tow
rod – to the towing eye.
The towing eye must only be used for
towing and not for recovering the
vehicle.
Switch on ignition to release steering wheel lock and to permit operation of
brake lights, horn and windscreen
wiper.
Switch the selector lever to neutral.
Release the parking brake.
Page 252 of 255

250Head restraint adjustment .............8
Head restraints ............................ 37
Heated mirrors ............................. 32
Heated rear window ..................... 35
Heated steering wheel .................75
Heating ........................................ 41
Heating and ventilation system . 125
High beam ........................... 94, 115
High beam assist ..................94, 116
Hill start assist ........................... 151
Horn ....................................... 13, 76
I
Identification plate .....................224
Ignition switch positions .............134
Immobiliser ............................ 30, 94
Indicators ...................................... 82
Info Display ................................... 99
Information displays...................... 95
Initial drive information.................... 6
Instrument panel fuse box .........194
Instrument panel illumination control .................................... 122
Instrument panel overview ........... 10
Interior care ............................... 218
Interior lighting ............................ 122
Interior lights .............................. 122
Interior mirrors .............................. 32
Interruption of power supply ......147
Introduction .................................... 3J
Jump starting ............................. 212
K Key, memorised settings ..............22
Keys ............................................. 19
Keys, locks ................................... 19
L Lane departure warning .......92, 167
Lashing eyes ............................... 71
Lighting features .........................123
Light switch ................................ 114
Load compartment ................28, 69
Load compartment cover .............70
Load compartment fuse box ......196
Loading information .....................72
Low fuel ....................................... 93
LPG .............................. 84, 170, 226
M Malfunction indicator light ............91
Manual anti-dazzle ......................32
Manual mode ............................. 146
Manual transmission .................. 148
Manual windows ..........................33
Memorised settings ......................22
Midlevel display ............................ 95
Mirror adjustment ........................... 8 Misted light covers .....................122N
New vehicle running-in ..............133
Number plate light .....................191
O Object detection systems ...........160
Odometer ..................................... 82
Oil, engine .......................... 221, 226
OnStar ........................................ 108
Outside temperature ....................78
Overrun cut-off ........................... 137
P Parking ................................ 18, 139
Parking assist ............................ 160
Parking brake ............................ 150
Particulate filter ........................... 141
Performance .............................. 231
Performing work ........................181
Pollen filter ................................. 130
Power button .............................. 134
Power outlets ............................... 81
Power steering fluid ....................183
Power windows ............................ 33
Preheating ................................... 93
Puncture ..................................... 208
R Radio Frequency Identification (RFID) ..................................... 246
Radio remote control ...................20