Page 113 of 183
External devices113The maximum resolution is 1280 x
720 pixels. The frame rate must be
less than 30 fps.
The usable codec is H.264/MPEG-4 AVC.
The playable audio formats are MP3,
AC3, AAC and WMA.
The displayable subtitle format is
SMI.
Playing audio
Activating the music function If the device is not yet connected to
the Infotainment system, connect the
device 3 111.
Usually, the respective audio main
menu is displayed automatically.
If playback is not started
automatically, e.g. if USB Auto
Launch is deactivated 3 111 , take the
following steps:
Press ; and then select Audio to
open the audio main menu last
selected.Select Source in the interaction
selector bar and then select the
desired audio source to open the
respective audio main menu.
Playback of the audio tracks starts
automatically.
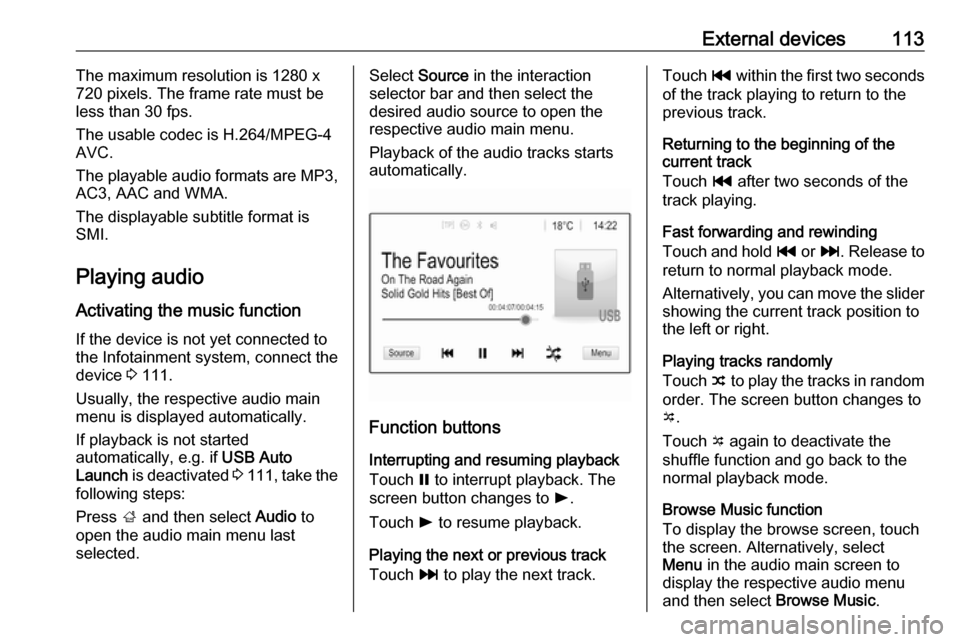
Function buttons
Interrupting and resuming playback
Touch = to interrupt playback. The
screen button changes to l.
Touch l to resume playback.
Playing the next or previous track
Touch v to play the next track.
Touch t within the first two seconds
of the track playing to return to the
previous track.
Returning to the beginning of the
current track
Touch t after two seconds of the
track playing.
Fast forwarding and rewinding
Touch and hold t or v. Release to
return to normal playback mode.
Alternatively, you can move the slider
showing the current track position to
the left or right.
Playing tracks randomly
Touch n to play the tracks in random
order. The screen button changes to
o .
Touch o again to deactivate the
shuffle function and go back to the
normal playback mode.
Browse Music function
To display the browse screen, touch
the screen. Alternatively, select
Menu in the audio main screen to
display the respective audio menu
and then select Browse Music.
Page 114 of 183
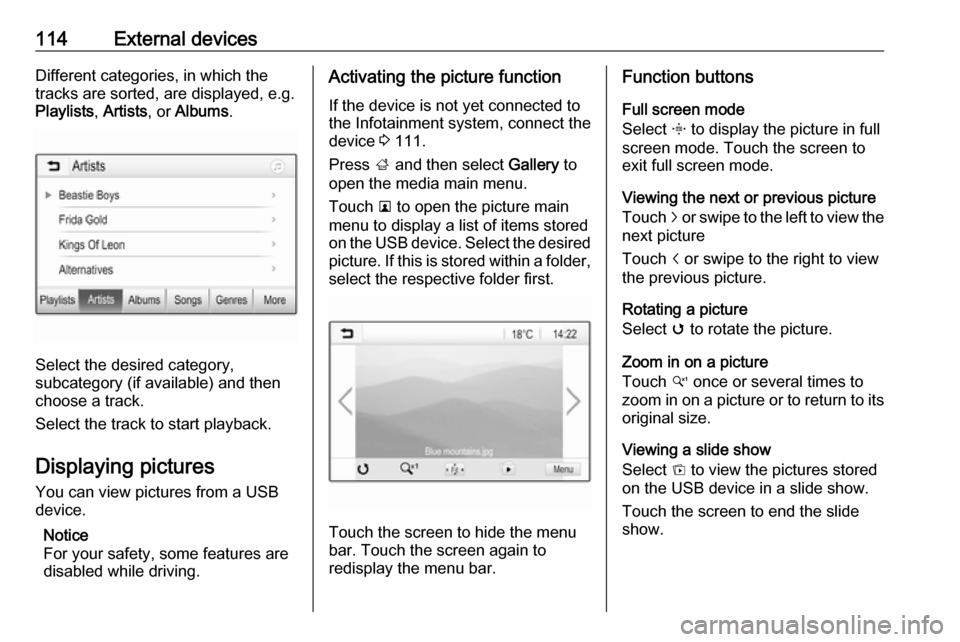
114External devicesDifferent categories, in which the
tracks are sorted, are displayed, e.g.
Playlists , Artists , or Albums .
Select the desired category,
subcategory (if available) and then
choose a track.
Select the track to start playback.
Displaying pictures
You can view pictures from a USB
device.
Notice
For your safety, some features are
disabled while driving.
Activating the picture function
If the device is not yet connected to
the Infotainment system, connect the
device 3 111.
Press ; and then select Gallery to
open the media main menu.
Touch l to open the picture main
menu to display a list of items stored on the USB device. Select the desired
picture. If this is stored within a folder, select the respective folder first.
Touch the screen to hide the menu
bar. Touch the screen again to
redisplay the menu bar.
Function buttons
Full screen mode
Select x to display the picture in full
screen mode. Touch the screen to
exit full screen mode.
Viewing the next or previous picture
Touch j or swipe to the left to view the
next picture
Touch i or swipe to the right to view
the previous picture.
Rotating a picture
Select v to rotate the picture.
Zoom in on a picture
Touch w once or several times to
zoom in on a picture or to return to its
original size.
Viewing a slide show
Select t to view the pictures stored
on the USB device in a slide show.
Touch the screen to end the slide
show.
Page 115 of 183
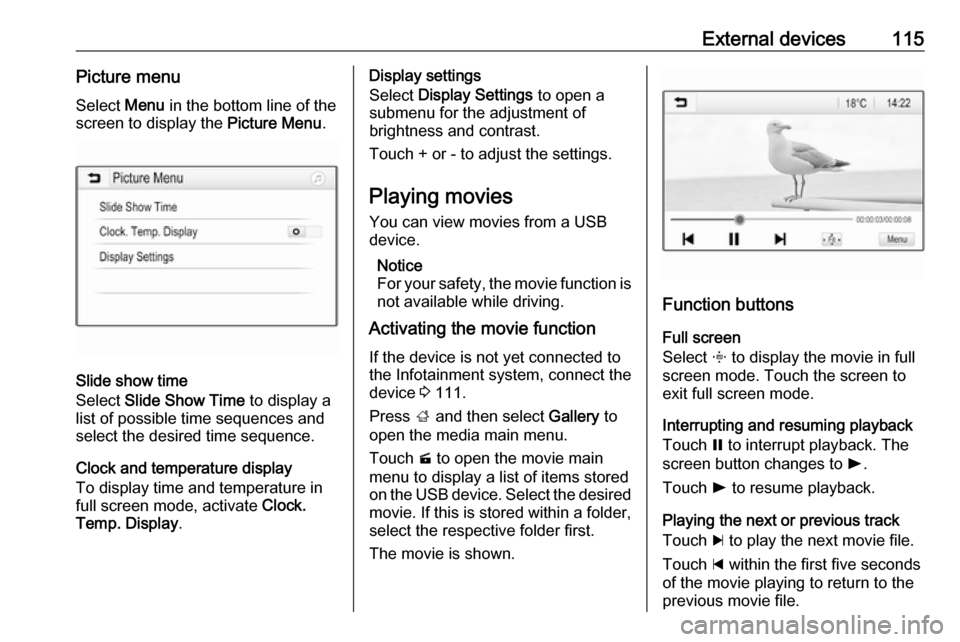
External devices115Picture menuSelect Menu in the bottom line of the
screen to display the Picture Menu.
Slide show time
Select Slide Show Time to display a
list of possible time sequences and select the desired time sequence.
Clock and temperature display
To display time and temperature in
full screen mode, activate Clock.
Temp. Display .
Display settings
Select Display Settings to open a
submenu for the adjustment of
brightness and contrast.
Touch + or - to adjust the settings.
Playing movies
You can view movies from a USB device.
Notice
For your safety, the movie function is
not available while driving.
Activating the movie function
If the device is not yet connected to
the Infotainment system, connect the
device 3 111.
Press ; and then select Gallery to
open the media main menu.
Touch m to open the movie main
menu to display a list of items stored on the USB device. Select the desired
movie. If this is stored within a folder, select the respective folder first.
The movie is shown.
Function buttons
Full screen
Select x to display the movie in full
screen mode. Touch the screen to
exit full screen mode.
Interrupting and resuming playback
Touch = to interrupt playback. The
screen button changes to l.
Touch l to resume playback.
Playing the next or previous track
Touch c to play the next movie file.
Touch d within the first five seconds
of the movie playing to return to the
previous movie file.
Page 116 of 183
116External devicesReturning to the beginning of the
current movie
Touch d after five seconds of the
movie playing.
Fast forwarding and rewinding
Touch and hold d or c. Release to
return to normal playback mode.
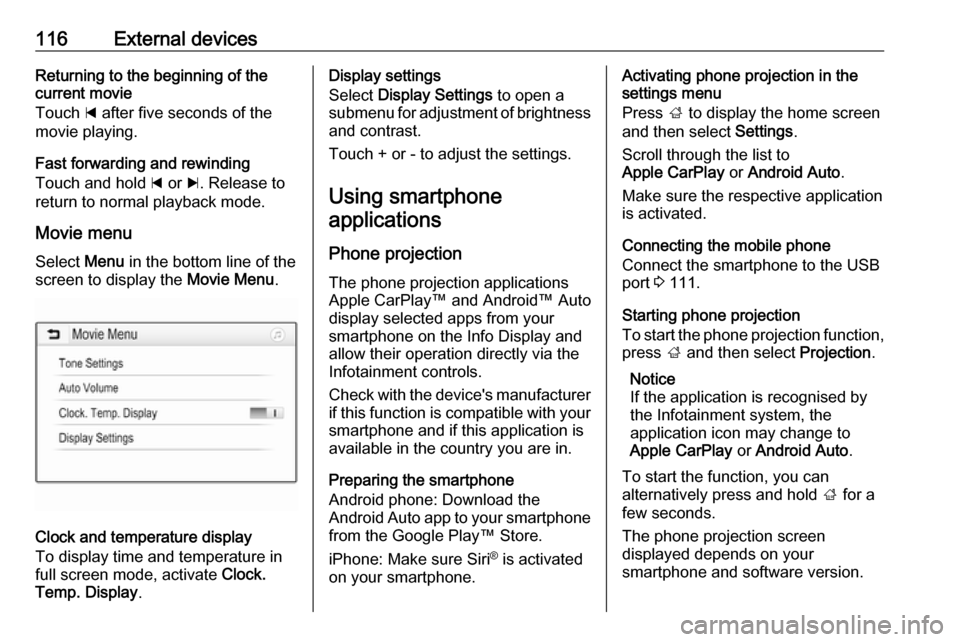
Movie menu Select Menu in the bottom line of the
screen to display the Movie Menu.
Clock and temperature display
To display time and temperature in
full screen mode, activate Clock.
Temp. Display .
Display settings
Select Display Settings to open a
submenu for adjustment of brightness and contrast.
Touch + or - to adjust the settings.
Using smartphone applications
Phone projection The phone projection applications
Apple CarPlay™ and Android™ Auto
display selected apps from your
smartphone on the Info Display and
allow their operation directly via the
Infotainment controls.
Check with the device's manufacturer
if this function is compatible with your smartphone and if this application is
available in the country you are in.
Preparing the smartphone
Android phone: Download the
Android Auto app to your smartphone
from the Google Play™ Store.
iPhone: Make sure Siri ®
is activated
on your smartphone.Activating phone projection in the
settings menu
Press ; to display the home screen
and then select Settings.
Scroll through the list to
Apple CarPlay or Android Auto .
Make sure the respective application
is activated.
Connecting the mobile phone
Connect the smartphone to the USB
port 3 111.
Starting phone projection
To start the phone projection function,
press ; and then select Projection.
Notice
If the application is recognised by
the Infotainment system, the
application icon may change to
Apple CarPlay or Android Auto .
To start the function, you can
alternatively press and hold ; for a
few seconds.
The phone projection screen
displayed depends on your
smartphone and software version.
Page 117 of 183
External devices117Returning to the home screen
Press ;.
BringGo BringGo is a navigation app providinglocation search, map display and
route guidance.
Notice
Before downloading the app, check whether BringGo is available in your
vehicle.
Downloading the app
Before BringGo can be operated
using the controls and menus of the
Infotainment system, the respective
application must be installed on the
smartphone.
Download the app from App Store ®
or
Google Play Store.
Activating BringGo in the settings
menu
Press ; to display the home screen
and then select Settings.
Scroll through the list to BringGo.
Make sure the application is
activated.Connecting the mobile phone
Connect the smartphone to the USB port 3 111.
Starting BringGo
To start the app, press ; and then
select the Nav icon.
The main menu of the application is
shown on the Info Display.
For further information on how to
operate the app, see the instructions
on the manufacturer's website.
Page 118 of 183
118NavigationNavigationGeneral information...................118
Usage ........................................ 119
Destination input ........................124
Guidance ................................... 129General information
This chapter is about the embedded
navigation system of Navi 4.0
IntelliLink.
The current traffic situation is taken
into account in the route calculation.
For this purpose, the Infotainment
system receives traffic
announcements in the current
reception area via RDS-TMC.
The navigation system cannot,
however, take into account traffic
incidents, traffic regulations changed
at short notice and hazards or
problems that arise suddenly (e.g.
road works).Caution
The usage of the navigation
system does not release the driver
from the responsibility for a
correct, vigilant attitude in road
traffic. The relevant traffic
regulations must always be
followed. If a navigation instruction contradicts traffic regulations, the
traffic regulations always apply.
Functioning of the navigation
system
The position and movement of the
vehicle are detected by the navigation
system using sensors. The travelled
distance is determined by the
vehicle's speedometer signal, turning
movements on bends by a sensor.
The position is determined by the
GPS (Global Positioning System)
satellites.
By comparing the sensor signals with the digital maps, it is possible to
determine the position with an
accuracy of approx. 10 metres.
The system will also work with poor
GPS reception. However, the
accuracy of the determination of the
position will be reduced.
After the entry of the destination
address or point of interest (nearest
petrol station, hotel, etc.), the route is
calculated from the current location to the destination selected.
Route guidance is provided by voice
output and an arrow, as well as with
the aid of a multi-colour map display.
Page 119 of 183
Navigation119Important informationTMC traffic information system and
dynamic route guidance
The TMC traffic information system
receives all current traffic information from TMC radio stations. This
information is included in the
calculation of the overall route. During
this process, the route is planned so that traffic problems related to pre-
selected criteria are avoided.
If there is a traffic problem during
active route guidance, depending on
the pre-settings, a message appears
as to whether the route should be
changed.
TMC traffic information is displayed in
the map display as symbols or as
detailed text on the TMC messages
menu.
To be able to use TMC traffic
information, the system must receive
TMC stations in the relevant region.
The TMC traffic stations can be
selected in the navigation menu
3 119.Map data
All required map data is stored within
the Infotainment system.
To update the navigation map data,
purchase new data at the Opel Dealer or on our home page http://
opel.navigation.com/. You are
provided with a USB device
containing the update.
Connect the USB device to the USB
port and follow the instructions on the screen. The vehicle must be turned
on during the update process.
Notice
The vehicle remains operational during the update process. If thevehicle is turned off, the update can
be paused. The navigation
application, Bluetooth and other
external devices are unavailable
until the update process is finished.
Usage To display the navigation map,
press ; and then select the
Navigation icon.Route guidance not active
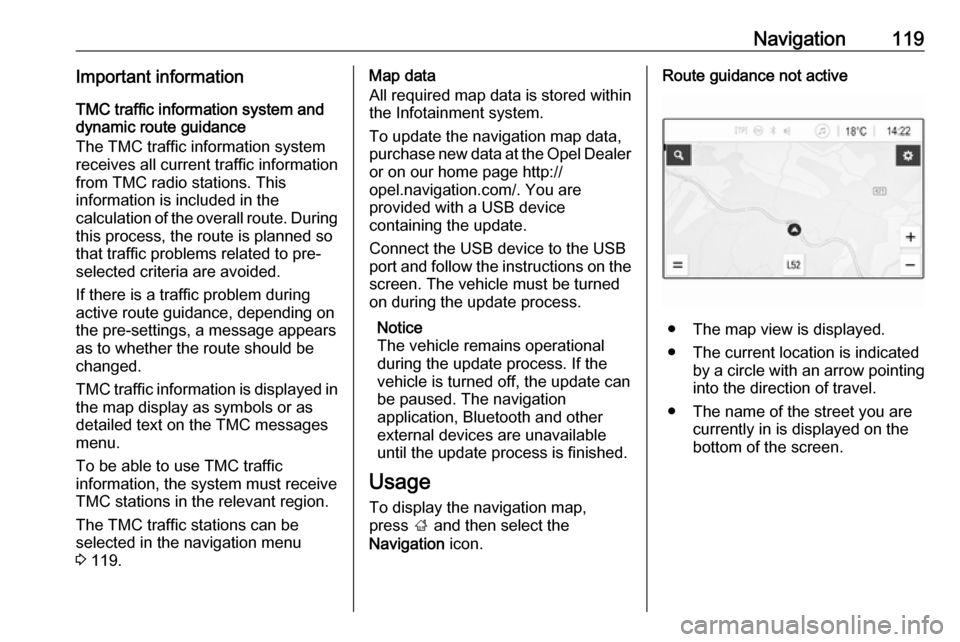
● The map view is displayed.
● The current location is indicated by a circle with an arrow pointing
into the direction of travel.
● The name of the street you are currently in is displayed on the
bottom of the screen.
Page 120 of 183
120NavigationRoute guidance active
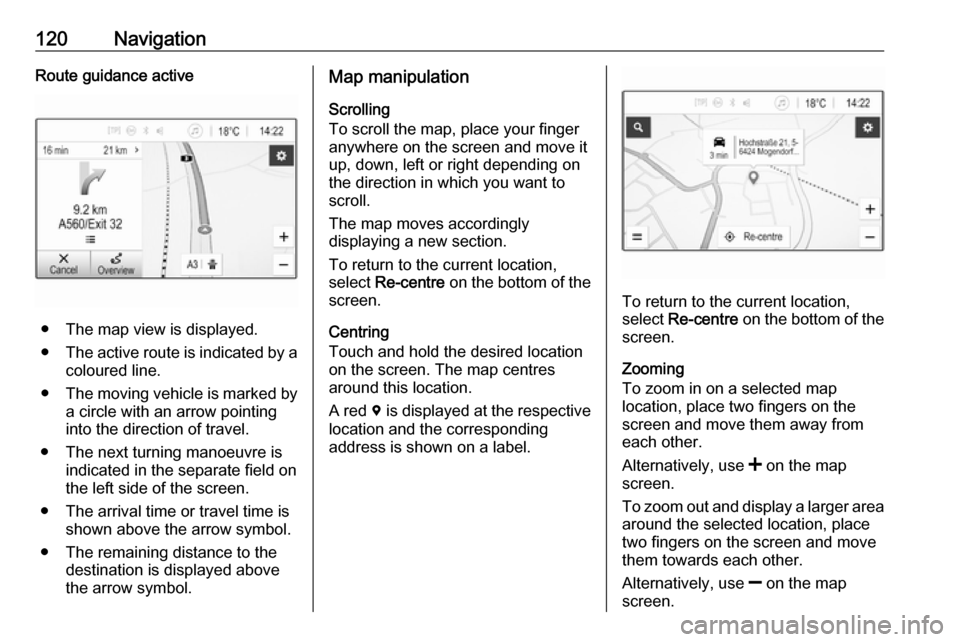
● The map view is displayed.
● The active route is indicated by a
coloured line.
● The moving vehicle is marked by
a circle with an arrow pointing
into the direction of travel.
● The next turning manoeuvre is indicated in the separate field on
the left side of the screen.
● The arrival time or travel time is shown above the arrow symbol.
● The remaining distance to the destination is displayed above
the arrow symbol.
Map manipulation
Scrolling
To scroll the map, place your finger
anywhere on the screen and move it
up, down, left or right depending on
the direction in which you want to
scroll.
The map moves accordingly
displaying a new section.
To return to the current location,
select Re-centre on the bottom of the
screen.
Centring
Touch and hold the desired location on the screen. The map centres
around this location.
A red d is displayed at the respective
location and the corresponding
address is shown on a label.
To return to the current location, select Re-centre on the bottom of the
screen.
Zooming
To zoom in on a selected map
location, place two fingers on the
screen and move them away from
each other.
Alternatively, use < on the map
screen.
To zoom out and display a larger area around the selected location, place
two fingers on the screen and move
them towards each other.
Alternatively, use ] on the map
screen.
 1
1 2
2 3
3 4
4 5
5 6
6 7
7 8
8 9
9 10
10 11
11 12
12 13
13 14
14 15
15 16
16 17
17 18
18 19
19 20
20 21
21 22
22 23
23 24
24 25
25 26
26 27
27 28
28 29
29 30
30 31
31 32
32 33
33 34
34 35
35 36
36 37
37 38
38 39
39 40
40 41
41 42
42 43
43 44
44 45
45 46
46 47
47 48
48 49
49 50
50 51
51 52
52 53
53 54
54 55
55 56
56 57
57 58
58 59
59 60
60 61
61 62
62 63
63 64
64 65
65 66
66 67
67 68
68 69
69 70
70 71
71 72
72 73
73 74
74 75
75 76
76 77
77 78
78 79
79 80
80 81
81 82
82 83
83 84
84 85
85 86
86 87
87 88
88 89
89 90
90 91
91 92
92 93
93 94
94 95
95 96
96 97
97 98
98 99
99 100
100 101
101 102
102 103
103 104
104 105
105 106
106 107
107 108
108 109
109 110
110 111
111 112
112 113
113 114
114 115
115 116
116 117
117 118
118 119
119 120
120 121
121 122
122 123
123 124
124 125
125 126
126 127
127 128
128 129
129 130
130 131
131 132
132 133
133 134
134 135
135 136
136 137
137 138
138 139
139 140
140 141
141 142
142 143
143 144
144 145
145 146
146 147
147 148
148 149
149 150
150 151
151 152
152 153
153 154
154 155
155 156
156 157
157 158
158 159
159 160
160 161
161 162
162 163
163 164
164 165
165 166
166 167
167 168
168 169
169 170
170 171
171 172
172 173
173 174
174 175
175 176
176 177
177 178
178 179
179 180
180 181
181 182
182


