Page 85 of 273
![OPEL AMPERA E 2018.5 Manual user Instruments and controls83
● Press ] to open main menu
page.
● Select a main menu page with { or }.
● Confirm a main menu page with 9.
Once a main menu page is selected,
press { or } to selec OPEL AMPERA E 2018.5 Manual user Instruments and controls83
● Press ] to open main menu
page.
● Select a main menu page with { or }.
● Confirm a main menu page with 9.
Once a main menu page is selected,
press { or } to selec](/manual-img/37/18756/w960_18756-84.png)
Instruments and controls83
● Press ] to open main menu
page.
● Select a main menu page with { or }.
● Confirm a main menu page with 9.
Once a main menu page is selected,
press { or } to select subpages.
● Press [ to open the next folder of
the selected subpage.
● Press { or } to select functions
or to set a numeric value, if
required.
● Press 9 to select and confirm a
function.
Vehicle and service messages pop-
up in the Driver Information Centre
when required.
Confirm messages by pressing 9.
Vehicle messages 3 89.
Vehicle info The following list contains all possible
Vehicle info menu pages. Some may
not be available for your particular
vehicle. Depending on the display,
some functions are symbolised.
Press { or } to select a page:
● Trip
● Tyre pressure (kPa)
● Average speed
● Timer
● Traffic sign assistant
● Following distance
● Blank page
Trip
Trip odometer displays the current
distance and the current average
electrical energy economy since a
certain reset.The distance counts up to
99,999.9 km then restarts at 0.
The average electrical energy
economy displays the approximate
average kWh per 100 km (kWh/100
km).
To reset, press and hold 9.
Tyre pressure (kPa)
Checks tyre pressure of all wheels
during driving 3 233.
Average speed
Display of average speed. The
measurement can be reset at any
time.
Timer
To start and stop, press 9. To reset,
press [ and confirm reset.
Traffic sign assistant
Displays the detected traffic signs for
the current route section 3 189.
Following distance
Displays the distance in seconds to a preceding moving vehicle 3 169.
Page 88 of 273
86Instruments and controlsCommunication error
If a communication problem has
occurred with the energy system, the
error message is displayed. In this
case, please try restarting the vehicle
or contact a workshop.
Flow
This menu displays energy flow
between the electric drive unit and the high voltage battery.
1. Touch Energy.
2. Touch Flow.
The components will be highlighted
when they are active.
Power off
No power is flowing to the wheels.
The high voltage battery scale colour
is greyed out.Power
The arrow indicates from high voltage battery to wheel.Regenerate
Power from the wheels returns to the
high voltage battery during
regenerative braking or coasting.
Page 89 of 273

Instruments and controls87High voltage battery power
High voltage battery power is active
with energy flowing to the wheels or
no power is flowing to the wheel when
vehicle is stationary.
Charging
Charge mode selection 3 197.
Programmable charging
Programmable charging 3 197.
Energy information To view Energy details , Energy usage
score and Efficiency History touch
Energy and then Information . Touch
< or > to go to the next screen.
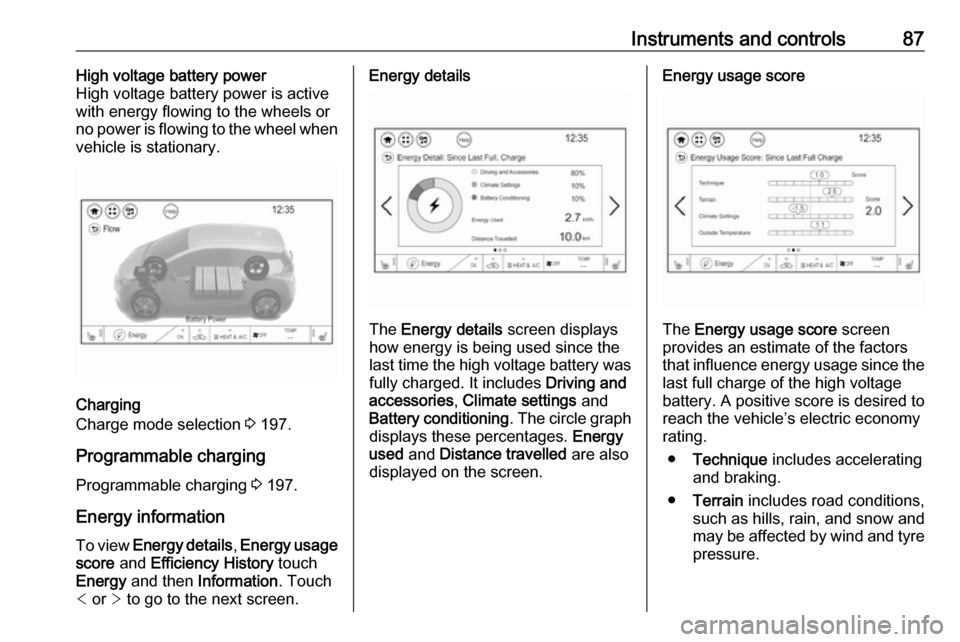
Energy details
The Energy details screen displays
how energy is being used since the
last time the high voltage battery was
fully charged. It includes Driving and
accessories , Climate settings and
Battery conditioning . The circle graph
displays these percentages. Energy
used and Distance travelled are also
displayed on the screen.
Energy usage score
The Energy usage score screen
provides an estimate of the factors
that influence energy usage since the last full charge of the high voltage
battery. A positive score is desired to
reach the vehicle’s electric economy
rating.
● Technique includes accelerating
and braking.
● Terrain includes road conditions,
such as hills, rain, and snow and
may be affected by wind and tyre
pressure.
Page 91 of 273

Instruments and controls89●Hill Top Reserve : Select Off, On ,
On – home only , or On – away
only .
Regenerative braking 3 161.
● Energy summary pop-up : Set the
energy summary pop-up feature
to On or Off.
● Charge status feedback : Set the
charge status feedback feature to Horn chirps or Off.
● Charge power loss alert : This
feature allows an alert to sound
when the vehicle is charging and
loses power at the electrical
outlet. Set the charge power loss alert feature to On or Off.
● Radio power down : This allows
high voltage battery power to be conserved. Set the value for the
reminder to be displayed. To set
high voltage battery charge level
for Radio power down , touch
Energy , then Energy settings ,
then Radio power down . Select
Off , 2% , 4% , 6% , 8% , 10% .Low power mode
This allows high voltage battery power to be conserved.1. Press and hold m of the
Infotainment system.
2. Touch Yes on the Info Display.
The screen will turn off.
3. Press m again to turn the display
on.Vehicle messages
Messages are indicated in the Driver
Information Centre, in some cases
together with a warning and signal
chime.
Press 9 on the steering wheel to
confirm a message.
Vehicle and service messages
The vehicle messages are displayed
as text. Follow the instructions given
in the messages.
Page 93 of 273

Instruments and controls91Vehicle personalisation
The vehicle's behaviour can be
personalised by changing the settings in the Info Display.
Depending on vehicle equipment and
country-specific regulations some of
the functions described below may
not be available.
Some functions are only displayed or
active when the vehicle is on.
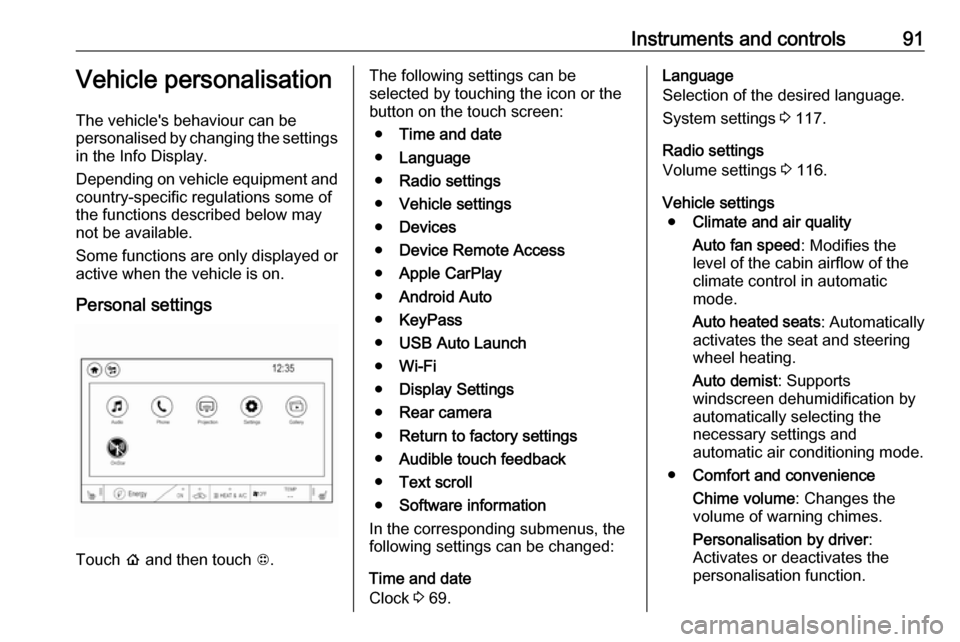
Personal settings
Touch p and then touch 1.
The following settings can be
selected by touching the icon or the
button on the touch screen:
● Time and date
● Language
● Radio settings
● Vehicle settings
● Devices
● Device Remote Access
● Apple CarPlay
● Android Auto
● KeyPass
● USB Auto Launch
● Wi-Fi
● Display Settings
● Rear camera
● Return to factory settings
● Audible touch feedback
● Text scroll
● Software information
In the corresponding submenus, the
following settings can be changed:
Time and date
Clock 3 69.Language
Selection of the desired language.
System settings 3 117.
Radio settings
Volume settings 3 116.
Vehicle settings ● Climate and air quality
Auto fan speed : Modifies the
level of the cabin airflow of the
climate control in automatic
mode.
Auto heated seats : Automatically
activates the seat and steering
wheel heating.
Auto demist : Supports
windscreen dehumidification by
automatically selecting the
necessary settings and
automatic air conditioning mode.
● Comfort and convenience
Chime volume : Changes the
volume of warning chimes.
Personalisation by driver :
Activates or deactivates the
personalisation function.
Page 103 of 273

Lighting10150 km/h. High beam is switched off at
a speed below 35 km/h, but high beam assist remains active.
The green control indicator f
illuminates continuously when the
high beam assist is activated, the blue one 7 illuminates when high beam is
on.
Control indicator f 3 81, 7 3 81.
Pushing the stalk once switches on
manual high beam without high beam assist.
High beam assist switches
automatically back to low beam
when:
● Driving in urban areas.
● Reverse parking function is active.
● Rear fog light is switched on.
If there are no restrictions detected,
the system switches back to high
beam.Deactivation
If high beam assist is active and high
beam is on, press f once or pull the
stalk once to deactivate high beam
assist.
If high beam assist is active and high
beam is off, press f once to
deactivate high beam assist.
Pushing the stalk to activate manual high beam will also deactivate highbeam assist.
Headlight flash in conjunction with high beam assist
Headlight flash by pulling the stalk
once will not deactivate high beam
assist when high beam is off.
Headlight flash by pulling the stalk
once deactivates high beam assist
when high beam is on.
Fault in headlight system
When the system detects a failure in
the headlight system, it selects a
preset position to avoid dazzling of
oncoming traffic. A warning is
displayed in the Driver Information
Centre.Headlight flash
To activate the headlight flash, pull
stalk.
Pulling stalk deactivates high beam.
Headlight range adjustment
Manual headlight range
adjustment
To adapt headlight range to the
vehicle load to prevent dazzling: turn
thumb wheel ? to required position.
Page 104 of 273
102Lighting0:front seats occupied1:all seats occupied2:all seats occupied and load
compartment laden3:driver's seat occupied and load
compartment laden
Daytime running lights
Daytime running lights increase
visibility of the vehicle during daylight.
While the daytime running light is
active, the tail lights and the sidelights are switched off.
Please remember that the low beam
should be switched on when required.
Hazard warning flashers Operated by pressing ¨.
In the event of an accident with airbag
deployment, the hazard warning
flashers are activated automatically.
Turn lightsstalk up:right turn lightstalk down:left turn light
A resistance point can be felt when
moving the stalk.
Constant flashing is activated when
the stalk is being moved beyond the
resistance point. It is deactivated
when the steering wheel is moved in
the opposite direction or stalk is
manually moved back to its neutral
position.
Page 106 of 273
104LightingInterior lightingInstrument panelillumination control
Brightness of the following lights can
be adjusted when the exterior lights
are on.
● instrument panel illumination
● Info Display
● illuminated switches and operation elements
Turn thumb wheel A until the desired
brightness is obtained.
Interior lights
During entry and exit of the vehicle,
the courtesy lights automatically
switch on and then off after a delay.
Front courtesy light
To operate, press the following
buttons:
w:automatic switching on
and offpress d:onpress K:offReading lights
Operated by pressing the buttons at
the front.
Sunvisor lights
Illuminates when the cover is opened.