Page 133 of 172
8-34
8
EBU32490Checking the parking brake padsEach brake pad is provided with a wear indi-
cator groove, which allows you to check the
brake pad wear without having to disassem-
ble the brake. If a brake pad has worn to the
point that the wear indicator groove has al-
most disappeared, have a Yamaha dealer re-
place the brake pads as a set.
EBU32500Checking the brake fluid levelBefore riding, check that the brake fluid is
above the minimum level mark. Check the
brake fluid level with the top of the reservoir
level. Replenish the brake fluid if necessary.
1. Brake pad wear indicator groove
1
1. Brake pad wear indicator groove
1
UB427BE0.book Page 34 Friday, February 5, 2016 2:14 PM
Page 135 of 172
8-36
8
As the brake pads wear, it is normal for the
brake fluid level to gradually go down. A low
brake fluid level may indicate worn brake
pads and/or brake system leakage; therefore,
be sure to check the brake pads for wear and
the brake system for leakage. If the brake fluid
level goes down suddenly, have a Yamaha
dealer check the cause before further riding.EBU32520Brake fluid replacementComplete fluid replacement should be done
only by trained Yamaha service personnel.
Have a Yamaha dealer replace the following
components during pe riodic maintenance or
when they are damaged or leaking.
Replace the oil seals every two years.
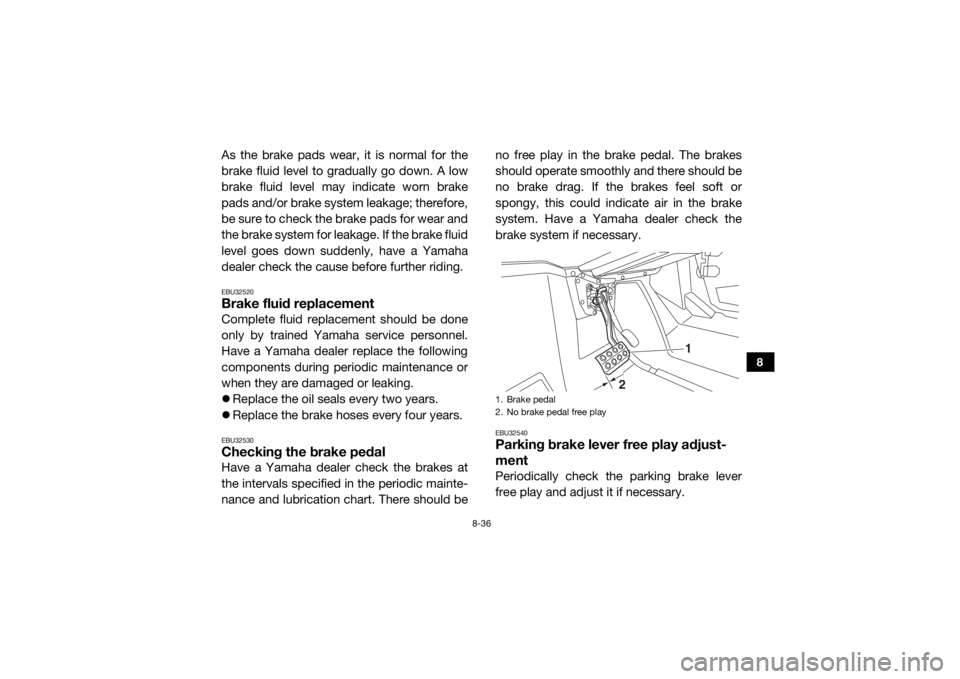
Replace the brake hoses every four years.EBU32530Checking the brake pedalHave a Yamaha dealer check the brakes at
the intervals specified in the periodic mainte-
nance and lubrication chart. There should be no free play in the brake pedal. The brakes
should operate smoothly
and there should be
no brake drag. If the brakes feel soft or
spongy, this could indicate air in the brake
system. Have a Yamaha dealer check the
brake system if necessary.
EBU32540Parking brake lever free play adjust-
mentPeriodically check the parking brake lever
free play and adjust it if necessary.1. Brake pedal
2. No brake pedal free play
1
2
UB427BE0.book Page 36 Friday, February 5, 2016 2:14 PM
Page 136 of 172
8-37
8
1. Shift the drive select lever into low gear“L”.
2. Check the parking brake lever free play. The maximum free play is equal to one
click of the parking brake lever. If neces-
sary, adjust the free play as follows.
3. Release the parking brake lever.
4. Slide the rubber cover back on the park- ing brake cable.
5. Loosen the locknut. 6. Turn the adjusting nut in direction (a) to
increase the free play or in direction (b) to
decrease the free play.
7. Tighten the locknut, and then slide the
rubber cover to its original position.1. Parking brake lever free play
1
1. Rubber cover
2. Adjusting nut
3. Locknut
1
(a)
(b)
2
3
UB427BE0.book Page 37 Friday, February 5, 2016 2:14 PM
Page 169 of 172
12-2
12
IIdentification number records ...................................... 11-1
Indicator lights and warning lights ................................. 4-2
Instruments, lights and switches, Pre-operation check ........................................................................... 5-7JJump-starting .............................................................. 8-46LLabel locations ............................................................... 1-1
Light switch .................................................................. 4-10
Loading .......................................................................... 6-7
Low-range indicator light ............................................... 4-2MMain switch .................................................................... 4-1
Maintenance and lubrication chart ................................ 8-6
Maintenance chart, emission control system ................ 8-4
Model label .................................................................. 11-1
Multi-function meter unit ............................................... 4-6NNeutral indicator light ..................................................... 4-3OOn-Command drive knob ............................................ 4-11
On-Command drive knob, operation ............................. 6-5
On-Command four-wheel-drive/differential gear lock indicator ....................................................................... 4-3
Owner’s manual and tool kit .......................................... 8-2PParking ........................................................................... 6-7
Parking brake indicator light .......................................... 4-3
Parking brake lever ...................................................... 4-13
Parking brake lever free play, adjusting ....................... 8-36 Parking brake pads, checking ..................................... 8-34
Passenger handhold, Pre-operation check ................... 5-7
RRear knuckle upper and lower pivot, lubrication ......... 8-39
Reverse indicator light ................................................... 4-3SSafety information .......................................................... 2-1
Seat belt indicator light .................................................. 4-5
Seat belts ..................................................................... 4-17
Seat belts, Pre-operation check .................................... 5-6
Seats ............................................................................ 4-15
Spark arrester, cleaning ............................................... 8-31
Spark plug, inspecting ................................................. 8-23
Specifications .............................................................. 10-1
Stabilizer bushes, checking ..........
............................... 8-39
Starting the engine ........................................................ 6-2
Steering, Pre-operation check ....................................... 5-7
Steering shaft, lubrication ............................................ 8-40
Storage .......................................................................... 9-2
Storage compartments ................................................ 4-18TTail/brake light bulb, replacing .................................... 8-53
Tire, replacing .............................................................. 8-41
Tires, Pre-operation check ............................................ 5-8
Trailer hitch bracket and receiver ................................ 4-23
Troubleshooting ........................................................... 8-54
Troubleshooting charts ................................................ 8-56VValve clearance ............................................................ 8-33
V-belt case drain plug .................................................. 8-31
Vehicle identification number ...................................... 11-1
UB427BE0.book Page 2 Friday, February 5, 2016 2:14 PM
Page:
< prev 1-8 9-16 17-24

